

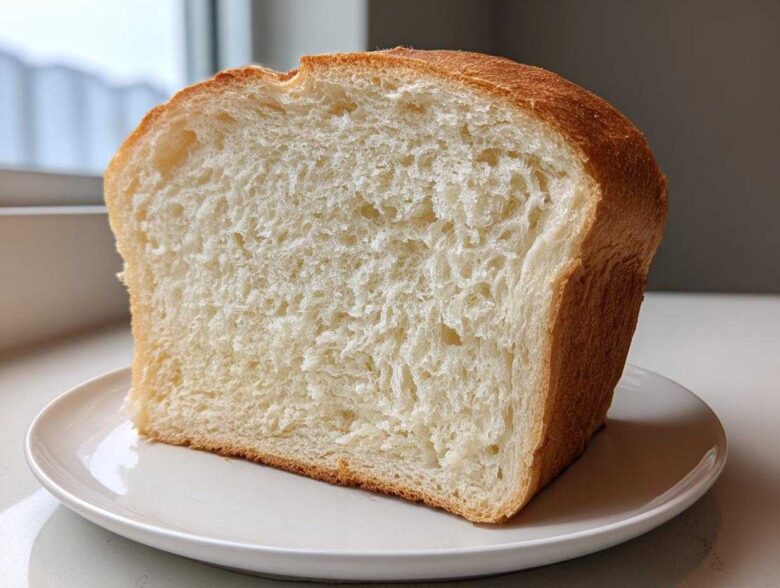
Oh my gosh, is there anything—and I mean anything—better than that smell? You know the one. That warm, slightly yeasty, deeply comforting aroma that fills every corner of your house when you pull a fresh loaf out of the oven? Forget the grocery store shelves, people! I’m here to tell you that making perfect **Homemade Bread** from scratch is totally doable, even if your confidence in the kitchen usually peaks around boiling water.
Seriously, my early baking attempts were a disaster of flat, dense bricks. I thought I needed some secret baker’s pedigree to get that fluffy interior and perfect crust. But after years of wrestling with sticky dough and reading every confusing yeast packet instruction imaginable, I finally cracked the code! This, right here, is my definitive guide to making the absolute best **Homemade Bread** loaf you’ll ever taste. We’re starting simple with this classic white bread, and trust me, this journey from scratch is the most satisfying thing you’ll do all week.
Why This Is the Best Homemade Bread Recipe for Beginners
If you’ve been intimidated by baking bread before, stop right now. This isn’t some fussy artisan sourdough requiring a week of planning. This is the ultimate **easy bread recipe**, made specifically to give you the confidence boost you need. My introduction to baking bread was a mess, but this recipe changed everything for me! We’re focusing on reliable results every single time you try it, making it the **best homemade bread** for newcomers!
My goal here is to get you that gorgeous, soft loaf without the stress. It uses simple pantry staples and a straightforward process that minimizes fuss and maximizes flavor. If you want to move on later to more exciting things like homemade garlic breadsticks, this foundation is everything. You won’t need any fancy techniques, just a little patience during the rising times, and you’ll see why homemade is miles better.
Key Advantages of Our Homemade Bread
- Unbelievably soft and fluffy texture—perfect for sandwiches!
- You control everything: no strange preservatives sticking around.
- Super high success rate, even if you’ve never touched yeast before.
- Easy cleanup, especially if you just use a bowl and your hands.
Essential Equipment for Your Homemade Bread Journey
Okay, now let’s talk tools! You might think to bake the **best homemade bread**, you need a massive, industrial-looking stand mixer like they have in bakeries. Nope! You really don’t. That’s the beauty of starting right here; this recipe is designed to work whether you have a dough hook attachment or just trusty old hands. I used to just use my biggest mixing bowl until my arms ached—it was a real workout!
If you do have an electric mixer, use it; it saves your shoulders, especially during the kneading phase. But if you’re holding off on major appliance purchases, hand kneading is just as effective for developing that strong gluten structure we need for our **Homemade Bread**.
My biggest pro tip? If you find yourself loving this, skip buying a dedicated dough scraper right away. You can just use the edge of a sturdy plastic spatula or even an old credit card to scrape those sticky bits of dough off the counter. It works like a charm!
Must-Have Tools for Perfect Homemade Bread
- One Big Mixing Bowl: Needs to be deep enough to handle that dough doubling in size.
- Measuring Cups and Spoons: Precision matters when dealing with yeast, so measure your water temperature carefully!
- A Standard 9×5 Inch Loaf Pan: Gotta give that dough a home to rise in!
- Wire Cooling Rack: This is non-negotiable, trust me; putting hot bread directly on the counter causes a soggy bottom.
A kitchen towel or plastic wrap for covering the dough while it proofs is also necessary. If you’re looking to up your game later, a [digital thermometer] can help nail that water temp or check internal temperature, but for now, don’t let fancy gadgets stop you from trying homemade English muffins down the road!
Gathering Ingredients for Classic Homemade Bread
Alright, let’s talk about what goes into this magic potion! Since this is that **simple white bread recipe**, the ingredient list is delightfully short. You probably have most of this stuff in your pantry right now. But here’s the deal: the *way* you handle these simple ingredients makes all the difference in achieving that soft, fluffy **Homemade Bread**. Don’t just eyeball the measurements; precision right now pays off huge later!
We need flour, salt, sugar, instant yeast, water, and butter. See? Easy! The most important things to prep before you start mixing are ensuring your butter is completely softened—not melted, just nice and pliable—and making sure that water is perfectly warm. Nothing kills bread faster than water that’s too hot!
Ingredient Notes and Substitutions for Homemade Bread
Let’s focus on the yeast first, because it’s the engine of your **Homemade Bread**. I specified *instant* dry yeast because you can just dump it right in with the dry stuff without waiting for it to bloom. If you only have active dry yeast, that’s totally fine! You just need to mix it with the sugar and your warm water first and let it sit for about five minutes until it gets foamy. That foam tells you the yeast is alive and ready to work its magic!
And that water temperature? It needs to be between 105°F and 115°F. If you don’t have a thermometer, the old test is: dip your clean finger in. It should feel pleasantly warm, definitely not hot enough to make you pull your hand away quickly. If it burns, you just killed your yeast, oops! For future loaves, if you decide you want a slightly heartier texture instead of pure white flour, you can swap out up to a cup of this all-purpose flour with whole wheat flour, but for this first run, stick to all-purpose for the softest results, just like in this whole wheat bread recipe I make on Sundays.
Step-by-Step Instructions for Baking Homemade Bread
This is where the real fun starts! If you followed the prep instructions for your ingredients, this whole **yeast bread instruction** set will go smoothly. We’re moving from a loose collection of ingredients to actual dough! Remember, if you’re **baking bread for beginners**, go slow here. Don’t rush the mixing or the resting phases; they are vital for that light texture we are chasing.
Mixing and Kneading: Developing Gluten in Your Homemade Bread Dough
First, everything goes into the bowl. Flour, salt, sugar, and that instant yeast that doesn’t need any babysitting. Then, pour in your warm water and drop in that softened butter. Start mixing; it’ll look messy and shaggy at first—almost like wet sand that refuses to cooperate. That’s perfectly normal! Don’t panic about the mess; that’s just the initial stage of **help making bread dough**!
Now, for the work: kneading! If you’re using a stand mixer with a dough hook, set it low and let it go for about 6 to 8 minutes. If you are throwing down by hand—which I highly recommend for your first time to really *feel* the dough change—you need to work that dough for a solid 8 to 10 minutes. You’re looking for a transformation here. It starts ragged, then it gets sticky, and suddenly, *snap*, it smooths out. It should feel supple, bouncy, and barely stick to your floured hands.
Here’s a baker’s secret I learned early on: the windowpane test! Grab a small piece of dough and gently stretch it out between your fingers. If you can stretch it thin enough to see light coming through it—like a thin windowpane—before it rips, your gluten is developed perfectly for this **Homemade Bread**! If it tears immediately, knead for just two more minutes and try again.
The Proofing Process for Fluffy Homemade Bread
Once kneaded, transfer that beautiful ball of dough into a lightly oiled bowl. Give it a quick roll so it’s coated in fat—this stops it from drying out! Cover it up tight with plastic wrap or a damp kitchen towel. A warm, draft-free spot is key for the first proof. If your kitchen is cold (mine often is in the winter!), put the covered bowl inside your turned-off oven, but crack the door slightly OR just turn the oven light on. That tiny bulb provides just the right gentle warmth!
Let it sit for an hour to an hour and a half. You are waiting for it to *double* in size. Seriously, mark the bowl with a marker so you can see the progress! After it doubles (that’s the first proof), you gently punch it down—go on, take out your frustrations on that dough! Shape it neatly into a log and tuck it into your greased loaf pan. Cover it again loosely and let it rise a second time for about 30 to 45 minutes. It should look puffy and just about crested over the top edge of the pan.
Baking and Cooling Your Fresh Baked Loaf Guide
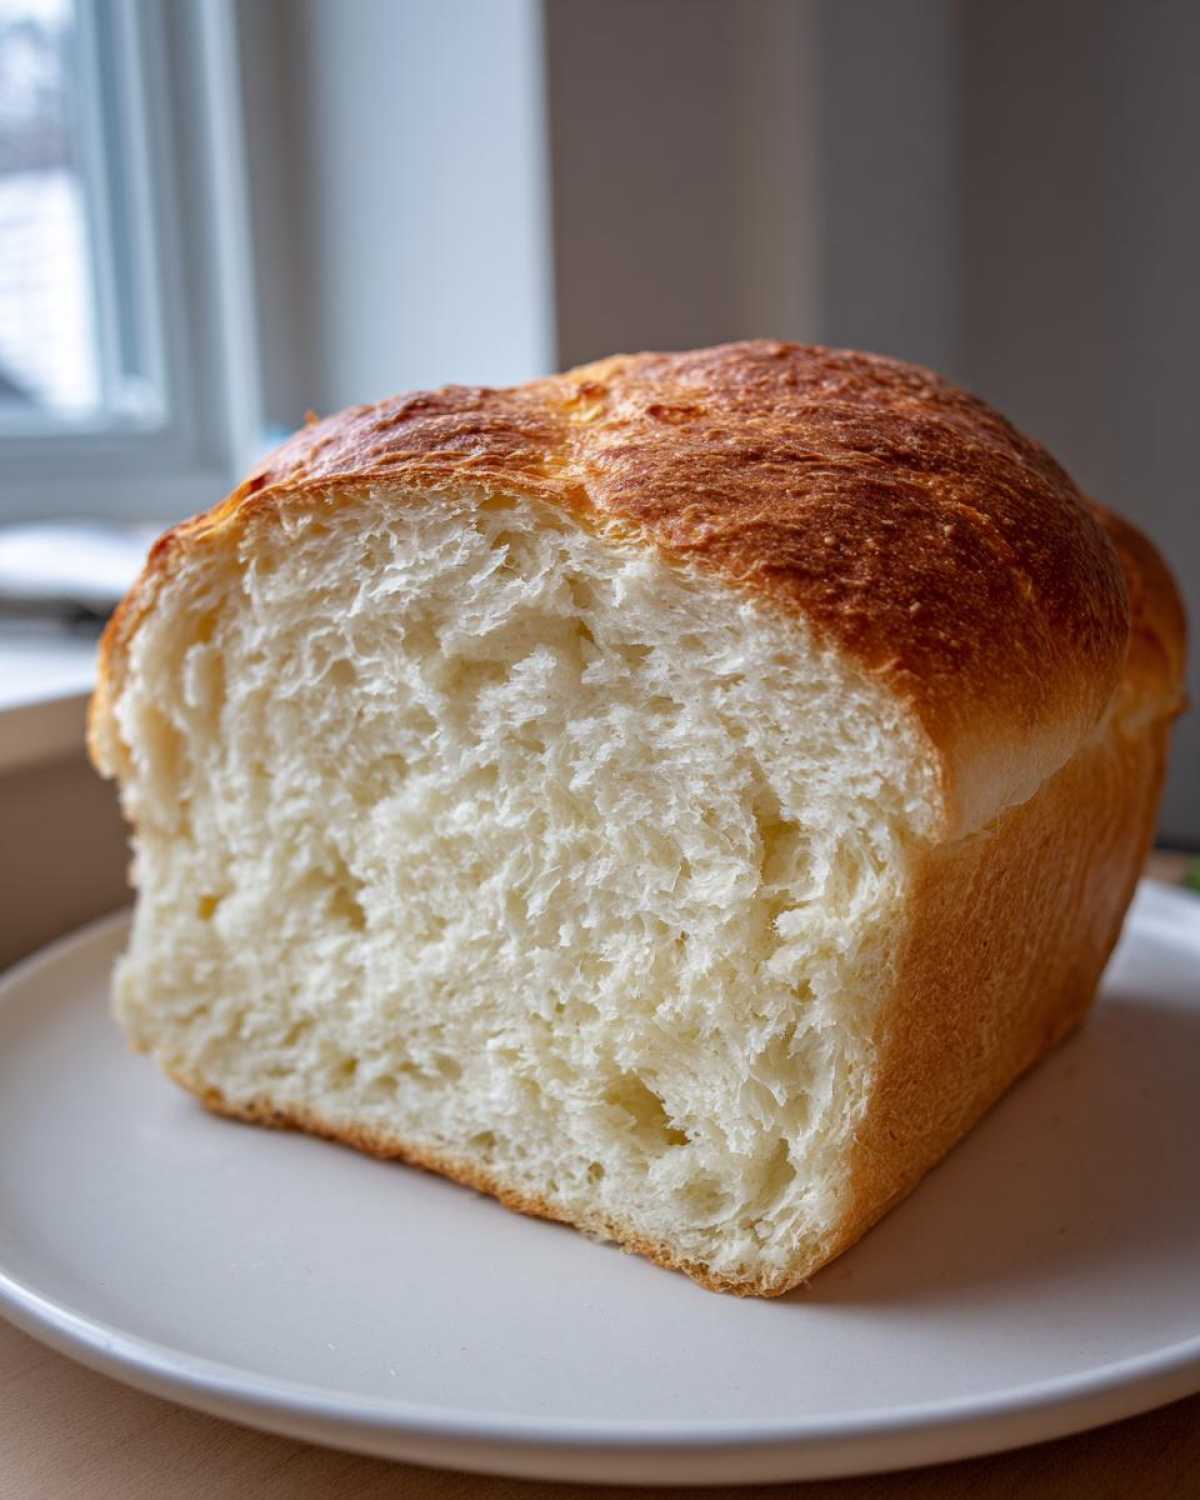
Preheat that oven to 375°F (190°C) while the dough is in its final rest. When the time is up, slide that pan into the oven. You’re looking at 30 to 35 minutes for this **Fresh Baked Loaf Guide**. You want that glorious golden-brown top. But don’t just trust your eyes! The most reliable measure for perfect **Homemade Bread** is temperature. Stick an instant-read thermometer right into the center—it should read 200°F (93°C).
The second it comes out? Get it out of that hot pan immediately and place it on a wire rack. Seriously, lift it right out! If you leave it sitting in the hot metal, the trapped steam will make the bottom soggy. You *must* let it cool until it’s barely warm before slicing. If you cut it too hot, you ruin that gorgeous, airy structure you worked so hard for! Honestly, the hardest part of this whole recipe is waiting for it to cool enough to slice! If you’re feeling ambitious later, you can try applying these same dough principles to something crusty like my French bread recipe or even an easy Italian bread.
Tips for Success: Mastering Your Homemade Bread
We’ve made the dough and we’ve baked the loaf, but let me share a few of my biggest **baker’s secrets for bread** that took me way too long to figure out! If your bread ever comes out dense, it’s almost always one of two things: your water was too cold, or you didn’t knead enough. That beautiful elasticity we talked about? That’s the gluten network trapping the gas the yeast makes. If the network is weak, the gas escapes, and you get a cracker instead of a fluffy loaf.
I once forgot to put the salt in my batch—oops! Salt does more than flavor; it actually controls the yeast activity. Without it, my dough went absolutely crazy in the first proof, nearly running over the bowl! It ended up collapsing during the second proof and baking into a tiny, salty hockey puck. So, don’t skip the salt!
For that picture-perfect finish, everyone asks about the **perfect bread crust tips**. If you want a soft crust, brush the top with melted butter the second it comes out of the oven—that stops the evaporation that makes the crust hard. If you want a really shiny, deep brown top, try brushing it with a whisked egg white mixed with a teaspoon of water right before it goes into the oven. It looks fancy, but it’s so easy! Don’t forget to check out how I use some of those scraps for homemade brown gravy later!
Troubleshooting Common Homemade Bread Failures
I’m going to be completely honest with you: even now, years into baking **Homemade Bread**, I still mess up sometimes. The difference is, now I know *why* it went wrong! We all hit snags, but this is where we tackle those common **troubleshooting bread baking failures** so you don’t waste your hard work. Think of this like your bread emergency hotline!
If you’ve ever wanted to bang your head on the counter because your loaf didn’t rise right, read on. I’ve broken down the usual suspects when we’re making a classic **yeast bread recipe** from scratch.
Why is my bread dense and heavy?
This is the number one complaint! Usually, it means one of two things happened during the beginning of the process. Either your water was too cold, and the yeast barely woke up, leading to weak gas production; or, you didn’t knead enough, so the gluten couldn’t trap the gas the yeast *did* make. If it was dense, it needed more time being worked! Don’t let that get you down; just try being more thorough next time. This is a common issue even when tackling something like a sourdough sandwich bread later on.
Why did my dough rise too much and then collapse?
This usually happens during the second proof (after you shaped it). Your kitchen might have been too warm, or you let it sit out too long. If the dough gets over-inflated, the gluten structure stretches too far and can’t hold the weight, so it deflates as soon as it hits the oven heat. If you notice it looks puffy, jiggly, and fragile, it’s time to bake it *now*, even if it’s 10 minutes early!
Why is my crust hard and thick?
If you are aiming for that wonderfully soft sandwich bread texture, a hard crust means you probably didn’t have enough steam in the oven, or you cooled it improperly. As I mentioned earlier, always brush melted butter on top right away for softness! Another trick: place a pan of hot water on the bottom rack while the bread bakes. That steam keeps the crust supple for the first half of the bake.
Why does my loaf have huge, uneven air holes?
This points back to not releasing enough air during the ‘gently punch down’ stage. Those huge holes are just giant air pockets that weren’t redistributed when you shaped it. Make sure you deflate that dough firmly after the first rise before you shape it for the pan. A quick, firm deflating and shaping helps keep things even inside your beautiful loaf of **Homemade Bread**!
Storage and Reheating Instructions for Homemade Bread
You did it! Now, how do we keep this sliceable perfection fresh? For the best texture, use up your **Homemade Bread** within two days. Store it sliced-side down under a clean kitchen towel at room temperature—never in the fridge, because that actually makes it go stale faster!
If you know you won’t finish it, freezing is your best friend. Wrap the entire cooled loaf tightly in plastic wrap, then foil. It freezes beautifully for up to three months! When you crave that fresh baked flavor again, just pull a slice or the whole loaf out. To reheat, microwave a slice for about 15 seconds, or wrap a whole loaf in foil and pop it into a warm oven (300°F) for 10 minutes. It tastes like it just came out of the oven! Before you try anything too complicated, stick to this classic loaf, not some crazy no-bake treat.
Serving Suggestions for Your Fresh Baked Loaf
So, you have this incredible, warm, fluffy loaf sitting perfectly cooled on your counter. What now? Honestly, just standing there smelling it is an option, but let’s get to eating!
Since this is such a straightforward, soft loaf, it’s the ultimate workhorse. Immediately, you have to try a slice toasted. Just a light golden toast, slathered with way too much butter—maybe even some jam if you’re feeling sweet. That golden color and the slight crispness on the edges bring out the best in this **fluffy bread recipe**.
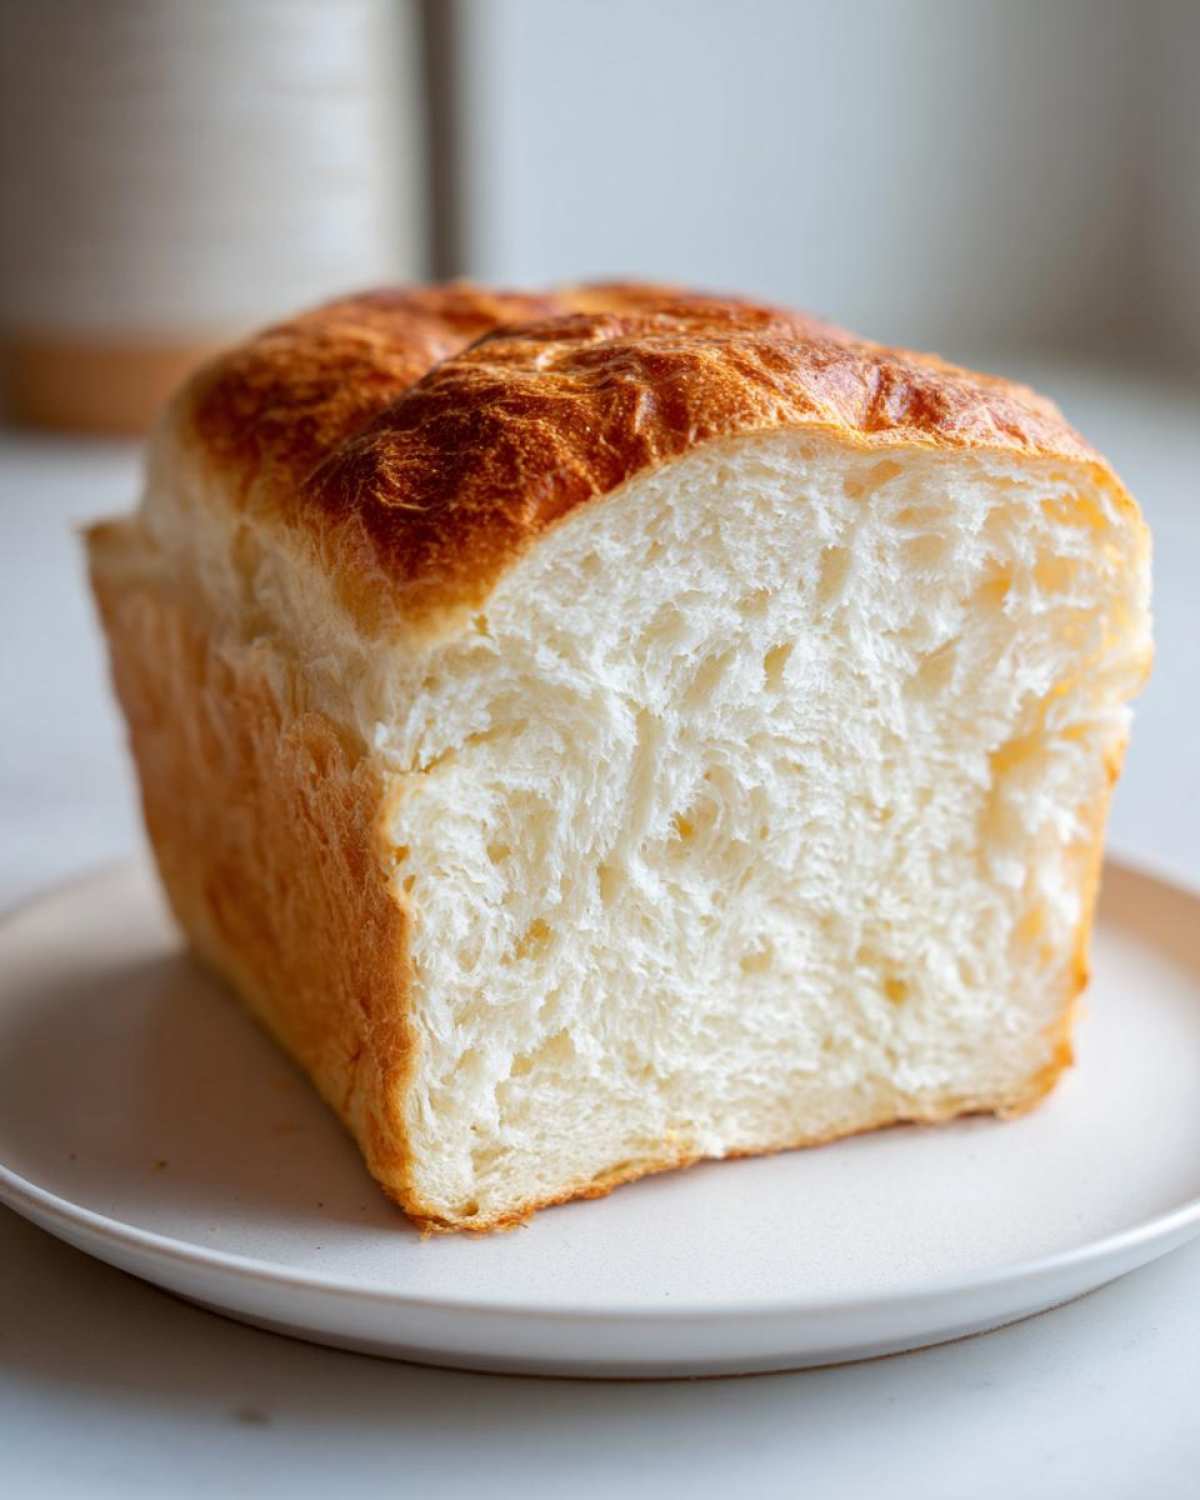
Of course, its primary job is being the best sandwich bread you’ve ever made. Turkey, ham, grilled cheese—you name it. The slight sweetness we added in the recipe perfectly complements savory fillings. But don’t feel you have to reinvent the wheel! This loaf is just as happy soaked up with some rich gravy from a hearty dinner, like my easy Salisbury steak.
If you wanted to jazz up a slice for dinner, try brushing it with olive oil, garlic powder, and a sprinkle of Italian herbs, then baking it until crisp. While this isn’t exactly how you make a crunchy, **rustic homemade loaf**, it gives you that delicious garlic bread vibe instantly! It tastes leagues better than anything packaged, I promise you that.
Nutritional Snapshot of This Homemade Bread
I know some of you are worried about all the goodness that goes into this loaf, but since we are making our **Homemade Bread** completely from scratch, you’ve already won massively by controlling the additives! We are sticking to simple flour, water, and a tiny bit of butter here. That said, since ingredients can vary slightly depending on what brand of flour you grab, these numbers are just a good ballpark estimate based on the recipe provided.
Think of this as a general guide, not a strict diet rule book! When you’re enjoying a fresh slice of this lovely bread, the satisfaction of making it yourself outweighs any minor fluctuations in calories or carbs. It’s bread made with love, after all!
Here is a quick look at the approximate values per slice of this **Classic Homemade White Bread Loaf**:
- Serving Size: 1 slice
- Calories: 130
- Fat: 2g (Saturated Fat: 1g)
- Carbohydrates: 25g
- Fiber: 1g
- Protein: 4g
- Sugar: 2g
- Sodium: 180mg
See? It’s surprisingly reasonable! Knowing exactly what made it into your **fresh baked loaf guide** is half the fun of baking from scratch. It’s healthier than whatever neon-dusted wrapper you’d find at the store, hands down!
Share Your Homemade Bread Success
Now, that’s it! You’ve done the work, you’ve waited patiently (maybe nervously!), and now you have the most beautiful, soft, fragrant loaf of **Homemade Bread** sitting right there. Seriously, take a minute and just admire it. I still do that every single time, even after years of baking!
I absolutely live to see your successes! Once you slice into that golden top and see that perfectly soft crumb, please don’t keep it a secret! Come back down to the comments section below and leave me a star rating! Was it a five-star masterpiece on your first try? Or did you have a little hiccup we can talk through? I want to hear everything!
And if you took a picture of your finished loaf—maybe it’s sitting next to your morning coffee or piled high with your first sandwich—share it on social media! Tag me! Seeing your fantastic results using my recipe is truly the best part of sharing these guides. Checking out the latest baking adventures and seeing what you’re all up to keeps me inspired in the kitchen!
Any questions popping up now that you’ve finished baking? Maybe you’re wondering how to scale this recipe down to make rolls next time? Drop your questions below. I try to answer every single one because we are all learning this **from scratch bread making** journey together!
PrintClassic Homemade White Bread Loaf
A straightforward recipe for baking a soft, fluffy white bread loaf from scratch, suitable for beginner home bakers.
- Prep Time: 20 min
- Cook Time: 35 min
- Total Time: 1 hour 50 min
- Yield: 1 loaf
- Category: Baking
- Method: Baking
- Cuisine: American
- Diet: Vegetarian
Ingredients
- 3 cups all-purpose flour
- 1 teaspoon salt
- 2 teaspoons instant dry yeast
- 1 tablespoon granulated sugar
- 1 cup warm water (about 105-115°F)
- 2 tablespoons unsalted butter, softened
Instructions
- In a large bowl, whisk together the flour, salt, yeast, and sugar.
- Add the warm water and softened butter to the dry ingredients.
- Mix by hand or with a dough hook on low speed until a shaggy dough forms.
- Knead the dough on a lightly floured surface for 8 to 10 minutes until it is smooth and elastic. If using a mixer, knead for 6 to 8 minutes.
- Place the dough in a lightly oiled bowl, turning to coat. Cover the bowl with plastic wrap or a clean towel.
- Let the dough rise in a warm place until doubled in size, about 1 to 1.5 hours (first proof).
- Gently punch down the risen dough to release the air.
- Shape the dough into a loaf and place it in a greased 9×5 inch loaf pan.
- Cover the pan loosely and let the dough rise again until it has nearly doubled, about 30 to 45 minutes (second proof).
- Preheat your oven to 375°F (190°C) during the last 15 minutes of the second proof.
- Bake for 30 to 35 minutes, or until the top is golden brown and the internal temperature reaches 200°F (93°C).
- Remove the bread from the pan immediately and cool completely on a wire rack before slicing.
Notes
- For a softer crust, brush the top of the loaf with melted butter immediately after removing it from the oven.
- If your kitchen is cold, place the covered dough bowl inside your oven with just the light turned on to create a warm proofing spot.
- If the dough tears while kneading, let it rest for 5 minutes before continuing; this allows the gluten to relax.
Nutrition
- Serving Size: 1 slice
- Calories: 130
- Sugar: 2
- Sodium: 180
- Fat: 2
- Saturated Fat: 1
- Unsaturated Fat: 1
- Trans Fat: 0
- Carbohydrates: 25
- Fiber: 1
- Protein: 4
- Cholesterol: 5