

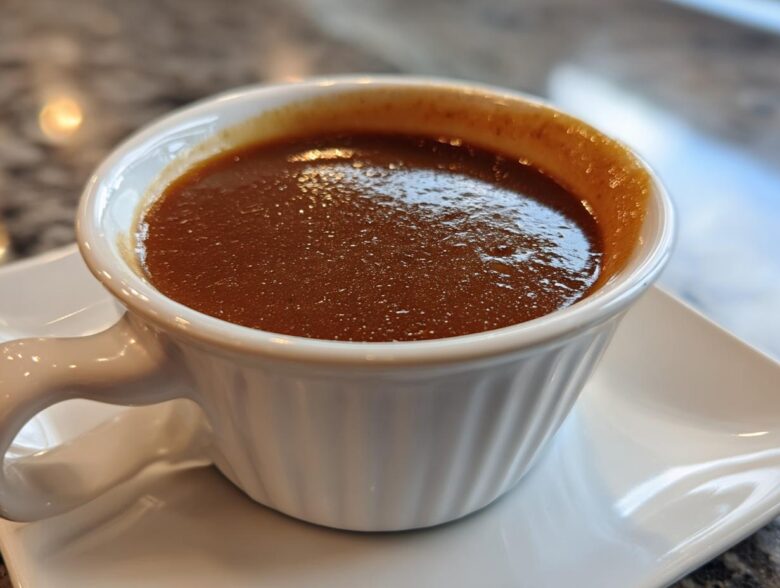
Oh, the sheer heartbreak of a dinner ruined by thin, watery, flavorless goop masquerading as gravy! You know what I mean—the kind that just slides right off your mashed potatoes. Believe me, I have been there more times than I care to admit trying to save a roast. But I’ve spent years mastering the foundational sauces, and I’m telling you, this recipe changed everything. We are making the ultimate homemade brown gravy right here, from scratch, and the best part? It comes together in about fifteen minutes and you don’t even have to wait for drippings. This is my tried-and-true, deeply seasoned recipe that proves you can achieve that restaurant-quality richness any night of the week.
I feel it’s my duty as a cook to ensure everyone knows how simple truly great gravy is. You can check out my commitment to honest, reliable recipes over at my About Us page if you’re curious! Trust me on this one; forget the packets forever.
Why You Will Make This Homemade Brown Gravy Again and Again
I promise this is the last time you’ll even look at the shelf where the powdered mixes live. This recipe for homemade brown gravy is simply unbeatable for several reasons that tackle all those dinner dilemmas we face.
- It delivers that deep, savory flavor everyone craves—truly rich, savory sauce quality.
- It is incredibly quick! We’re talking about having this perfect topping ready in about 15 minutes total.
- Zero reliance on pan drippings means you can whip this up for any meal, making it a perfect gravy without drippings option.
- The texture is amazing; it’s that velvety smooth gravy you usually only find in diners.
- It’s versatile enough for chicken, pork, mashed potatoes, or even as a base for other sauces. It’s a true comfort food topping staple.
- It uses basic pantry items, so you never have to run to the store when dinner needs finishing.
- It’s so much better than any box mix—you can taste the homemade difference immediately!
These are the reasons I rely on this easy brown gravy recipe whether I’m making a quick weeknight chicken fry or tackling full-blown holiday side dishes.
Gathering Ingredients for Rich Homemade Brown gravy
Okay, let’s talk about what you need to make this incredible homemade brown gravy. The beauty of this recipe is that it truly relies on simple pantry staples. We aren’t hunting around for exotic spices or waiting for the turkey to finish roasting for drippings!
Since we aren’t relying on drippings, the quality of your stock really matters here. I always recommend grabbing low sodium beef broth or stock if you can. This gives us much better control over the final saltiness. Also, make sure your three tablespoons of butter are just regular unsalted butter—no margarine substitutes allowed in my kitchen, trust me on this one!
Essential Components for Deep Flavor
Here is the list you need to gather before you even turn on the stove. Keep everything measured out ahead of time because once the roux starts going, you have to move quickly!
- 3 tablespoons all-purpose flour
- 3 tablespoons unsalted butter
- 2 cups beef broth or stock (low sodium preferred)
- 1 teaspoon Worcestershire sauce
- 1/2 teaspoon onion powder
- 1/4 teaspoon black pepper
- Pinch of salt (to taste)
That’s it! With these basic items, we are going to build a truly deep flavored gravy that tastes like it took hours, not minutes.
Stovetop Tutorial: How to Make Brown Gravy From Scratch
This is where the magic happens, folks! Making this brown gravy from scratch is really all about mastering one crucial technique: the roux. A proper roux is what gives you that beautiful color and that incredible, lump-free, velvety smooth gravy texture. Don’t rush this part; pay attention to your heat, and you’ll never have watery gravy again.
If you want an extra deep flavor that screams “restaurant quality,” a well-developed roux is the secret weapon. I can link you to my guide on making a stovetop white chili recipe, which also relies on a good foundation sauce, but for now, just watch your butter!
Creating the Perfect Roux Base
First things first, don’t be afraid of the heat, but you absolutely must respect it. You melt your butter in a saucepan over medium heat—just enough to get it shimmering nicely. Then, you whisk in that flour. This forms the roux.
Whisk constantly and cook this fatty flour paste for just 1 to 2 minutes. You want it to look like a smooth, light brown paste—think pale peanut butter. As it cooks, you’ll notice the scent changing—that slightly raw, dusty flour smell will get nutty and warm. Stop right when it smells warm and savory, before it turns dark brown. That’s Step 2 done!
Achieving Velvety Smooth Gravy Without Lumps
This is the step where most people get lumps, so listen closely! You need to add your liquid very slowly while whisking like you mean it. Pour in *just a splash* of your cold beef broth, whisk vigorously until it is totally smooth—I mean totally smooth, like silk. Then, and only then, pour in the rest of the broth while you keep the whisking going.
Once every drop of liquid is incorporated, you bring the whole thing up to a nice simmer over medium heat, whisking occasionally. You will immediately notice it starts thickening up beautifully. If you see any little lumps forming, just pull the pan off the heat for a second and whisk them out before putting it back on.
Finishing Touches for Rich Savory Sauce
Once the gravy is simmering and has thickened to the point where it coats the back of a spoon nicely, it’s time to season it for that truly deep flavored gravy experience. Drop in your Worcestershire sauce, onion powder, and black pepper.
Let this simmer gently, stirring every so often, for another 3 to 5 minutes. This bubbling time is crucial because it cooks out any last trace of that raw flour taste, giving you a clean, rich savory sauce. After that, taste it! If your broth was low-sodium, you might need a tiny pinch of salt to make those flavors really pop. And that’s it—your best homemade gravy is done!
Expert Tips for Restaurant Quality Homemade Brown Gravy
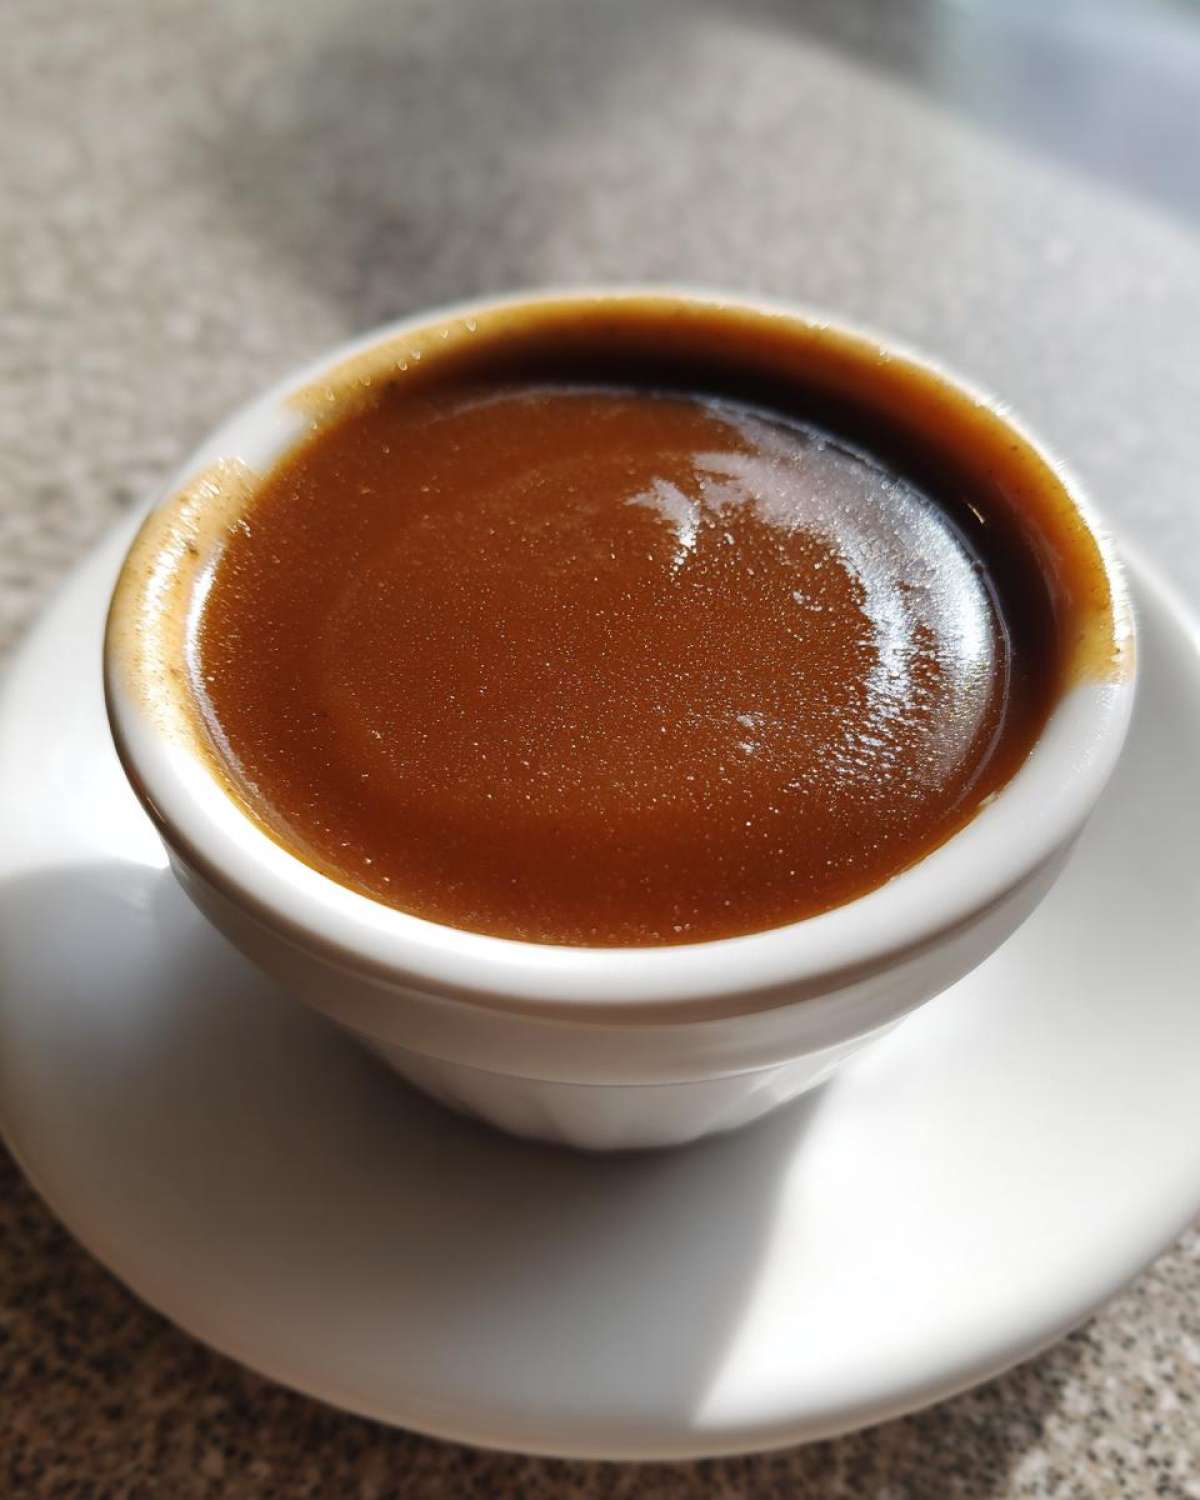
Now that you have the basic steps down for your homemade brown gravy, let’s talk about elevating it. Seriously, these little tweaks are exactly what separates the decent gravy from the truly show-stopping, “where did you buy this?” kind of gravy. If you want that true restaurant quality gravy that sings over your Sunday roast, these notes from my test kitchen are going to be your secret weapon.
I’ve gone through so many batches of roux to figure out how much color is *too* much color. It’s subtle, but mastering the shade of your base makes all the difference in both the final depth of flavor and the final color.
Adjusting Color and Consistency
Remember that first minute or two we cooked the roux until it was that pale, light brown paste? Well, if you want to go darker, you can absolutely keep cooking it! Just keep whisking patiently; you can push that color deeper, aiming for a robust, dark peanut butter shade. This develops a more intense, deeply roasted flavor profile in your homemade brown gravy. Just watch it like a hawk because you don’t want to burn that flavor out!
Now, let’s talk about texture consistency because gravy is alive once it’s off the heat! It thickens up a lot as it cools down. If you’ve let it sit for five minutes and suddenly it looks more like wallpaper paste than a pourable sauce, don’t panic! Just slide it back onto low heat and whisk in a small splash—maybe a quarter cup—of really warm (or hot) broth, or even just plain warm water. Whisk it until it relaxes back down into that beautiful, pourable texture. It always comes back!
Ingredient Notes and Substitutions for Your Brown Gravy Recipe
Since this recipe shines because it’s a sturdy gravy without drippings, the stock you choose is genuinely the most important flavor component after the roux itself! You need to treat your stock selection with the seriousness it deserves.
I wrote this recipe assuming most people will use beef broth because it gives that traditional, deep brown color and savory foundation. But listen, if you’re cooking for vegetarians or just ran out of beef stock, don’t stop!
You can absolutely use high-quality mushroom stock or even vegetable stock. Just know that the color will be slightly lighter—more of a golden brown rather than a deep mahogany. If you use vegetable stock and want that deep color, you might need to cook your roux out just a little bit longer, aiming for that darker, nutty brown shade we talked about.
If you’re looking for ways to swap liquid bases in other meals, I have a fantastic recipe for savory oatmeal with egg and cheese that uses broth in an unexpected way, so you know how versatile stock can be!
Pro tip: If you do use vegetable stock and still want that meaty depth, add an extra half-teaspoon of that onion powder or perhaps a quarter teaspoon of dried thyme. It won’t taste exactly like beef, but it will certainly give you a complex, satisfying flavor that pairs perfectly with your favorite comfort food toppings!
Pairing Your Homemade Brown gravy: Perfect Comfort Food Toppings
The gravy is done. It’s shimmering, it’s thick, and it smells absolutely divine. Now, what in the world are we going to drown in this beautiful stuff? Honestly, with a homemade brown gravy this good, the topping almost becomes secondary! But finding the right comfort food pairing can take a meal from great to legendary.
If you’re looking for some ideas that showcase this amazing sauce, here are my go-to dishes. These are the things I always seem to have on hand when I need a ridiculously satisfying and quick dinner side that feels like a hug.
You know I love a good one-dish meal too. If you need ideas for using this up as part of a bigger plate, you have to check out my recipe for Skillet Shepherd’s Pie—it uses gravy as the savory binder, and it’s unbelievable.
Here’s how I like to serve up my very best homemade gravy:
- Mashed Potato Topping Heaven: This is the classic for a reason! Make sure your potatoes are mountain-high, and then pour slowly. The way this thick gravy soaks into the peaks is just heaven. No thin, watery stuff here!
- Meatloaf Magic: If you bake meatloaf, serving a thick slice right next to a pool of this gravy is mandatory. It keeps the meatloaf moist and adds such a professional touch.
- Biscuits and Gravy: Okay, usually that calls for white sausage gravy, but I’ve made this beef version over split, toasted biscuits when I want something heartier for Sunday supper. It works beautifully!
- Pork Chop Platter: Pan-fried pork chops need a salty, savory sauce. This works ten times better than a gravy made only from the few bits left in the pan.
- Over Noodles or Rice: This is my biggest secret for turning boring weeknight meals into something special. Just boil some egg noodles or a cup of white rice, and spoon this rich sauce right over the top. Instant soul food!
Seriously, once you rely on this easy brown gravy recipe, you’ll start looking around your kitchen wondering what else needs a drizzle of savory perfection!
Storing and Reheating This Easy Brown Gravy Recipe
We made nearly two cups of this glorious, rich sauce, and chances are you might not use it all in one sitting. That’s okay! The great thing about mastering this simple stovetop technique is that your leftovers are just as fantastic as the first batch. Storing and reheating your easy brown gravy recipe correctly keeps that homemade flavor locked in and ensures you don’t end up with a solid block of weirdness later.
I always make a double batch around the holidays just so I have it ready for those leftover turkey sandwiches the next day. Seriously, this stuff transforms a boring sandwich!
Here’s my routine for keeping that delicious texture perfect when storing for later use.
Storing Your Gravy
First, you really need to let it cool down a bit before putting it away, but don’t let it sit on the counter for hours—safety first!
- Once it’s cooled enough that steam isn’t violently rising off it, transfer your leftover homemade brown gravy into an airtight container. A glass jar works perfectly, but any decent plastic container will do.
- When it’s cooled completely (I usually wait about an hour on the counter), seal it up tight and pop it in the refrigerator. It keeps beautifully for up to four days. Honestly, I’ve pushed it to five, but four is my safe recommendation for the best homemade brown gravy flavor.
Reheating for That Perfect Pour
When you go to reheat this, remember what I told you earlier: gravy contracts as it cools, so it will be significantly thicker than when you first made it. You have a couple of totally fine options here.
If you are using a large portion, the stovetop is always my preferred method because you have better control over the liquid addition.
- Scoop the cold, firm gravy into a small saucepan.
- Add a splash of warm liquid—again, beef broth is best, but water works too—for every half-cup of gravy you are reheating. Start small, maybe a tablespoon!
- Heat it over low or medium-low heat, stirring constantly until it’s smooth and molten again. Keep stirring until that beautiful, velvety texture returns.
I know sometimes you just need a single serving fast, so the microwave works in a pinch. Pop a portion in a microwave-safe bowl, add that splash of warm liquid, reheat in 20-second bursts, and stir well between each blast. Don’t try to nuke it all at once, or you’ll get hot spots and lumpy gravy. No one wants that!
No matter how you reheat it, you’re guaranteed a flavorful, rich sauce ready to top whatever you need it to!
Frequently Asked Questions About Brown Gravy From Scratch
I know when I first start learning a new technique, like making this brown gravy from scratch, I have a million little questions buzzing around my head! Most of them revolve around color, thickness, and timing. Don’t worry if you’re wondering about the same things; that just means you care about getting that perfect, velvety smooth gravy! This section should answer those nagging doubts.
I pulled some of the questions I get asked most often about this recipe. If you’re making this for Thanksgiving, you’ll definitely want to read the next section!
Can I make this gravy ahead of time for Thanksgiving side dishes?
Absolutely, yes! This is one of the major perks of using a broth-based recipe—it holds up like a champ. If you have a busy holiday like Thanksgiving, making your gravy ahead of time is a total lifesaver. Once it’s cooked and cooled, just store it in an airtight container in the fridge for up to four days. When it’s time to serve, remember what I said: you’ll need to reheat it on the stovetop low and slow, adding splashes of warm broth until it melts back into that luscious pouring consistency. It’s one of the best moves you can make for Thanksgiving side dishes!
What if I want a darker beef gravy recipe?
If you are really aiming for that deep, rich mahogany color, you need to spend a little extra time on the roux. That initial cook time of 1 to 2 minutes for a light brown paste is great for a standard easy brown gravy recipe. But if you want that deep, almost mahogany shade, that’s what signals a truly deep flavored gravy to me.
Instead of stopping at pale brown, just keep that heat on medium and keep stirring. You are looking for a color like dark chocolate or rich peanut butter. As it gets darker, the flavor gets nuttier and deeper, which is why it becomes a superior beef gravy recipe. Just be super careful right around the 4-minute mark; that’s when the flour can go from perfectly dark to slightly bitter way too fast. Watch it closely!
How do I prevent my gravy from having a raw flour taste?
This is the number one giveaway that gravy wasn’t cooked long enough! The secret is the simmer time *after* you add the liquid. Once that broth combines with your roux, you need that mixture to come to a clear, rolling simmer. Let it keep doing that, stirring every minute or so, for a solid three to five minutes. That heat has to cook the starchiness out of the flour entirely. You’ll know it’s done because the gravy will smell sweet and savory, and the unpleasant raw smell will completely disappear. That final simmer stage is essential for a true rich, savory sauce that tastes professional!
Since you’re stopping by my little corner of the internet, feel free to check out my latest kitchen adventures over on the blog when you get a chance!
Nutritional Estimates for Your Homemade Brown Gravy
I know some of you look beyond just taste and texture and want to know the numbers, too. While this is a foundational sauce, understanding what you’re adding to your plate is always smart! Here are the basic nutritional estimates for this homemade brown gravy based on the ingredients listed.
Please remember, this is just a guideline, not a scientific guarantee! Your batch size, the sodium content of your stock, and whether you used butter or maybe a slightly different brand of flour can absolutely change these numbers. Like all my recipes, you can find more about how I calculate these estimates on my disclaimer page.
This is based on a yield of about four quarter-cup servings:
- Serving Size: 1/4 cup
- Calories: 75
- Fat: 5g
- Saturated Fat: 3g
- Carbohydrates: 5g
- Protein: 2g
- Sugar: 0.5g
- Sodium: 250mg (This will vary wildly based on your broth choice!)
- Cholesterol: 7mg
See? Not bad at all for something so unbelievably rich and savory! It’s easy to see why this simple recipe makes such a fantastic, guilt-free topping for your favorites.
PrintRich Brown Gravy Without Drippings
Make a rich, savory brown gravy from scratch using stock, perfect for mashed potatoes or roasted meats. This recipe is quick and does not require pan drippings.
- Prep Time: 5 min
- Cook Time: 10 min
- Total Time: 15 min
- Yield: About 1.5 cups
- Category: Side Dish
- Method: Stovetop
- Cuisine: American
- Diet: Vegetarian
Ingredients
- 3 tablespoons all-purpose flour
- 3 tablespoons unsalted butter
- 2 cups beef broth or stock (low sodium preferred)
- 1 teaspoon Worcestershire sauce
- 1/2 teaspoon onion powder
- 1/4 teaspoon black pepper
- Pinch of salt (to taste)
Instructions
- Melt the butter in a medium saucepan over medium heat.
- Whisk the flour into the melted butter. Cook this mixture, stirring constantly, for 1 to 2 minutes until it forms a smooth, light brown paste (a roux). Do not let it burn.
- Slowly pour in the beef broth, whisking continuously to prevent lumps from forming.
- Bring the mixture to a simmer, still whisking occasionally. The gravy will begin to thicken as it heats.
- Once simmering, reduce the heat to low. Stir in the Worcestershire sauce, onion powder, and pepper.
- Continue to simmer for 3 to 5 minutes until the gravy reaches your desired thickness and the raw flour taste is gone.
- Taste the gravy and add a pinch of salt if needed. Serve hot over your favorite dish.
Notes
- For a darker color, cook the roux for an extra minute until it reaches a deep peanut butter color before adding the liquid.
- If the gravy becomes too thick upon standing, whisk in a small amount of extra warm broth or water until the texture is smooth.
- For a deeper flavor, substitute half of the beef broth with mushroom or vegetable stock.
Nutrition
- Serving Size: 1/4 cup
- Calories: 75
- Sugar: 0.5
- Sodium: 250
- Fat: 5
- Saturated Fat: 3
- Unsaturated Fat: 2
- Trans Fat: 0
- Carbohydrates: 5
- Fiber: 0.2
- Protein: 2
- Cholesterol: 7