

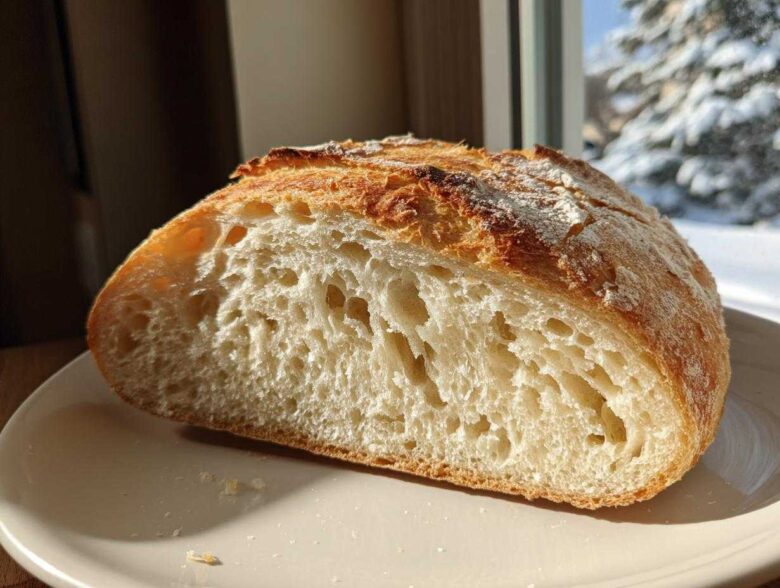
Oh, honey, I know the struggle! You want that amazing sourdough tang, but when you slice the loaf, it’s like trying to cut through a brick? I’ve been there—I once made a loaf so structurally dense I’m pretty sure I used it to hold open a garage door. It was tough, not flaky, and totally useless for school lunches. I almost gave up on the whole natural leavening thing for daily bread! But trust me, those days are over. This recipe for easy sourdough sandwich bread fixes every single one of those common issues. We are going to nail that soft, sliceable texture every single time. This classic sourdough sandwich bread belongs on your table every single day! If you want to read more about my journey into baking naturally leavened goods, check out my thoughts on why I started this whole crazy baking adventure.
Why This Is the Best Sourdough Sandwich Bread Recipe for Beginners (E-E-A-T)
When you’re tackling sourdough for the first time, you don’t want a complicated, sticky mess that demands three hours of folding. You want bread that actually works for your life! This recipe nails it because we are leveraging the magic of a long, cold proof. That slow chill in the fridge not only develops that wonderful, complex, tangy flavor but it also firms up the dough structure beautifully. This makes it incredibly easy to handle when it comes time to shape it, which is huge for beginners trying to get that classic loaf shape.
Plus, yes, we are cheating just a little bit by adding softened butter. Don’t tell the purists! That little bit of fat is the secret weapon that ensures you get that wonderfully soft, pillowy texture we all crave in a slice of sandwich bread. It keeps the crumb super tender. You can read more about my philosophy on welcoming newcomers to sourdough over here: Sourdough for Beginners.
Key Features of Our Easy Sourdough Bread Recipe
- Perfect slice thickness for everyday use.
- Ideal texture for making incredible French toast or simple buttered toast.
- Highly digestible due to the long, slow fermentation.
- Minimal kneading required—the time does the hard work for you!
Gathering Ingredients for Your Sourdough Sandwich Bread Loaf
Okay, let’s talk about what goes into this magical loaf. Because we’re aiming for the softest, fluffiest result—the one that makes you want to skip the store-bought stuff forever—the ingredients matter! You absolutely MUST have an active starter for this. If your starter isn’t hungry, bubbly, and ready to party, your bread won’t rise right, plain and simple. But the real star for getting that wonderfully soft, **buttery sourdough crumb** is that small amount of softened butter we sneak in. It adds richness and keeps the structure tender, so don’t skip it!
Ingredient Measurements and Specifics
Get your scale out, because precision helps us nail that perfect texture! Here are the exact components you’ll need:
- 100g active sourdough starter (and this needs to be 100% hydration, just so you know!)
- 350g warm water (This is important—aim for around 85F, not cold and not boiling hot!)
- 500g bread flour (Seriously, use bread flour; all-purpose just won’t give you the structure we want here.)
- 10g fine sea salt
- 20g unsalted butter, softened (Make sure this is actually soft, not melted!)
Step-by-Step Instructions for Classic Sourdough Sandwich Bread
Alright, put your apron on, because here is where the magic—and the structure—happens! We’re taking this shaggy mess and turning it into a gorgeous loaf that you can brag about. The key here is patience during the initial mix and then letting time and temperature work their wonders. Don’t get stressed by the long timeline; most of that time is just resting! I always start this process the night before I want to bake. If you want to see my favorite mixing bowls and tools I can’t live without, pop over to my baking essentials page!
Mixing and Initial Development (Autolyse and Folds)
First, mix that happy, active starter into your warm water until it dissolves a bit—we want that starter totally integrated. Now, dump in all 500g of your bread flour and mix it until you have a rough, shaggy ball. It won’t look pretty! This needs a 30-minute rest, called an autolyse. This rest lets the flour soak up the water nicely without needing tons of mixing action later on. After 30 minutes, sprinkle that salt over the top. Use wet fingers to just dimple it in until it disappears. Next, we get into the folds!
We do four sets of stretch and folds, each spaced 30 minutes apart. This builds strength gently. When you reach the second set of folds, this is your moment to add the softened 20g of butter. Just tear the dough gently, press the butter right into the stretched surface, and then fold it over itself until the butter is completely absorbed. Be gentle here! You’re sealing the butter inside, making the dough smooth and rich without tearing the gluten network we’ve worked so hard to build.
Bulk Fermentation and Shaping for a Sliceable Sourdough Bread
After that last fold, cover it up and step away! This is the bulk fermentation stage. You need the dough to increase in volume by about 30% to 50%. This means it should look noticeably puffier, feel lighter, and have some bubbles showing on the surface. Depending on how warm your kitchen is, this could take anywhere from 2 to 4 hours. Don’t rush this part or your crumb will be dense!
When it’s ready, gently turn it out onto a lightly floured counter. We aren’t doing a round boule; we are making a sandwich loaf! Carefully shape it into a tight log, pulling the edges under to create tension on the surface. That tension is what gives you that beautiful oven spring in the loaf pan. Now, lightly grease a standard 9×5 inch loaf pan, place your dough seam-side down, cover it, and get ready for the freezer nap.
The Cold Proof and Baking the Sourdough Sandwich Bread
The pan goes straight into the refrigerator for a long, cold proof, spanning 12 to 18 hours. I love this step! It stops the yeast from over-proofing while the friendly bacteria keep working, deepening the flavor and making it so much easier to slice later without squishing it. When you’re ready to bake, preheat your oven *really* hot—450F (232C)—with the rack in the bottom third for good bottom crust development.
Take the dough out of the fridge, but let it sit on the counter for about one hour while that oven blasts up to temperature. Once it’s ready, pop it in! Bake for 20 minutes right there at 450F. Then, without opening the door if you can avoid it, drop the oven temperature down to 375F (190C) and bake for another 25 to 30 minutes. You are done when an instant-read thermometer hits 200F (93C) right in the middle. Trust me, pull it out right at that temp! Let it cool on a wire rack for ages—seriously, wait until it’s completely cool before slicing, or it will be gummy!
Tips for Achieving a Fluffy Sourdough Bread Crumb
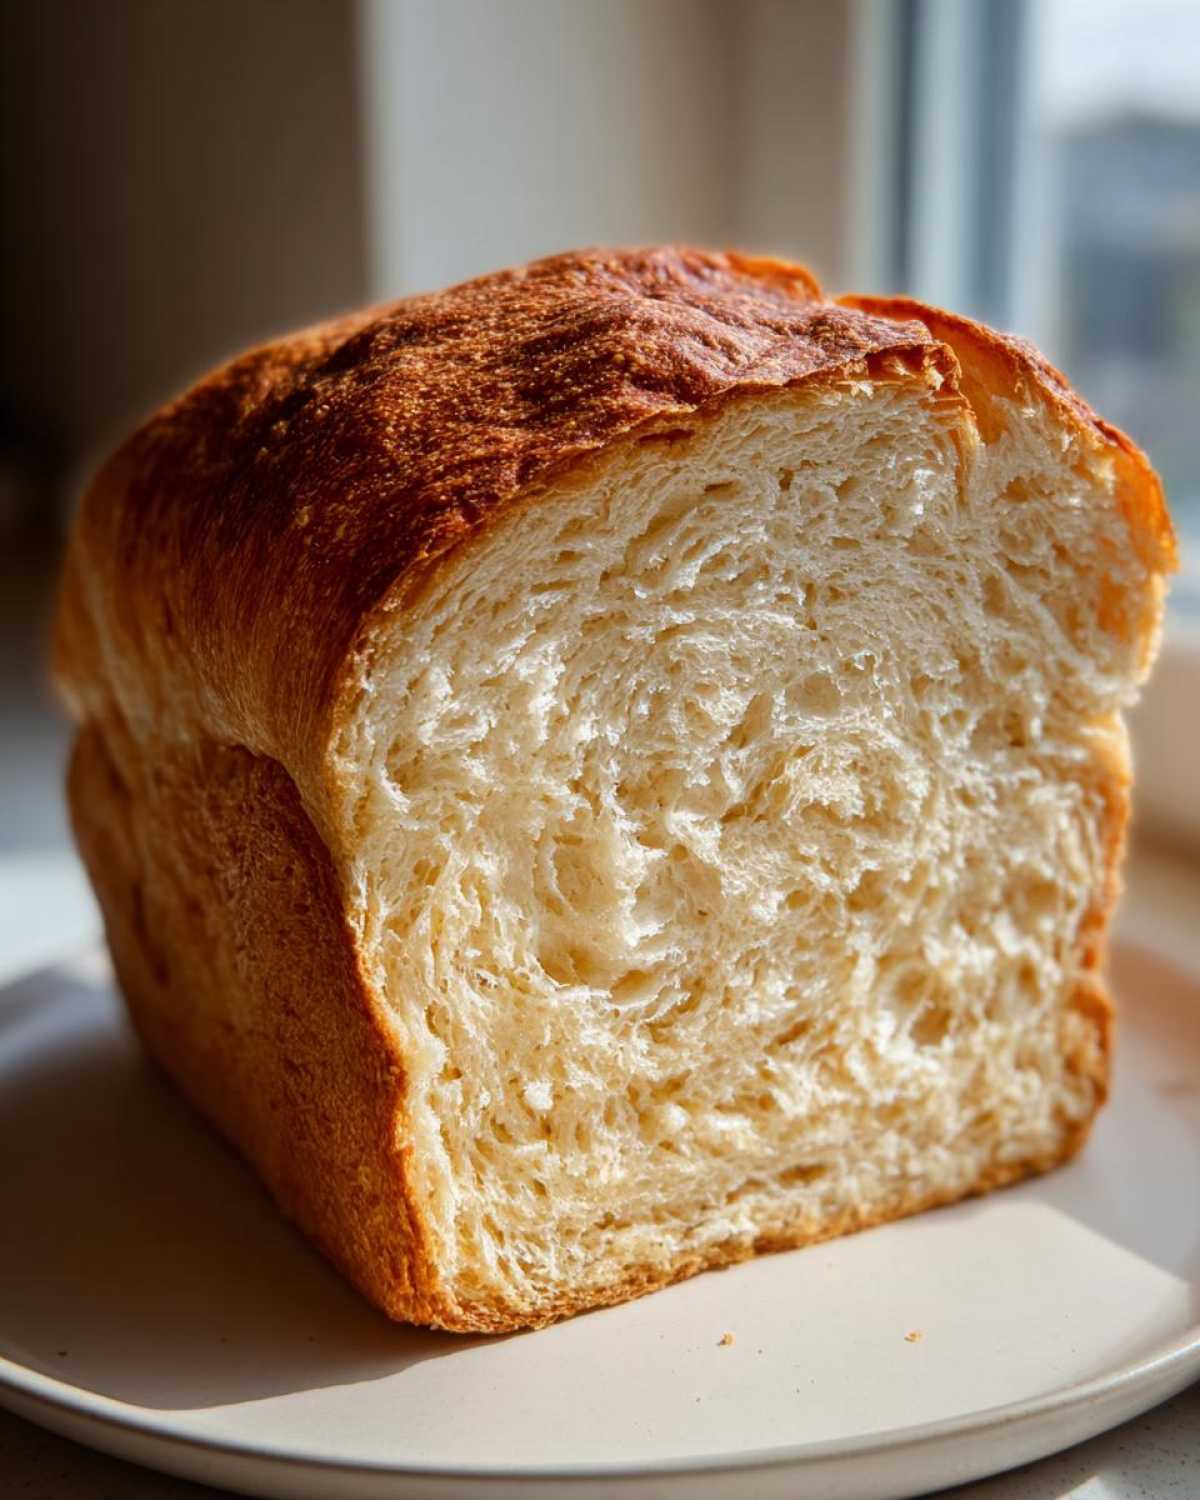
We’ve baked the loaf, but now we need to talk execution! So many times, people follow the recipe perfectly, but the texture ends up gummy or too dense. That’s usually down to one of two things: ingredients or patience at the very end. If you want that perfect, light, airy structure that makes for the best **sourdough sandwich bread**, you need to pay attention to these final steps. They aren’t optional; they are the difference between good bread and *wow* bread, I promise you!
Ingredient Checks for the Best Sourdough Sandwich Recipe
Before you even mix anything, look at your starter. Is it happy? I mean really happy? For this recipe to succeed—especially since we aren’t kneading it forever—your starter needs to be absolutely rocketing. It should be bubbly, smelling pleasantly sour, and if you drop a small spoonful into water, it should immediately float. If it sinks, it’s not ready, so feed it again. Don’t try to bake with a sleepy starter, or you’ll end up with a brick!
The other thing is the flour! I know bread flour can be more expensive, but for a **fluffy sourdough bread** designed to be soft and sturdy enough for toasting, you need that high protein content. Bread flour builds structure that AP flour just can’t match. That structure is what allows the bread to hold its shape when you slice it, stopping it from collapsing into a dense mess in the middle.
Crucial Cooling Time for Homemade Sandwich Bread Sourdough
This is the step that separates the patient bakers from the impatient ones, and honestly, this is probably the biggest reason people end up with gummy slices. You must, must, *must* let this bread cool completely. I know it smells incredible right out of the oven, and you just want that first warm slice slathered in butter, but hold the line!
The structure of the bread is still setting while it cools down. If you slice it while it’s hot, all the steam rushes out, and the internal starches haven’t had time to reorganize properly. That’s what creates that wet, gooey, gummy texture inside. Give it at least four hours, or even better, let it cool overnight on a wire rack. This extra patience guarantees you get that perfect, non-gummy result for your **homemade sandwich bread sourdough**!
Making This Digestible Sourdough Loaf Suitable for Daily Meals
One of the absolute best things about choosing sourdough—especially when you take the time to let it cold proof overnight like we do here—is how much easier it is on your tummy! That long, slow fermentation process is almost like pre-digesting the dough for you. The natural acids produced by the wild yeasts start breaking down starches and gluten chains long before you even toast it.
That means you get all that wonderful, hearty bread flavor without the heavy, sluggish feeling you sometimes get from commercial yeast bread. It’s why people who can’t normally handle wheat often do great with naturally leavened loaves like this! It turns our **sourdough sandwich bread** into the perfect companion for those jam-packed lunchboxes or quick weeknight dinners. For another recipe that really leans into keeping your insides happy, you should check out my recipe for a super vibrant green juice.
Serving Suggestions for Your Everyday Sourdough Bread
Now that you’ve gone through all that effort to create a perfect, soft, and incredibly versatile loaf, you deserve to enjoy it! Honestly, this **everyday sourdough bread** shines in simplicity. You worked hard for that flavor and texture, so you don’t need fancy spreads to prove a point.
Of course, the number one use is sandwiches. Because this loaf is sturdy yet soft, it handles wet fillings way better than a standard bakery loaf. Think about your classic PB&J—this bread won’t tear when you spread the peanut butter thick. It’s also amazing for grilled cheese because that slightly tangy crust gets perfectly crisp while the inside stays soft and fluffy against the melted cheese. If you ever want to elevate your breakfast game, slicing this bread thicker than normal makes for the absolute best French toast. Speaking of which, you have to try my recipe for caramelized banana French toast—it’s seriously next level with this sourdough!
But honestly, my favorite way to celebrate a successful bake is just simple enjoyment. Slice a piece thick, toast it until it’s golden brown, and load it up with good salted butter. That slightly sour hint mixing with the melting butter is just heaven. This loaf makes the perfect **sourdough toast bread** because it has enough internal structure to hold up to a good toasting without getting rock hard.
Storing and Reheating Your No-Fuss Sourdough Loaf
Look, I know you want to eat this whole **sourdough sandwich bread** loaf in about 24 hours, but if you manage to save some for later, we need to store it right! Since this loaf has a bit of butter in it and relies on that natural leavening, it stays fresher longer than white bread, but it’s still sourdough, so it will eventually stale. The key is keeping that soft crumb intact.
At room temperature, I recommend keeping it in a paper bag for the first day or two. A paper bag lets the crust breathe, which is vital. Storing it in plastic right away traps moisture, and you start sacrificing the crust texture immediately. After two days, if you still have half a loaf left, it’s time to move it to the freezer. Slice the loaf first! This is crucial for having an **easy sourdough bread recipe** on hand.
Slice the entire loaf first, wrap the slices tightly in plastic wrap, and then tuck them all into a zip-top freezer bag. This way, you can pull out just one or two slices whenever you need them for lunch or a quick breakfast. They freeze beautifully!
When that craving hits for some warm **sourdough toast bread**, don’t even thaw the slice! Just pull it straight from the freezer, toss it right into the toaster, or lay it face-down on a hot skillet for a minute per side if you want to revive that buttery flavor. You won’t believe how perfect the texture comes back once it’s heated up again. It’s like magic for your lunchtime routine!
Frequently Asked Questions About Sourdough for Beginners
I know sometimes baking can feel like chemistry class gone wrong, especially with sourdough! So many questions pop up once you start playing around with wild yeast. Don’t worry at all; that’s what this section is here for—to make sure your journey to the perfect **sourdough for beginners** is smooth sailing. When I was first making these loaves, I had tons of questions, and I want to save you the troubleshooting time!
Can I skip the cold proof and bake the Sourdough Sandwich Bread the same day?
Oh, I get this one all the time! Technically, yes, you *can* try to bake it right off the counter after bulk fermentation. But if you do that, you are throwing away the key to the best texture for a sandwich loaf! If you skip the long, cold proof, your dough will be much stickier, it will spread more in the pan, and your final slices will often come out denser or slightly gummy. The cold rest is what firms up the dough enough so that when you slice it later, it doesn’t mush. For the **sliceable sourdough bread** we are after, please, please give it that overnight snooze in the fridge!
What if my dough doesn’t rise enough during bulk fermentation?
If you let your dough sit out and it still looks basically the same—no puff, no bubbles after those 3-4 hours—then we have a starter problem, usually. Did you feed your starter a few hours before mixing, and was it floating? If your starter wasn’t at its peak when you mixed it in, it just won’t have the strength to lift that nice, heavy, buttery dough. If your kitchen is generally cold, that’s another culprit! If the dough looks weak, gently move it somewhere warmer, like near a pilot light or inside an oven with just the light turned on, and see if it perks up. If it’s been 5 hours and it still looks sad and flat, you might have to call it, feed the starter again, and try again tomorrow. Don’t force the bake!
If you need more specific advice or want to ask me anything else about handling your dough, don’t hesitate to reach out through my contact page!
Estimated Nutritional Data for This How to Bake Sandwich Bread Naturally Leavened Recipe
For those of you who track macros or just want a general idea of what’s in that delicious loaf, here is the estimated nutrition breakdown based on the recipe above. Remember, these numbers are just a guide! They assume you’re slicing the loaf into about 14 slices. If you make bigger, heartier slices for your lunches, the numbers per serving will change a little, naturally.
Here’s a quick look at what you can expect per single slice:
- Calories: Around 220
- Total Fat: About 3 grams (mostly the butter we added!)
- Carbohydrates: Roughly 42 grams
- Protein: A good 8 grams to keep you full!
We are proud that this bread keeps the sugar super low (only about half a gram!) because we rely on the natural sweetness of the grain and the tang of the fermentation. If you want to know more about how I handle ingredients and sourcing, please take a look at my full ingredient disclaimer.
PrintEasy Soft Sourdough Sandwich Bread

A beginner-friendly recipe for a soft, sliceable sourdough loaf perfect for daily sandwiches and toast.
- Prep Time: 30 min
- Cook Time: 50 min
- Total Time: 14 hours 50 min
- Yield: 1 loaf
- Category: Bread
- Method: Baking
- Cuisine: American
- Diet: Vegetarian
Ingredients
- 100g active sourdough starter (100% hydration)
- 350g warm water (around 85F)
- 500g bread flour
- 10g fine sea salt
- 20g unsalted butter, softened
Instructions
- Mix the active starter and warm water in a large bowl until combined.
- Add the flour and mix until a shaggy mass forms. Cover the bowl and let it rest for 30 minutes (autolyse).
- Sprinkle the salt over the dough. Dimple it in with wet fingers, then mix until the salt is incorporated.
- Perform four sets of stretch and folds, spaced 30 minutes apart, incorporating the softened butter during the second set of folds.
- After the final fold, let the dough rest at room temperature until it increases in volume by about 30-50% (this may take 2-4 hours depending on your kitchen temperature).
- Gently shape the dough into a tight log and place it seam-side down into a lightly greased 9×5 inch loaf pan.
- Cover the pan and place it in the refrigerator for a cold proof for 12 to 18 hours.
- Preheat your oven to 450F (232C) with a rack in the lower third position.
- Remove the dough from the refrigerator. Let it sit on the counter for 1 hour while the oven preheats.
- Bake for 20 minutes at 450F (232C). Reduce the oven temperature to 375F (190C) and continue baking for another 25-30 minutes, or until the internal temperature reaches 200F (93C).
- Remove the bread from the pan immediately and cool completely on a wire rack before slicing.
Notes
- For the softest crumb, use high-protein bread flour.
- Ensure your starter is very active before mixing the dough.
- Cool the bread completely (at least 4 hours) before slicing to prevent a gummy texture.
Nutrition
- Serving Size: 1 slice
- Calories: 220
- Sugar: 0.5
- Sodium: 350
- Fat: 3
- Saturated Fat: 1.8
- Unsaturated Fat: 1.2
- Trans Fat: 0
- Carbohydrates: 42
- Fiber: 2
- Protein: 8
- Cholesterol: 8