

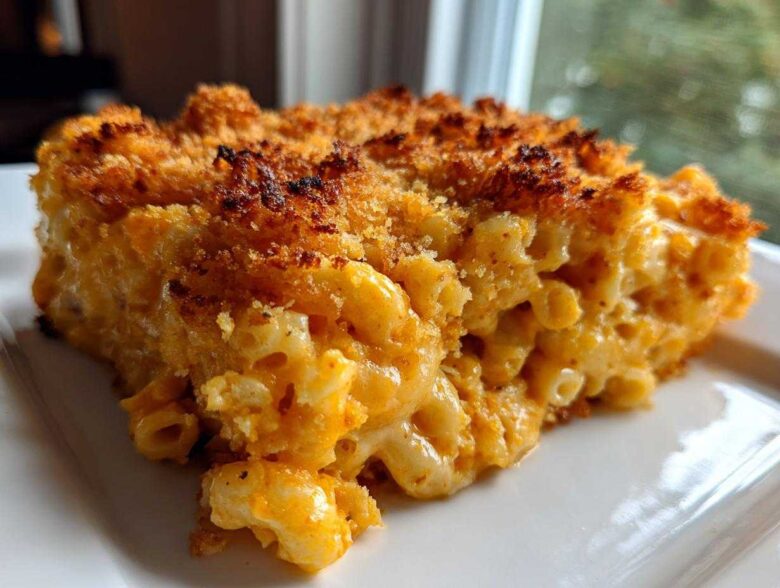
Oh, stop what you are doing right now, because we need to talk about comfort food. I mean the truly epic, warm-you-to-your-bones kind of comfort. For me, nothing beats a perfect pan of homemade baked macaroni and cheese. I’ve spent years tweaking my process, trying to find that elusive perfect balance, and I think I finally cracked the code for the ultimate baked mac and cheese recipe. This isn’t your thin, watery stuff! We are aiming for a ridiculously gooey interior that cradles the pasta perfectly, topped with that crunchy, golden shield everyone fights over. Trust me, mastering the roux finally made all the difference in my cooking!
Why This is the Ultimate Baked Mac and Cheese Recipe
Listen, I’ve eaten enough bland, gummy casseroles to last a lifetime. That’s why this recipe works—it conquers the two biggest failures of homemade mac and cheese right up front. You get the textural contrast that separates the good from the truly legendary. It’s rich, deeply cheesy, and honestly, it tastes like a hug.
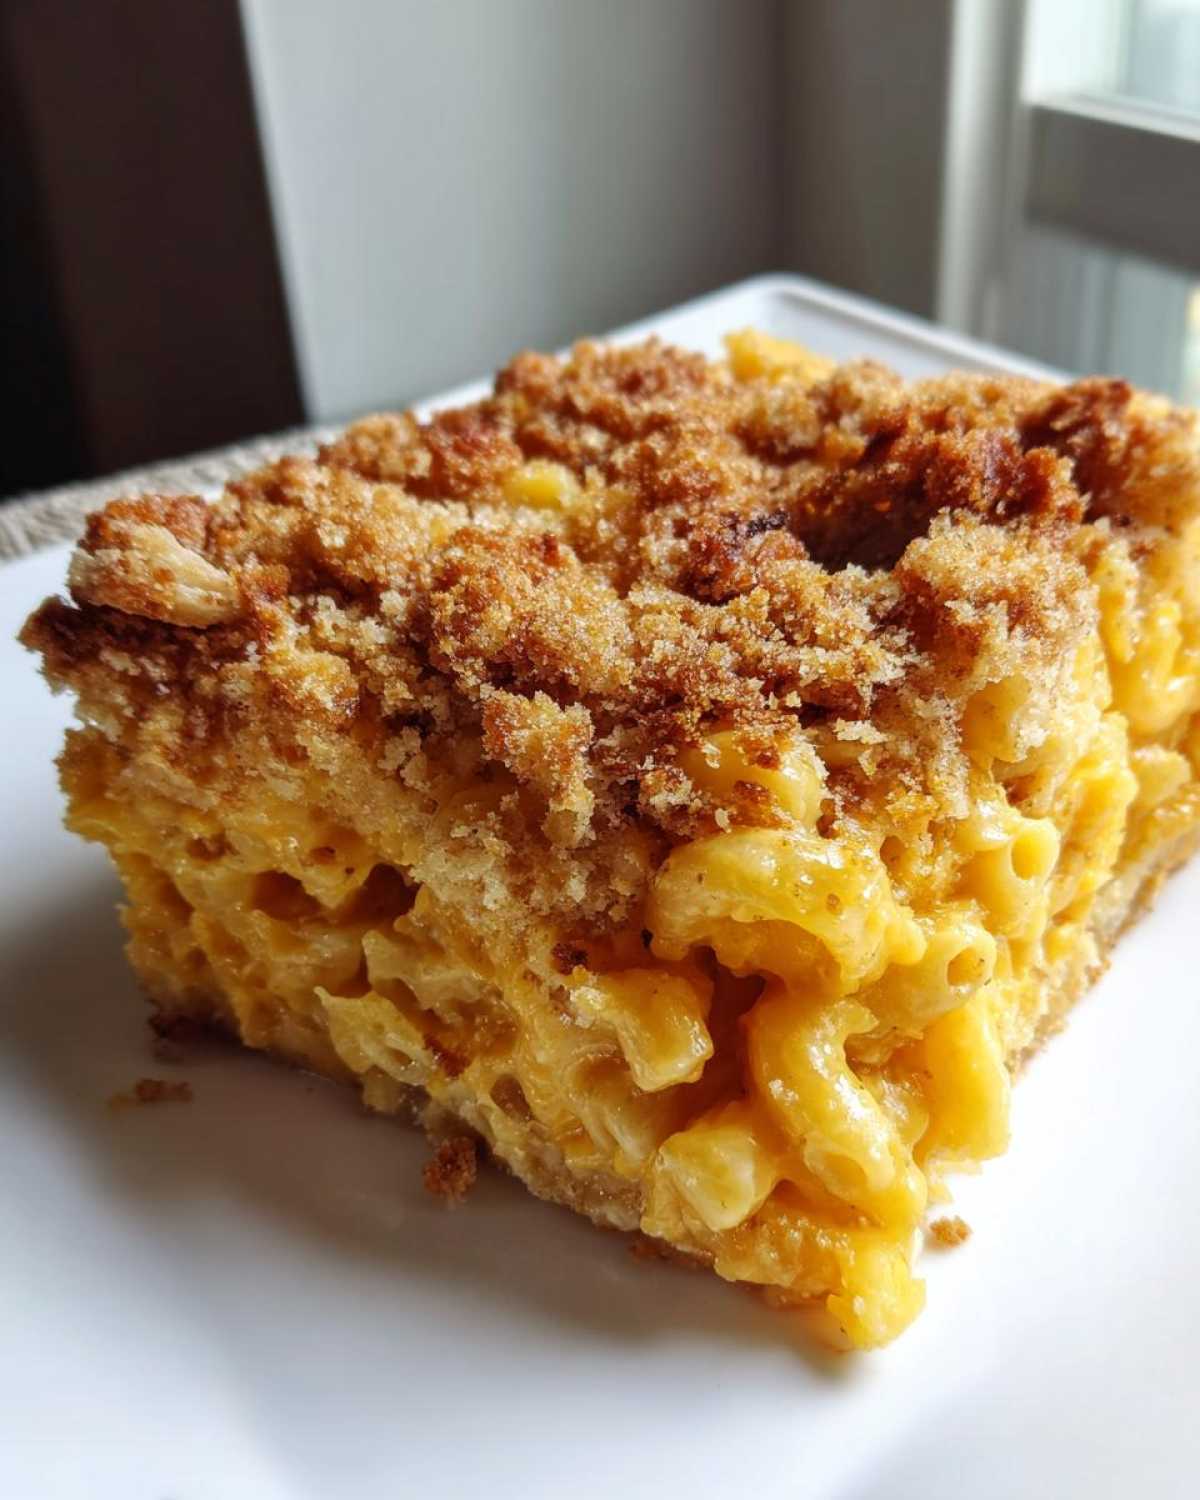
- The texture contrast is king: soft, velvety pasta inside, a sturdy, crunchy cap on top.
- We use a three-cheese blend, and I’ll tell you exactly why that combination sings!
- It comes together so fast, which makes it perfect for a weeknight when you need serious comfort food, pronto.
Achieving the Perfect Gooey Interior
The secret to that inside gooiness, my friend, lies entirely in the starting point: the roux and the milk. If you cook the flour and butter (your roux, remember?) for just the right amount of time, you cook out that raw flour taste, but you don’t let it get too dark. Then, by whisking in the warm whole milk slowly and letting it thicken *gently*—I mean, don’t let it get into a rolling boil!—you create a beautiful béchamel that coats every noodle perfectly. That’s the foundation for the best baked mac and cheese recipe you’ll ever make.
The Secret to a Crispy Mac and Cheese with Crispy Topping
Seriously, don’t skip the Panko! Those Japanese breadcrumbs are lighter and crunchier than standard breadcrumbs, which is crucial when you’re trying to mimic that perfect crunchy shell without drying out the cheese underneath. The trick? You absolutely have to toss them in melted butter before they hit the top layer. That fat is what turns them golden brown and brittle instead of just toasted and dry. It transforms this dish into a proper Mac and Cheese with Crispy Topping!
Essential Ingredients for Your Baked Mac and Cheese Recipe
Okay, let’s talk about what goes into this masterpiece. When you’re making a classic like this, ingredient quality really shines through, especially with the cheese! I’ve laid out everything you need right here, but I have to stress one non-negotiable rule before you even start measuring.
Please, please, please shred your cheese yourself! Pre-shredded bags? They have starches in them to keep them from clumping in the bag, but those same starches turn your smooth cheese sauce into something grainy when it melts. Don’t let that happen to your glorious sauce! Stick to the blocks, trust me.
For the pasta, elbow macaroni is the classic choice, but really, whatever short noodle you have on hand will work as long as you boil it just shy of done—al dente is key because it finishes cooking in the oven.
Cheese Selection for the Best Baked Mac and Cheese
This blend is what gives us that incredible depth of flavor for the Best Baked Mac and Cheese. We aren’t just dumping in one type! You need the sharp, tangy punch from the Sharp Cheddar, which is non-negotiable for that classic flavor profile. The Gruyere is my secret weapon—it melts like a dream and brings this slight, nutty complexity that just elevates everything. Finally, the Monterey Jack is there for stretchiness and creaminess; it melts into silk!
- 8 ounces sharp cheddar cheese, shredded
- 4 ounces Gruyere cheese, shredded
- 4 ounces Monterey Jack cheese, shredded
Step-by-Step Instructions for Your Creamy Baked Pasta Bake
Now that we have our perfect cheese blend measured out—and I hope you shredded it yourself!—we can get cooking. This whole process moves really quickly once you get the heat going. The main thing to remember is to move with purpose so you don’t overcook that macaroni. We’re aiming for fully coated and baked, not mushy, right? Get that oven warmed up to 375°F (190°C) and make sure that 9×13 baking dish is greased up nicely so serving is a breeze later on. You’ll drain those noodles as soon as they hit al dente and set them aside; they are waiting for their cheesy destiny!
For those of you looking for a fantastic weeknight comfort food dinner, this part is key for keeping things quick. As soon as the pasta is resting, we go straight to the stovetop for the sauce where all the magic happens.
Preparing the Roux and Béchamel Base
Grab your biggest saucepan and melt down those 6 tablespoons of butter over medium heat. Once it’s bubbly, whisk in the flour right away. You need to stir this constantly for exactly one minute. This cooks the raw starchy flavor out—that’s the roux! Once it smells slightly nutty, start adding your warmed milk slowly. And I mean slowly! Whisk continuously while you pour. If you dump it all in at once, you’ll end up with lumps, and nobody wants that in their ultimate baked mac and cheese recipe. Keep stirring until that sauce is thick enough that it coats the back of a spoon. It shouldn’t bubble aggressively, just gently simmer until it thickens up, which usually takes about six or seven minutes.
Melting the Cheese into the Sauce
This is where technique really matters, especially if you want that silky finish instead of a weird, oily separation. First things first: take the saucepan completely off the heat! Seriously, remove it from the burner. This stops the sauce from getting too hot, which causes the cheese to seize up. Now, you add your cheese blend—the cheddar, the Gruyere, the Jack—in small batches, maybe a handful at a time. Wait until that first batch is completely melted and incorporated before you even think about adding the next handful. You’ll stir in your seasonings—salt, pepper, a whisper of nutmeg and cayenne for a little background warmth—before the final cheese addition.
Once everything is smooth and glossy, gently fold in your cooked, drained macaroni. Make sure every single noodle is bathed in that glorious cheese sauce. Then, scrape it all into your prepared baking dish. Remember those buttery Panko breadcrumbs? Sprinkle them evenly over the top. Pop it into that 375°F oven for about 20 to 25 minutes, until you see the edges bubbling fiercely and that topping is a glorious, crispy gold brown. Be patient now! Let it rest for about 10 minutes before you dive in, otherwise, you’ll just get a cheesy puddle. That resting time lets everything set up for the perfect serving consistency.
Pro Tips for Perfect Southern Baked Macaroni and Cheese Results
Look, I know people get really passionate about their regional takes on cheesy pasta. While this recipe leans toward the creamy style, you can absolutely apply these tricks to make your Southern Baked Macaroni and Cheese the absolute best at your next gathering. These are the little things I learned that turn good mac and cheese into something everyone asks for the recipe for!
Don’t be afraid to personalize this dish a little bit. Sometimes I swap out the Monterey Jack if I’m feeling extra indulgent, or maybe I need a quicker topping. It’s all about loving what you’re eating, right?
Ingredient Substitutions for Your Baked Mac and Cheese Recipe
If you want to really dial up the richness—especially if you’re making this dish for a big holiday spread—swap out one full cup of that whole milk for heavy cream when you are making your béchamel. It makes the sauce noticeably silkier and adds an almost decadent mouthfeel. That’s a real Southern touch, I think!
What if you ran out of Panko or just don’t want the crunch? No sweat. Instead of the buttered Panko, just sprinkle an extra half-cup of that sharp cheddar cheese right over the top before it goes in the oven. It won’t be as crispy as the Panko finish, but you’ll get these lovely, browned, slightly chewy cheese patches, which is also totally delicious. Check out some of my other favorite snack and side recipes for more easy tweaks!
Making This Cheesy Comfort Food Casserole Ahead of Time
The holidays are hard enough without having to make everything right before company shows up. Guess what? This amazing cheesy comfort food casserole is fantastic for making ahead of time, which means you can focus on the turkey or the gravy or just relaxing for five minutes that afternoon!
You can assemble the entire thing—pasta mixed with sauce, topping sprinkled on—and cover it tightly with plastic wrap. I usually prepare it completely, cover it really well with two layers of wrap, and stash it right in the fridge. It holds up beautifully for about 24 hours, but honestly, a full day seems to let the flavors meld even better, making it taste richer the next day. If you’re planning on making it for a party the day before, this is your secret weapon!
Now, here’s the important bit about baking time, because cold pasta is dense pasta. If you pull it straight from the fridge, the baking time in the recipe (20–25 minutes) won’t cut it anymore. You’ll need to add about 10 to 15 minutes to that bake time. You’re looking for that same bubbly sauce, but you’ll need to keep an eye on the topping so it doesn’t burn before the center gets hot all the way through. If you notice the topping browning too fast while the center is still cool, just tent a piece of aluminum foil loosely over the top. Problem solved!
If you have more time than that—say, 2 or 3 days—it’s better stored uncooked in the freezer! Just wrap it super securely, and when you’re ready to bake, thaw it overnight in the fridge first, and then follow those adjusted baking times. Or, you can bake it straight from frozen, but honestly, that could take close to an hour, so plan accordingly! I found this tip super helpful when I was making a big casserole for a potluck last year, and it saved my bacon!
Storing and Reheating Your Homemade Mac and Cheese Recipe
Oh, the battle! You’ve made this incredible, gooey masterpiece, and now you have leftovers. Hallelujah! But how do you reheat it without turning that beautiful, creamy sauce into rubber? It’s all about gentle heating, my friends. I promise, it tastes almost as good the second day, even if the topping is a little sad.
For refrigerator storage, you want airtight protection. Cover that casserole dish tightly with plastic wrap, making sure the wrap doesn’t actually touch the cheesy topping too much, or it will mess with the texture when you pull it off later. It will keep perfectly fine in the fridge for three to four days. Any longer than that, and I start to worry, so eat it up!
When you go to reheat leftovers, the oven is always my preferred method for the best results, especially if you want to try and resuscitate some of that crunch. If you’re only heating a small scoop, you can definitely use the microwave—just know that the Panko topping will likely soften up a bit. That’s okay! It will still be hot, cheesy goodness.
If you’re using the oven to gently warm up a large portion, place your serving in an oven-safe dish, splash just a tiny bit of milk or water around the edges (maybe a teaspoon or so), cover it loosely with foil, and bake it at about 325°F (160°C) until it’s heated all the way through. This low and slow method keeps the sauce from scorching or breaking. If you want that topping back, pull the foil off for the last five minutes of reheating.
If you’re microwaving a single serving, give it 60 to 90 seconds and stir halfway through; this ensures even heating. If you’re feeling fancy when reheating leftovers, sometimes I’ll sprinkle a tiny bit of extra shredded cheddar on top and pop it under the broiler for two minutes—watch it like a hawk, though! That broiler is fast! We want cheesy goodness, not burnt cheese, right? If you loved the crispy topping, check out my tips on upgrading that classic cheesy tuna noodle casserole for a similar crunch!
Frequently Asked Questions About This Baked Mac and Cheese Recipe
I get so many questions about this recipe because everyone wants that perfect texture, and honestly, I love chatting about cheese combos! Here are a few things I hear most often when people try to nail down their ideal gooey cheesy pasta bake.
Can I make this a Three Cheese Baked Mac and Cheese without Gruyere?
Oh yes, you absolutely can! While Gruyere brings that fantastic nutty depth that I adore, if you don’t have it on hand or just aren’t a huge fan, you have great options. I recommend swapping it out for an equal amount of Fontina or a good quality Provolone. Both of those melt incredibly smoothly and will still give you that fantastic stretch and flavor foundation you need for a wonderful three cheese baked mac and cheese.
How long does the Ultimate Macaroni and Cheese Recipe take to bake?
If you followed the rule and let your sauce come together on the stovetop before baking, the oven time is pretty quick, which is great for an easy baked mac and cheese for dinner! Once it’s assembled and topped with the buttery Panko, it only needs about 20 to 25 minutes at 375°F. You’re looking for two clear signs: the edges of that sauce should be bubbling up around the edges, and that Panko topping should be deeply golden brown and crunchy. Don’t forget to let it rest about 10 minutes after it comes out, or it turns into soup!
If you’re thinking about making this for breakfast someday—I don’t judge!—you can find some other fun comfort food ideas over on the breakfast category page!
Estimated Nutritional Data for This Baked Mac and Cheese Recipe
Now, I know some of you are tracking macros or trying to figure out how this stunning dish fits into your weeknight goals, and I totally get that! When you’re making something this decadent, it helps to have a ballpark idea of what’s in it. Remember, this is truly just an estimate because what kind of cheese you buy or exactly how much milk clings to the pasta can change things slightly.
I crunched the numbers based on the ingredients list for this ultimate baked mac and cheese recipe. You should know that these values reflect the entire casserole divided up into six generous servings. It’s rich, yes, but that amazing flavor comes from quality ingredients like whole milk and real butter!
- Serving Size: 1 serving
- Calories: Approximately 650
- Fat: Roughly 38g (about 22g saturated fat)
- Carbohydrates: Around 55g
- Protein: A hearty 28g—thanks to all that cheese!
Since this is a comfort classic and not exactly a salad, the sodium and fat content are on the higher side, which is what makes it taste so unbelievably good! If you’re ever curious about how I calculate things like this, I keep a little note on my disclaimer page about how these nutritional estimates are figured out based on standard ingredient sizes.
Share Your Family Favorite Macaroni Recipe Experience
Well, my friends, that’s it! That is my absolute favorite, tried-and-true, no-fail method for achieving the ultimate creamy baked mac and cheese. I pour my heart into these recipes, and honestly, the greatest compliment I can receive is hearing that you crushed it in your own kitchen!
Now that you’ve created this beautiful, bubbly, cheesy casserole, I want to hear all about it! Did you serve it with pulled pork or as the main event (no judgment here!)? Did you try the Gruyere, or did you go rogue with your favorite sharp cheddar blend? Don’t be shy!
Please, take a second to leave me a rating and tell me what you thought in the comments section below. Did the Panko crisp up just right? Did your family ask for seconds immediately? Your feedback helps everyone who comes after you feel confident trying this homemade mac and cheese recipe for the first time.
And if you snapped a picture of your golden-brown masterpiece—and I really hope you did!—feel free to tag me on social media! Seeing your creations really makes my day. If you have questions while you’re working through the steps, don’t hesitate to pop over to my contact page and send me a note. Happy eating, you all!
PrintUltimate Creamy Baked Mac and Cheese with Crispy Panko Topping
This recipe yields a rich, creamy interior and a golden, crunchy topping for the best baked macaroni and cheese experience.
- Prep Time: 15 min
- Cook Time: 30 min
- Total Time: 45 min
- Yield: 6 servings
- Category: Casserole
- Method: Baking
- Cuisine: American
- Diet: Vegetarian
Ingredients
- 1 pound elbow macaroni
- 6 tablespoons unsalted butter
- 1/2 cup all-purpose flour
- 4 cups whole milk, warmed
- 1 teaspoon salt
- 1/2 teaspoon black pepper
- 1/4 teaspoon nutmeg
- 1/4 teaspoon cayenne pepper
- 8 ounces sharp cheddar cheese, shredded
- 4 ounces Gruyere cheese, shredded
- 4 ounces Monterey Jack cheese, shredded
- 1 cup Panko breadcrumbs
- 2 tablespoons melted butter (for topping)
Instructions
- Preheat your oven to 375°F (190°C). Grease a 9×13 inch baking dish.
- Cook the macaroni according to package directions until al dente. Drain well and set aside.
- In a large saucepan, melt 6 tablespoons of butter over medium heat. Whisk in the flour and cook for 1 minute, stirring constantly to form a roux.
- Gradually whisk in the warm milk until the mixture is smooth. Continue cooking, stirring often, until the sauce thickens enough to coat the back of a spoon, about 5 to 7 minutes. Do not let it boil rapidly.
- Remove the sauce from the heat. Stir in the salt, pepper, nutmeg, and cayenne pepper.
- Add the shredded cheddar, Gruyere, and Monterey Jack cheese to the sauce in handfuls, stirring until completely melted and smooth before adding the next batch. This is your cheese sauce.
- Fold the cooked, drained macaroni into the cheese sauce until everything is evenly coated.
- Pour the mixture into the prepared baking dish.
- In a small bowl, toss the Panko breadcrumbs with 2 tablespoons of melted butter. Sprinkle the buttered Panko evenly over the top of the macaroni and cheese.
- Bake for 20 to 25 minutes, or until the sauce is bubbly and the topping is golden brown and crisp.
- Let the casserole rest for 5 to 10 minutes before serving.
Notes
- Shred your own cheese from blocks; pre-shredded cheese contains anti-caking agents that prevent smooth melting.
- For a richer flavor, substitute 1 cup of the whole milk with heavy cream.
- If you prefer a softer topping, skip the Panko and top only with an extra 1/2 cup of shredded sharp cheddar cheese before baking.
Nutrition
- Serving Size: 1 serving
- Calories: 650
- Sugar: 8
- Sodium: 650
- Fat: 38
- Saturated Fat: 22
- Unsaturated Fat: 16
- Trans Fat: 1
- Carbohydrates: 55
- Fiber: 3
- Protein: 28
- Cholesterol: 110