

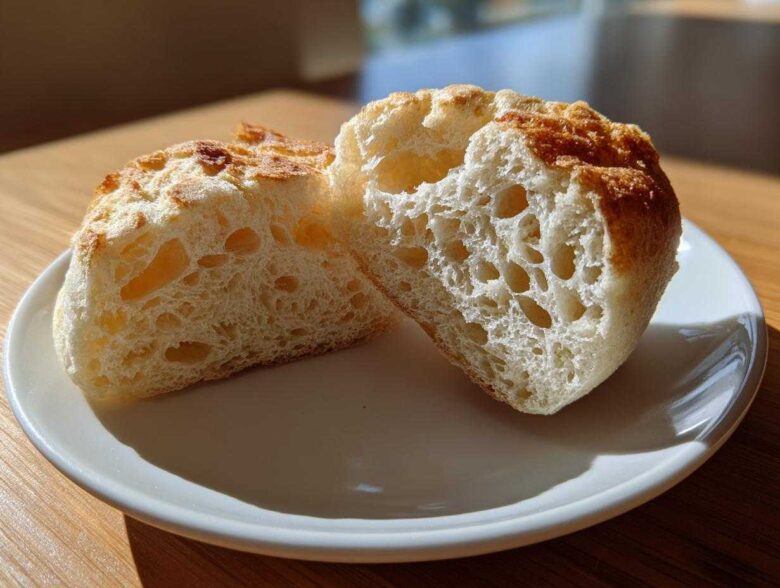
Oh my gosh, you pulled a chair up to the counter, I have to tell you about these muffins! There is nothing—and I mean *nothing*—that beats pulling a warm, golden disc off the griddle first thing in the morning. I spent *years* trying every packaged brand, and they always ended up tasting dusty or too doughy. I thought getting those airy nooks and crannies that totally soak up melted butter was impossible to achieve at home. Well, I was wrong! This homemade english muffins recipe finally cracked the code. Trust me, once you nail this simple stovetop technique, you’ll never look back. We are aiming for fluffiness and texture, folks! If you love starting the day right with something warm and baked, you absolutely have to check out all my other wonderful breakfast recipes.
Why This Homemade English Muffins Recipe Works (The Secret to Nooks and Crannies)
So, why are these the absolute best? It all comes down to two silly little secrets that the big companies just don’t bother with. First, no oven! We cook these low and slow on the stovetop in a dry pan. This gentle heat cooks the inside perfectly, creating all those wonderful air tunnels you want. If you bake them, you just get a biscuit, not an English muffin!
Second, we treat the dough kindly once it’s risen. You’ll notice the kneading time is really short. We want just enough gluten structure to hold everything together, but we don’t want to push out all those lovely carbon dioxide bubbles made by the yeast. That’s the magic dust that gives you those famous English Muffins Nooks and Crannies. It’s all about careful mixing and even slower cooking. You won’t believe the difference between these and the stuff in the plastic bag!
Essential Ingredients for Perfect Homemade English Muffins
For the very best results, grab these items. You probably have most of them kicking around already! We need simple stuff to make these incredibly Soft Homemade Muffins. Don’t substitute the milk for water, though; that little bit of fat makes them tender. And make sure your yeast is fresh—if it doesn’t foam up when you wake it up, your dough won’t rise, and that would be a tragedy!
- 2 cups all-purpose flour
- 1 tablespoon granulated sugar
- 1 teaspoon salt
- 1 packet (2 1/4 teaspoons) active dry yeast
- 3/4 cup warm milk (about 105-115°F)
- 1/4 cup warm water (about 105-115°F)
- 2 tablespoons unsalted butter, melted
- Extra flour or cornmeal for dusting
Gathering Supplies for Your Homemade English Muffins
Okay, before we get flour everywhere, let’s make sure you have your toolkit ready! This recipe is so simple that you don’t need a fancy stand mixer—though you certainly can use one if you want to save your arms. My favorite way to stir this up is just by hand in a big sturdy bowl. Seriously, don’t stress the equipment.
The most important things you need are a large bowl, a sturdy rolling pin, and something to cut the circles. You’ll want a 3-inch round cutter for that classic size. And finally, a heavy-bottomed griddle or skillet. That heavy metal is what gives you that beautiful, even golden-brown color when we cook them low and slow!
Step-by-Step Instructions for Easy Homemade English Muffins
Alright, let’s get into the fun part! This is the complete Recipe for English Muffins that I swear by. The most important thing to remember throughout this whole process is *gentleness*. We are building texture, not armor plating! Don’t rush the rising, and definitely don’t press them when they cook. It’s that simple commitment to slowness that pays off big time. If you need a perfect topping for these beauties, you might want to check out my recipe for easy peach butter!
Activating the Yeast and Mixing the Dough for Homemade English Muffins
First things first, we need to wake up that yeast. Mix your warm milk and warm water—make sure it’s thermometer-friendly warm, between 105 and 115°F. If it’s too hot, you’ll kill your yeast, and we’ll have a flat disaster on our hands! Stir in the yeast and let it sit for five minutes until it looks foamy and happy on top. That’s a great sign!
While that’s blooming, whisk your flour, sugar, and salt in a big bowl. Once the yeast is bubbly, pour in the yeast mix along with that melted butter. Just mix it until it looks like a shaggy, messy cloud. Don’t get fancy here; we’re keeping things loose for now.
The Rise and Shaping of Your Homemade English Muffins
Turn that shaggy dough onto a lightly floured surface. Now, knead gently for maybe three to five minutes total. You just want it smooth, not tough! Put it in a light oiled bowl, cover it up, and let it have a nice nap in a warm spot for about an hour until it’s doubled. Seeing it puff up feels like magic every single time!
When it’s ready, gently punch the air out. Roll it out with your rolling pin until it’s about a half-inch thick—that’s key for the proper height. Use your 3-inch cutter to stamp out your rounds. I always dust my parchment paper generously with cornmeal right now, as this is what gives the bottom that perfect slight crunch. Let those cut rounds rest again for 30 minutes, covered loosely.
Cooking Your Golden Brown English Muffins on the Stovetop
This is the *real* secret weapon! Heat up a large, dry griddle or skillet over medium-low heat. I mean it: medium-low! If it’s too hot, the outside will burn before the inside cooks through, and you certainly won’t get those beautiful tunnels. In fact, one of my main tips for achieving the classic texture is cooking them slowly.
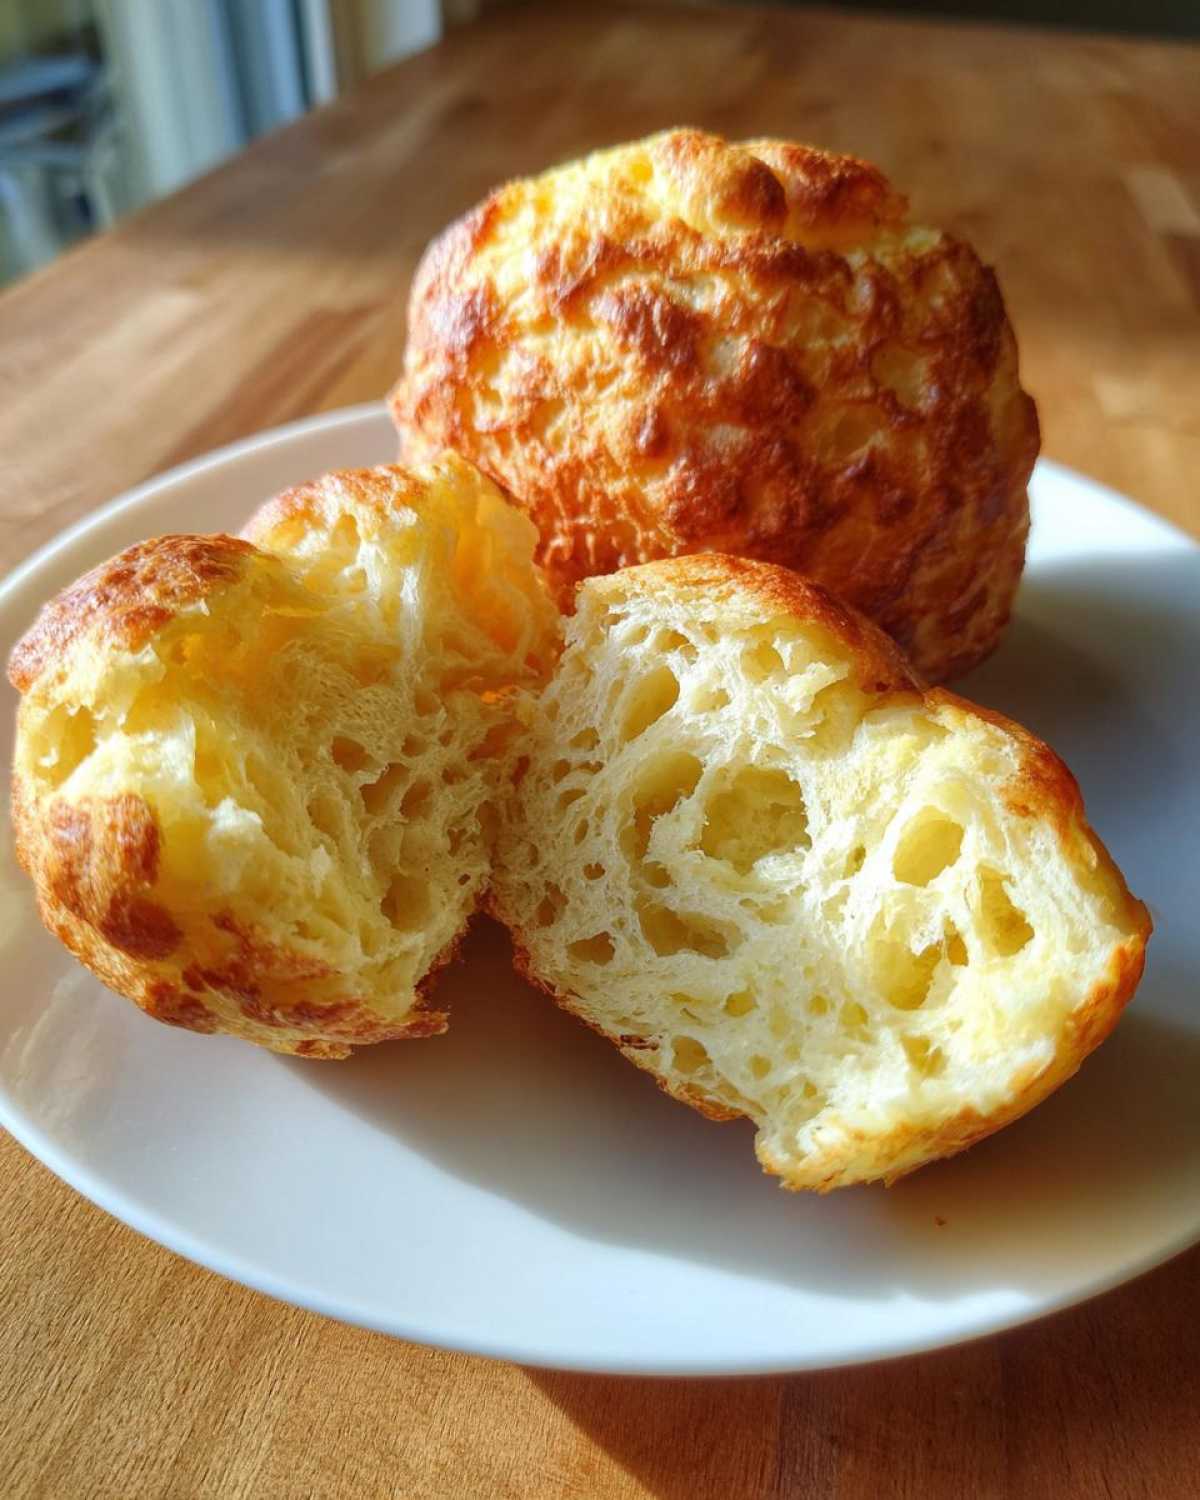
Lay them carefully onto the hot griddle. Let them cook for a solid 8 to 10 minutes per side. They need time to breathe and puff up. You’re looking for that deep, satisfying color that means you’ve got Golden Brown English Muffins. Whatever you do, resist the urge to press down on them with a spatula—that squishes out all the air!
Tips for Success: Achieving the Best Homemade English Muffins
I’m going to share the shortcuts I learned the hard way so you can skip straight to the perfect result! If you want the Best English Muffin Recipe in your life, the heat management is everything. Don’t try to rush! Medium-low heat for cooking them on the griddle is non-negotiable. If you see them browning too fast, turn the heat down immediately. That slow cook ensures the inside is light and airy, not dense. For more baking inspiration whenever you need it, you can always browse through my baking archive!
Also remember that resting period after cutting the rounds? Don’t skip that 30-minute second rise! That little boost gives them the final puff they need before hitting the heat. If your edges look really dry when you cut them, try dusting the dough with a little extra flour before rolling it out. These tiny actions make a huge difference in the final texture!
Ingredient Notes and Simple Substitutions for Homemade English Muffins
Listen, sometimes you’re in a hurry, and that’s okay! You can generally swap the milk for water, but it will make the final muffin a little less rich. If you do that, you might need a tiny splash more butter to keep them soft. I haven’t played much with swapping the flour, because all-purpose flour seems to have the perfect amount of protein for this dough.
If you only have instant yeast instead of active dry, skip the blooming step completely! Just toss the instant yeast right in with your dry ingredients. It works just as well, and cutting out that little step saves you time when you’re trying to make ahead for the week!
Serving Suggestions for Your Fresh Homemade English Muffins
The absolute best way to eat these is split open gently with a fork—that exposes all those nooks and crannies perfectly! Once split, a quick toast on the griddle (or under the broiler if you’re speedy) makes them heaven. They are fantastic just covered in jam, but they really sing when used as amazing Breakfast Sandwich Bread. I love piling mine high with a fried egg, cheese, and maybe some avocado.
If you’re looking for a fun group breakfast idea besides just muffins, you have to check out my recipe for sheet pan breakfast bake—it’s great for leftovers too!
Storage and Make-Ahead Options for Homemade English Muffins
These muffins are so good you’ll want to eat them all today, but don’t worry, they keep really well! You can absolutely Make Ahead and freeze them. Once they are totally cooled down, wrap your un-split muffins tightly in plastic wrap, then slide them into a freezer bag. They stay perfect for up to a month!
If you’re keeping them on the counter, store them in an airtight container at room temperature, but try to eat those within two or three days for the best soft texture. If you love having quick breakfast options ready to go, I’ve got some great advice on freezer breakfast burritos too!
Frequently Asked Questions About Homemade English Muffins
I know when you’re trying out a new Recipe for English Muffins, you always have a bunch of little nagging questions pop up. Don’t worry, I’ve been there! If you’re totally confused about the best way on How to Make English Muffins at Home without getting frustrated, drop me a line using my contact page! But here are the main things folks always ask me about this recipe.
Can I bake these homemade English muffins instead of using a griddle?
You absolutely *can*, but I really wouldn’t recommend it if you want those true nooks and crannies! Baking cooks them too fast and dries out the exterior, giving you something closer to a regular soft roll. The slow, dry heat of the Stovetop English Muffins process is what creates that signature crust and allows the interior to steam into a spongey texture perfectly suited for butter!
Why are my homemade English muffins flat and dense?
That usually means one of three things happened! Either your yeast was dead and didn’t create enough gas bubbles, you heavily over-kneaded the dough, or—and this is the most common error—you pressed down on them with a spatula while they were cooking on the griddle. That pressing is my mortal enemy because it just smooshes all the beautiful air right out of your dough!
Sharing Your Classic English Muffins Baking Journey
Now that you’ve got a rack full of glorious, fresh muffins, which I hope look just divine, I really, really want to hear about it! Did you get those amazing nooks and crannies I was raving about? Baking is all about sharing the joy, so snap a photo and pop a comment below letting me know how they turned out for you!
I’m dying to know your favorite way to dress them up. Are you a simple butter-and-jam traditionalist, or did you go all out and make an epic breakfast sandwich? Don’t be shy! I love seeing how everyone styles their finished bakes. If you want to read more about my adventures in the kitchen, you can always check out my About Us page!
PrintClassic Homemade English Muffins

A straightforward recipe for making soft, fluffy English muffins at home with distinct nooks and crannies.
- Prep Time: 20 min
- Cook Time: 20 min
- Total Time: 1 hour 40 min
- Yield: 8 muffins
- Category: Breakfast
- Method: Stovetop Griddle
- Cuisine: American
- Diet: Vegetarian
Ingredients
- 2 cups all-purpose flour
- 1 tablespoon granulated sugar
- 1 teaspoon salt
- 1 packet (2 1/4 teaspoons) active dry yeast
- 3/4 cup warm milk (about 105-115°F)
- 1/4 cup warm water (about 105-115°F)
- 2 tablespoons unsalted butter, melted
- Extra flour or cornmeal for dusting
Instructions
- Combine the warm milk, warm water, and yeast in a small bowl. Let stand for 5 minutes until foamy.
- In a large bowl, whisk together the flour, sugar, and salt.
- Pour the yeast mixture and the melted butter into the dry ingredients. Mix until a shaggy dough forms.
- Turn the dough out onto a lightly floured surface. Knead gently for 3 to 5 minutes until the dough is smooth. Do not over-knead.
- Place the dough in a lightly oiled bowl, turning to coat. Cover the bowl with plastic wrap and let it rise in a warm place for 1 hour, or until doubled in size.
- Gently punch down the dough. On a surface dusted with flour or cornmeal, roll the dough out to about 1/2 inch thickness.
- Use a 3-inch round cutter to cut out the muffins. Place the cut rounds on a baking sheet lined with parchment paper, lightly dusted with cornmeal.
- Cover the rounds loosely and let them rest for 30 minutes.
- Heat a large, dry griddle or heavy skillet over medium-low heat.
- Cook the muffins for 8 to 10 minutes per side, until golden brown. Do not press down on them while cooking.
- Remove from the griddle and cool completely on a wire rack. Split open with a fork before toasting.
Notes
- For best results and maximum nooks and crannies, cook the muffins slowly on the griddle rather than baking them in the oven.
- Use cornmeal instead of flour when dusting the griddle for a more traditional texture.
- You can freeze cooled, un-split muffins for up to one month.
Nutrition
- Serving Size: 1 muffin
- Calories: 180
- Sugar: 2
- Sodium: 280
- Fat: 3
- Saturated Fat: 2
- Unsaturated Fat: 1
- Trans Fat: 0
- Carbohydrates: 33
- Fiber: 1
- Protein: 5
- Cholesterol: 10