

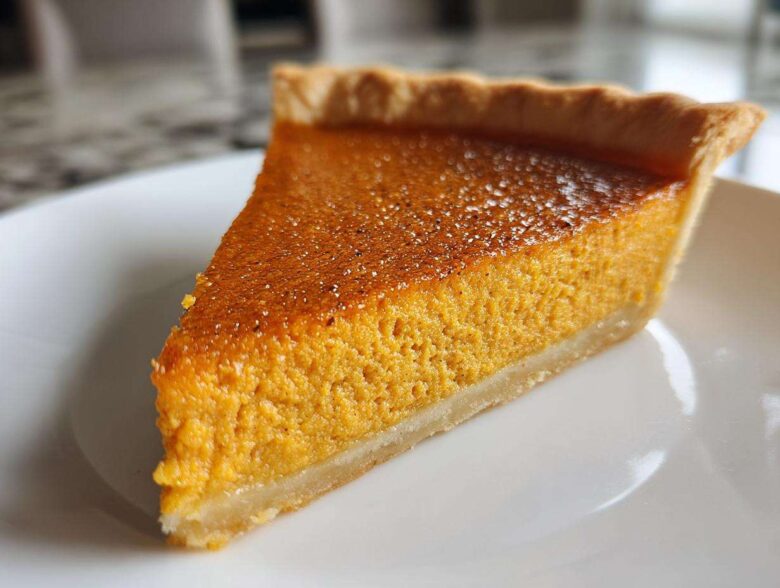
Oh, the smell of fall baking—nothing beats it! When that first chill hits, my mind immediately goes to the Thanksgiving table and that one perfect dessert: The Pumpkin Pie. I must have tested fifty different versions over the years, trying to capture the creamy, comforting magic my aunt used to make. It took ages, but I finally landed on what I genuinely believe is the definitive, foolproof classic pumpkin pie recipe. Forget bland, grainy filling! This one guarantees that smooth, velvety texture paired with just the right hit of warm cinnamon and cloves. In fact, if you love that spice, you absolutely must check out my recipe for pumpkin spice pancakes later this week! Trust me, once you try this simple method for the pie, you won’t look back. It’s the taste of the holidays, bottled up and baked perfectly.
Why This is the Best Homemade Pumpkin Pie
Now, I know what you’re thinking: there are a billion pumpkin pie recipes out there, so why should you trust mine? Well, this isn’t fancy, fussy baking; this is real-deal, throw-it-together holiday food designed to withstand frantic family schedules. I’ve taken the best parts of those old **old fashioned pumpkin pie** recipes and tweaked them slightly so you absolutely cannot mess it up. It’s designed for consistency! I guarantee you’ll end up with the creamiest, most perfectly spiced pie every single time. If you’re already stocking up on fall flavors, you could also try my brown butter pumpkin cookies!
Here’s why this particular **classic pumpkin pie recipe** reigns supreme at my table, especially when the pressure is on for those **Thanksgiving dessert recipes**:
- The Texture Magic: Using sweetened condensed milk is the secret weapon for that gorgeous, dense, yet unbelievably smooth filling. No risk of curdling or graininess here—just pure, melt-in-your-mouth goodness.
- Spice Harmony: We aren’t just dumping cinnamon in! We use a specific blend of cinnamon, ginger, nutmeg, and cloves that brings out the best in the pumpkin without tasting overtly like potpourri. It’s warm, comforting, and perfectly balanced.
- Crust Flexibility: Listen, holidays are chaotic. That’s why this filling works perfectly whether you make a stunning, all-butter crust from scratch, or if you just need to pop open a can of Pillsbury. This recipe delivers the flavor either way, making it an incredibly **easy classic pumpkin pie**.
- Hands-Off Time: The total bake time is under an hour, which is incredible for a holiday centerpiece! From start to finish—including oven preheating—you’re looking at about 65 minutes, yielding 8 perfect slices.
Ingredients for Your Traditional Pumpkin Pie Recipe
When you’re dealing with a real classic pumpkin pie recipe, the ingredient list needs to be short and sweet, right? You don’t want to hunt down twenty different specialty items just for one holiday dessert. My version relies on pantry staples to create that incredible richness and spice. I’ve kept this list super tight so you can pull it together fast. If you love easy fall baking, you will also adore my recipe for pumpkin spice waffles when you need an easy morning treat!
Here is exactly what you’ll need to make 8 servings of pure holiday nostalgia:
- 1 (9 inch) unbaked pie crust (Homemade or ready-made, but make sure you crimp those edges nicely if it’s homemade!)
- 1 (15 ounce) can good quality pure pumpkin puree
- 1 (14 ounce) can sweetened condensed milk
- 2 large eggs, lightly beaten
- 1 teaspoon ground cinnamon
- 1/2 teaspoon ground ginger
- 1/4 teaspoon ground nutmeg
- 1/4 teaspoon salt
- 1/4 teaspoon ground cloves
Okay, quick but important note on that pumpkin puree: You MUST use the plain, 100% pure pumpkin, not the stuff labeled ‘Pumpkin Pie Filling.’ The filling already has the spices and the sugar mixed in, and that will throw off the consistency of this traditional pumpkin pie recipe completely. Trust me on this one—the whole point of our recipe is controlling that perfect spice blend ourselves!
How to Make the Creamy Pumpkin Filling
This is where the magic happens, and honestly, it’s so easy you’ll wonder why you ever bought one pre-made again! Making this filling for our classic pumpkin pie recipe is all about keeping things smooth and gentle. We aren’t whipping up a meringue here; we want a velvety, cohesive texture that sets up just right. If you have a few minutes to spare before you tackle this, you absolutely have to check out my recipe for pumpkin spice latte bars—they scream autumn comfort!
First things first: Get your oven preheated to 425°F. And make absolutely sure that pie crust is chilling in its pan and ready to go onto a baking sheet. We need high heat to set that crust edge initially!
Preparing the Perfectly Spiced Pie Mixture
I always find that mixing the dry ingredients separately is the absolute key to getting that spectacular **perfectly spiced pie** flavor in every single bite. If you dump the spices right into the wet stuff, sometimes they clump up or don’t quite integrate right before the baking starts. It’s just an extra two seconds of effort that pays off hugely!
Grab a small bowl and whisk together your cinnamon, ginger, nutmeg, salt, and cloves. Really work that whisk for about thirty seconds until you can no longer see any distinct piles of one spice or another. That’s your powerhouse spice blend! Set that aside right next to your big mixing bowl.
Now, back to the main event! In that large bowl, pour in your pure pumpkin puree—make sure it’s nice and smooth straight from the can. Next, add the whole can of sweetened condensed milk. Whisk those two together until they are completely blended and look uniform. Remember what I said earlier: we are aiming for smooth, not frothy! Don’t overdo it!
Once that pumpkin base is happy, gently whisk in your two lightly beaten eggs until they are just barely incorporated. You want them mixed in, but we absolutely do not want to introduce too much air here. Over-beating the eggs is the number one way people accidentally make their **creamy pumpkin filling** turn out a little spongy instead of silky!
Finally, gently sprinkle that powerhouse spice blend you made over the top of the wet mixture. Now, fold it in with a rubber spatula or whisk slowly until the color is uniform and you don’t see any streaks of white or tan left. That’s it! Fill that crust, pop it in the oven, and get ready for the easiest, most delicious pie you’ve ever made.
Baking Instructions for the No Fail Pumpkin Pie
Alright, deep breaths! This is the part where people panic about their classic pumpkin pie recipe cracking or ending up runny, but I promise you, we’re avoiding all that drama. The key to that perfectly set, crack-free top is a two-step temperature journey. It’s like a little spa treatment for your pie!
First, make sure your oven is nice and hot at 425°F, and that pie is sitting on a sturdy baking sheet—this helps distribute the heat evenly under the crust. We hit it with the high heat right away to set the bottom and sides of that crust quickly, which keeps it from turning into a soggy mess. If you’ve got leftover holiday sweet tooth cravings after this, you really should look up my recipe for the pumpkin french toast bake!
Once your pie is nestled in:
- Bake like a champ at 425°F for exactly 15 minutes. Don’t peek too much!
Once those initial 15 minutes are up, DO NOT open the oven door yet! Just turn the temperature dial straight down to 350°F. Opening the door lets all that heat escape, and we risk deflating that nice set we just created. Let it bake for another 35 to 40 minutes at the lower temperature.
This slower bake is what gives you that beautifully **creamy pumpkin filling** without overcooking the eggs. Speaking of overcooking, if you notice those gorgeous crimped edges of your pie crust starting to look a little too dark—we’re talking golden brown turning toward burnt—just grab a little strip of aluminum foil. You can gently wrap it around the edge, creating a protective ring, and it will save your crust while the center finishes setting.
How do you know it’s done? Skip the guesswork! A thin knife or a toothpick inserted about an inch from the edge should come out clean. If it pulls out wet, give it another five minutes. Now, here’s the final step for success: Cool it down completely on a wire rack. Resist the urge to slice into it warm. It needs that time to firm up perfectly before you can enjoy that **no fail pumpkin pie**!
Flaky Pie Crust Guide and Preparation Tips
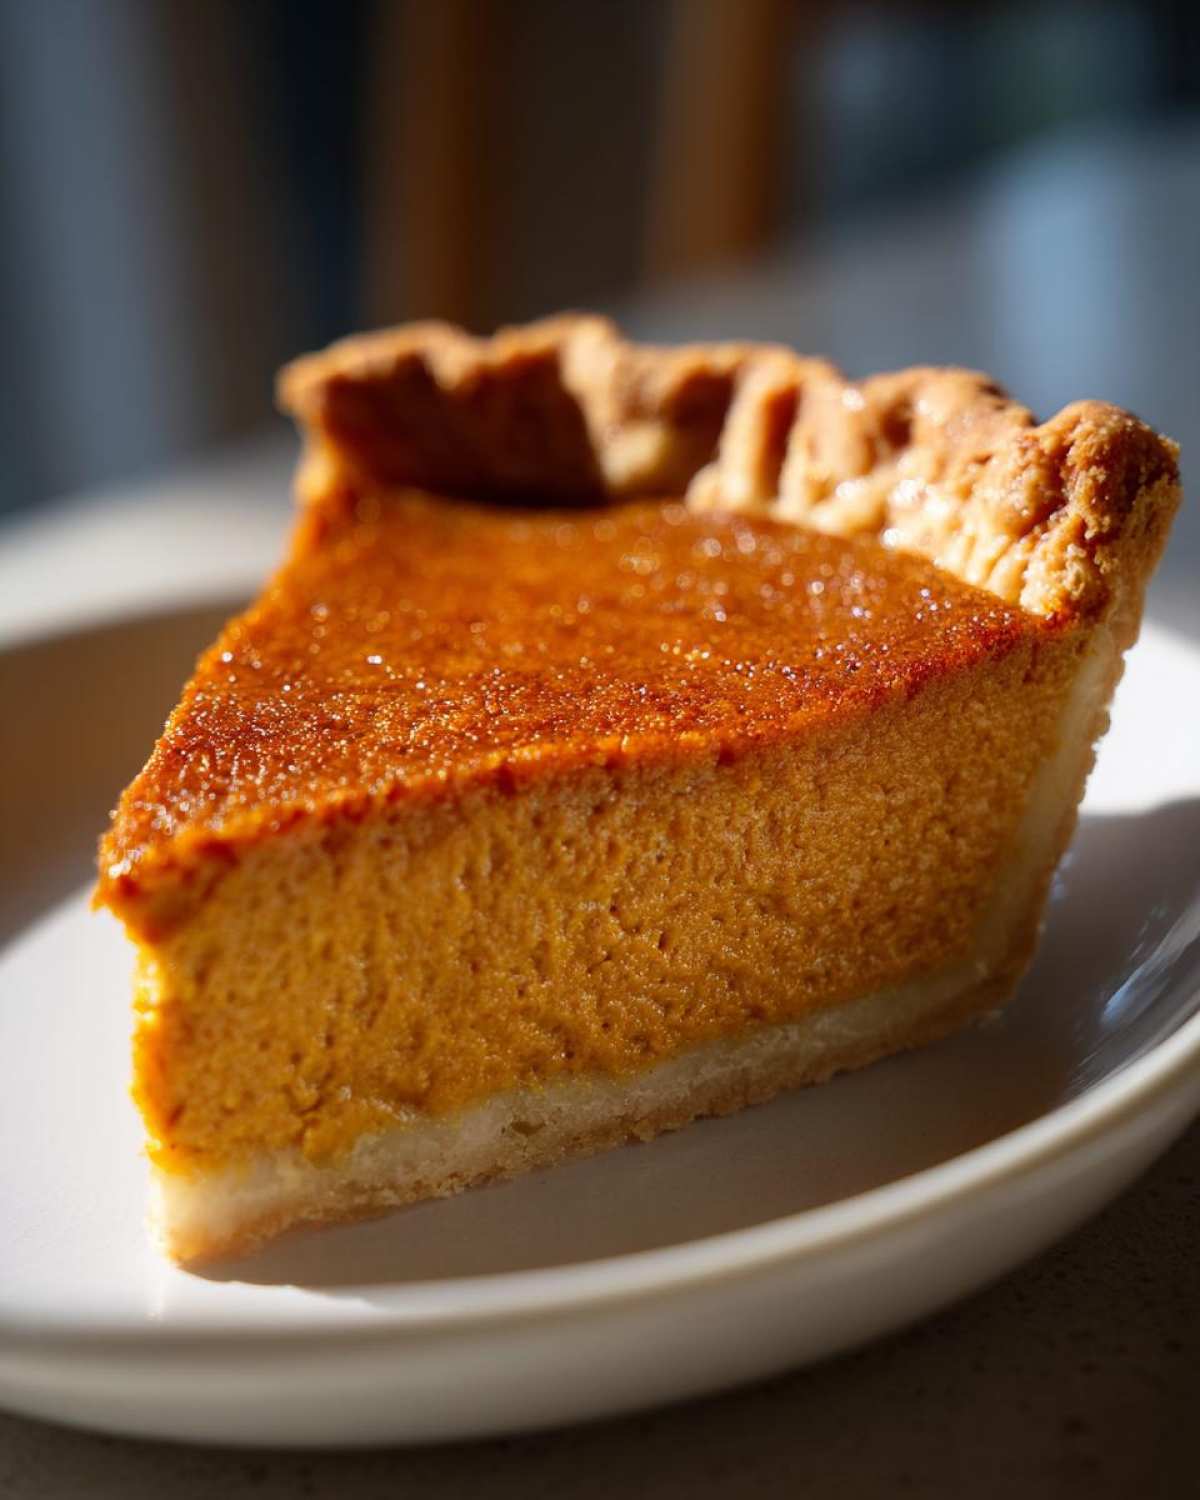
Okay, let’s talk crust, because even the most divine, **creamy pumpkin filling** deserves a solid foundation! Since I know most of you are trying to keep things moving quickly during the holidays—and I totally get that—this classic pumpkin pie recipe is perfectly happy with a store-bought crust. Seriously, zero shame here. It cuts down on cleanup and gives you more time for important things, like taste-testing! If you’re looking for more pie inspiration later, you should check out my recipe for apple cinnamon pull-apart bread; it’s great for feeding a crowd.
But just because it’s store-bought doesn’t mean we can’t treat it like royalty! If you’re using a chilled or frozen crust, take it out about 20 minutes before you need it so it’s pliable enough to handle. When you gently lay it into your pie plate, this is your moment to really pay attention to the edges.
Handling Store-Bought Crusts for a Perfect Edge
Even the best pre-made crusts can sometimes look a little sad or flat when they bake. To make sure your pumpkin pie looks like a centerpiece and not something that wandered off a frozen food aisle, you need to crimp those edges. If you are using a refrigerated crust that comes already set in the aluminum tin, that’s your baking vessel!
You can use your thumb and forefinger, or—my favorite trick—use the back of a fork. Just gently press down all the way around the rim, creating those lovely, defined little waves. This crimping does two great things: it looks professional, and it helps fortify the edge so it doesn’t slump down the sides while the filling is still hot inside.
The Love for a Truly From Scratch Pumpkin Pie Experience
Now, if you *are* taking the plunge and making a crust completely **from scratch pumpkin pie** experience, good for you! Handmade crusts that use cold butter or shortening and ice water are unbeatable for flakiness. When you make your own for this **traditional pumpkin pie recipe**, you have to be quick and delicate with handling the dough.
The key rule I always follow, no matter what crust I use, is making sure the crust is nice and chilled right up until the moment it goes into that hot oven. Cold fat hitting a hot oven creates that beautiful steam, giving you those tender, flaky layers we all dream about. The filling might be the star, but the crust gets the first bite, so treat it right!
Serving Suggestions for Your Classic Holiday Pie Baking
You’ve done the hard work! You nailed the perfect bake, your **classic pumpkin pie recipe** is set up beautifully, and it smells incredible filling up the whole house. But hold on, we aren’t quite done yet! Serving it right is the final flourish that completes the whole **Classic Holiday Baking** picture. This pie is fantastic all on its own, truly, but a little something extra on top takes it from great to legendary.
If you made this for Thanksgiving or Christmas, you know presentation matters just as much as taste! When you’re ready to eat, the first thing you need to decide is what’s going on top. You absolutely must have a cool counterpoint to that warm spice filling inside.
If you’re looking for the ultimate refreshment after a heavy meal, trust me, you need to see my recipe for the copycat Starbucks pumpkin cream cold brew. It’s the perfect cold beverage complement to that warm slice of pie!
The Traditional Topping That Never Fails
The absolute, non-negotiable classic topping for any good **traditional pumpkin pie recipe** is fresh whipped cream. Forget the aerosol cans if you can! Whipping heavy cream yourself is so superior, and it’s just as easy. You just need a touch of powdered sugar and maybe just a drop of vanilla extract.
When you serve it, don’t just dollop it on sloppily. I like to use a piping bag with a star tip if I’m feeling fancy, but honestly, just a good spoon swirl on top while the slice is resting gets the job done beautifully. The cool, airy texture of the whipped cream cuts right through the rich density of the custard filling. It’s truly divine!
When You Need Something Extra Rich
If you happen to be serving this during a colder evening, or if you just want to lean into the decadence of the holiday season, you might want to skip the simple whipped cream for something a little more substantial. My favorite alternative is a homemade spiced caramel sauce. It’s easy—just cook down some sugar, butter, and cream, and add a tiny pinch more of that nutmeg from the filling.
Drizzle that warm caramel over a slice of chilled pie! The mixture of cold, thick pumpkin and warm, salty-sweet caramel is stunning. It’s amazing how that little addition elevates the entire dessert experience. You won’t have any leftovers when you serve it this way, I promise you that!
The Simplest Sweet Finish With Ice Cream
Sometimes, you are just running out of time because the turkey is dry and your in-laws just arrived. In that case, don’t stress about making a homemade topping! A good quality vanilla bean ice cream is the most foolproof alternative to whipped cream.
Serve a slice of pie that’s either room temperature or slightly warm (if you gently reheated it—see my storage tips for that!) with a scoop of vanilla ice cream melting down the sides. The contrast in temperature makes this simple fallback feel really special. It’s the perfect quick finish for any **Simple Fall Dessert**!
Storing and Reheating Your Traditional Pumpkin Pie Recipe
You’ve successfully baked the most delicious **classic pumpkin pie recipe**, and now you have leftovers—or maybe you just need to know how to make it ahead! Storage is almost as important as the bake time itself, especially when you’re dealing with that beautiful, delicate custard. We want to keep that **creamy pumpkin filling** perfect for leftovers!
My first and most important rule? You absolutely have to let the pie cool completely on that wire rack before you even think about wrapping it up. If you cover it while it’s still warm—even slightly warm—that trapped steam is going to make your beautiful crust soggy and might make the custard weep a bit. Give it at least two to three hours on the counter until it’s fully room temperature. Patience is a virtue here, especially when it comes to a perfect **traditional pumpkin pie recipe**.
Once it’s cool, it needs to chill out! Pumpkin pie is really best served cold or at room temperature, which is why refrigeration is key. Wrap the whole pie loosely but securely in plastic wrap. Make sure that plastic wrap isn’t actually touching the surface of the pie if you can help it—if you do, it might stick later—so use a piece of parchment paper directly on the surface first before wrapping that seal tight with plastic.
How Long Does This Holiday Pie Keep?
Stored tightly wrapped in the fridge, this pie is fantastic for four to five days. That’s more than enough time for us to enjoy it throughout the entire holiday weekend! Because this recipe doesn’t rely heavily on fresh cream or eggs that are easily separated (thanks, sweetened condensed milk!), it holds up really well. It’s sturdy enough that you can even transport it to a potluck wrapped up, though I recommend keeping it flat!
If you’re really planning ahead for a huge gathering, you *can* technically freeze an un-cut, cooled pie. Wrap it extremely well in a couple of layers of plastic wrap, followed by a layer of aluminum foil. It keeps beautifully for about a month frozen, and you can thaw it in the fridge overnight. It’s perfect for a make-ahead **Holiday Pie Baking** victory! If you end up wanting to skip eating leftovers entirely next time, you should totally try my pumpkin pie smoothie recipe for a refreshing twist!
Reheating Your Slices for the Best Texture
You’ve done the hard work! You nailed the perfect bake, and now you need to know how to handle those leftovers without ruining that beautiful texture. I rarely reheat my slices because the cold texture is just so good, but I know some people prefer it just slightly warm. If you want to revive that fresh-from-the-oven feeling, you need to follow a gentle reheating process. You can’t just throw a slice in the microwave; you’ll end up with lava on the edges and an ice-cold middle, which ruins that smooth texture we worked so hard to achieve!
For a single slice, I actually prefer the oven method. Preheat your oven to a low 300°F. Place your slice on a small piece of foil—keeping it protected is key—and keep pulling it out to check it. You just want it warm all the way through, maybe 10-15 minutes tops. This keeps the crust from getting tough. It’s all about gentle warmth to bring back that tenderness of the **traditional pumpkin pie recipe**.
If you *must* use the microwave, keep it short! Heat it on 50% power for 15-20 seconds maximum. You are just trying to take the chill off—not cook it further. This is how you preserve the integrity of that **classic pumpkin pie recipe** slice for day two!
Frequently Asked Questions About This Classic Pumpkin Pie Recipe
I get so many messages asking about adjustments or specific techniques, so I pulled the most common questions I get about making the absolute best classic pumpkin pie recipe! Pie baking, especially around the holidays, can feel stressful, but once you know these little tricks, you’ll feel like a pro. Seriously, this pie is so straightforward; it’s one of my favorite **Comfort Dessert Recipes**.
Sometimes I even have to sneak a slice while everything is cooling down, which is why I often check out savory recipes like my copycat Panera broccoli cheddar soup to balance out all the sugar!
Can I make this Easy Classic Pumpkin Pie ahead of time?
Yes, absolutely! This is one of the best things about this **easy classic pumpkin pie**—it’s fantastic as a make-ahead option. I actually prefer it that way for big holiday weekends. You must let it cool completely on the counter first, which takes a couple of hours. That’s non-negotiable for the texture! Once it’s cool, wrap it up tightly (I use plastic wrap with a layer of foil over the top) and stick it in the fridge. It stays perfect for about four or five days. You don’t need to worry about reheating it unless you really want to; it’s delicious straight out of the fridge!
What makes this filling so creamy?
That velvety, smooth quality in the **creamy pumpkin filling** comes down to two things that we were super careful about in the main recipe. First, the star: sweetened condensed milk. That ingredient is loaded with sugar and milk solids that bake up incredibly uniform, locking in moisture and creating that silky texture without needing heavy cream. Second, remember how I told you not to overbeat the eggs? If you incorporate too much air, your pie sets up light and kind of spongy, like a cake. We want density, not fluff for this **traditional pumpkin pie recipe**, so just mix until it’s combined, not bubbly!
How do I know when my Old Fashioned Pumpkin Pie is done?
This is probably the most asked about part of baking any custard pie! You absolutely have to use the knife test—insert a thin, clean knife about an inch or so from the edge of the crust. If it comes out clean, you are very, very close. However, the real tell-tale sign for this **old fashioned pumpkin pie** is the little Jiggle Test.
When you gently nudge the pie plate, you should see a small area—maybe the size of a quarter—in the very center that still looks wet and wobbly. It shouldn’t be liquidy, but it should ripple slightly, not hold a solid line like jelly. That center part will continue to set up as the pie cools on the rack. If you wait until that center is completely firm in the oven, you’ve waited too long, and you’ll end up with a slightly cracked, overcooked top!
Nutritional Estimates for This Simple Fall Dessert
Okay, now for the part where we look at the numbers! I always feel like pie should be enjoyed without worrying too much about the stats, but I know some of you like to keep track, especially when planning a big holiday meal. So, for our truly **simple fall dessert**, here are the general estimates for one slice of this rich, **classic pumpkin pie recipe**.
Keep in mind that these numbers are based on the ingredients listed—especially using a standard pre-made crust—and they will shift a bit depending on the exact brand of sweetened condensed milk you use or if you opt for a homemade crust, which can sometimes be higher in fat! Don’t forget to check out my general snacks category for lighter ideas too!
Here is the breakdown for one serving that yields 8 total slices:
- Calories: Approximately 300 per slice
- Fat: About 15g (with 7g of that being saturated fat—hello, butter in that crust!)
- Carbohydrates: Around 35g
- Sugar: Roughly 25g (This is why it’s so satisfying!)
- Protein: About 6g
- Cholesterol: Approximately 60mg
This is designed to be a treat, not an everyday snack, but honestly, 300 calories for that rich, spiced comfort is a steal in my book! The salt and sodium levels are pretty standard for a baked dessert, as is the fiber content from the pumpkin itself. The most important thing to remember is that enjoying this pie is part of the whole **holiday pie baking** memory. Don’t stress the small stuff—just make sure you have plenty of whipped cream ready to go!
PrintThe Definitive Classic Pumpkin Pie: Creamy Texture, Perfect Spice Blend

Follow this straightforward guide to make a traditional, creamy pumpkin pie with a warm spice blend. This recipe works well with a homemade or store-bought crust.
- Prep Time: 15 min
- Cook Time: 50 min
- Total Time: 65 min
- Yield: 8 servings
- Category: Dessert
- Method: Baking
- Cuisine: American
- Diet: Vegetarian
Ingredients
- 1 (9 inch) unbaked pie crust (homemade or store-bought)
- 1 (15 ounce) can pure pumpkin puree
- 1 (14 ounce) can sweetened condensed milk
- 2 large eggs, lightly beaten
- 1 teaspoon ground cinnamon
- 1/2 teaspoon ground ginger
- 1/4 teaspoon ground nutmeg
- 1/4 teaspoon salt
- 1/4 teaspoon ground cloves
Instructions
- Preheat your oven to 425 degrees Fahrenheit (220 degrees Celsius). Place the pie crust on a baking sheet.
- In a large bowl, whisk together the pumpkin puree, sweetened condensed milk, and lightly beaten eggs until smooth.
- In a separate small bowl, combine the cinnamon, ginger, nutmeg, salt, and cloves. Add these spices to the pumpkin mixture and mix well until fully incorporated.
- Pour the filling mixture into the unbaked pie crust.
- Bake at 425 degrees Fahrenheit for 15 minutes.
- Reduce the oven temperature to 350 degrees Fahrenheit (175 degrees Celsius) without opening the oven door. Continue baking for 35 to 40 minutes, or until a knife inserted near the center comes out clean.
- Cool the pie completely on a wire rack before slicing. Serve chilled or at room temperature, often topped with whipped cream.
Notes
- If you use a homemade crust, crimp the edges before filling.
- If the crust edges begin to brown too quickly during baking, cover them loosely with aluminum foil strips.
- For the creamiest texture, do not overbeat the filling mixture.
Nutrition
- Serving Size: 1 slice
- Calories: 300
- Sugar: 25
- Sodium: 250
- Fat: 15
- Saturated Fat: 7
- Unsaturated Fat: 8
- Trans Fat: 0
- Carbohydrates: 35
- Fiber: 2
- Protein: 6
- Cholesterol: 60