

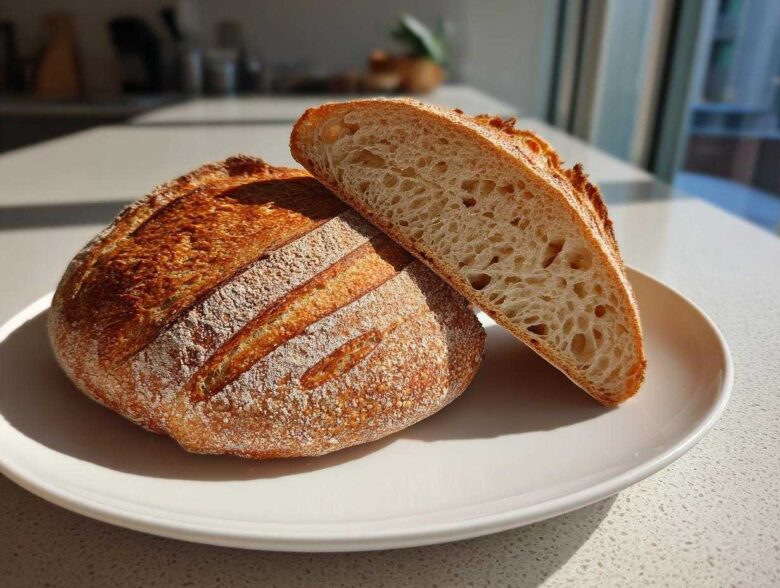
Oh, let’s be honest—trying to nail that perfect, shatteringly crisp, crackly crust at home feels like chasing a ghost, right? You pull the bread out, it looks okay, but it’s soft! It’s missing that signature bakery punch. For years, I’ve been determined to bring the true taste of Paris into my kitchen, and after countless flops involving pale loaves and gummy insides, I finally cracked the code. This isn’t just another recipe; this is the definitive guide to getting that real Bakery Style French Bread With Crackly Crust every single time. Trust me, once you master the steam step in this Artisan French Bread Recipe, you’ll never look back. I spent nearly a year perfecting the hydration and the oven environment to share these secrets with you!
Why This Bakery Style French Bread With Crackly Crust Works
We aren’t doing things the easy way here; we’re doing them the *bakery* way. The three pillars supporting this loaf are high hydration, slow, controlled fermentation through folds, and, most importantly, serious steam. That steam doesn’t just help the bread rise; it keeps the surface flexible so it can stretch and create that amazing, thin crust. If you’ve ever struggled with a dense interior after trying an Artisan French Bread Recipe before, it’s usually a process breakdown in one of these three areas.
The Role of Hydration in Open Crumb French Bread
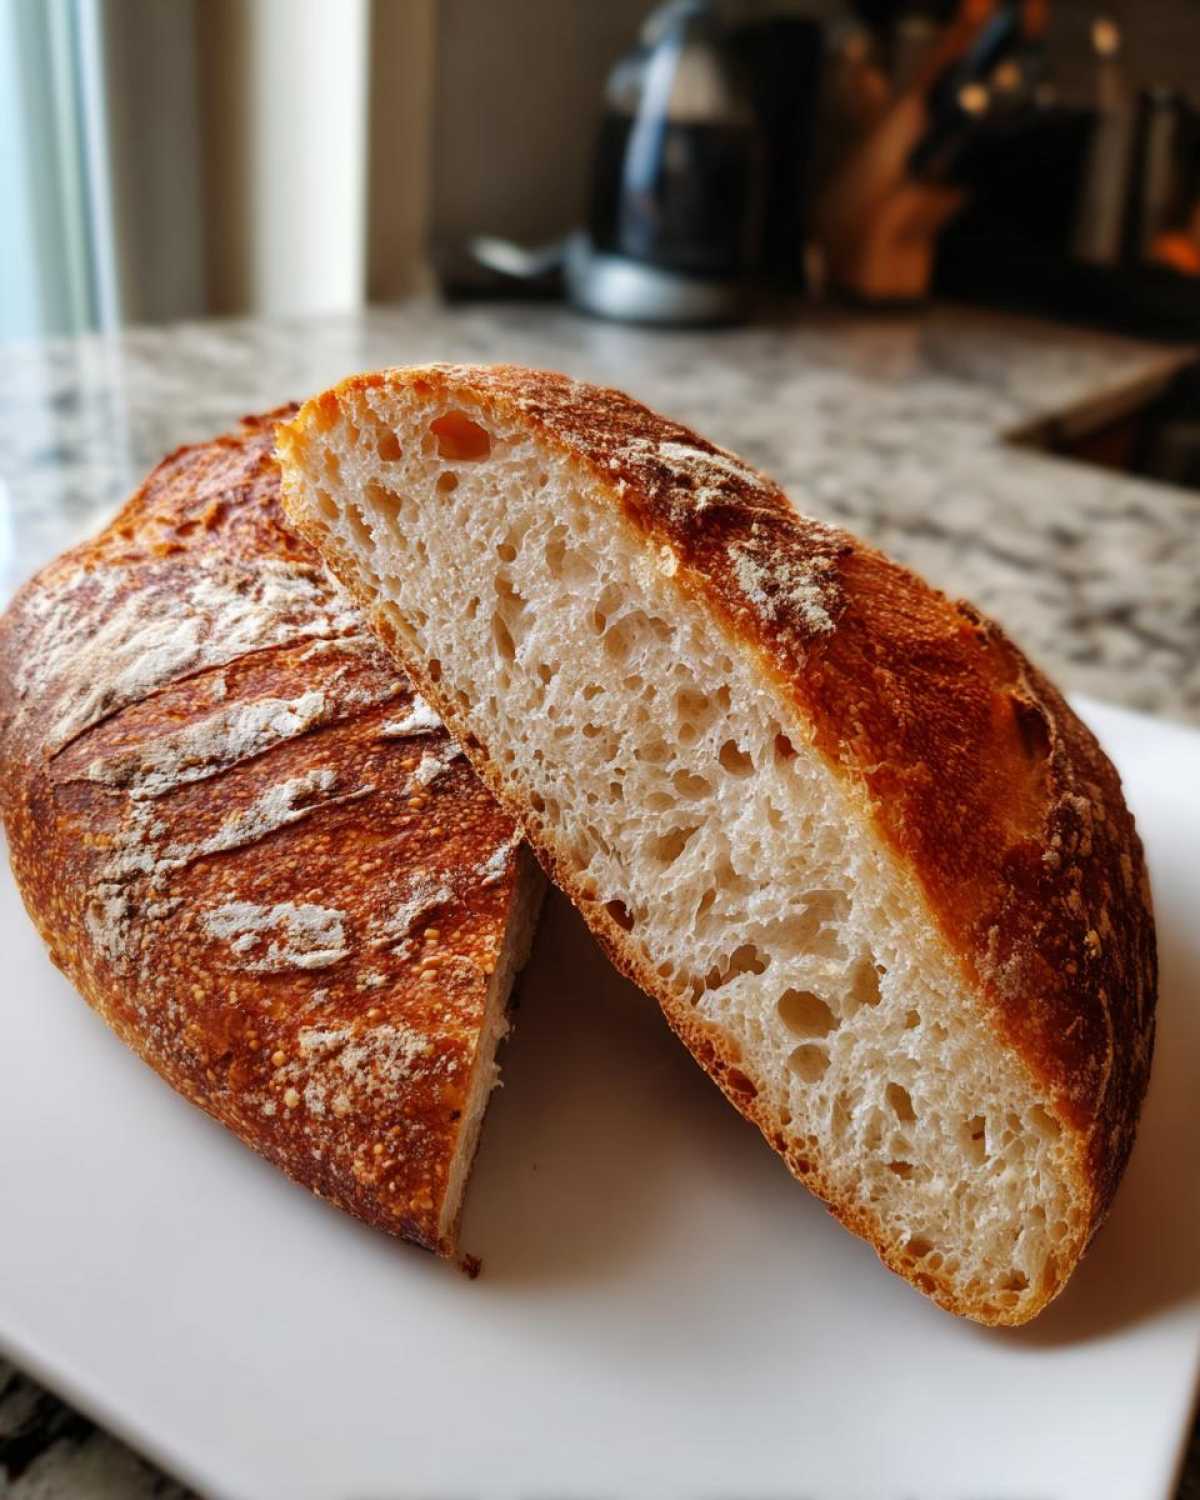
This recipe calls for a 70% hydration level, which is quite wet! Don’t panic about the shaggy dough at the start. That high water content is exactly what you need to create those big, irregular air pockets we call an open crumb. More water equals more space for gas to push out, resulting in a light, airy interior that’s wonderful for soaking up olive oil or butter.
Secrets to Achieving That Crackly Crust Bread
Here’s where folks often fail when trying to make a **Homemade Baguette with Crispy Crust**. You need immediate, intense steam when the bread enters the oven. This stops the crust from setting too soon, allowing the dough maximum oven spring. Those **Crackly Crust Bread Secrets** all boil down to moisture management upfront. Without that initial layer of wet heat, you get thick, dull crusts instead of thin, shattery ones.
Essential Ingredients for Bakery Quality French Loaf
You’ve heard me rave about the technique, but you have to start with the right fuel! Good bread comes from simple ingredients treated really well. For this recipe, we are keeping it pure because that’s how the French do it. You need precision, especially with the water ratio, if you want that amazing texture. Everything goes into one bowl, but the details matter! If you love clean, simple recipes like this, you might want to check out my guide on Sourdough Sandwich Bread too.
- 500g Bread Flour (That’s about 4 cups, but try to weigh if you can!)
- 350g Water, cool (About 1 1/2 cups – keep that water cool!)
- 10g Salt (That’s roughly 1 3/4 teaspoons)
- 3g Instant Dry Yeast (About 1 teaspoon)
Don’t forget the extra water for steaming—that’s our crust magic!
Ingredient Notes and Substitutions
The flour choice is non-negotiable. You absolutely need Bread Flour here; its higher protein content is what helps you achieve that structure for an **Open Crumb French Bread**. All-Purpose won’t give you the chew you want. We use instant dry yeast because it integrates smoothly and doesn’t require proofing separately, letting us jump right into the bulk fermentation. Stick to the salt measurement too; salt controls the fermentation speed! If you mess with these ratios, you won’t get the **Bakery Style French Bread With Crackly Crust** we are aiming for.
Mastering the Authentic French Bread Technique: Mixing and Folding
Okay, buckle up, because we are *not* kneading this dough—and that’s a huge secret to success when aiming for an **Open Crumb French Bread**! Traditional kneading overworks the dough, trapping gas. Instead, we’re going to build strength gently using the stretch and fold method. First, mix everything until it’s just a shaggy mass. Don’t try to make it smooth; just make sure there are no dry patches of flour left. Cover it up; this 30-minute rest is called autolyse.
Now for the folds! Over the next 1.5 hours, every 30 minutes, you give it a set of gentle stretch and folds. Just grab a section, stretch it up without tearing, and fold it over the center. Turn the bowl and repeat until you’ve worked all the way around. Do this three times total. I always check the dough after the third set; it should feel noticeably smoother and start holding its shape a little better. This slow development prevents degassing while building that crucial gluten network needed to support a big oven spring. If you want some fun bread ideas after this loaf, check out my easy homemade garlic breadsticks recipe for inspiration!
Shaping Baguettes for Maximum Oven Spring and Bakery Style French Bread With Crackly Crust
Shaping is where you earn that beautiful oven spring and the gorgeous exterior of your **Bakery Style French Bread With Crackly Crust**. The goal here is surface tension—we need the dough skin tight so it holds its shape and explodes upwards in the oven, not outwards. Gently turn the dough out onto a *very* lightly floured surface. Divide it, and then pre-shape it into loose rounds. Don’t fuss; just let it relax for 20 minutes covered. This short rest makes the final shaping way easier!
When you finally shape them into tight logs or baguettes, be deliberate but gentle. You’re folding the dough over itself tightly, sealing the seam firmly underneath to lock in that tension. This is critical for **Shaping Baguettes for Maximum Oven Spring**. After shaping, you need support! Place the loaves seam-side down on a heavily floured couche or a thick linen tea towel. Create deep folds between each loaf; this stops them from melding together while they proof.
This final proof is crucial for success. Next up, we talk about trapping all that beautiful moisture for the ultimate crust development, so don’t forget to see my homemade English muffins recipe for comparison on proofing times!
The Crucial Baking Phase: Steam Injection Bread Baking
Alright, forget everything else for one second, because if you want that signature bakery crust, this is the part you cannot skim! This is where we implement serious **Steam Injection Bread Baking**. You need to preheat your oven to 475°F (245°C) with your baking stone or steel inside for a solid 45 minutes—we need that radiant heat banking up!
Now for the steam itself. I use a cast iron pan on the lowest rack during the preheat. When you’re ready to load the bread, this is your moment of truth! Score the loaves quickly (see below), slide them gently onto that screaming-hot stone, and immediately pour about a cup of boiling water into that cast iron pan. Slam the door shut FAST! That immediate rush of steam allows your **Bakery Style French Bread With Crackly Crust** to expand beautifully before the crust hardens. Bake it like that for 15 minutes. After 15 minutes, carefully remove the pan (watch out for the steam!) and drop the temperature down to 450°F (230°C) to let that crust deepen its color for another 15 to 20 minutes.
Scoring and Transferring Your Loaves
Don’t try to score your loaf until the oven is fully preheated and the steam pan is ready to go. Use a razor blade or a lame and make three to five long, decisive diagonal slashes. They should overlap slightly and be quite deep—about half an inch! This controls how the bread bursts open. I dust my transfer peel heavily with cornmeal or semolina so the loaf slides off smoothly onto the hot stone, which is way better than trying to juggle it in there! If you’re looking for something completely different after this, check out my easy no-bake Oreo balls recipe.
Tips for Success: How to Get the Perfect Bread Crust
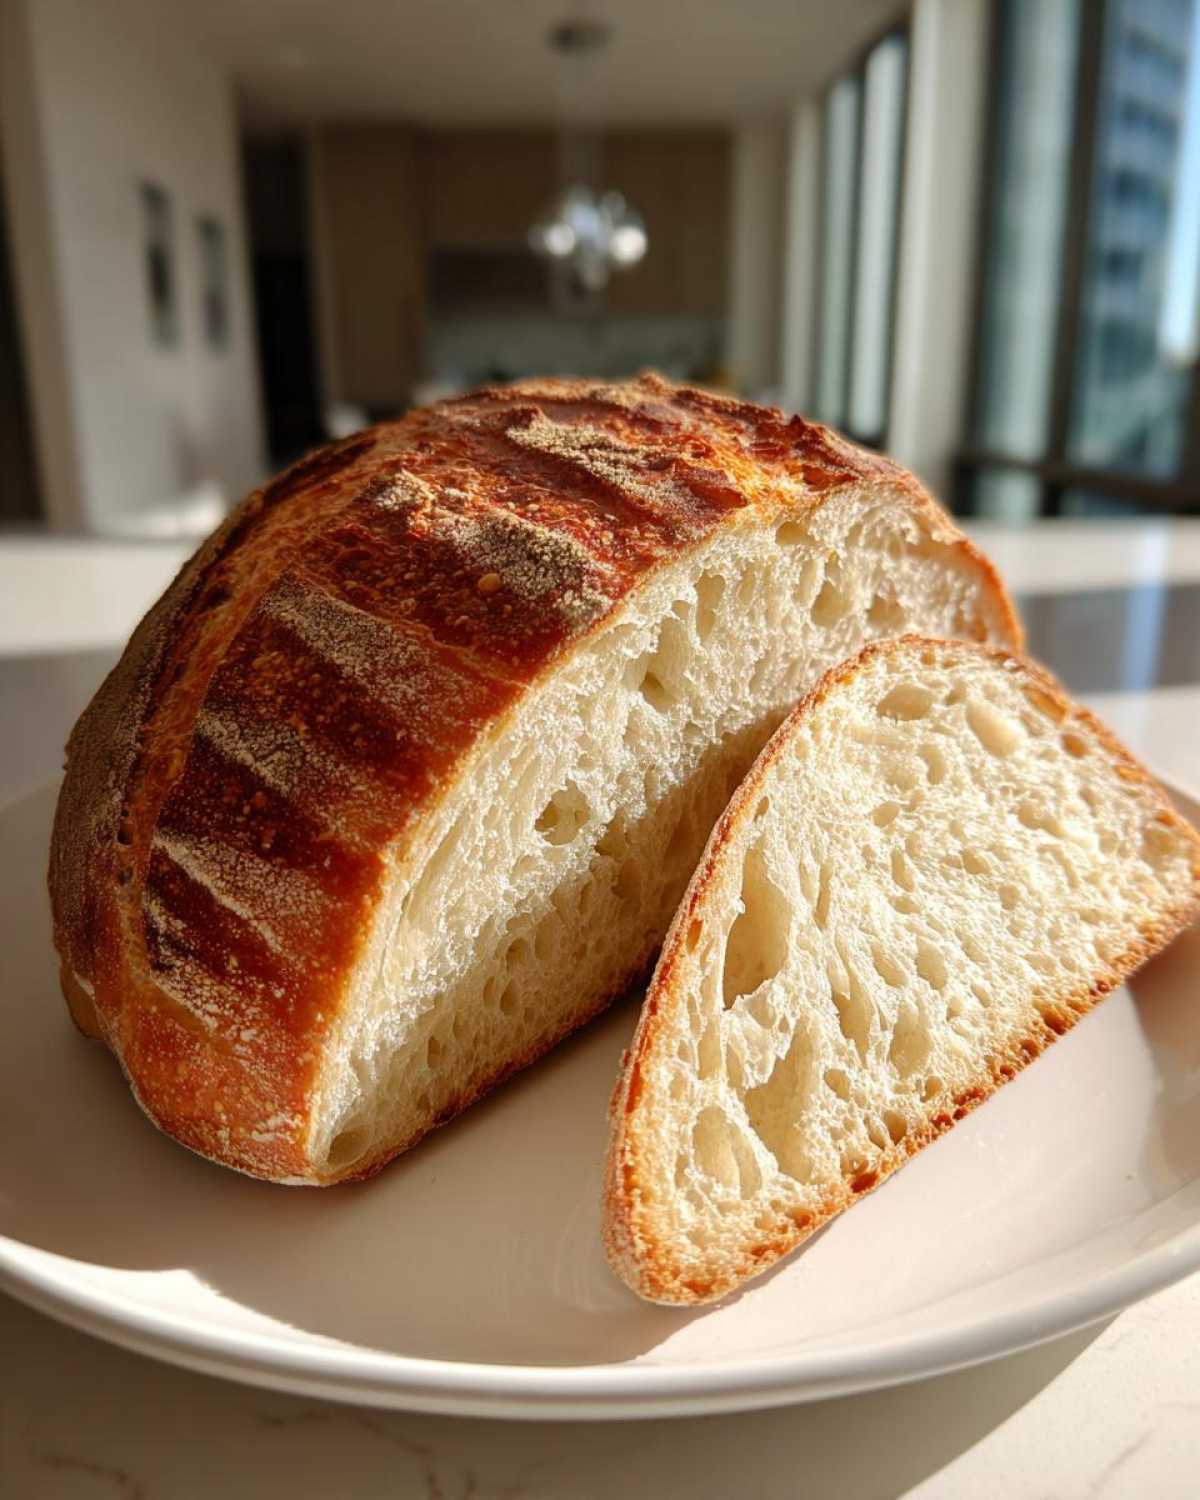
Even with perfect technique, sometimes things go sideways! If your loaf comes out pale, it’s almost always a steam issue, meaning the crust set before the bread could fully expand. You may have opened the door too soon, or your oven wasn’t hot enough initially. If you don’t have a steam tray setup like the one I showed you, you need a manual workaround to achieve that **Perfect Bread Crust**. Seriously, don’t skip the steam!
Here’s my go-to trick for a backup steam: once the loaves are on the stone, quickly spray the entire interior oven wall heavily with water using a spray bottle—do this three or four times rapidly, then shut the door. You have to repeat that spraying action about every five minutes for the first 15 minutes, too! If your crumb is dense, revisit the stretch and folds; you might not have developed enough strength, or you might have let it overproof before baking.
This bread is meant to be dark! Don’t pull it out just because it looks golden; you want a deep, nutty brown shade to hear that audible crackle when it cools. Try visiting my easy French toast recipe if you need something less intense next time!
Storing and Reheating Your Bakery Style French Bread With Crackly Crust
This bread is a marathon, not a sprint, so the cooling time is part of the recipe! You absolutely must let your loaves cool completely on a wire rack before you slice them. If you cut into it too soon, you’ll smash that beautiful open crumb structure you worked so hard for. For storage, skip the plastic bag entirely; plastic seals in moisture and kills the crackle instantly. Keep it in a clean paper bag.
If your gorgeous crust softens overnight—which happens—don’t fret! Just put the loaf directly onto the oven rack for about three minutes at 350°F (175°C). That brief blast of dry heat wakes the crust right back up. It’s like magic! For more culinary inspiration, you can always check out my recipe for homemade brown gravy from scratch once you’re done eating this!
Frequently Asked Questions About Making Bakery Bread at Home
Baking bread always brings up questions, especially when you’re aiming for top-tier results like a true **Bakery Quality French Loaf**. Don’t worry if you’re still figuring out your oven’s quirks; we all started there! Here are some common sticking points I hear about all the time.
Can I use all-purpose flour instead of bread flour for this recipe?
You technically *can*, but I really, really wouldn’t recommend it if your main goal is that **Open Crumb French Bread**! Bread flour has a higher protein content (that’s the gluten potential) needed to support all that water (the 70% hydration). If you use AP flour, your dough won’t have the strength to hold its shape during the final proof, and you’ll end up with a denser, flatter loaf that struggles to get that beautiful oven spring.
What is the best way to achieve an open crumb French Bread without a baking stone?
A baking stone or steel is truly the secret weapon for heat retention, but if you don’t have one, you can fake it! The key is getting something heavy and conductive really hot. Try preheating two heavy baking sheets stacked on top of each other instead of one stone. Or, even better, preheat a large, heavy-bottomed cast iron skillet until it’s ripping hot. Slide your loaves onto that skillet instead of a peel. It holds the heat just as well!
Why did my Bakery Style French Bread With Crackly Crust turn out pale?
If you were expecting that deep, burnished gold color that signals a perfect crust, and you got pale yellow instead, you messed up one of two things—or both! Either you didn’t bake it long enough, or you didn’t generate enough steam early on. Remember, that dark color is flavor! If the steam vanishes too fast, the crust sets prematurely and won’t darken properly. Next time, really commit to that first 15 minutes of heavy steam injection!
If you manage to nail this bread, I’ve got a fantastic recipe for easy chicken marinade that makes a great pairing for a simple soup!
Estimated Nutritional Data
Now, let’s talk fuel! Since this is just flour, water, yeast, and salt, it generally keeps things pretty focused, but remember these are just estimates since every ingredient brand varies. We calculated this based on dividing the whole batch into 16 slices. For the full nutritional breakdown, check out my About Us page for more details on how I calculate these numbers.
- Serving Size: 1 slice (approx 1/8 loaf)
- Calories: 180
- Protein: 6g
- Carbohydrates: 38g
- Fat: 0.5g
- Sugar: 0.5g
Keep in mind that the beauty of this bread is that it’s virtually fat-free and sugar-free, letting the true flavor of the wheat shine through!
PrintBakery Style French Bread With Crackly Crust
Follow this detailed recipe to make authentic French Bread at home, focusing on techniques that produce a shatteringly crisp, crackly crust and an open, soft interior crumb.
- Prep Time: 30 min
- Cook Time: 35 min
- Total Time: 2 hr 40 min
- Yield: 2 loaves
- Category: Bread
- Method: Baking
- Cuisine: French
- Diet: Vegetarian
Ingredients
- 500g Bread Flour (about 4 cups)
- 350g Water, cool (about 1 1/2 cups, 70% hydration)
- 10g Salt (about 1 3/4 teaspoons)
- 3g Instant Dry Yeast (about 1 teaspoon)
- Extra water for steaming
Instructions
- Mix the flour, water, salt, and yeast in a large bowl until just combined into a shaggy mass. Do not overmix.
- Cover the bowl and let it rest for 30 minutes (autolyse).
- Perform a set of stretch and folds every 30 minutes for the next 1.5 hours (three sets total). This builds strength.
- After the final fold, let the dough rest, covered, for 1 hour at room temperature until it has increased in volume by about 50%.
- Gently turn the dough onto a lightly floured surface. Divide it into two equal pieces. Pre-shape each piece into a loose round. Cover and rest for 20 minutes.
- Shape each piece into a tight log or baguette shape. Use gentle tension to create surface tightness, which helps with oven spring. Place the shaped loaves seam-side down on a heavily floured couche or linen cloth, ensuring folds separate them.
- Cover the loaves and allow them to proof at room temperature for 45 to 60 minutes, or until they feel puffy but still spring back slowly when lightly poked.
- Preheat your oven to 475°F (245°C) with a baking stone or steel inside for at least 45 minutes. Place a cast iron pan or broiler tray on the bottom rack.
- Carefully transfer the loaves to a peel dusted with cornmeal or semolina. Score the tops quickly and deeply with a sharp lame or razor blade (about 3 to 5 diagonal slashes).
- Slide the loaves onto the hot baking stone. Immediately pour 1 cup of boiling water into the hot pan on the bottom rack and quickly close the oven door to trap the steam.
- Bake for 15 minutes with steam.
- Carefully remove the steam pan (or open the door briefly to vent steam). Reduce the temperature to 450°F (230°C).
- Continue baking for another 15 to 20 minutes, or until the crust is deep golden brown and sounds hollow when tapped.
- Cool completely on a wire rack before slicing to allow the interior structure to set.
Notes
- For the best crackly crust, steam is essential. If you do not have a pan for water, spray the oven walls heavily with water every 5 minutes for the first 15 minutes of baking.
- A high hydration (70% water to flour ratio) contributes to an open crumb structure.
- Use cool water to slow down fermentation slightly, giving you more control over the final proof.
Nutrition
- Serving Size: 1 slice (approx 1/8 loaf)
- Calories: 180
- Sugar: 0.5
- Sodium: 300
- Fat: 0.5
- Saturated Fat: 0.1
- Unsaturated Fat: 0.4
- Trans Fat: 0
- Carbohydrates: 38
- Fiber: 2
- Protein: 6
- Cholesterol: 0