

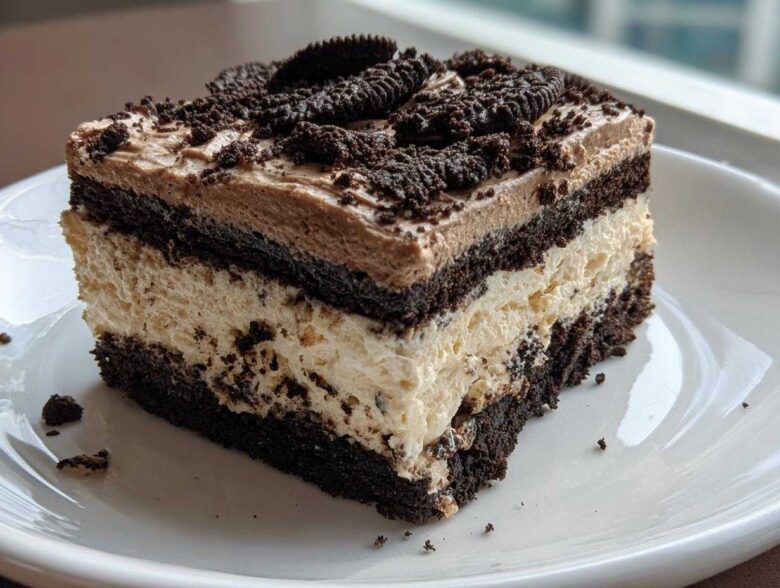
You know those desserts that instantly take you back to childhood parties or sticky summer picnics? That’s exactly the feeling you get with a great dirt cake, and trust me, we’ve perfected the recipe. Forget the oven; this is the ultimate, no-bake oreo dirt cake that’s guaranteed to disappear at any gathering. Back when Chloe and I started Cookery Courier, we realized that the simplest food often speaks the loudest. For us, that means reliable, easy-to-deliver comfort, and nothing says comfort and fun like this creamy, crunchy creation. This dirt cake sends a clear message: you deserve a seriously delicious treat right now!
Why This is the Best No-Bake Oreo Dirt Cake Recipe
I know there are a million dirt cake recipes out there, but I promise you, this one hits different. Liam and I tested versions until we got the texture absolutely perfect. If you’ve ever had a dirt cake that felt too soupy or too stiff, those days are over, friend.
Here’s why our version quickly became a potluck favorite:
- It’s 100% no-bake, which means zero oven stress. Seriously, that’s a win every time!
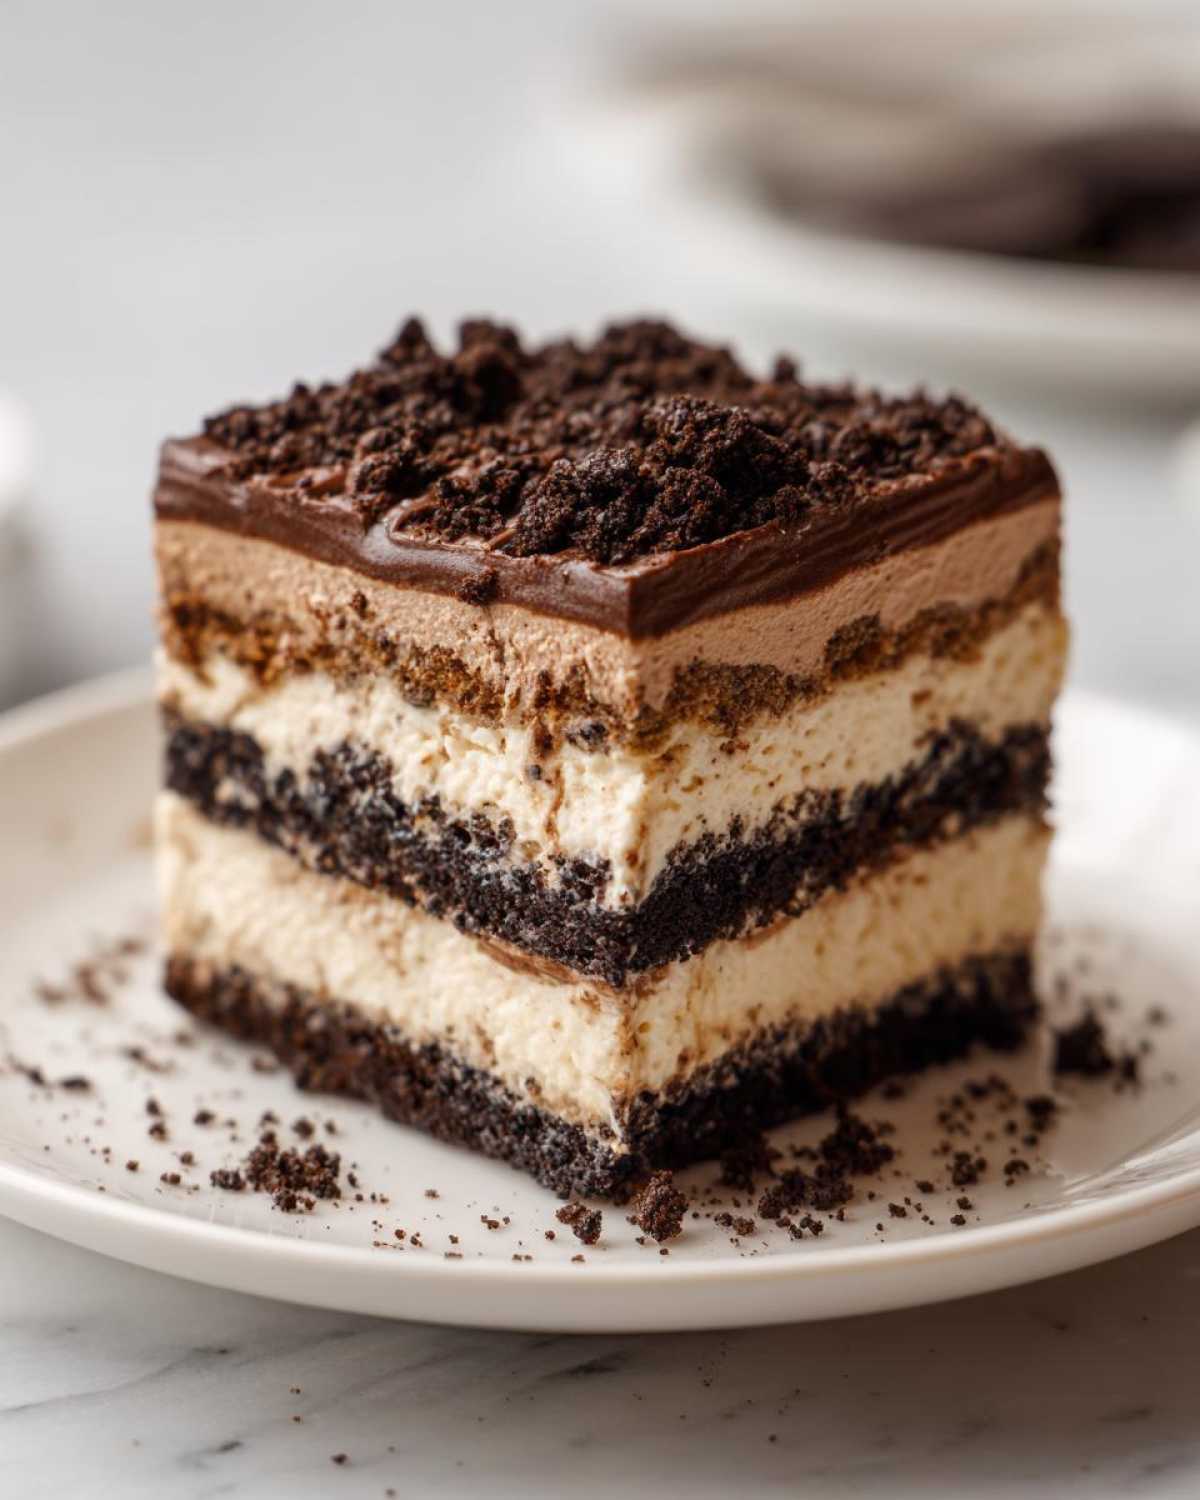
- The layers set up beautifully, giving you that satisfying crunch followed by melt-in-your-mouth creaminess.
- It’s such a kid friendly dessert—the crushed cookie “dirt” is just pure fun. Check out our tips for other no-bake favorites too!
Quick Preparation for Your Next Oreo Dirt Cake
We timed this out! You can have all the mixing done in under twenty minutes. That’s right, twenty! This is my go-to when I need a last-minute treat for a dinner party or if one of us suddenly decides we need a quick chocolate dessert before bedtime. You won’t believe how fast it comes together.
The Secret to a Super Creamy Oreo Dirt Cake
The biggest difference maker here is what we use for the white layer. We don’t just rely on pudding. We combine softened cream cheese with the thawed whipped topping, and that makes all the difference. It gives you a beautiful, slightly tangy, and incredibly sturdy creamy oreo treat that holds its shape even when it’s in a big dish.
Gathering Ingredients for Your Oreo Dirt Cake
Okay, getting your ingredients ready is the first dispatch message in our process. Since this is a no-bake wonder, the quality of what you put in really matters! Chloe and I always lay everything out before we start crushing cookies—it saves so much time when you’re rushing. You’ll need a few pantry staples and a package of those famous black and white cookies.
Here is exactly what you need to gather for this amazing dirt cake. Make sure your cream cheese is softened up—that’s important for that smooth texture we talked about!
- One whole package (that’s the big 14.3 ounce size) of Oreo cookies. We use the whole thing, cream filling and all!
- One package of instant chocolate pudding mix. Make sure it’s the smaller 3.9 ounce box.
- Two cups of milk. This has to be very cold because we are using instant pudding, remember?
- One container (it’s usually 8 ounces) of frozen whipped topping ready to be thawed. Keep it tucked away until just before you need it.
- Eight ounces of cream cheese—and don’t forget it needs to be fully softened to room temperature before mixing!
- One cup of powdered sugar for sweetness in our creamy layer.
- Just one teaspoon of vanilla extract to boost all those chocolate flavors.
That’s it! See? No weird specialty items needed. Once you have these eight things gathered up, we can move on to the fun part: turning those cookies into glorious, chocolatey dirt!
Step-by-Step Instructions for Your Dirt Pudding Recipe
Alright, now that we have all our ingredients lined up—thanks, Chloe!—it’s time to bring this dream to life. Remember, this is all no-bake magic, so we don’t have to worry about oven temperatures or burnt edges. We are focusing on building those great layers that give this dirt pudding recipe its satisfying structure. Just follow these steps exactly, and you’ll have the best easy layered dessert ready for chilling.
Preparing the Oreo Crumbs for the Oreo Dirt Cake
First things first: we need our amazing dirt! Take all those Oreos and toss them straight into a large, sturdy zip-top bag. I mean *all* of them. Now, grab a rolling pin—or frankly, the bottom of a heavy mug works too—and just start crushing away. You want coarse, uneven crumbs that look authentically muddy, not fine dust.
Go ahead and crush them until they are mostly broken down, but you still have some texture left. This is crucial for the crunch. Once you’re happy with the texture, take out about one full cup of those crumbs and set them aside. That reserved cup is going to be our perfect topping later, so don’t mix it in by mistake!
Mixing the Creamy Filling Base for the Layered Cookie Dessert
Next, we tackle the creamy heart of this dessert. This is a two-part mix! In one bowl, whisk together your instant chocolate pudding mix and the two cups of very cold milk. You need to whisk this hard, but only for about two minutes until it starts to get thick. Let that stand for five minutes; it sets up fast, but it needs a quick breather.
While the pudding is resting, grab a separate bowl. Beat the softened cream cheese until it’s smooth—no lumps allowed! Mix in the powdered sugar and the vanilla extract until you have a uniform, sweet base. Now, take your thawed whipped topping and gently fold it into the cream cheese mixture. Chloe always reminds me to be gentle here, or you deflate all the air!
Finally, the grand union! Gently fold the slightly thickened pudding mixture into that cream cheese base. Don’t overdo it! You want the two components to just marry each other—a few streaks of white or brown are fine. This is the rich, creamy layer that makes this layered cookie dessert so addictive.
Assembling the Oreo Dirt Cake Layers
Time to build! Grab your trifle dish (you know, the big, clear glass one that shows off all the layers?) or a 9×13 pan. First, spread half of your crushed Oreos right across the bottom. Press them down *slightly*—just to anchor them.
Next, spread half of that gorgeous, creamy pudding mixture evenly over the cookie layer. Don’t stir them together; we want clear divisions, remember? Then, you repeat the process! Spread the remaining half of the crushed Oreos right on top of that first creamy layer. Top that off with the rest of your creamy mixture. Make sure the top layer is smoothed out nicely. Save that last cup of crumbs for the very final touch!
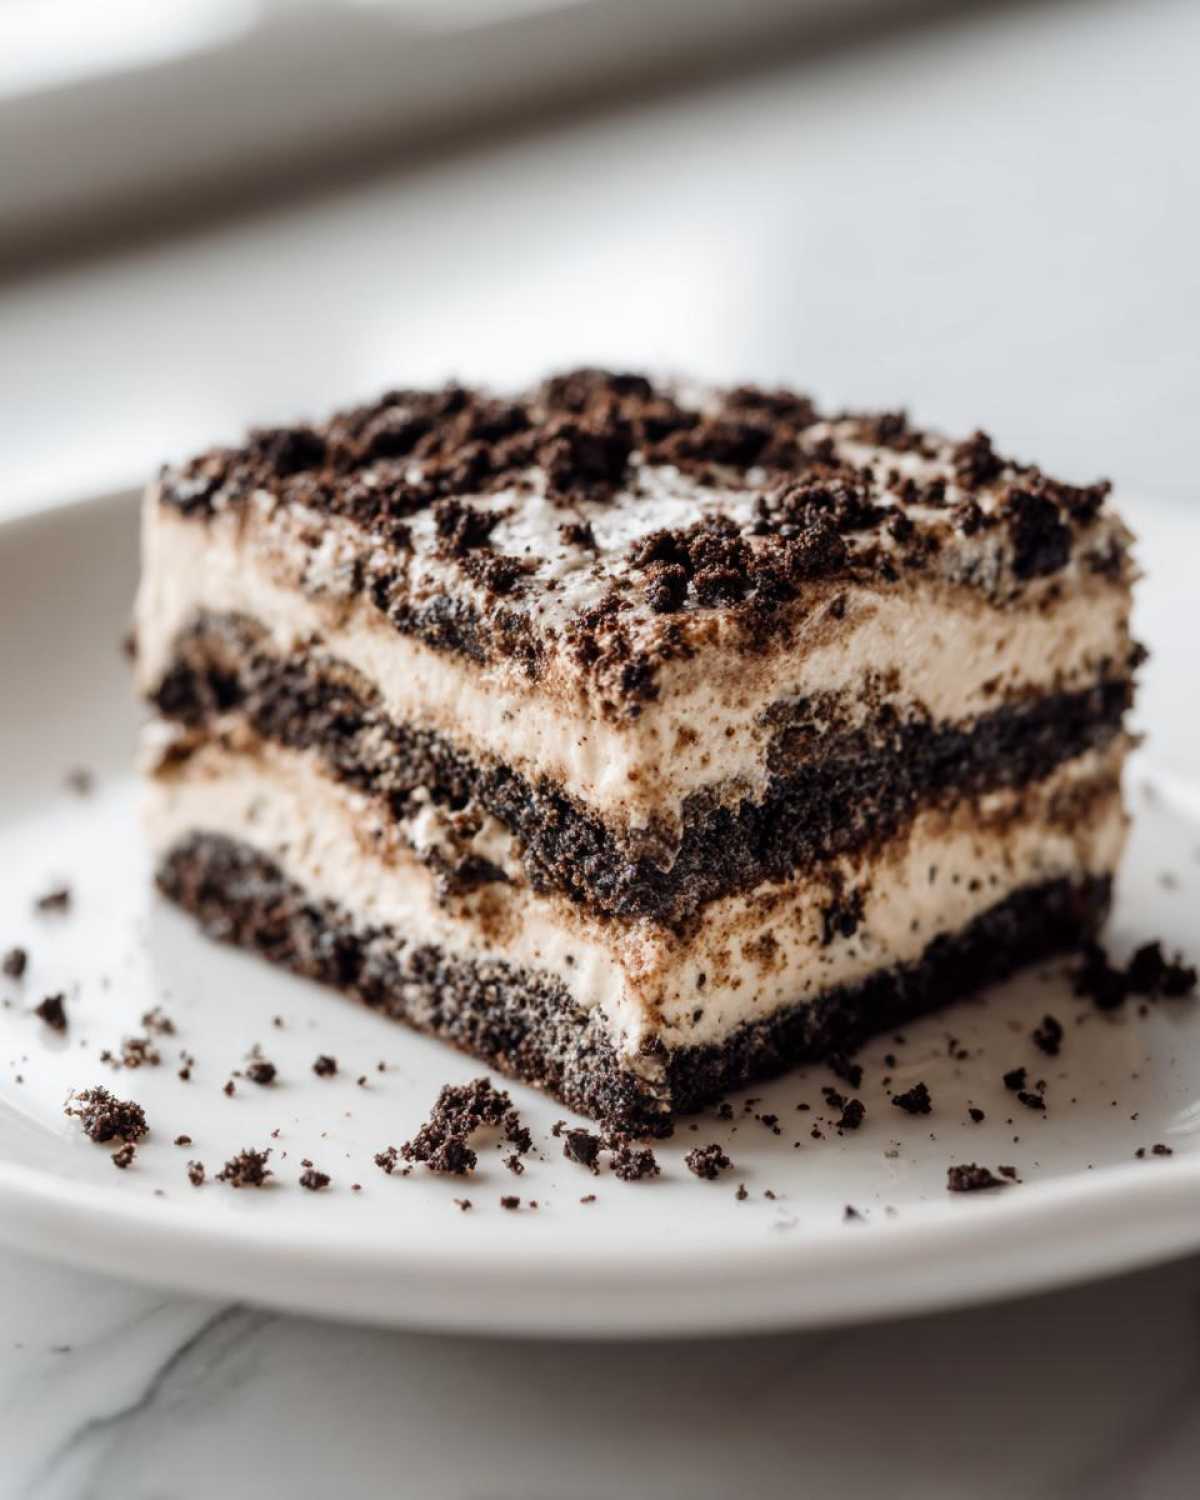
Once the bulk of the layering is done, go ahead and sprinkle that reserved cup of crumbs all over the top. That’s the ‘dirt’ topping! Now, and please hear me on this—you absolutely must cover this up and let it chill. It needs a minimum of four hours in the fridge, but honestly, overnight is where you get the best, most settled texture. If you slice into it too early, it will slump!
If you want to check out some other amazing things you can make with minimal effort, take a peek at my tips over here on Peanut Butter Rice Krispie Treats!
Tips for the Perfect Oreo Dirt Cake Presentation
We’ve nailed the texture, but let’s talk about presentation. When you’re taking a dessert like this to a gathering, you want it to look as fun as it tastes. The best part about this kid friendly dessert is how adaptable it is. Using a big trifle dish is great for showing off those pretty layers, but sometimes you need something different, right?
One of my favorite ways to serve this, especially for little hands, is scooping the layers into individual clear plastic cups. It makes serving super easy—no messy cutting involved! Plus, you get that perfect ratio of topping to cream in every single person’s serving. Another fun, nostalgic option Liam and I have tried? Line a clean, brand-new flower pot with plastic wrap and build the layers inside. When you pull the plastic out, it looks like you planted a delicious Oreo garden! It’s such a hit.
Ingredient Tweaks for a Richer Creamy Oreo Treat
While the recipe is perfect as written, sometimes I like to make a little upgrade, especially if I’m making this for adults or just feeling extra indulgent. Liam, being the gourmet courier he is, always suggests swapping things up slightly for flavor depth.
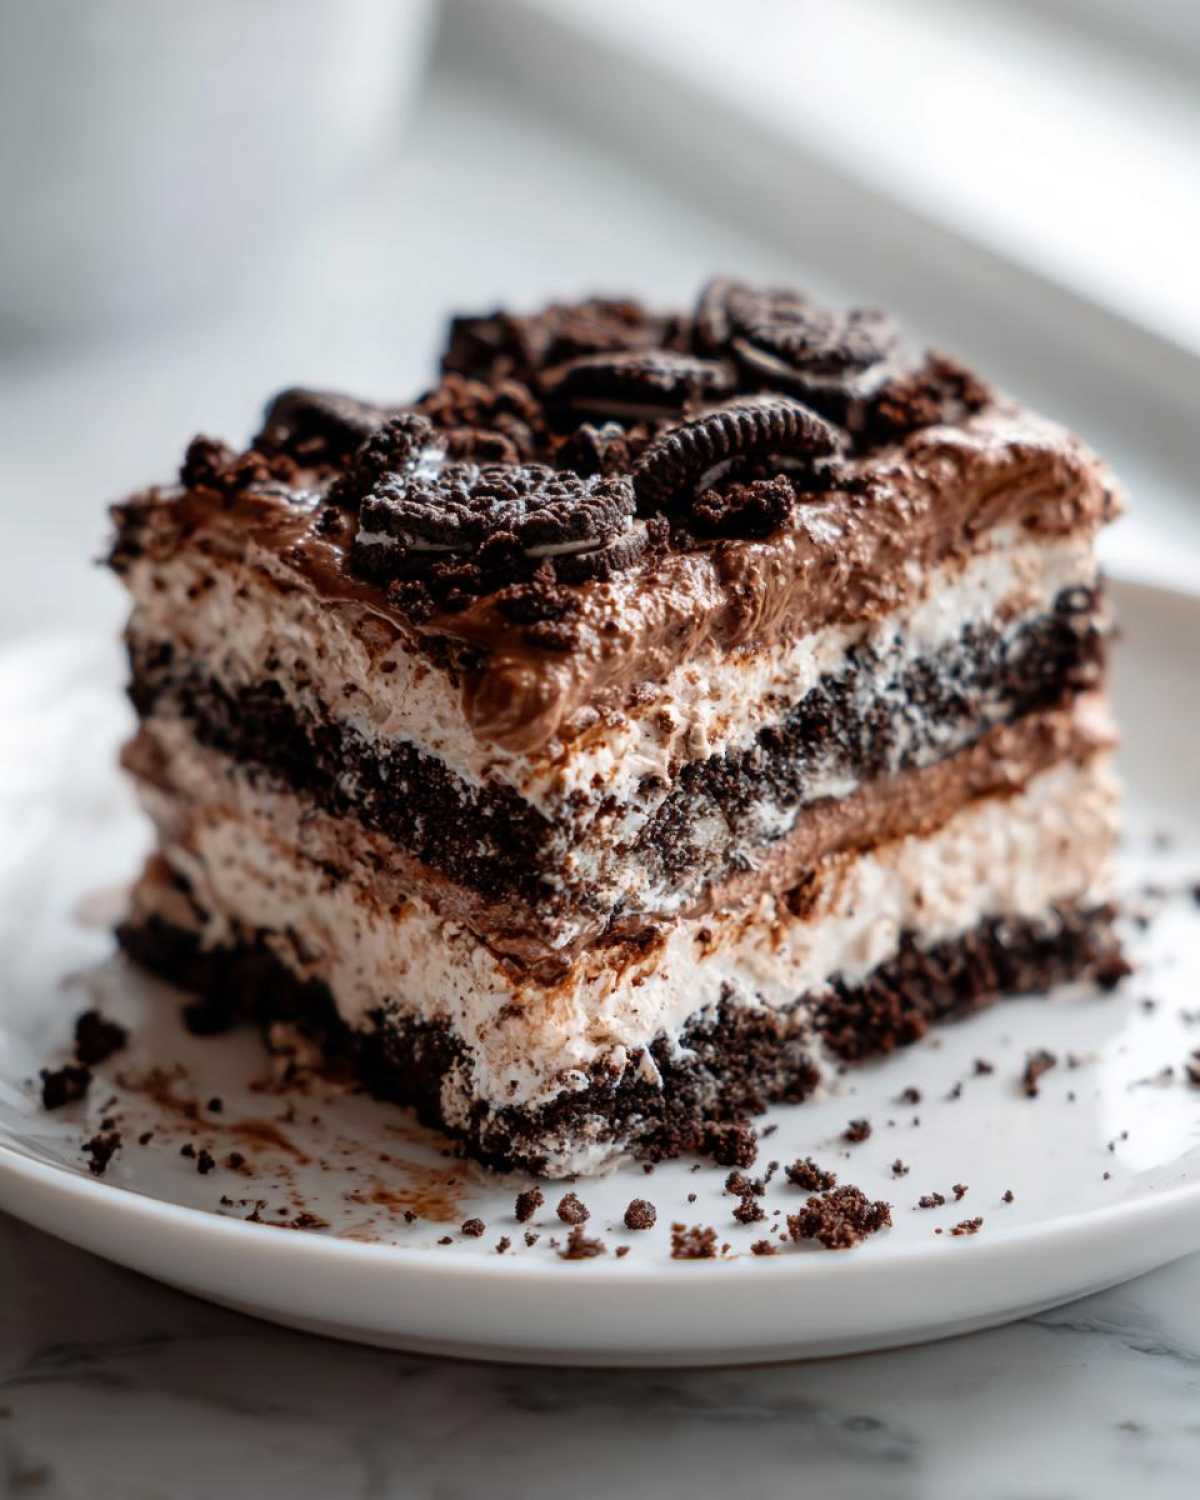
If you want that pudding layer to be ridiculously rich, try this: instead of using the full two cups of cold milk when you mix the pudding, substitute half of that milk with heavy cream. Just use one cup of milk and one cup of heavy cream. Trust me, it creates an even silkier pudding that complements that creamy oreo treat base beautifully.
Also, remember that note about the cream cheese layer? If you find that your dessert is sitting out for a long time at a party, or if you’re in a really hot kitchen, you can make that base firmer. Instead of *just* using cream cheese, try creaming half cream cheese (8 oz) with a quarter cup of softened butter. It gives the layer a slight cheesecake firmness that holds up like a champ. Don’t forget to check out how we make mini cheesecake bites if you love that tangy sweetness!
Serving Suggestions for This Party Dessert Ideas
Since this Oreo Dirt Cake is so incredibly rich—hello, cream cheese and pudding explosion!—it sometimes needs a little contrast when serving it up at big get-togethers. When Liam and I bring this to a potluck favorite situation, we think about what cuts through that sweetness.
You don’t need a complicated topping, because we already have plenty of “dirt” on top! Sometimes the best accompaniments are the simplest things you already have in the kitchen. This is where Liam’s palate really kicks in because he hates when a dessert overpowers everything else on the plate.
When planning your party dessert ideas, consider these simple pairings:
- A big bowl of fresh, tart berries. Raspberries or thinly sliced strawberries cut right through the chocolate richness. They add color and a necessary little zing!
- For the adults, a side of slightly strong, freshly brewed coffee is surprisingly wonderful. The bitterness balances the sweetness so well. You can even serve it alongside our recipe for Quick & Creamy Homemade Chocolate Milk for a fun throwback pairing.
- If you are serving this as part of a bigger dessert spread for major dessert for gatherings, keep the sides simple. Maybe just a side of vanilla bean ice cream, even though the cake itself is served cold. It just adds another texture point!
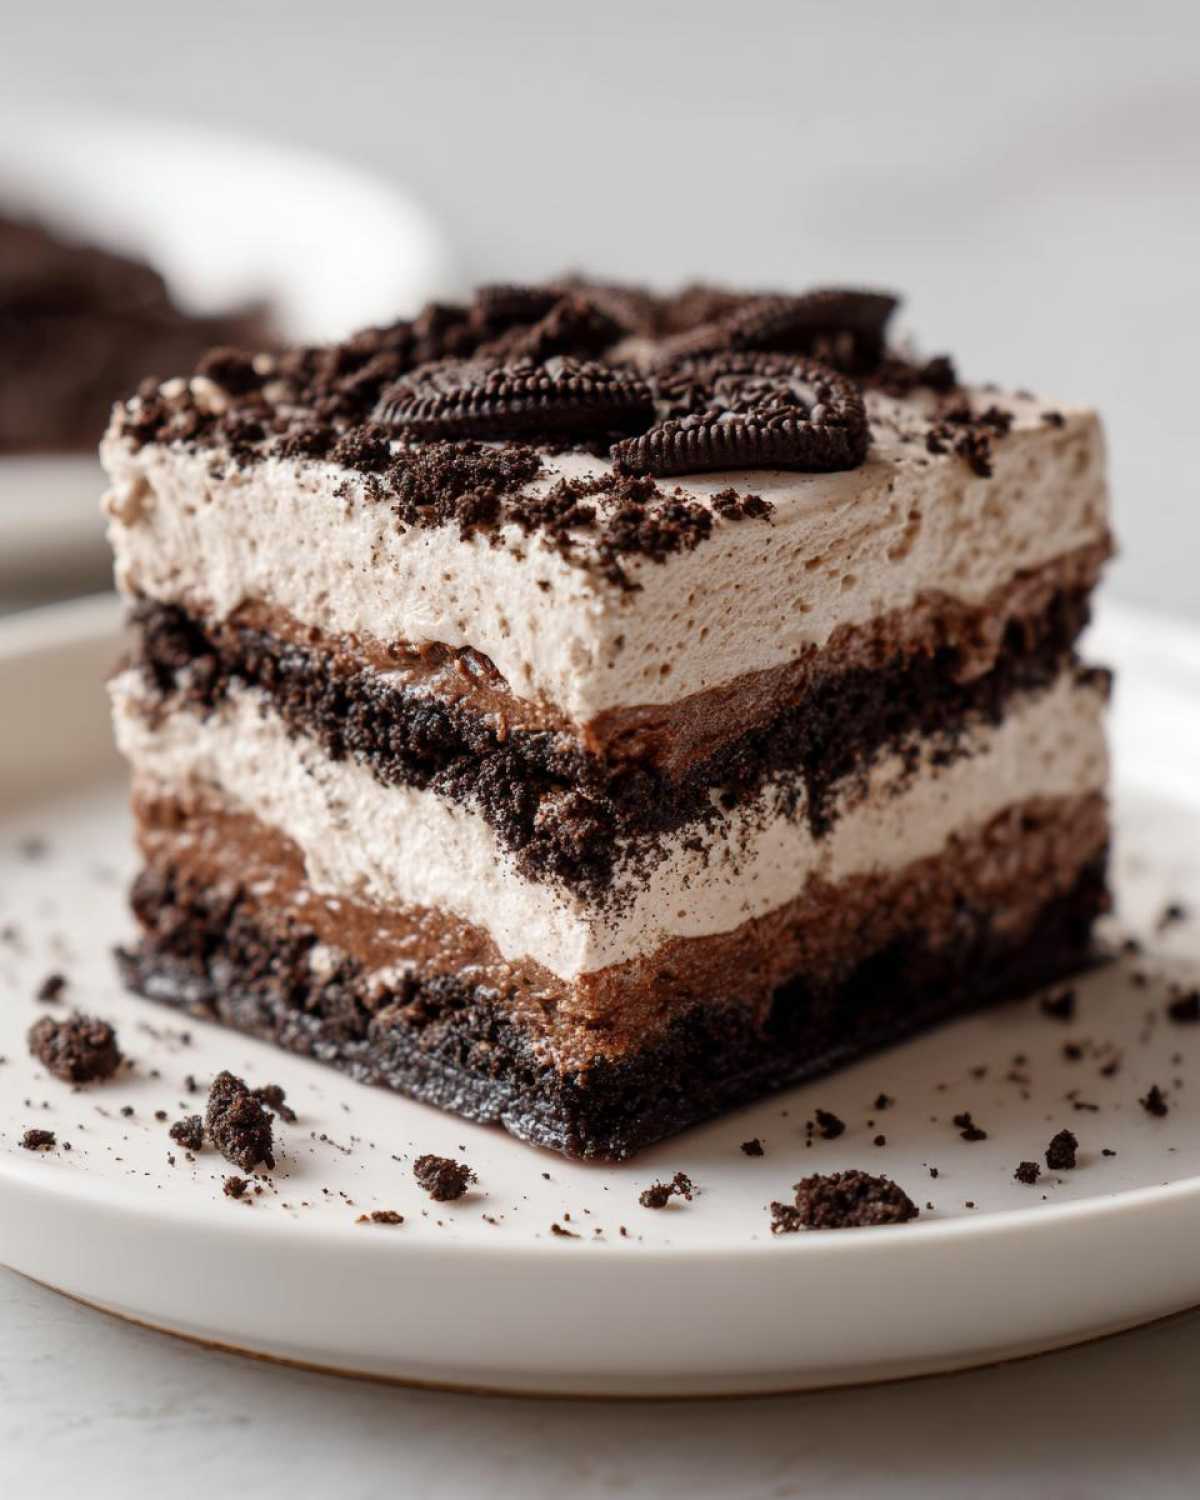
Honestly, though, the beauty of this dessert for gatherings is that it stands entirely on its own. You don’t need much else! Just make sure you have enough spoons, because everyone digs right in!
Storage and Make-Ahead for Your No Bake Oreo Dessert
This is one of those marvelous treats designed for company, and that means figuring out the timing is everything! The great news is that since this is a no bake Oreo dessert, it actually gets *better* when you make it ahead of time. That crucial chilling period isn’t just recommended for presentation; it allows those creamy layers to truly meld together with the cookie ‘dirt.’
If you’re baking for a Friday night pop-in, I always suggest aiming to assemble this on Thursday night. We said a minimum of four hours earlier, but if you can let this beauty chill overnight—say, 8 to 12 hours—it sets up perfectly. The pudding firms up nicely against the cream cheese base, and you get cleaner slices if you are serving it in squares.
What about freezing? This is a tricky one for me because the texture relies so heavily on the whipped topping and the pudding mixture. While you *can* technically freeze it, I’ve found the thawed texture can sometimes get a little grainy or weep a bit when it comes back to room temperature. For the absolute best experience, keep this dessert refrigerated. It lasts quite well, usually staying fresh and delicious for a good 3 to 4 days if it’s covered tightly! It’s perfect for making a big batch for parties early in the week.
If you are looking for other recipes that freeze like a dream, you should definitely look at the tips we put together for our No-Bake Oreo Balls. Those are freezer-friendly champions!
Frequently Asked Questions about Oreo Dirt Cake
I always get so many questions when people try this recipe for the first time, and that’s the fun part of being a dispatcher—translating the magic into simple answers! Since this is a showstopper, people want to make sure they get every detail right. Here are some common things Chloe and I hear about making the ultimate oreo dirt cake.
Can I make this easy dirt cake recipe ahead of time?
Yes, please do! This is one of those rare easy dirt cake recipes that actually tastes better the longer it sits! We always recommend assembling it the night before you plan to serve it. If you can give it a good 10 to 12 hours in the refrigerator, the pudding gets super creamy, and the cookie crumbs soften just enough to blend perfectly with the filling. Honestly, it’s the ideal potluck favorite because you make it, hide it in the fridge, and forget about it until party time!
What if I want a different flavor for my chocolate pudding dessert?
Oh, that’s a fantastic question, and absolutely you can change up the pudding! While the classic chocolate pudding dessert version is what we based this on (because hey, more chocolate is usually good, right?), you have options. If you want something a bit lighter, try using instant vanilla pudding mix. It gives you a gorgeous light-colored layer that contrasts beautifully with the dark Oreos—almost like a cookies and cream mashup.
Another fun one is butterscotch pudding! It gives the whole thing a slightly salty-caramel note that pairs surprisingly well with the cookie crunch. Just remember that if you switch from chocolate, the final look of your creamy chocolate crunch will change dramatically! The structure of the layers will remain the same, though, which is the most important part.
If you’re curious about other simple recipes we’ve dispatched, check out the whole archive over on the Cookery Courier Blog!
Estimated Nutrition for Your Creamy Chocolate Crunch
If you’re like me, maybe you try not to look at the nutrition label on a dessert that’s 90% Oreos and cream cheese, but sometimes it’s good to have a general idea what we are delivering to the family! Since this is a delicious, decadent creamy chocolate crunch, these numbers are definitely ballpark estimates—they assume we are cutting this into 12 decent-sized servings from a 9×13 pan.
Please remember, these values are estimates only, based heavily on the product sizes called for in the recipe and can change based on the brand of pudding or whipped topping you use. This is just to give you a general idea, not a precise breakdown for a strict diet plan!
Here are the numbers we ran for one serving:
- Calories: About 350
- Total Fat: 18g
- Saturated Fat: 10g
- Total Carbohydrates: 45g
- Sugar: 35g (Yes, it’s high, it’s a party dessert!)
- Protein: 4g
It’s rich, it’s sweet, and it’s totally worth it for a special occasion. We believe in enjoying the process and the results, and that means not stressing too much over the specifics of a party dessert!
For important context regarding how we calculate these values on the site, you can always check out our full recipe disclaimer page. Now, the only other important thing left to do is share the love!
Send Your Delicious Message: Share This Oreo Dirt Cake
Well, we’ve successfully sent the message! This amazing oreo dirt cake is ready to travel from our kitchen to yours, and then straight to the party you’re heading to. Remember what we always say here at Cookery Courier: every recipe is a little message of comfort and care you can hand-deliver.
Now that you’ve successfully created Liam’s favorite creamy chocolate crunch, we want to see it in action! Did you use a flower pot presentation? Are you delivering this to someone who really needed a sweet pick-me-up?
Take a moment and let us know how it went. Head down to the comments below and share who you are sending this delicious comfort to—and please, give it a rating so other busy folks know this no bake oreo dessert is worth whipping up!
If you need to get in touch about a recipe question or want to share a delivery story, you can always reach out through our contact page. Happy serving, and thanks for letting us be part of your journey!
PrintThe Best No-Bake Oreo Dirt Cake Recipe

Make this easy Oreo Dirt Cake, a no-bake dessert featuring creamy layers of chocolate pudding, whipped topping, and crushed Oreos. It is a perfect party dessert.
- Prep Time: 20 min
- Cook Time: 0 min
- Total Time: 4 hr 20 min
- Yield: 12 servings
- Category: Dessert
- Method: No-Bake
- Cuisine: American
- Diet: Vegetarian
Ingredients
- 1 package (14.3 ounces) Oreo cookies
- 1 package (3.9 ounces) instant chocolate pudding mix
- 2 cups cold milk
- 1 container (8 ounces) frozen whipped topping, thawed
- 1 package (8 ounces) cream cheese, softened
- 1 cup powdered sugar
- 1 teaspoon vanilla extract
Instructions
- Place all Oreo cookies in a large zip-top bag. Crush the cookies using a rolling pin until they resemble coarse crumbs. Set aside about 1 cup of the crumbs for topping.
- In a large bowl, whisk together the instant chocolate pudding mix and cold milk for 2 minutes until slightly thickened. Let it stand for 5 minutes.
- In a separate bowl, beat the softened cream cheese, powdered sugar, and vanilla extract until smooth.
- Gently fold the thawed whipped topping into the cream cheese mixture until just combined.
- Fold the pudding mixture into the cream cheese mixture until fully incorporated. This is your creamy layer.
- In a large trifle dish or 9×13 inch pan, create the first layer by spreading half of the crushed Oreos on the bottom.
- Spread half of the creamy pudding mixture evenly over the cookie layer.
- Repeat the layers: spread the remaining crushed Oreos over the pudding, then top with the remaining creamy mixture.
- Sprinkle the reserved 1 cup of crushed Oreo crumbs over the top layer to resemble dirt.
- Chill the dirt cake in the refrigerator for at least 4 hours, or preferably overnight, before serving to allow it to set properly.
Notes
- For a fun presentation, you can layer this dessert in individual clear cups or even a clean flower pot (line it first).
- If you want a richer flavor, substitute half of the milk with heavy cream when making the pudding.
- You can use a cream cheese and butter mixture instead of just cream cheese for a firmer base layer.
Nutrition
- Serving Size: 1 serving
- Calories: 350
- Sugar: 35
- Sodium: 320
- Fat: 18
- Saturated Fat: 10
- Unsaturated Fat: 8
- Trans Fat: 0.5
- Carbohydrates: 45
- Fiber: 1
- Protein: 4
- Cholesterol: 35