

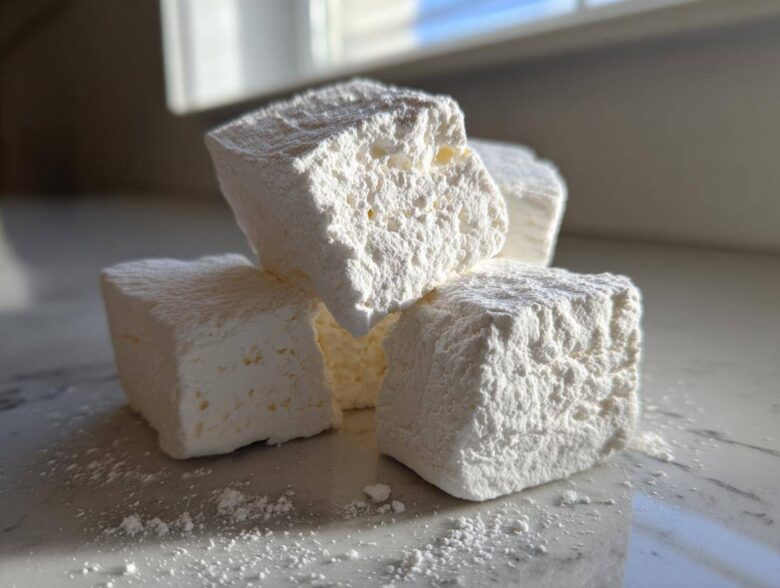
I know, I know. The word ‘homemade candy’ sounds intimidating, right? For the longest time, my idea of a sweet treat delivery was ordering takeout—I was officially fluent in reservations, not recipes! But when Liam started sending me warm little messages made in his kitchen, I realized some comforts just can’t be bought. And guess what? Making **homemade marshmallows** is absolutely not the impossible mission you think it is. Seriously, once you see how straightforward this process is, you’ll be whipping up these clouds of joy faster than you can grab the takeout menus. This, my friends, is the easiest, fluffiest recipe for **homemade marshmallows** you’ll ever try. If you want to read more about how we learned to speak each other’s language through food, you can check out our story over at Cookery Courier. Get ready for melt-in-your-mouth perfection!
Why This is the Best Homemade Marshmallows Recipe (E-E-A-T)
I know I spend most of my time translating Liam’s effortless kitchen magic into something *we* can all manage, and honestly, this recipe is the gold standard. This isn’t just *a* recipe; it’s *the* **recipe for soft marshmallows** that actually works every single time. You end up with these cloud-like, **fluffy homemade marshmallows** that leave the store-bought stuff in the dust. It’s reliable, and that reliability is what makes it the best way to start your journey into making **homemade marshmallows**.
Achieving That Perfect Pillowy Texture
The secret to that incredible, soft, chewy candy feel isn’t luck; it’s physics! We need the sugar syrup cooked precisely to that 240-degree soft-ball stage. That high, specific temperature guarantees the structure. Then, you have to trust the mixer and let it go—we’re whipping that heavy syrup into the gelatin for a full 12 to 15 minutes. Don’t cheat this part! That long, high-speed whisking is what incorporates all that air, turning heavy syrup into weightless pillows.
Gathering Your Ingredients for Homemade Marshmallows
Okay, let’s talk supplies. Look at this list—it’s all pretty standard stuff you probably have hiding in your pantry already. That’s why I call this an **easy marshmallow recipe**! We aren’t dealing with ten different specialized extracts here. We need three packets of good quality unflavored gelatin because texture is everything. Then we use exactly 1 cup of cold water, divided—pay attention to that little word ‘divided’ because that water shows up in two different steps later on! The rest is sugar, corn syrup, salt, and the pure vanilla extract that makes these smell heavenly.
Ingredient Notes and Simple Substitutions
Now, if you are aiming for those extra special **vanilla bean marshmallows**, you absolutely can scrape the seeds from a real bean and throw them right into the sugar when you start heating it up. It makes such a beautiful little speckle!
A question I get a lot is about the corn syrup. For this method to get that signature pillowy sweet flavor, corn syrup is really key for controlling crystallization. If you choose to try making **no corn syrup marshmallows** using maple syrup or honey—which is totally possible for **natural homemade marshmallows**—just know it will change the final texture. It won’t be quite this classic, light fluff, but it’ll still be delicious in its own way!
How to Make Homemade Marshmallows From Scratch: Step-by-Step
Alright, this is where the magic happens, and I promise you, if you can follow directions, you can master **how to make marshmallows from scratch**. It takes precision, yes, but it’s not complicated. Just follow my lead, and we’ll have these light beauties setting up in no time! We’re making something really special here, so pay close attention to the heat and the timing. If you want to jump straight to the quick version of this recipe we documented, check out the full details right here.
Preparing the Pan and Blooming the Gelatin
First thing’s first: prep your workspace, because once that syrup is hot, things move fast! You need a 9×13 inch pan, and we are not messing around with sticking. Lightly grease it, then grab that mix of cornstarch and powdered sugar we talked about. You want to dust the entire inside of that pan—bottom and those tall sides—very, very generously with this mix. Don’t be shy; this is your non-stick insurance!
Next, head to your stand mixer. Pour 1/2 cup of the cold water into the bowl, then sprinkle the gelatin right over the top. Don’t stir! We need that gelatin to bloom, meaning it absorbs the water and gets ready to do its stabilizing job. Let that sit for about 10 minutes while you deal with the syrup.
Cooking the Sugar Syrup to the Right Temperature
While the gelatin is puffing up, get your sugar, corn syrup, and that last 1/4 cup of water into a medium saucepan. Stir just until the sugar disappears at medium heat. The second it starts boiling? That’s it—you stop stirring! If you keep stirring, you risk creating crystals, and we want smooth sailing. Attach your candy thermometer right to the side. Liam stresses this part: you must cook this syrup until it hits exactly 240 degrees Fahrenheit. That’s the soft-ball stage, and it is crucial for getting that lovely structure. Once it hits 240°F, pull it off the burner immediately.
Whipping the Marshmallow Fluff Mixture
Now, stand back and turn your mixer on low speed. This is the crucial safety moment! Slowly, carefully pour that blazing hot syrup down the side of the bowl—don’t pour it right onto the whisk, or it’ll splatter everywhere! Once it’s all in, crank that mixer up to high speed. You need patience here! Beat it high for a full 12 to 15 minutes. You’ll watch it transform from a yellowish, thin liquid into this massive, glossy, pure white cloud. When it holds stiff peaks, you know those **fluffy homemade marshmallows** are ready! Beat in your vanilla right at the end. If you want some other ideas on making **gourmet marshmallows**, check out some tips another baker shared here.
Setting, Cutting, and Coating Your Homemade Marshmallows
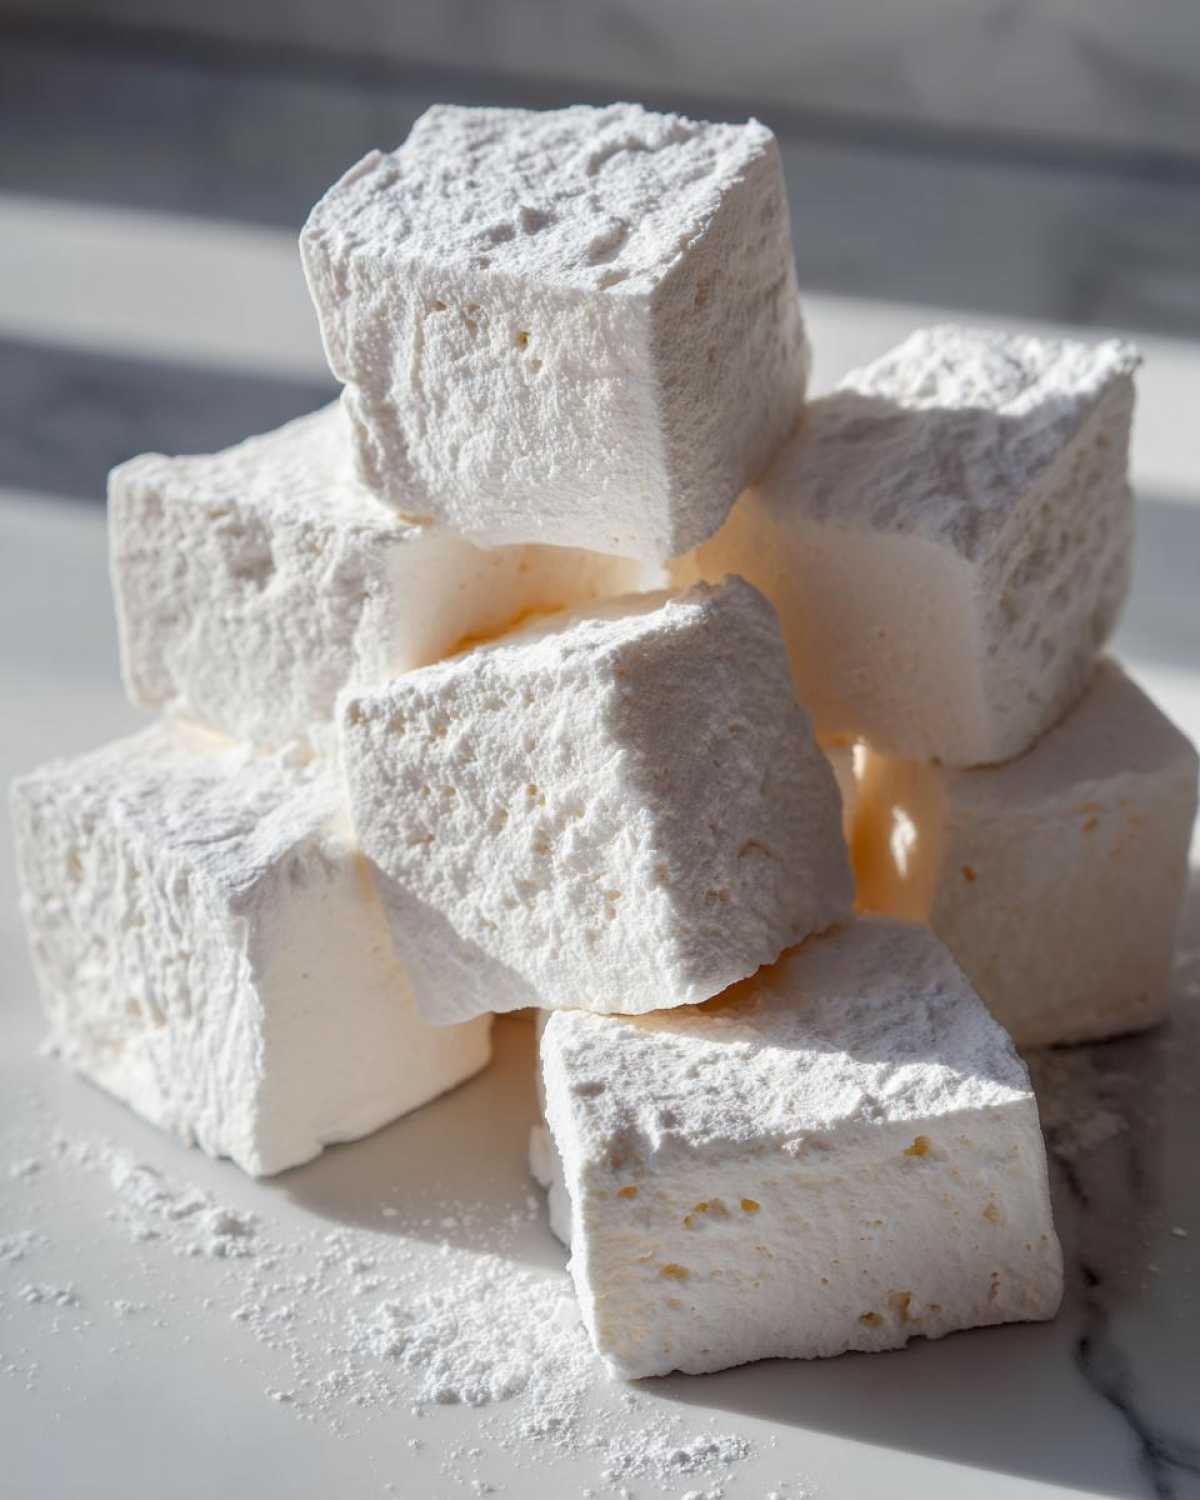
Work quickly now! Scrape that enormous sticky mass into your prepared pan. Use an oiled spatula or just oiled hands to gently smooth the top. Resist the urge to press down hard; remember, we want air! Let it sit on the counter, uncovered, for at least four hours, but honestly, overnight is best so it firms up nicely.
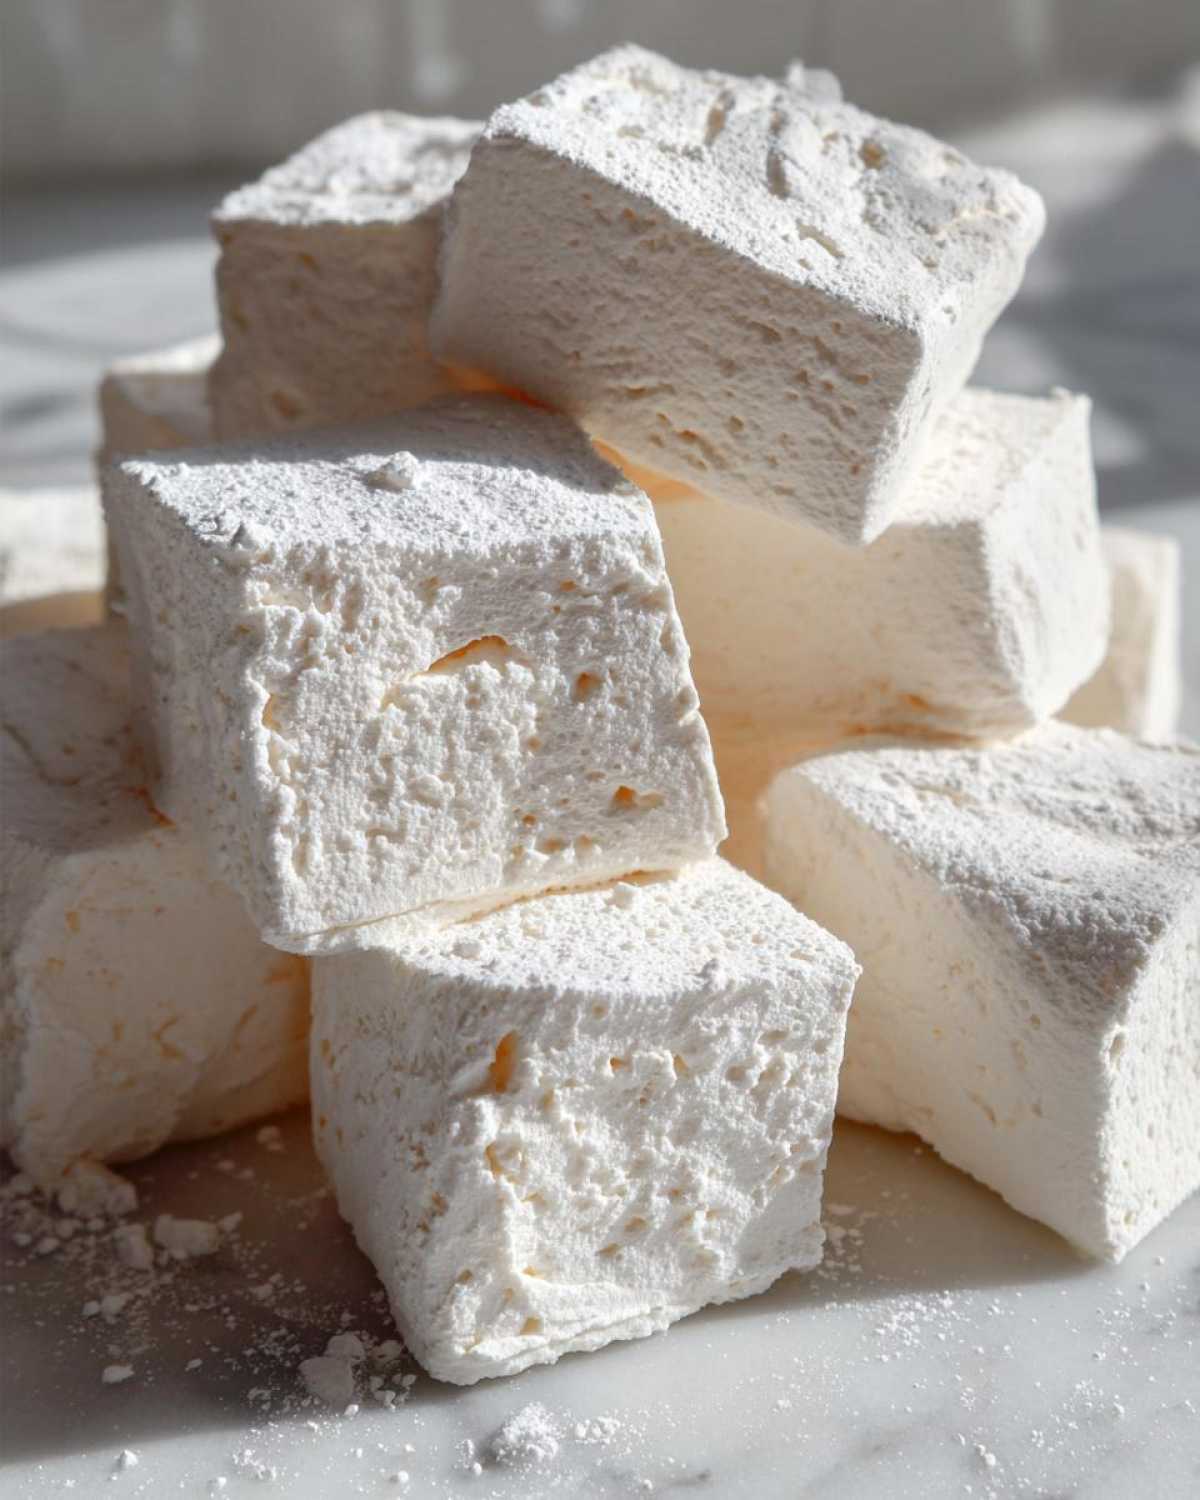
The next day is cutting day! Gently turn the whole slab out onto a board dusted heavily with the extra powder mix. Use a large, sharp knife—oiled again—or maybe a pizza cutter for the cleanest slice, following the best **marshmallow cutting techniques**. As you cut, toss each square into the extra dusting mixture you have ready. This keeps your **homemade marshmallows** from gluing themselves into one giant block!
Tips for Perfect Homemade Marshmallows Every Time
Even with an easy marshmallow recipe, a few little secrets can really boost your confidence. My biggest tip, always, circles back to temperature. That 240°F needs to be exact, trust me. If you’re a little low, they won’t set right; too high, and they can get tough instead of pillowy. So, keep that candy thermometer handy!
Secondly, when you dump that gorgeous, sticky fluff into the pan, move fast! That mixture starts setting up almost immediately because it’s holding so much air. Don’t fiddle with it too much or you’ll deflate the volume Liam spent 15 minutes whipping into it. Just a gentle spread is all it needs. If you treat this process with respect—respect for the heat and respect for the air you incorporated—you won’t have a single sticky disaster on your hands!
Using Your Homemade Marshmallows in Other Recipes
So, you’ve successfully made a pan full of glorious, pillowy homemade sweets! Now what? The best part is that these homemade versions are worlds better than the stuff in the plastic bag when you use them in other things. They stay so much softer!
If it’s a chilly evening, you absolutely need these **marshmallows for hot chocolate**. They melt down into this impossibly creamy layer on top—none of that weird, waxy residue you get from the store-bought brand. They truly elevate a simple mug of cocoa. I love making a big batch of my hot cocoa mix and then sending a bag of these marshmallows along with it as a special delivery! You can find the recipe for that over here.
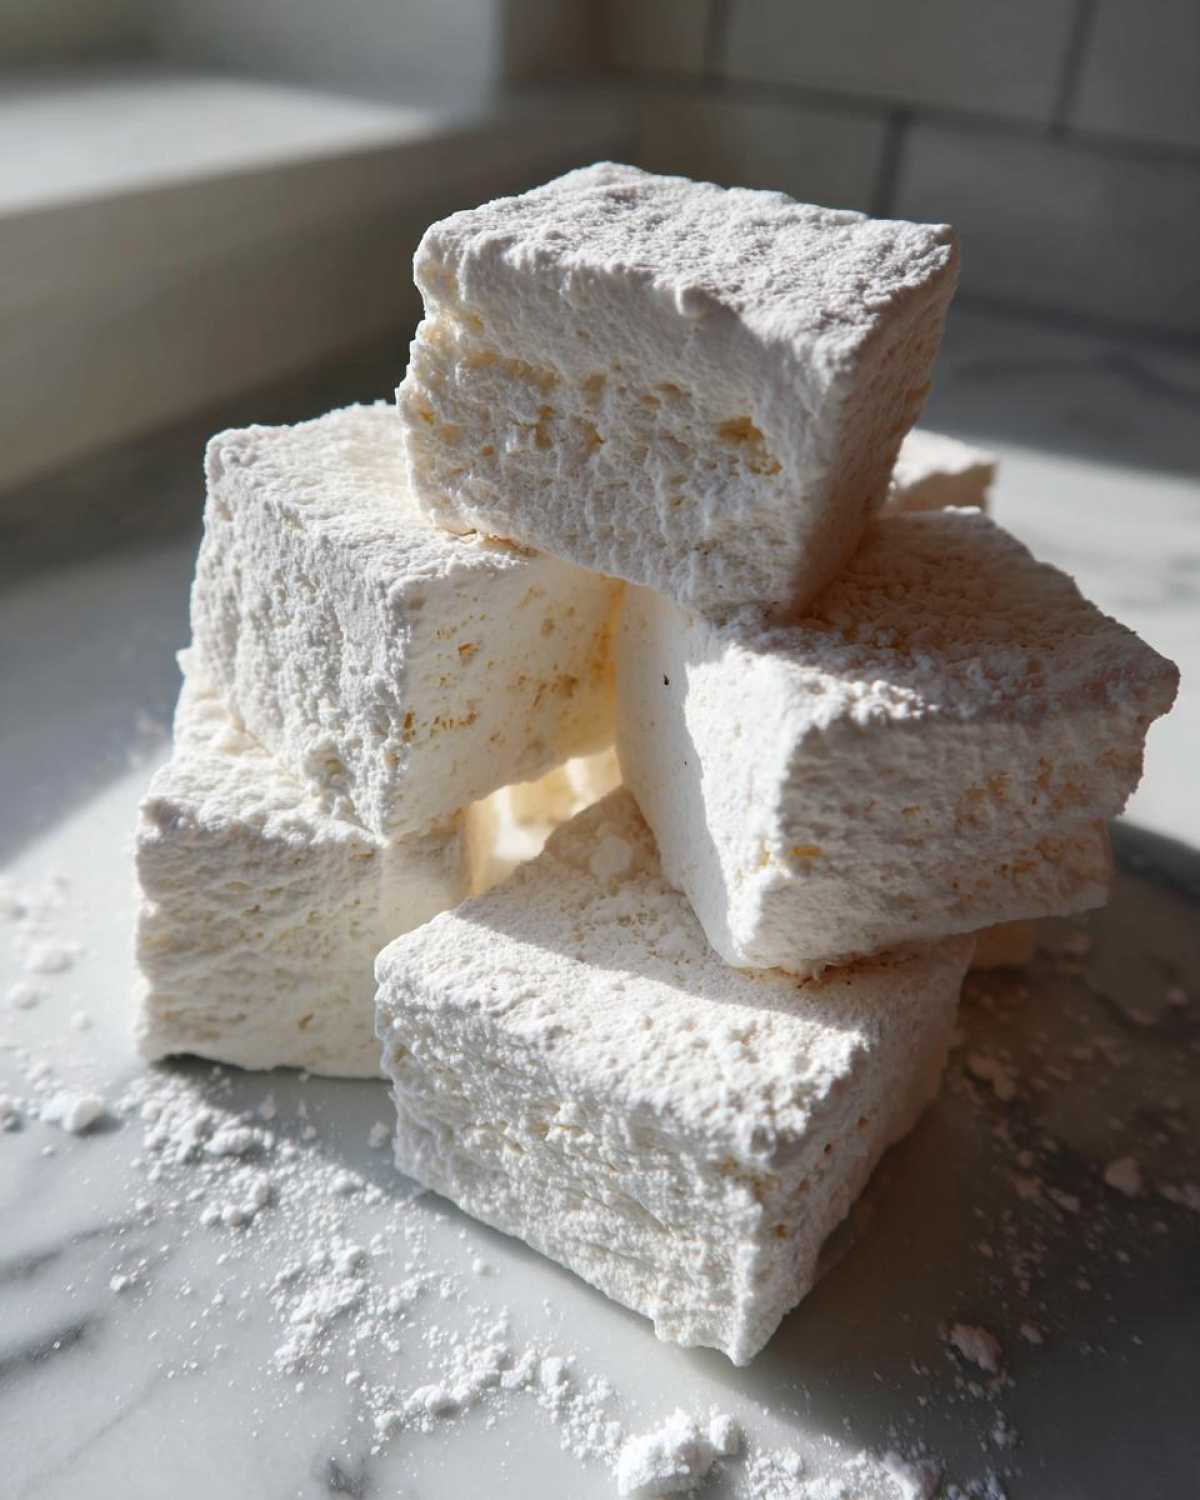
And for fire pits? Forget buying those stale, dense tubes. These are the star component in **homemade s’mores ingredients**. The fluffiness means they toast beautifully and get that perfect caramelized crust on the outside while staying gooey inside. If you want to try them in a bar format, you have to check out our recipe for peanut butter treats where they shine: Peanut Butter Rice Krispie Treats.
Making Gourmet Marshmallows Variations
Because we’ve mastered the basic vanilla version, we can dive right into the **gourmet marshmallow recipe** territory. It’s so simple! When you were whipping the mixture, right before you added the vanilla, we could have added so many things.
Think about swirling in 1 teaspoon of peppermint extract for a holiday flavor, or maybe adding two tablespoons of good quality cocoa powder for a rich chocolate version. You can even fold in some instant coffee powder if you’re feeling bold. They become instantly special little **gourmet marshmallows** ready for dipping or gifting. If you’re looking for more simple ideas, you can see how easy it is on another great site here!
Storage and Shelf Life for Your Soft Chewy Candy
You’ve created some absolutely divine **soft chewy candy**, and now you’re wondering how long you can keep that cloud-like perfection around. The good news is that because we cooked the sugar properly, these keep really well! The main enemy of homemade marshmallows is dry air, which makes them turn all hard and stale on the outside.
The trick here is containment. You must store your finished **homemade marshmallows** in a truly airtight container. I mean, seal it up tight! Keep them right there on the counter or in a cool pantry. Please, please, do not put them in the fridge. Refrigeration always makes candy sticky and pulls moisture from the air inside the fridge, which ruins that perfect delicate crust we worked so hard to achieve.
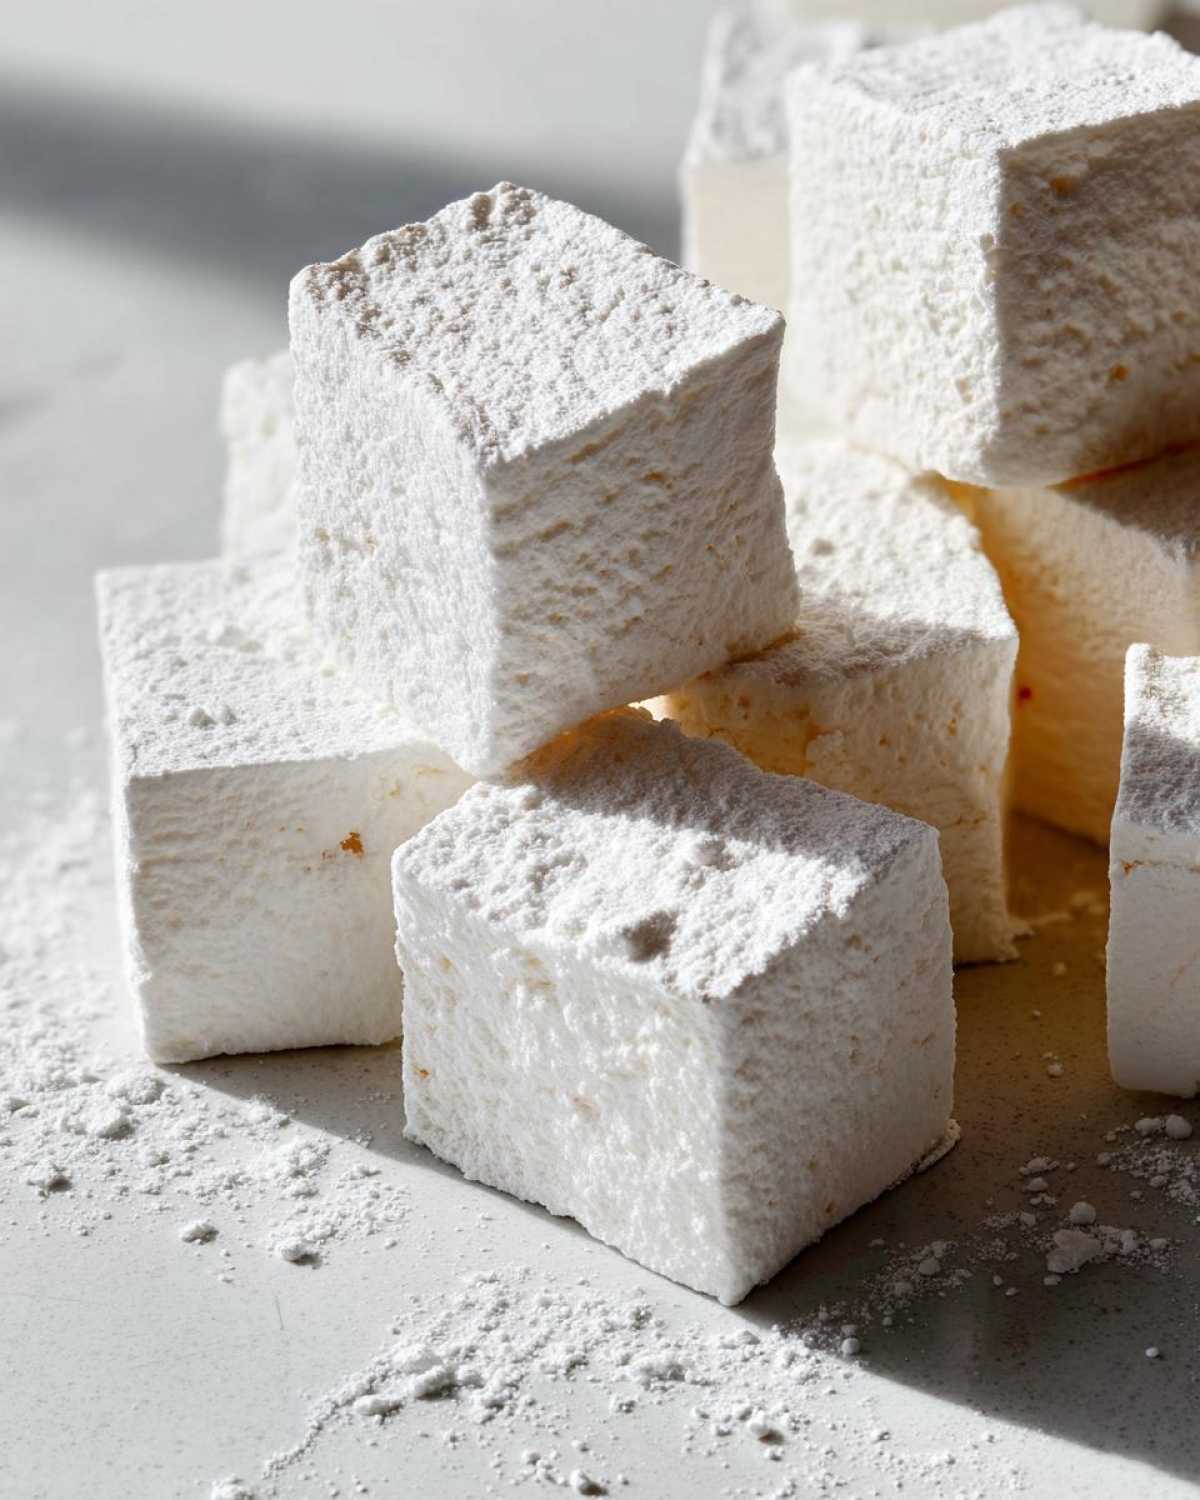
If you’ve cut them nicely and tossed them well in that starch/sugar mix, they should stay perfectly soft and bouncy for about 10 days to two weeks. If they look a little dull after that time, just toss them again in the dusting mixture. Honestly, I rarely have any leftovers longer than five days because Liam and I usually snack them away before then, but two weeks is a safe bet for maximum softness!
Frequently Asked Questions About Making Homemade Marshmallows
When you’re diving into something like making marshmallows from scratch, you always end up with a few questions buzzing in your head! Liam and I have answered all the ones we used to ask ourselves when we were just getting started. Don’t worry if you feel a little unsure; that’s why we’re here to make sure your dispatch delivery is a massive success! If you want to see more of our recipe dispatches, feel free to browse the main blog.
Can I make no gelatin marshmallows?
That’s a totally fair question, especially if you’re looking into specialized diets! For this particular recipe, the answer is tricky. Gelatin is what gives us that structural integrity—it’s what magically traps the air and lets the mixture set into those beautiful, firm squares that we want for cutting. If you skip the gelatin, you are moving away from a sliceable marshmallow and heading toward something more like a very thick, homemade syrup or a very soft **marshmallow fluff recipe**. If you want a truly firm, cuttable square, gelatin really is the ingredient needed for this method.
What is the difference between this and a marshmallow fluff recipe?
This is an important distinction! A **marshmallow fluff recipe** is fantastic if you want something you can dollop right onto a brownie or spread on toast—it stays soft, sticky, and spoonable. Our recipe is specifically designed for making that amazing, **pillowy homemade sweet** that you can slice cleanly into cubes. We cook the syrup higher and we let the gelatin set completely, which is the step that allows us to dust them and cut them into neat squares rather than keeping them loose in a jar.
Are these considered **holiday candy recipes**?
Absolutely! These are one of my favorite things to make when the weather gets chilly. They fall squarely into the best **holiday candy recipes** category. Because they look so gorgeous and taste incredible, they make fantastic **gifting homemade treats**. You can easily double or triple the batch, cut them into cute shapes, bag them up with a pretty ribbon, and you’ve just delivered instant holiday joy. For something extra festive, you could try a quick chocolate drizzle before they fully set!
Nutritional Estimates for This Pillowy Homemade Sweet
Okay, so while we’re focused way more on comfort and flavor in this kitchen than counting macros, I know some of you care about what goes into these sweet little clouds. Since we are making these **homemade marshmallows** completely from scratch, we’re using whole ingredients, which is awesome!
I want to be super clear: these numbers are just estimates, like a general idea based on the sugar and corn syrup ratios. When you start swapping things out for **natural homemade marshmallows**, the numbers definitely shift! But for a standard serving—which we are counting as four of these beautiful squares—here’s the general breakdown of what you’re looking at for this **pillowy homemade sweet**:
- Serving Size: 4 squares
- Calories: 150
- Sugar: 35g (Yep, that’s where most of the energy comes from!)
- Protein: 2g
- Fat: 0g
- Carbohydrates: 38g
See? Zero fat! That’s another reason I love these so much—they are basically pure, light sweetness and air. It’s comforting to know that while we’re enjoying this fantastic **soft chewy candy**, it’s not weighing us down with any heavy fats. Just pure, simple homemade goodness!
Send Your Delicious Message: Share Your Homemade Marshmallows
Well, that’s it! You’ve successfully navigated the sugar syrup and whipped up a batch of the most amazing **homemade marshmallows**. Now it’s your turn to send out a delicious message! Did you try them in hot cocoa, or are you already prepping for **homemade s’mores ingredients**? Let me know how they turned out in the comments below. If you need to reach out with a question, you can always find us over at our contact page. Happy baking!
PrintEasy, Fluffy Homemade Vanilla Marshmallows (The Best Basic Recipe)
Learn how to make soft, pillowy homemade marshmallows from scratch. This easy recipe results in melt-in-your-mouth perfection that beats store-bought versions every time. Perfect for hot chocolate or homemade s’mores ingredients.
- Prep Time: 20 min
- Cook Time: 15 min
- Total Time: 4 hours 35 min
- Yield: About 4 dozen
- Category: Dessert
- Method: Mixing/Whisking
- Cuisine: American
- Diet: Vegetarian
Ingredients
- 3 packets unflavored gelatin
- 1 cup cold water, divided
- 1 cup granulated sugar
- 1 cup light corn syrup
- 1/4 cup water
- 1/4 teaspoon salt
- 1 tablespoon pure vanilla extract
- 1/2 cup powdered sugar, for dusting
- 1/2 cup cornstarch, for dusting
Instructions
- Lightly grease a 9×13 inch baking pan. In a small bowl, mix the powdered sugar and cornstarch together. Generously dust the bottom and sides of the prepared pan with this mixture. Set aside.
- In the bowl of a stand mixer fitted with the whisk attachment, sprinkle the gelatin over 1/2 cup of the cold water. Let it sit for 5 to 10 minutes to bloom.
- While the gelatin blooms, combine the granulated sugar, corn syrup, the remaining 1/4 cup cold water, and the 1/4 cup of water for the syrup in a medium saucepan. Stir to combine.
- Heat the sugar mixture over medium heat, stirring until the sugar dissolves. Stop stirring once it boils. Attach a candy thermometer to the side of the pan.
- Cook the syrup without stirring until it reaches 240 degrees Fahrenheit (soft-ball stage). This usually takes about 8 to 10 minutes.
- Once the syrup reaches 240 degrees F, carefully remove the pan from the heat.
- Turn the stand mixer on low speed. Slowly and carefully pour the hot syrup down the side of the mixing bowl into the bloomed gelatin mixture. Avoid pouring directly onto the whisk.
- Once all the syrup is added, increase the mixer speed to high. Beat for 12 to 15 minutes until the mixture is very thick, glossy, white, and has increased significantly in volume. It should hold stiff peaks.
- Stop the mixer. Beat in the vanilla extract.
- Working quickly, scrape the marshmallow mixture into the prepared pan. Use a lightly oiled spatula or lightly oiled hands to gently spread the mixture evenly into the pan.
- Dust the top surface generously with the remaining powdered sugar and cornstarch mixture.
- Let the marshmallows set uncovered at room temperature for at least 4 hours, or preferably overnight.
- Once set, turn the marshmallow slab out onto a cutting board dusted with the sugar/cornstarch mixture. Use a large, sharp, oiled knife or pizza cutter to cut the slab into squares. Toss the cut edges in the remaining dusting mixture to prevent sticking.
- Store your soft chewy candy in an airtight container at room temperature for up to two weeks.
Notes
- For vanilla bean marshmallows, scrape the seeds from one vanilla bean and add them to the sugar mixture before heating.
- If you want to make gourmet marshmallows, you can add 1 teaspoon of peppermint extract or 2 tablespoons of cocoa powder (with a little extra liquid if needed) during the last minute of mixing.
- To make perfect s’mores ingredients, cut the marshmallows into large cubes before setting completely, then lightly toast them over a flame.
- If you prefer a recipe for soft marshmallows without corn syrup, you will need to substitute it with honey or maple syrup, but this will change the final texture and setting time.
Nutrition
- Serving Size: 4 squares
- Calories: 150
- Sugar: 35
- Sodium: 15
- Fat: 0
- Saturated Fat: 0
- Unsaturated Fat: 0
- Trans Fat: 0
- Carbohydrates: 38
- Fiber: 0
- Protein: 2
- Cholesterol: 0