

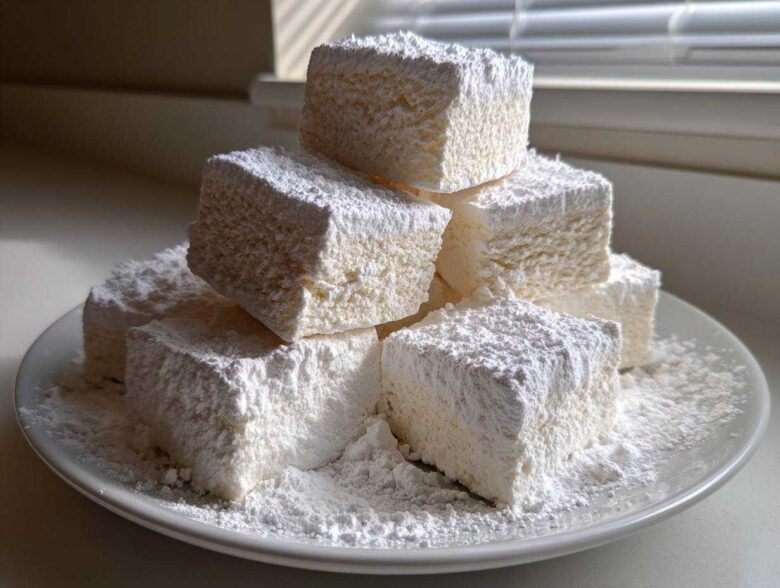
Oh my goodness, you are in for such a treat! Forget those sad, slightly stale bricks you find hiding in fancy coffee shop bins. Making your own candy really feels like magic, and trust me, **homemade marshmallows** are the gateway drug to serious DIY sweets addiction. I spent way too long battling sticky messes until I finally cracked the code. This is the easiest, fluffiest recipe I’ve ever found, guaranteeing you get those pillowy soft squares that just melt the second they hit your tongue. Seriously, once you try these, you won’t ever look back!
Why This is the Best Homemade Marshmallows Recipe for Beginners
I’ll tell you exactly why I call this the best **easy homemade marshmallow recipe**: it takes away all the guesswork! The two absolute pillars of success here are blooming the gelatin correctly—which is just letting it soak up the water for ten minutes—and hitting that perfect syrup temperature, 240 degrees! If you nail those first steps, you’ve done 90% of the hard work. It sounds intense, but hitting that soft-ball stage is what guarantees the absolute **best texture marshmallows** you’ll ever encounter. Check out my main baking resource over at my baking hub if you want to see more tricks like this!
Achieving Pillowy Soft Homemade Marshmallows
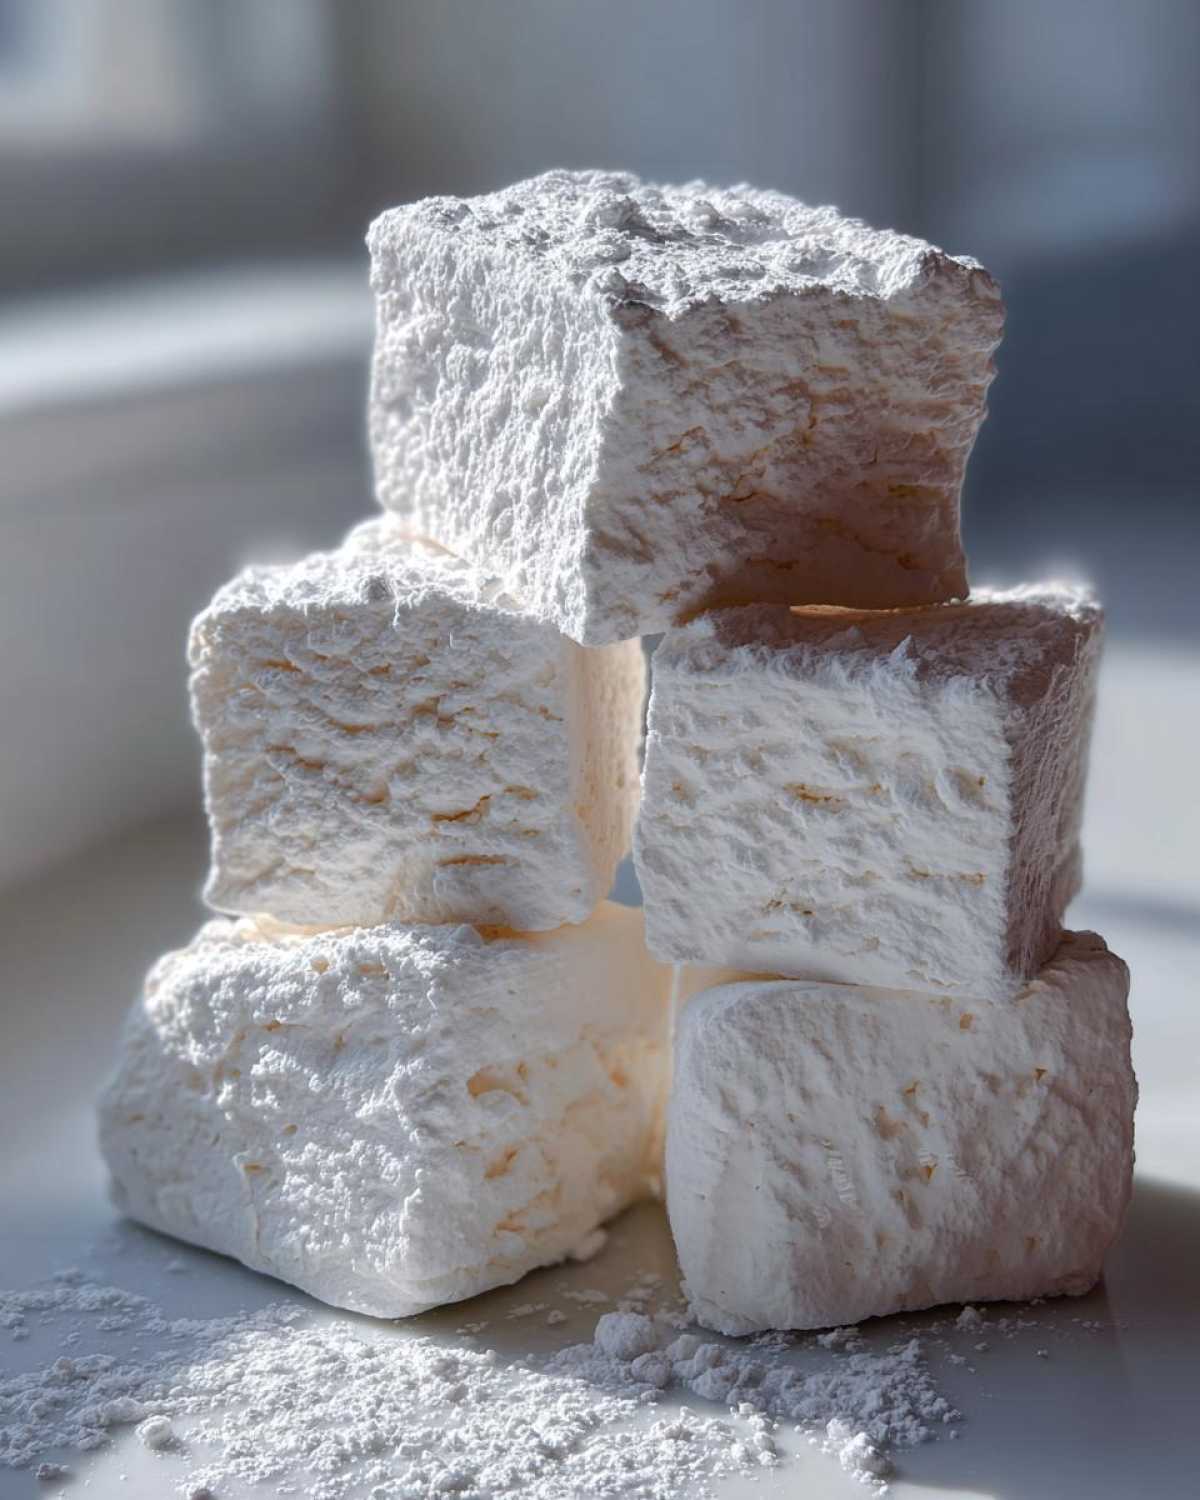
The texture is everything, right? We aren’t aiming for chewy; we want dreamy! The stand mixer is your best friend here. You need to let it whip that mixture on high for a full 12 to 15 minutes. Don’t cheat this step, even if your arm is tired! Watching that glossy mixture turn pale and cool down is how you create those **pillowy soft marshmallows** that feel like biting into sweet, airy clouds. Pure perfection!
Gathering Ingredients for Homemade Marshmallows From Scratch
Okay, before we even think about turning on the stove, let’s talk about what you need. Making **homemade marshmallows from scratch** requires a very specific shopping list—that’s why this feels like proper **diy candy making**! Don’t stress; most items are standard pantry staples, but the quality matters when there are so few ingredients.
Here’s the rundown for our **basic marshmallow recipe**:
- Three tablespoons of unflavored gelatin powder. Get a decent brand; the flavor has to be clean!
- Half a cup of cold water for blooming that gelatin.
- One cup of granulated sugar for body.
- Half a cup of light corn syrup—this is key for that non-grainy set.
- A quarter cup of water, just for making the syrup.
- A tiny pinch of salt to wake up all the sweet flavors.
- One teaspoon of pure vanilla extract—if you can use real vanilla bean seeds, wow, holy smokes!
- And finally, the coating team: half a cup of powdered sugar mixed with half a cup of cornstarch.
Ingredient Notes and Substitutions
Let’s talk corn syrup for a second. I know some folks search for a **marshmallow recipe without corn syrup**, and while you *can* swap it out for glucose syrup or even raw honey, you have to be warned: it changes things! Honey tends to make the marshmallows stickier and brown slightly, and it definitely changes the flavor. For this super light, fluffy goal, corn syrup is absolutely the non-negotiable star. It keeps the sugar from crystallizing into sand, which is the enemy of soft candy!
Also, remember that vanilla? If you’re doing the **vanilla bean marshmallows** version, just scrape the seeds right out of one magnificent bean pod and stir them in at the very end with the extract. It’s an extra step, but the tiny black specks floating in your white clouds? Gorgeous!
Essential Equipment for Your Fluffy Marshmallow Tutorial
Okay, before you even reach for your sugar, we need to set up the kitchen properly. This is where a lot of people trip up when they try **how to make marshmallows from scratch** for the first time—they don’t have the right tools! Don’t worry, you probably already own most of this stuff, but two items are absolute must-haves if you want that perfect fluffy result.
First up, you simply cannot beat the power of a good, powerful stand mixer. You’re whipping air into sugar syrup for nearly 15 minutes straight. Hand mixing? Forget about it! It’ll take forever and you probably won’t get the volume we need for that airy texture. Make sure it has the whisk attachment ready to go.
Second, and this is the most important piece for success, you need a candy thermometer. I can’t stress this enough! Syrup temperature matters tremendously for the final set. If it’s too cool, your marshmallows will collapse; if it’s too hot, they’ll be hard as rock candy when they cool down. You need to hit that 240 degrees Fahrenheit mark dead on. It’s the secret weapon for guaranteed results every single time!
Beyond that, you just need standard kitchen gear. Gather up a sturdy 9×13 inch pan—that’s what we’re using for the classic slab—a small saucepan, a heat-safe spatula, and a very sharp, large knife (or preferably a pizza cutter) for slicing later. Having everything out and ready means when that syrup hits temperature, you can move lightning fast!
Step-by-Step Instructions: How to Make Marshmallows From Scratch
Alright, let’s get our hands sticky! This section is where we put all that prep work to good use. Remember, speed and precision are your friends when dealing with hot sugar. If you have a helper, now is the time to recruit them to watch the thermometer while you manage the mixer! Nothing tastes better than a batch of **homemade marshmallows** you made entirely yourself, and following these core steps ensures success for your **fluffy marshmallow tutorial**.
Preparing the Pan and Blooming Gelatin
First things first, get that 9×13 pan lined up. You need to grease it lightly—I usually use just a high heat oil spray or a smear of butter—and then you have to dust it. And I mean *dust* it! Mix up your powdered sugar and cornstarch—that’s the magic non-stick shield—and coat every single interior surface generously. Shake out the excess, but make sure it looks totally white and dry. While that’s sitting, sprinkle your gelatin over the cold water in your mixer bowl and let it sit quietly for ten minutes to bloom. That gelatin needs to soak up every drop it can before we introduce heat!
Cooking the Syrup to the Correct Stage
This part is serious business, so put your candy thermometer right in the saucepan with the sugar, corn syrup, and the small amount of water. Stir gently ONLY until the sugar dissolves completely off the bottom. Once you see those first bubbles breaking the surface, back off the stirring completely. We need to cook this carefully until it hits exactly 240 degrees Fahrenheit. If you accidentally pour that super-hot syrup into the mixer bowl too fast, or if it’s the wrong temperature, the whole batch can seize up on you! Be gentle as you pour it slowly down the side of the mixing bowl once it hits temp.
Whipping for Ultimate Homemade Marshmallows Texture
Once that beautiful, dangerous syrup is safely drizzled into the bloomed gelatin, turn your mixer up to high speed. Now you wait—and trust me, this wait is where the structure happens. You need to let this whip for a solid 12 to 15 minutes. Seriously, set a timer! You are looking for a few major visual cues: the bowl should be warm but not hot anymore, the mixture should look super thick and glossy, and when you stop the whisk, it should leave stiff, beautiful peaks. That’s the sign of your incredible **foam structure**! Gently fold in your vanilla extract after you stop the motor for the final mix.
If you want to see my secret for getting desserts to set perfectly without baking—check out my no-bake peanut butter pie recipe; the technique for chilling is similar!
The Marshmallow Cutting Guide for Perfect Homemade Marshmallows
Okay, the hard part is over, but this next bit determines how pretty (and usable!) your treats will be. We’re talking about the final setup: getting the marshmallow slab out of the pan and slicing it neat. Remember that powdered sugar and cornstarch mixture we used earlier? Grab the rest of it! You need to dust a big cutting board heavily before you do anything else. Take a deep breath, and gently invert that entire slab onto your coated board. It should easily release, but if it gives you any side-eye, gently shaking the pan usually does the trick.
Use a big, sharp knife or, my favorite secret weapon, a pizza cutter that you’ve lightly sprayed with cooking spray. Glide through the marshmallow, cutting squares of the size you prefer. Don’t press straight down hard; try to use a gentle sawing motion so you don’t deflate all that beautiful air we whipped in there! If you’re looking for other great no-bake treats besides these gorgeous marshmallows, check out my energy bites recipe—they share a similar ‘no-bake’ spirit!
Once everything is cut, immediately toss the little sticky sides of the squares into whatever coating powder you have left. This step stops the squares from gluing themselves together in storage, which is just heartbreaking. You want distinct, fluffy cubes ready for toasting or gifting!
Serving Suggestions for Your Gourmet Marshmallows Recipe
Now comes the really fun part—eating them! These aren’t just for looking pretty in a jar, you know? The best part about making your own is seeing how incredibly versatile they are compared to the store-bought kind. Seriously, your friends will ask where you got them!
First off, they absolutely transform your evening beverage. Imagine a cold evening, you’ve made a rich, dark hot chocolate (maybe even my copycat pumpkin spice latte variation but swap the pumpkin for spice?), and instead of those dusty little cylinders, you drop in one of these massive, soft pillows. They melt slowly and create this incredible, creamy froth on top. They are the ultimate upgrade for **marshmallows for hot chocolate**.
And you know I can’t talk about fluffy candy without talking about the fire! You have to try making gourmet s’mores. Forget the standard Hershey bar—we need something worthy of our effort here. Toast these babies until they are perfectly golden brown and gooey. They become the star ingredient in a proper s’mores experience, whether you’re making a quick campfire treat or going all out with a skillet cookie base. I even chop mine small and fold them into buttercreams when I frost cakes. Trust me, once you taste the difference, you’ll be thinking up new ways to eat these every single day!
Storage and Gifting Homemade Candy with Your Homemade Marshmallows
So, you made the perfect batch! Now, how do we keep them from turning into one giant, sticky blob? Thankfully, because we used that generous coating of cornstarch and powdered sugar, storage is pretty straightforward. Just seal them up tight in an airtight container. No need to refrigerate these beauties—they actually prefer to hang out at room temperature. Honestly, they’ll keep wonderfully for about two weeks, though I’ve never actually had a batch last that long!
The other amazing thing about these beauties is how well they travel as gifts. Who doesn’t love receiving homemade candy? This isn’t just any treat; it feels so special, and it’s so much easier than trying to bake crusts or temper chocolate. For **gifting homemade candy**, presentation is everything. I usually layer them nicely in a cellophane bag and tie it off with a thick piece of twine and maybe a little cinnamon stick attached.
For gifting your **homemade marshmallows**, try adding a small jar of high-quality hot cocoa mix right alongside them. That way, the recipient instantly knows how to use them perfectly! If you’re making fruit-flavored ones later—maybe lime or strawberry—you could pair them with some of my easy peach butter recipe for a truly stunning gift basket setup. Honestly, the look on people’s faces when they realize you whipped these all up yourself? That’s the best part of the whole process!
Frequently Asked Questions About Making Homemade Marshmallows
I knew you’d have questions! When you leap into trying something like making candy from scratch, of course you’ll have a few doubts. It’s totally normal! I’ve compiled some of the things I hear most often after someone tries this recipe for the first time. You can find more general bits about my site over on my About page, but let’s tackle the sticky business first!
Can I use honey instead of corn syrup in this easy homemade marshmallow recipe?
Oh, this comes up all the time! While you technically *can* substitute honey for corn syrup in an **easy homemade marshmallow recipe**, I strongly advise against it if you are chasing that light, fluffy texture we talked about. Honey has a higher water content and a different type of sugar structure than corn syrup. If you use honey, your syrup might take forever to reach that crucial 240 degrees, and even if it does, the final marshmallow usually ends up being much stickier, darker in color, and sinking or weeping—meaning it releases liquid—a little bit faster after setting.
How do I get the coating marshmallows recipe just right?
This coating, which is really about preventing doom (aka sticking!), is SO important. People often just dump the powdered sugar on, but you need that cornstarch buddy right alongside it for the best results. You want a blend of half powdered sugar and half cornstarch, and you need about a half-cup of each, so a one-to-one ratio works perfectly! Make sure you dust your pan heavily before pouring, and then dust your cutting board, and then toss every single cut square in the mixture. If you skip completely coating the sides after slicing, you’ll open your container later to a single, giant, sugary marshmallow brick, and trust me, nobody wants that drama!
Remember, even if your first batch isn’t magazine perfect, they will still taste absolutely divine, especially if you toast them up!
Estimated Nutritional Data for Homemade Marshmallows
When you’re making something this delicious from scratch, you’re probably wondering about the numbers, right? I get it! It’s important to know what you’re enjoying, even if we’re mostly focused on texture around here. Please remember that this is just an estimate based on the exact recipe ingredients I listed above—every brand of corn syrup or sugar can slightly change these values.
These figures are based on a serving size of one standard square cut from the 9×13 pan. These are definitely a treat, but gosh, they are worth every single calorie!
- Serving Size: 1 square
- Calories: 110
- Sugar: 25g
- Sodium: 15mg
- Fat: 0g
- Saturated Fat: 0g
- Unsaturated Fat: 0g
- Trans Fat: 0g
- Carbohydrates: 28g
- Fiber: 0g
- Protein: 2g
- Cholesterol: 0mg
This data assumes you are using the exact measurements listed in the recipe card for the syrup and the dusting mixture. If you use less dusting powder, the sugar content will be slightly lower, but honestly, you need that coating to stop the sticking!
For the most accurate information regarding how this recipe relates to my site policies, always check out my official disclaimer page. Primarily, enjoy these treats knowing you made them with love from simple ingredients!
PrintThe Easiest, Fluffiest Homemade Vanilla Marshmallows (Step-by-Step Guide)
Make soft, pillowy homemade vanilla marshmallows from scratch. This straightforward recipe guarantees a superior texture perfect for hot chocolate or s’mores.
- Prep Time: 20 min
- Cook Time: 15 min
- Total Time: 4 hr 35 min
- Yield: About 36 large squares
- Category: Dessert
- Method: Candy Making
- Cuisine: American
- Diet: Vegetarian
Ingredients
- 3 tablespoons unflavored gelatin powder
- 1/2 cup cold water (for blooming gelatin)
- 1 cup granulated sugar
- 1/2 cup light corn syrup
- 1/4 cup water (for syrup)
- 1/4 teaspoon salt
- 1 teaspoon pure vanilla extract
- 1/2 cup powdered sugar (for dusting)
- 1/2 cup cornstarch (for dusting)
Instructions
- Lightly grease a 9×13 inch baking pan. Mix the powdered sugar and cornstarch together in a small bowl. Dust the prepared pan generously with this mixture, shaking out any excess.
- In the bowl of a stand mixer, sprinkle the gelatin powder over the 1/2 cup of cold water. Let it sit for 10 minutes to bloom.
- While the gelatin blooms, combine the granulated sugar, corn syrup, 1/4 cup water, and salt in a small saucepan. Stir over medium heat until the sugar dissolves. Stop stirring and bring the mixture to a boil. Cook until the syrup reaches 240 degrees Fahrenheit (soft-ball stage) on a candy thermometer.
- Once the syrup reaches temperature, remove it from the heat. Turn the stand mixer on low speed. Slowly and carefully pour the hot syrup down the side of the mixing bowl into the bloomed gelatin. Avoid pouring directly onto the whisk.
- Increase the mixer speed to high. Whip for 12 to 15 minutes until the mixture is very thick, glossy, and has cooled down significantly. It should hold stiff peaks.
- Stop the mixer and mix in the vanilla extract by hand with a spatula.
- Working quickly, pour the marshmallow mixture into the prepared pan. Use a lightly oiled spatula to smooth the top.
- Dust the top surface generously with more of the powdered sugar/cornstarch mixture. Let the marshmallows set, uncovered, at room temperature for at least 4 hours, or preferably overnight.
- To cut, dust a large cutting board with the remaining mixture. Invert the marshmallow slab onto the board. Use a large, oiled knife or pizza cutter to cut into squares. Toss the cut sides in the dusting mixture to prevent sticking.
Notes
- For a gourmet touch, substitute vanilla extract with the seeds scraped from one vanilla bean.
- If you plan to use these for s’mores, cutting them slightly larger than usual works well.
- Store finished marshmallows in an airtight container at room temperature for up to two weeks.
Nutrition
- Serving Size: 1 square
- Calories: 110
- Sugar: 25
- Sodium: 15
- Fat: 0
- Saturated Fat: 0
- Unsaturated Fat: 0
- Trans Fat: 0
- Carbohydrates: 28
- Fiber: 0
- Protein: 2
- Cholesterol: 0