

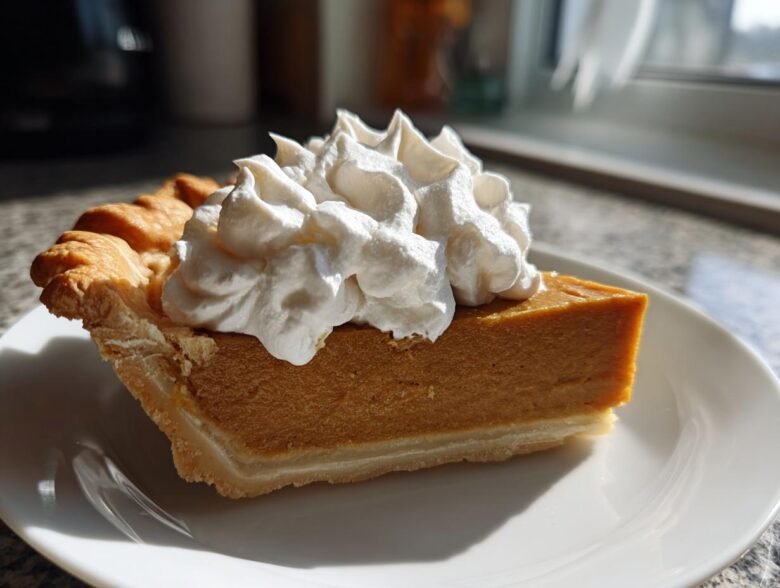
You know how sometimes a smell instantly pulls you back to a specific moment? For me, the scent of warm brown sugar and melting butter throws me right back to Sundays at Liam’s family house. Forget pumpkin or pecan; my heart belongs to that perfect, gooey slice of butterscotch pie. It’s the ultimate indulgence for a rich dessert recipes night, but let’s be honest—most recipes out there result in scrambled eggs or a grainy mess. Not ours!
That’s where I step in. Liam has that magical touch where he just knows how to make things perfect, especially that silky smooth pie filling, but he forgets to write down the specifics. So, I took his effortless talent and translated every little movement into steps you can trust. This Old-Fashioned Creamy Butterscotch Pie recipe is the result: honest-to-goodness, from-scratch deliciousness that will make everyone at your table ask for the number of the “Cookery Courier.” If you want to know more about how we started sending these warm messages, you can check out our story over at Cookery Courier. Trust me, mastering this means you’re delivering a serious message of comfort.
Why This Old-Fashioned Butterscotch Pie is Your Next Favorite Dessert
I know you’ve seen enough stunning pies online to be skeptical, but this one is different. We’re talking about serious childhood nostalgia baked into a pan. When you make this old fashioned butterscotch pie from scratch, you get layers of flavor you just can’t replicate from a box. And more importantly, you get that *texture*.
- It delivers that completely velvety butterscotch pudding pie experience—no grainy sugar, ever!
- The flavor is deep and authentic because we’re using packed brown sugar, not just white sugar trying to imitate caramel.
- It’s honestly the best holiday pie recipe when you need a break from the usual, and guests absolutely lose their minds over it.
If you want to see another classic that Liam absolutely nails every time, check out the steps for our classic pumpkin pie recipe next!
Achieving the Perfect Silky Smooth Pie Filling
This is the main reason we cook from scratch, folks! Forget those wimpy, thin fillings you get when you use pre-made pudding mixes. Liam insists that the magic comes from whisking the cornstarch and sugar perfectly *before* any liquid goes in. That initial dry mix eliminates clumps before they even start, guaranteeing you a velvety butterscotch pudding pie that scoops like silk. It’s worth the extra three minutes of stirring; trust me on this one.
A Classic Dessert to Bake for Any Gathering
When the weather cools down, everyone defaults to apple or pecan, right? Don’t get me wrong, I love those, but nothing stands out like a perfect, creamy butterscotch pie. It feels special, slightly retro, and unbelievably indulgent. Whether it’s Thanksgiving, a family reunion, or just a really dreary Tuesday, this pie sends the message, “I made this specifically for you.” It’s easily the best holiday pie recipe to surprise people with.
Ingredients for Your Creamy Butterscotch Pie Recipe
Alright, let’s get into the good stuff. This is where we gather the crew for the show. Remember, since this is a from scratch pie crust situation, you need to check that off first! We’re making the custard filling today, and Liam’s list here is incredibly specific about how things need to be prepped. No sloppy measuring allowed if you want that perfect texture.
- 1 (9-inch) unbaked pie crust (from scratch or store-bought—no judgment here!)
- 1 cup packed light brown sugar (Make sure it’s packed down tight!)
- 1/4 cup cornstarch (Don’t skimp on this; it’s key to the creaminess!)
- 1/4 teaspoon salt
- 1 1/2 cups cold water
- 3 large egg yolks, lightly beaten (We save the whites for another day, sorry, meringue lovers!)
- 2 tablespoons unsalted butter
- 1 teaspoon vanilla extract
- For the Topping:
- 1 cup heavy whipping cream
- 2 tablespoons powdered sugar
- 1/4 teaspoon vanilla extract
See? It looks like just a few things, but every item plays a vital role in creating this incredible caramel custard dessert.
Ingredient Notes and Substitutions for Your Butterscotch Pie
Before you start grabbing things, let me give you Chloe’s translation of Liam’s secret ingredient knowledge. Getting these details right moves you from a decent pie to the one everyone asks for later! If you’re worried about handling the crust, I have a whole post on making a quick homemade brown gravy recipe from scratch that covers technique, and trust me, the pie crust rules are similar!
First, the vanilla. Use the good stuff, the pure extract. Skip the imitation flavorings. That tiny bit of pure vanilla makes the butterscotch flavor really pop and cuts through the richness of this indulgent sweet treat.
Second, the cornstarch. It has to be fresh. Old cornstarch can clump up or just not activate properly, which means your silky smooth pie filling turns into slightly sweetened goo. We need that thickening power!
Finally, the crust. Liam prefers making his from scratch pie crust—he says the slight saltiness helps balance the sweetness. But if you’re strapped for time and need an easy homemade butterscotch dessert experience, grabbing a high-quality, store-bought crust is totally fine. Just make sure it’s blind-baked and completely cool before we pour in that hot filling!
How to Make the Ultimate Butterscotch Pie From Scratch
Okay, buckle up, because this is where the magic—and maybe a little panic—happens! Making a true, old fashioned butterscotch pie filling means using the stovetop and dealing with eggs. Don’t let that scare you off! This is the “message” that requires concentration, but I promise, once you get the rhythm, you’ll feel like Liam himself. We’re focusing on making sure that final step yields a perfect, creamy custard dessert.
I remember the first time I attempted this step for him. I poured the hot sugar mixture into the yolks way too fast, and bam! I ended up with sweet, butterscotch-flavored scrambled eggs. I was ready to toss the whole thing, but Liam just smiled, handed me a whisk, and said, “Slow kisses, Chloe. The yolks need a slow kiss.” That’s how I learned about tempering. It’s crucial!
Preparing the Crust and Setting the Filling for Your Butterscotch Pie
We start simple because the custard needs our full attention later. First step is making sure your pie shell is ready. If you baked it blind (which I highly recommend for this recipe), make sure it’s completely cooled down. I mean ice cold. If you pour hot filling into a warm crust, the bottom gets soggy, and we are aiming for the best dessert here, not a sad, soupy mess!
Once that filling is poured in—and we’ll get to how to make it perfect in a second—you need patience, which, as you know, is something I’m still working on. Press a piece of plastic wrap directly onto the surface of the filling. No air gaps allowed! This stops that weird rubbery skin from forming while it chills. Then, it goes into the fridge for at least three hours. It really needs that time to set into that incredible, sliceable, velvety butterscotch pudding pie texture.
Achieving the Silky Smooth Pie Filling Consistency
Now for the core of this incredible butterscotch pie experience, steps 2 through 8. This is Liam’s method, and it works every time. In your saucepan—don’t turn the heat on yet!—whisk your brown sugar, cornstarch, and salt until you can’t see any dry pockets anymore. Then, slowly whisk in that cold water until it looks like smooth, slightly muddy water. Turn the heat to medium.
You have to stir constantly until it bubbles and thickens. Seriously, don’t walk away! Once it boils for one full minute, you take it off the heat. Now comes the “slow kiss” part: Take half a cup of that hot mixture and pour it in a tiny, thin stream into your lightly beaten egg yolks *while you whisk the yolks like crazy*. Got it? Whisk, whisk, whisk! Don’t stop! This raises the yolk temperature gently.
Once the yolks are whisked and safe, pour that whole mixture back into the saucepan with the rest of the sugar base. Return it to the medium heat and cook, stirring constantly, until it thickens again and boils for one minute. It should coat the back of a spoon beautifully. Get it off the heat fast! Then, stir in the 2 tablespoons of butter and the vanilla until glossy. That process guarantees that silky smooth pie filling texture you’re looking for. It’s what separates the amateurs from the couriers! Want more tips on making things smooth? You should see how we do the gravy over at Easy Salisbury Steak with Mushroom Gravy.
If you’re looking for other ways people make this stunning dessert, check out how they handle the filling over at Tastylicious!
Tips for the Best Creamy Butterscotch Pie Recipe
We’ve made the pie, we’ve chilled the pie, but now we need to make absolutely sure this masterpiece turns out exactly how Liam intended—rich, gorgeous, and totally foolproof. I always say that making a great dessert is 90% trusting your instincts and 10% following the little rules Liam drilled into me. This is how we guarantee that top-tier rich dessert recipes result every single time.
Since we are going for the ultimate creamy butterscotch pie recipe, our main job is vigilance during cooking. I learned the hard way that if you let that custard sit off the heat for too long before tempering the eggs, you risk a lumpy disaster. Always have your yolks ready to go! If you are a visual learner like I was when I first started, I highly recommend seeing someone else tackle this tricky custard over at Medium to watch the technique.
Look, I know the included recipe calls for whipped cream because that’s my preference (it’s lighter!), but if you want a true Southern style pies experience, you’ve got to switch gears. Liam’s notes tell you that you can use a meringue instead. If you decide to go that route, treat it like a completely separate component. Whip your egg whites, add your sugar, and then you have to brown it right before serving. Pop that pie under a hot broiler for just 30 seconds—watch it like a hawk because it goes from pale white to burnt charcoal in a blink! That browned meringue is an amazing counterpoint to the sweet filling.
And here’s one last thing I always do, which is based on the notes: I over-whisk the cornstarch and sugar in that dry pan. Seriously, I whisk until my arm hurts a little. It’s impossible to over-whisk that initial dry mixture before adding the water. If you feel like you’ve whisked enough, whisk it five more times. That thorough blending is what makes sure that caramel custard dessert is flawlessly smooth when it chills. For more incredible comfort food tips, check out our guide on making best creamy cheesy scalloped potatoes!
Storage and Reheating Instructions for Your Butterscotch Pie
Okay, you’ve successfully delivered your message of comfort! This butterscotch pie is rich, and just like any good thing, we need to treat it right so it stays delicious for leftovers. Since we used that beautiful, fluffy whipped cream topping, we need to be a little careful here. This isn’t something you leave out on the counter after dinner, not if you want that fantastic texture!
Because this pie is made with a cooked custard filling covered with fresh whipped cream, it absolutely has to stay chilled. You should cover the pie loosely—and I mean *loosely*—with plastic wrap or foil, making sure the wrap doesn’t touch that luscious whipped topping. If it does touch, you’ll end up with a sticky mess when you uncover it. It’ll happily live in the fridge for about three to four days. Any longer, and that crust starts getting a bit sad, bless its heart.
Now, for the reheating question: We don’t. This pie is meant to be served cold! It’s the chill that firms up that silky smooth pie filling into that perfect sliceable consistency that makes it such an indulgent sweet treat. Trying to warm it up will just melt your gorgeous whipped cream border into a puddle. If, for some wild reason, you have leftovers of just the plain filling (maybe you tested too much while cooking—I won’t tell!), that can be warmed up gently on the stovetop, but honestly, just eat this amazing rich dessert recipes slice cold, straight from the fridge. That’s how we honor the hard work we put in!
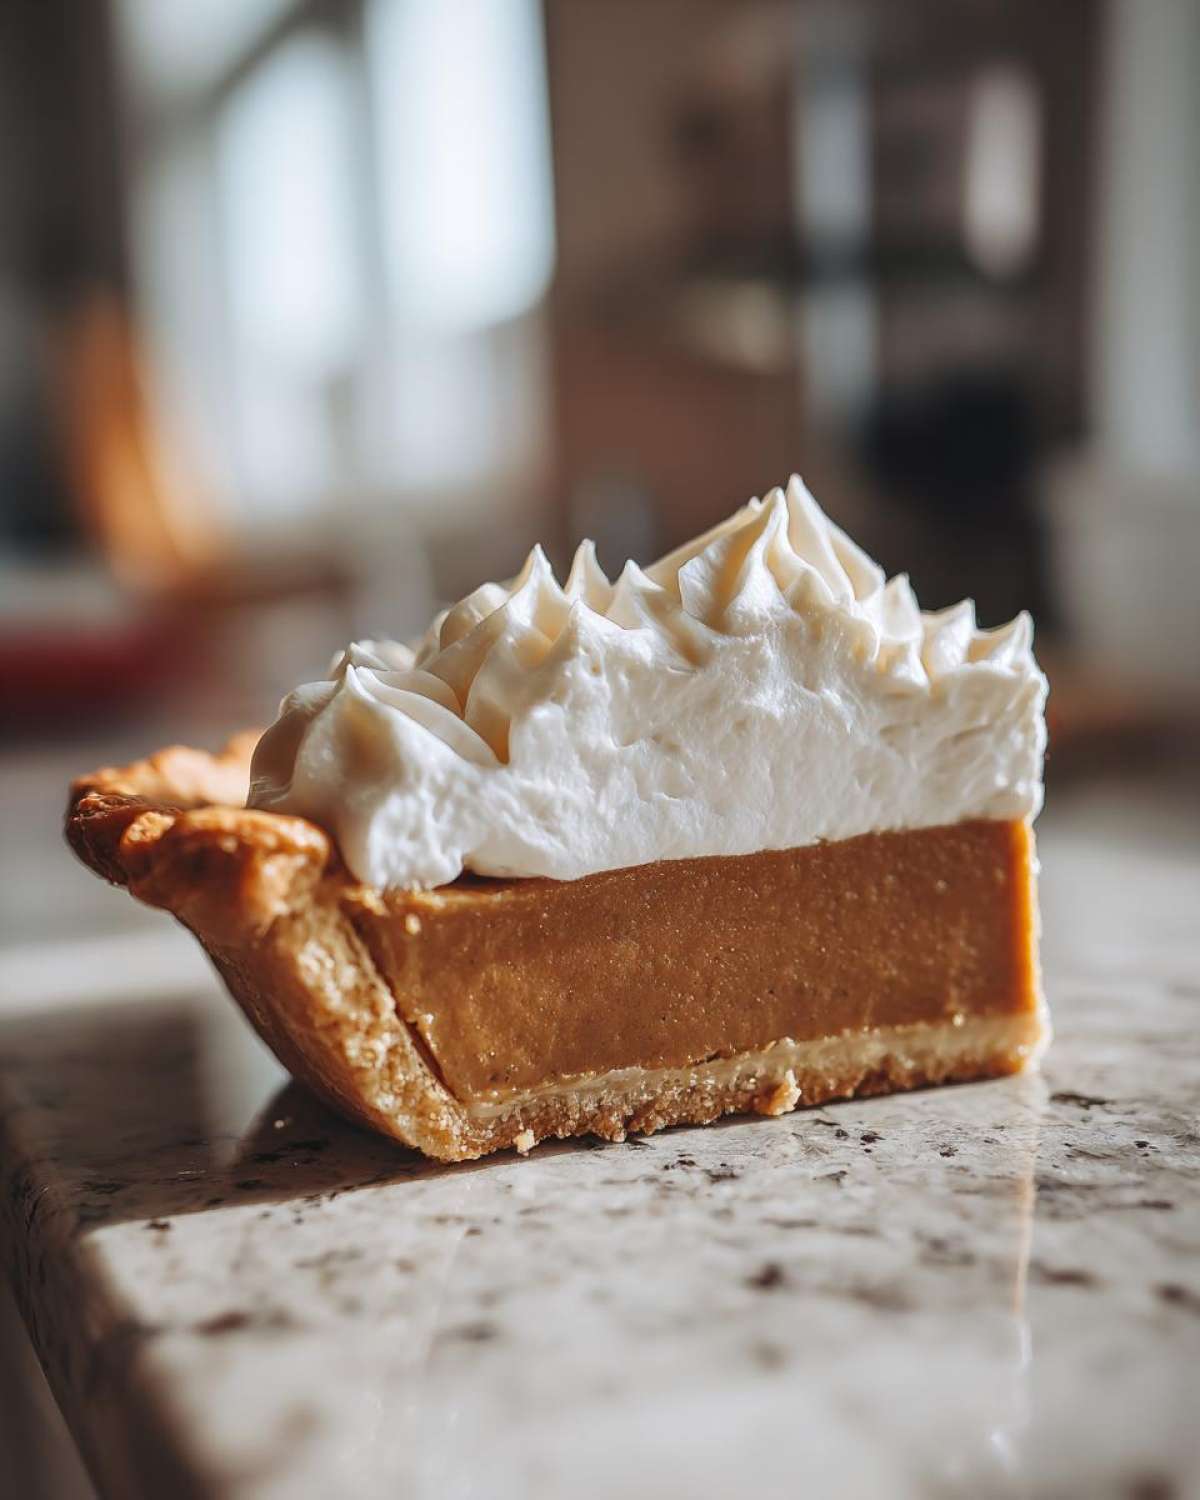
Variations on the Classic Butterscotch Pie
I love that we nailed the authentic old fashioned butterscotch pie recipe here, giving us that beautiful classic flavor. But you know how it is in the kitchen—sometimes you want to riff a little, right? Since Liam’s version is built on that cooked, from scratch pie crust and custard base, it’s a fantastic starter canvas for some fun flavor twists. It’s still going to be a show-stopping butterscotch pie, just with a little extra flair!
If you’re feeling inspired by those Southern cooking legends, here’s how you can tweak this. You know how some people want that specific Dolly Parton pie recipe flavor profile? Often, that involves a bit more depth in the caramel notes. You can achieve that easily by swapping out half of your packed light brown sugar for a dark brown sugar, or even trying a spoon of molasses mixed into the sugar/cornstarch dry blend. You can look up the famous recipe referenced over at Dolly Parton’s Butterscotch Pie recipe for comparison on flavor complexity!
Another common request seems to be for those cozy, comforting Amish-style desserts. To nod to that feel, you could play around with your topping. We used whipped cream because I’m impatient, but if you want to lean into the custard aspect—which feels very caramel custard dessert—skip the whipped cream entirely and just top it with a thin dusting of freshly toasted pecans right after the plastic wrap comes off for chilling. Nuts add a great crunch that contrasts the silky smooth pie filling!
Now, let’s talk about adapting this for when you absolutely cannot turn on the oven, which directly addresses that no-bake desire. This recipe, as written, is technically not a no bake butterscotch pie because we have to boil the custard and use a pre-baked crust. If you wanted truly no-bake, you’d need to start with a different base, perhaps crushed graham crackers or Biscoff cookies mixed with butter for the shell, and rely on something like melted butterscotch chips mixed with cream cheese for the ‘filling’ structure instead of relying on cornstarch and egg yolks to thicken on the stove. But honestly, if you put in the effort to make this cooked version, I promise you’ll agree it’s worth the extra ten minutes of stovetop time for the superior, creamy result!
For some other truly indulgent sweet treats that scratch that intense sugar itch, you should definitely check out how Liam makes his chocolate caramel toffee crunch cake next. It’s ridiculous!
Frequently Asked Questions About Making Butterscotch Pie
I’m Chloe, and I know the second you feel like you’ve mastered a recipe, a thousand little questions pop up. That’s Liam’s influence—he always wants to make sure the message (the pie!) is delivered perfectly. Here are the things I get asked most often when people try to make this creamy butterscotch pie recipe for the first time!
Can I make a no bake butterscotch pie using this recipe?
That’s a great question! If you are aiming for a true, rich, old fashioned butterscotch pie flavor, this method is actually the best route, even though it requires cooking. We need that high heat to properly activate the cornstarch and thicken the egg yolks to create that unbelievably luxurious, silky smooth pie filling. A true no-bake usually relies on pre-made pudding or melted chips, which, honestly, never tastes as rich as this cooked custard.
For this specific recipe, you absolutely need a pre-baked crust because the filling comes off the stove hot. If you truly need a no bake butterscotch pie, I’d suggest looking for a recipe that uses a graham cracker crust (or maybe even a cookie crust!) and thickens in the fridge using melted chips and gelatin, but stick with what you have here if you want that unforgettable creamy texture!
How do I ensure my filling is a perfect caramel custard dessert and not grainy?
This is the secret to happy pie-making! Graininess almost always happens because the sugars or the starch didn’t dissolve properly before cooking, or because the eggs scrambled during tempering. Remember my story about Liam’s “slow kisses”? That tempering step is number one. You must whisk the hot liquid into your egg yolks very slowly, a thin stream at a time, while constantly whisking the yolks. This prevents shocking the yolks.
Secondly, make sure you let the filling boil for that full minute after it thickens the first time (before adding the yolks back in) and then again after you add the tempered yolks back to the pot. That boiling time is essential for dissolving the cornstarch completely. If you do that, you’ve made a true, caramel custard dessert that won’t let you down!
If you’re looking for more of our top tips and tricks from the kitchen, you can always browse our main blog for new dispatches!
Serving Suggestions for This Indulgent Sweet Treat
So, you’ve managed to pull off this magnificent, creamy butterscotch pie recipe! Congratulations, you’ve definitely sent a powerful message of love and comfort across the table. Now, how do we serve this masterpiece? Since this is one of those deeply satisfying, rich dessert recipes, you don’t need much else to go with it, but if you want to build a whole dessert spread, I have a few thoughts.
First, temperature matters! This pie is heavenly when it’s chilled. Serving it straight from the fridge helps maintain that beautifully set structure so you can get a clean slice of that silky smooth pie filling. If your kitchen is freezing or you just want to bring it *slightly* out of the fridge shock, let it sit on the counter for maybe five or ten minutes—but seriously, no longer than that, or the whipped cream starts to sweat!
If you’ve decided to go with the whipped cream topping, a little coffee is the perfect partner. A strong, dark roast cuts through the sweetness of the butterscotch beautifully. It’s the classic pairing!
If you went for the toasted meringue topping (hello, Southern style!), try serving it alongside something tart to balance things out. Maybe a small bowl of fresh raspberries or a very light lemon sorbet on the side? It adds a wonderful brightness that stops the whole dessert from feeling too heavy.
And speaking of other rich treats that deserve a spot on your dessert menu, if you love that buttery, brown sugar flavor, you have to try making Liam’s legendary peanut butter pretzel bark recipe. It’s crunchy, salty, and sweet—the perfect counterpoint to this smooth butterscotch pie. Trust me, having both on the table means nobody goes home unhappy!
Share Your Butterscotch Pie Success
Wow, look at you! You’ve successfully delivered a truly old fashioned butterscotch pie. You didn’t use a mix, you faced down tempered eggs, and you created a smooth custard that tastes like pure nostalgia. That’s not just baking; that’s sending a serious, warm message to everyone lucky enough to get a slice. I’m so proud of you for tackling this from scratch pie crust dessert!
Liam and I live for hearing about your kitchen adventures. Did your filling set perfectly? Did you manage to not scorch your meringue (if you went that route)? Tell us everything! Please leave a rating below—it helps other folks who are nervous about trying their first creamy butterscotch pie recipe feel confident enough to try it. We read every single comment that comes through, and they honestly make our entire week.
If you felt like this was an easy homemade butterscotch dessert experience, share a picture with us! You can tag us on social media or send us a note directly through our contact page over at Contact. Knowing these recipes are finding their way into your homes and making people smile is exactly why we started this whole Cookery Courier business. Go enjoy that slice of heaven, you earned it!
PrintOld-Fashioned Creamy Butterscotch Pie

Bake this rich, velvety butterscotch pie from scratch. This classic recipe delivers a silky-smooth filling perfect for any gathering.
- Prep Time: 20 min
- Cook Time: 15 min
- Total Time: 3 hours 35 min
- Yield: 8 servings
- Category: Dessert
- Method: Stovetop Cooking
- Cuisine: American
- Diet: Vegetarian
Ingredients
- 1 (9-inch) unbaked pie crust (from scratch or store-bought)
- 1 cup packed light brown sugar
- 1/4 cup cornstarch
- 1/4 teaspoon salt
- 1 1/2 cups cold water
- 3 large egg yolks, lightly beaten
- 2 tablespoons unsalted butter
- 1 teaspoon vanilla extract
- 1 cup heavy whipping cream
- 2 tablespoons powdered sugar
- 1/4 teaspoon vanilla extract
Instructions
- Prepare your 9-inch pie crust and bake it according to package directions or your preferred method until lightly golden. Let the crust cool completely on a wire rack.
- In a medium saucepan, whisk together the brown sugar, cornstarch, and salt.
- Gradually whisk in the cold water until the mixture is smooth.
- Place the saucepan over medium heat. Cook, stirring constantly, until the mixture thickens and comes to a boil. Let it boil for 1 minute, continuing to stir. Remove from heat.
- Temper the egg yolks: Slowly pour about 1/2 cup of the hot sugar mixture into the beaten egg yolks while whisking constantly. This prevents the yolks from scrambling.
- Pour the tempered egg yolk mixture back into the saucepan with the remaining hot mixture.
- Return the saucepan to medium heat. Cook, stirring constantly, until the filling thickens again and reaches a gentle boil. Cook for 1 more minute. Remove from heat immediately.
- Stir in the 2 tablespoons of butter and 1 teaspoon of vanilla extract until the butter melts and is fully incorporated.
- Pour the hot butterscotch filling into the cooled, pre-baked pie crust. Press plastic wrap directly onto the surface of the filling to prevent a skin from forming. Chill in the refrigerator for at least 3 hours, or until the filling is completely set.
- When ready to serve, prepare the topping: In a chilled bowl, beat the heavy whipping cream, powdered sugar, and 1/4 teaspoon vanilla extract until stiff peaks form.
- Spread or pipe the whipped cream topping over the chilled, set butterscotch filling.
- Slice and serve this rich dessert recipe immediately.
Notes
- For the silkiest smooth pie filling, make sure you whisk the sugar and cornstarch together thoroughly before adding liquid.
- If you want a Southern style pie, substitute the whipped cream topping with a meringue and brown it lightly under the broiler.
- This recipe works well as a Thanksgiving pie alternative when you need a change from pumpkin or pecan.
Nutrition
- Serving Size: 1 slice
- Calories: 380
- Sugar: 45g
- Sodium: 210mg
- Fat: 19g
- Saturated Fat: 10g
- Unsaturated Fat: 9g
- Trans Fat: 0.5g
- Carbohydrates: 50g
- Fiber: 1g
- Protein: 5g
- Cholesterol: 95mg