

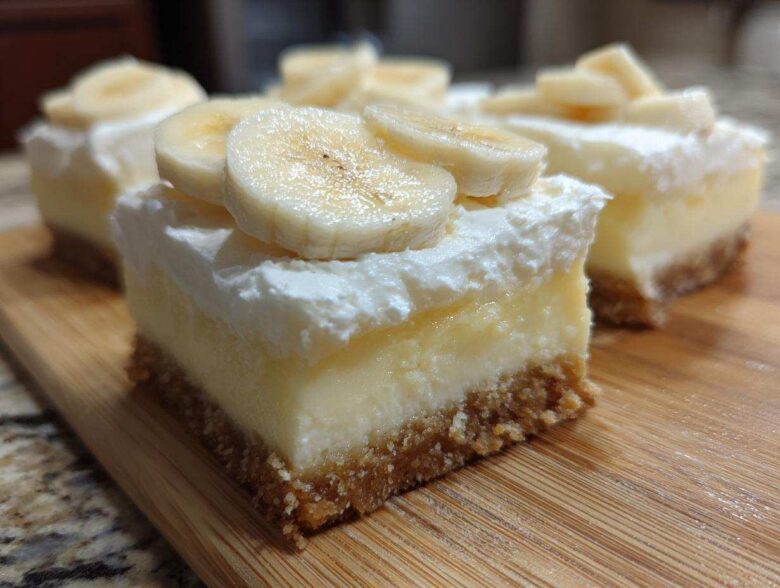
Okay, listen to me: if you’ve ever stared longingly at a Southern picnic table, torn between a slice of rich, tangy cheesecake and that incredibly comforting bowl of banana pudding, I have solved your dilemma forever. Why choose? We are combining the very best of both worlds into one show-stopping, sliceable treat! Trust me when I say these Banana Pudding Cheesecake Bars are the ultimate dessert mashup. My secret is using real, high-quality vanilla wafers in the base, which gives it that authentic, almost nostalgic crunch you just can’t fake. It’s decadent, it’s creamy, and it’s surprisingly easy to put together. Seriously, you need these in your life, especially if you’re planning a big summer gathering! You can find my absolute favorite classic banana pudding recipe for comparison right here.
Why You Must Make These Banana Pudding Cheesecake Bars Today
I know you’ve got a list of desserts waiting, but I promise you, these bars need to jump to the top. They look like you spent 12 hours fussing over them, but honestly, they come together faster than you’d think. They are absolutely mandatory for any potluck this season.
- They are 100% sliceable! No messy scoops of pudding or cracked cheesecake tops. Just beautiful, clean squares ready for serving.
- They cover all the comfort food cravings in one bite—the buttery crust, the slight tang of the cheesecake, and that sweet, creamy banana finish.
- You can look like a genius without breaking a sweat. They chill beautifully, so you can totally bake them the day before your big event.
- The vanilla wafer crust offers that signature crisp texture that makes traditional banana pudding so addictive.
The Perfect Blend of Textures
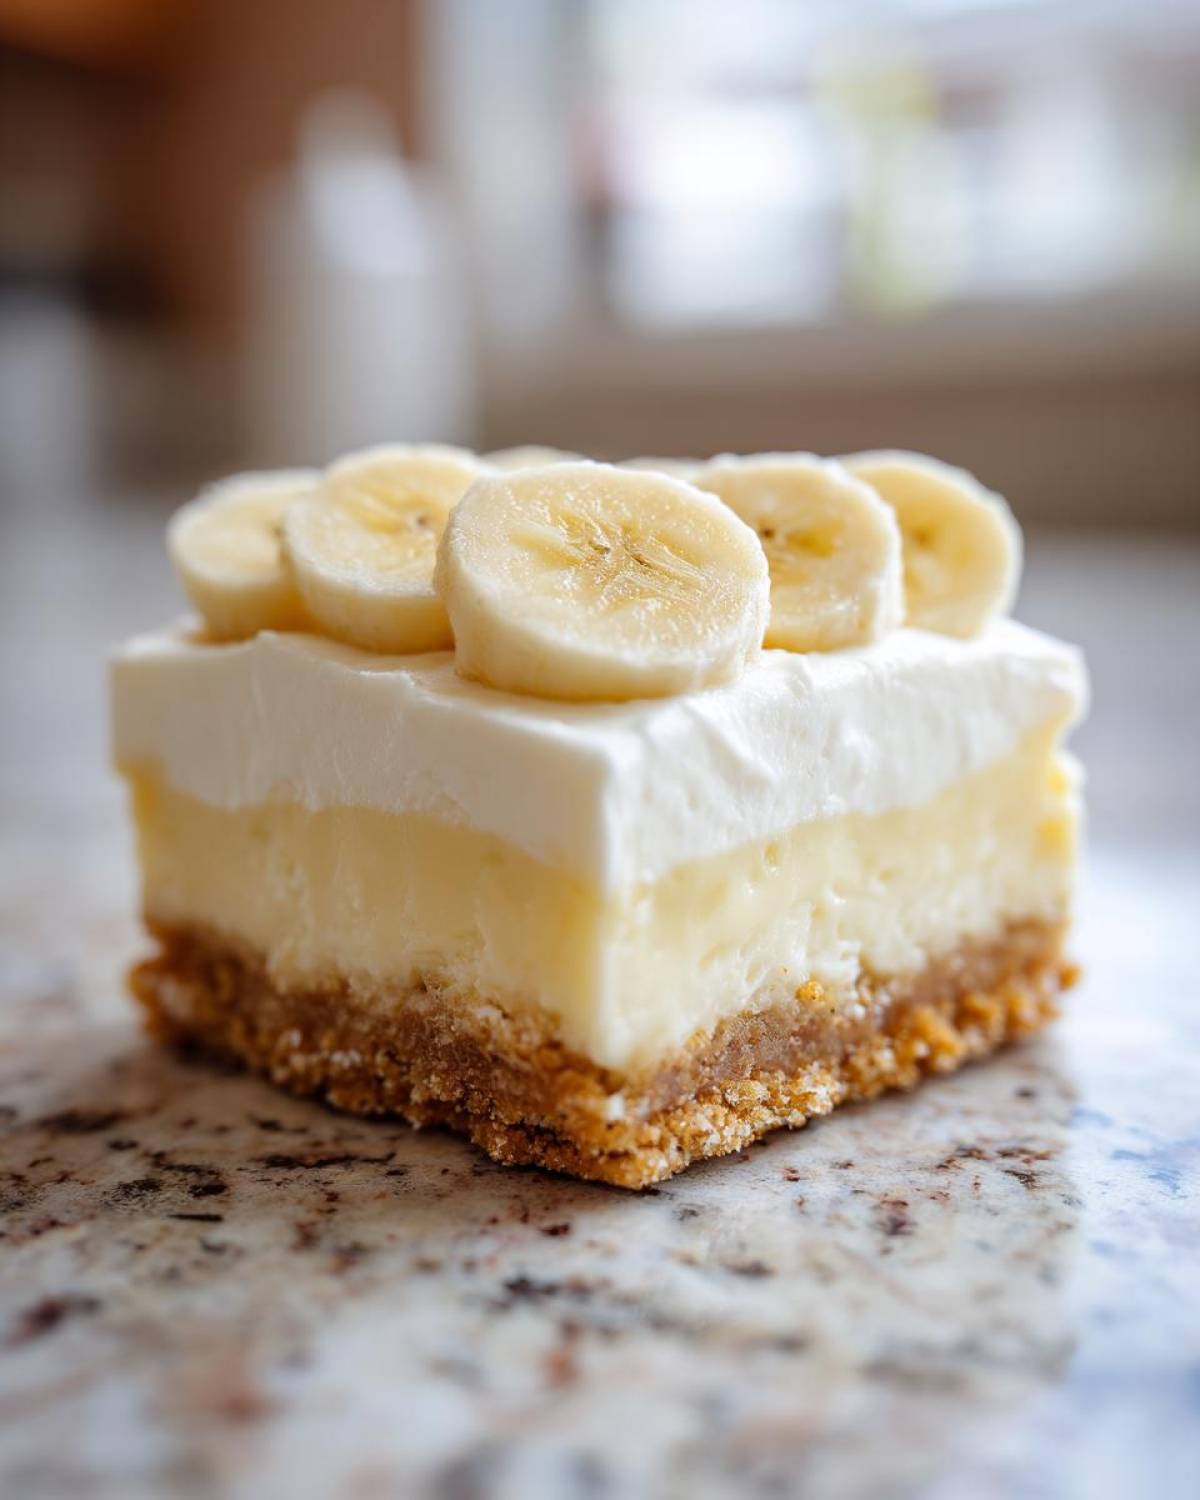
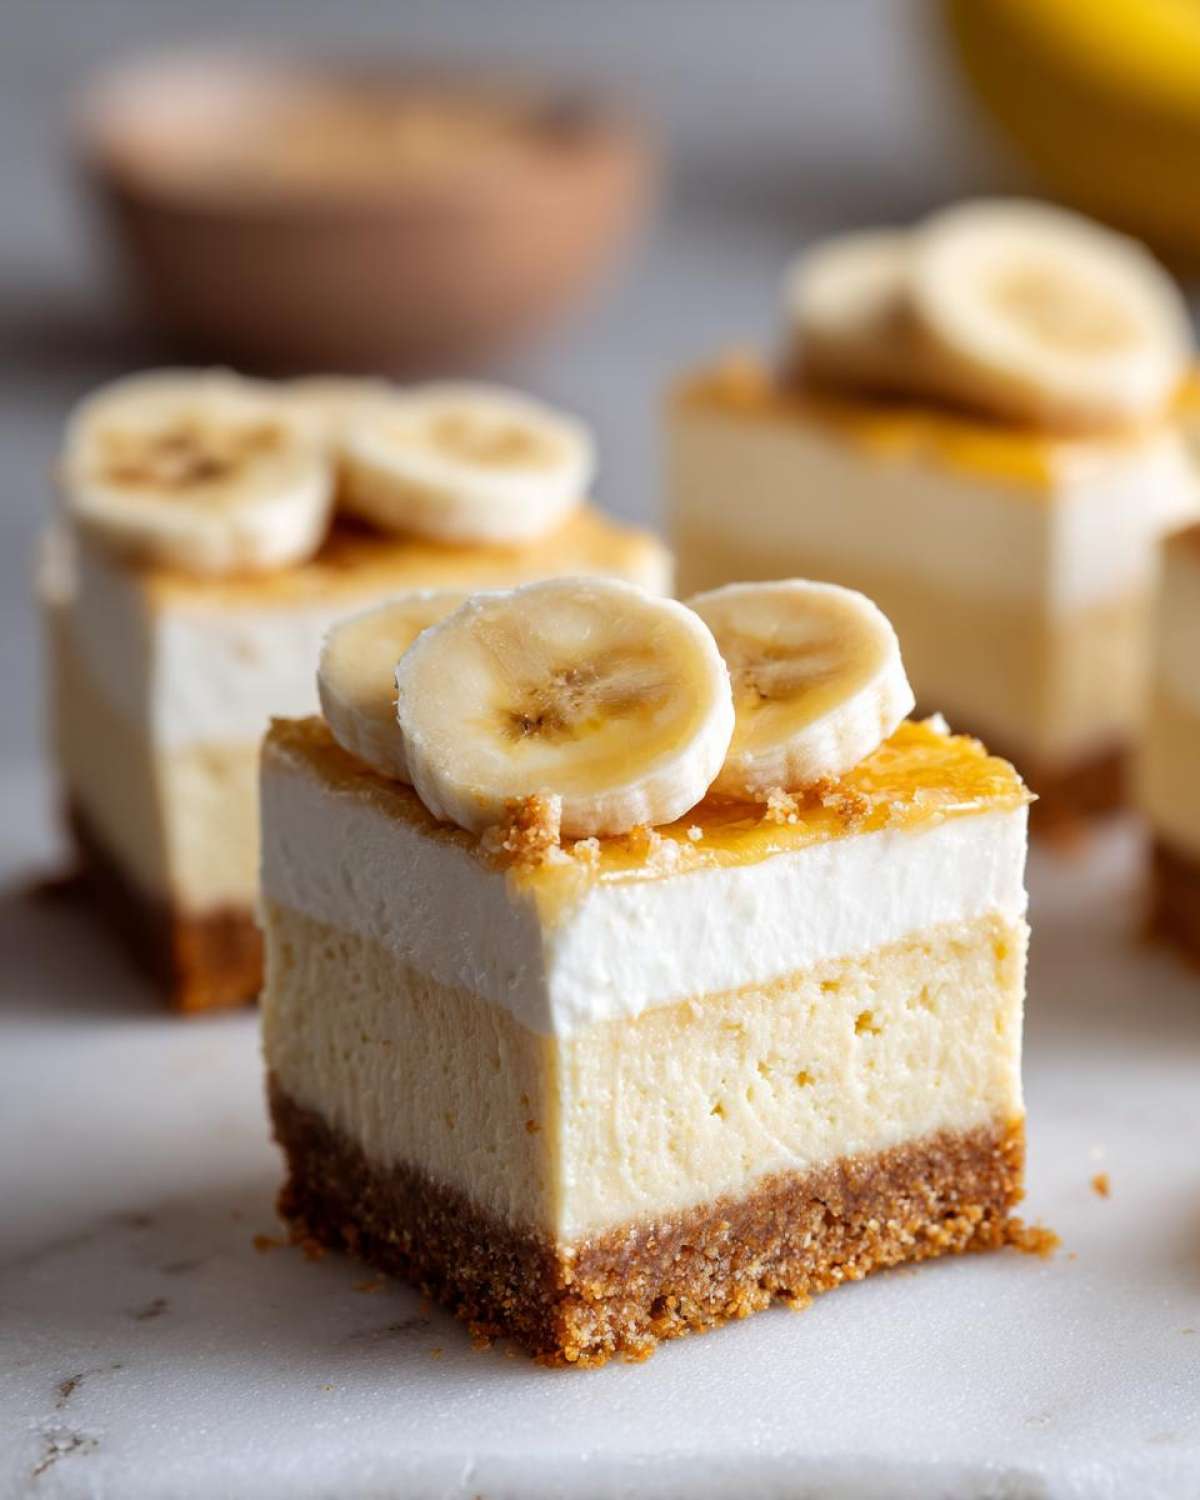
It’s all about the layers working in harmony. You get that satisfying little crunch from the baked vanilla wafer base. Then your spoon sinks through that cool, dense blanket of cream cheese filling. Everything is topped off with that pillowy soft pudding layer and the tender banana slices. It’s textural heaven, honestly; I can’t get enough of that contrast!
Making Incredible Banana Pudding Cheesecake Bars
This is what I love most—it’s a total showstopper. People see those three distinct layers and immediately think you’re some kind of pastry master! But truly, the process is just layering your baked elements with your prepared cold elements. If you can press crumbs into a pan and mix stiff ingredients, you can master these Banana Pudding Cheesecake Bars. They truly are the best layered dessert bars I’ve made all year.
Gathering Ingredients for Your Banana Pudding Cheesecake Bars
Okay, let’s talk shopping! Getting the right ingredients here makes all the difference between a good bar and a showstopper. Since we are combining two classic desserts, quality matters, especially with the vanilla wafers and the bananas. Think of this list as your absolute roadmap to success. If you need tips on keeping that cheesecake top smooth and crack-free, check out my other cheesecake guide!
For the Vanilla Wafer Crust Cheesecake Bars
This base sets the whole structure, so make sure your wafers are fresh! You’ll need:
- 1 1/2 cups vanilla wafer crumbs (If you buy the whole wafers, crush them yourself—it’s worth the five minutes!)
- 1/2 cup unsalted butter, melted
For the Creamy Cheesecake Layer
This is the tangy, rich heart of the bar. Remember, room temperature helps everything mix smoothly!
- 16 ounces cream cheese, softened
- 1 cup granulated sugar
- 1 teaspoon vanilla extract
- 3 large eggs (just use whole eggs; no need to separate or fuss!)
For the Pudding Topping of Your Banana Pudding Cheesecake Bars
This is where the classic flavor comes roaring back in! Pay close attention to the state of your pudding mix and topping here.
- 1 (3.4 ounce) package instant vanilla pudding mix
- 1 cup cold milk
- 1 (8 ounce) container frozen whipped topping, thawed (make sure it’s totally thawed but not liquidy!)
- 2 ripe bananas, sliced thinly
Step-by-Step: How to Prepare Banana Pudding Cheesecake Bars
Okay, here’s where we turn ingredients into magic! The secret to these layered bars is managing the temperatures and timing, especially getting that cheesecake layer just right before we pile on the cold toppings. Once you get the hang of this process, making these Banana Pudding Cheesecake Bars feels like cheating because they taste so ridiculously gourmet.
Preparing and Baking the Crust
First things first, get that oven humming at 350 degrees Fahrenheit! Grab your 9×13 inch pan and line it with parchment paper, making sure you leave a little overhang—that’s your built-in handle for lifting these babies out later. Mix up those vanilla wafer crumbs with the melted butter until it looks like wet sand. Press that firmly into the bottom of the pan, nice and even. Pop that crust in for 10 minutes to set up, then pull it out and let it cool off on a wire rack while we work on the main event.
Creating the Cheesecake Filling for Banana Pudding Cheesecake Bars
In your big bowl, beat that softened cream cheese until it’s beautifully smooth; we absolutely need zero lumps here! Mix in the sugar and the vanilla extract until they vanish. Now, this is key: add your eggs one at a time, mixing just until they disappear after each addition. Don’t overbeat air into it! Pour that gorgeous filling right over your slightly cooled crust. Bake this for about 20 to 25 minutes. You’re looking for the edges to be set, but the very center might still have a tiny wiggle. For more creamy cheesecake tips, check out my guide!
Assembling the Layered Banana Dessert Bars
While the cheesecake is cooling completely—and I mean completely, let it chill out on the side—it’s pudding time! Whisk that instant vanilla pudding mix right into the cold milk until it starts getting thick, which happens fast, usually about two minutes. Don’t stop mixing! Now, gently fold in your totally thawed whipped topping. Be gentle here; we want it light and fluffy, not deflated meringue! Spread this creamy mixture evenly over the cooled cheesecake. Then, arrange those lovely sliced bananas neatly over the top layer.
Chilling Your Banana Pudding Cheesecake Bars
This is the hardest part, but you must be patient! Cover the pan loosely with plastic wrap and move it straight into the refrigerator. You need at least four hours for everything to firm up properly, but seriously, overnight is where these bars turn into masterpiece squares. If you try cutting them too soon, they just turn into a glorious, delicious mess, which isn’t the goal for a nice bar shape!
Tips for Achieving Perfect Banana Pudding Cheesecake Bars
Look, even the most foolproof recipe can hit a snag, right? That’s why I want to share the little tricks I learned through trial and error to make sure your Banana Pudding Cheesecake Bars turn out flawless every single time—creamy filling, sturdy crust, zero disaster. These little adjustments are what take a good bar to an absolutely legendary one. We don’t want any baking sadness here, especially when dealing with rich desserts like this!
Ingredient Notes and Substitutions for Banana Pudding Cheesecake Bars
Remember those little notes tucked into the recipe card? They are gospel! For the topping, you absolutely need firm, slightly underripe bananas. If they are too soft, they go all mushy the second they hit that cold pudding layer, and we want clean slices, not sludge! Also, make sure you follow the note about chilling the crust beforehand—it helps prevent that butter from leaching up into your cheesecake layer, giving you a much firmer, cleaner base for your Banana Pudding Cheesecake Bars.
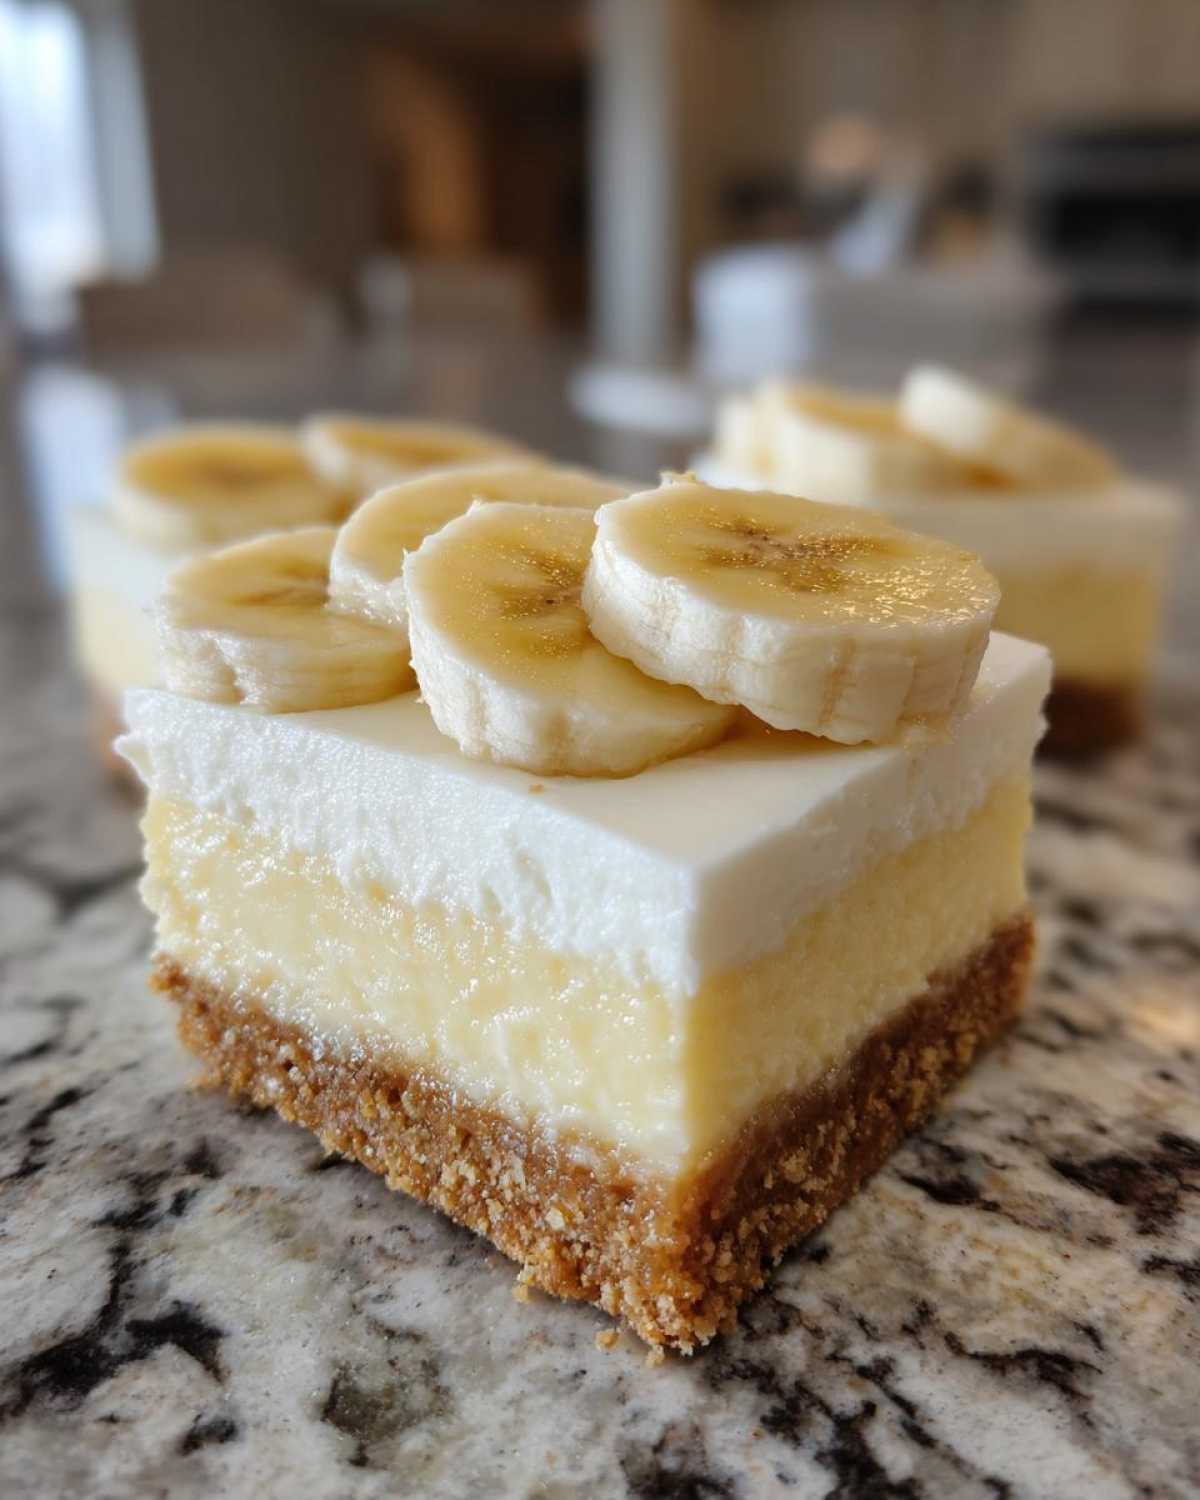
Here’s my big tip for the cheesecake part: Don’t even think about using low-fat cream cheese. Seriously, don’t. Full-fat cream cheese has the right fat content to set up beautifully and give you that rich structure that holds up under the pudding. It’s the main reason these bars taste so decadent! If you’re ever nervous about things sticking, check out my tips for preventing cheesecake sticking—the principles apply here too!
Making These Easy Banana Pudding Dessert Bars No-Bake
Sometimes you’re short on time, or maybe your oven is already hogged by a turkey, I totally get it! The beautiful thing about these bars is you can easily convert them into easy banana pudding dessert bars that never see the oven. To do this, skip the whole crust baking part and the cheesecake baking part (steps 2, 3, and 4 in the instructions).
You just mix the crust ingredients, press it firmly into the prepared pan, and immediately pop that crust layer into the freezer for about 30 minutes to firm up while you make the pudding topping. We skip baking the cheesecake layer entirely. Then, proceed with spreading the pudding mixture and topping with bananas. You still need that long chill time—four hours minimum—for the pudding layer to set up nice and firm enough to slice. It works like a charm for a truly creamy no bake banana dessert!
Storage and Make Ahead for Your Banana Pudding Cheesecake Bars
One of the biggest secrets to hosting a stress-free party is making desserts ahead of time, and these bars are superstars in that department! Seriously, you can whip these up the day before your event, and honestly, they taste even better the next day once all those lovely layers have truly melded together in the cold.
Once you’ve sliced them, you need to treat them like a dairy dream. They must stay refrigerated, no exceptions! Keep them tightly covered in that 9×13 pan—or transfer them to an airtight container if you’ve already cut them—and pop them into the fridge. Because of the cream cheese, pudding, and fresh bananas, they definitely don’t like sitting out on the counter.
If you made them entirely, they hold up beautifully for about three to four days when stored properly in the refrigerator. After that, the bananas start to look a little sad, even under the pudding. If you’re planning way ahead, you can sometimes freeze the crust and cheesecake layers *before* you add the pudding and banana topping, but I find it’s easiest to just make them completely and then transfer whole squares carefully to a freezer-safe container separated by parchment if you plan on freezing them for up to a month.
For make-ahead success, slice them right before you serve them, or at least make sure the knife goes through clean lines. You can find my extended guide on make-ahead banana desserts if you want to get really organized for a big weekend!
Serving Suggestions for Rich Banana Cream Cheese Squares
We’ve done the hard work of layering and chilling, so now it’s time for the fun part: making these beautiful bars look even better on a plate! Presentation is everything, right? Even a simple dessert tastes fancier when it gets a little something extra on top right before serving.
Since these bars are already loaded with texture and flavor from the crust, the cheesecake, and the pudding, we don’t need to go crazy with toppings. A little garnish goes a long way to making these feel incredibly decadent.
The Simple Dusting Trick
My favorite ultra-quick finish is just a dash of spice right before they hit the serving platter. A tiny dusting of ground cinnamon or even a pinch of nutmeg over the top of the banana layer adds warmth and color. It’s so subtle but catches the eye beautifully. You can use a small tea strainer to get that perfect, airy coating.
Elevating the Plate with Whipped Cream
If you want a little cloud of airy contrast next to your rich square, serve it with a small dollop of fresh whipped cream on the side. Don’t smother the bar itself—the pudding layer is already soft! A tiny mountain of cream acts as a perfect counterpoint to the tanginess of the cheesecake layer. If you’re feeling ambitious, you can even flavor that fresh cream with just a drop of almond extract instead of vanilla; it plays so nicely off the bananas.
Pairing Suggestions for an Afternoon Treat
Honestly, a glass of milk is perfect, but if you’re serving these after dinner, they pair wonderfully with something light and bright. They are rich, so you want a beverage that cuts through that. A hot cup of coffee or a nice iced black tea works perfectly. If you’re looking for other easy, delightful baked goods to serve alongside them, you have to check out my recipe for fluffy vanilla cupcakes—they are the perfect light foil to these heavy, creamy squares!
Frequently Asked Questions About Banana Pudding Cheesecake Bars
I get so many questions once people see photos of these bars because they look so intensely layered and fancy! It’s usually about making quick adjustments or ensuring they hold together perfectly. I’ve pulled the top questions I get in my inbox to make sure you feel totally confident before you start mixing. If you need tips on totally different kinds of comfort food, like my famous Salisbury Steak, you can check that recipe here!
Can I use fresh bananas instead of instant pudding in my Banana Pudding Cheesecake Bars?
That’s a great question, and it comes down to structure! The instant pudding mixed with the cold milk and then folded with the whipped topping is what gives us that light, yet firm, texture needed for slicing these Banana Pudding Cheesecake Bars. If you try to use homemade cooked pastry cream or custard, it tends to be too soft and wet, and it won’t set up firmly enough when chilled over the cheesecake layer.
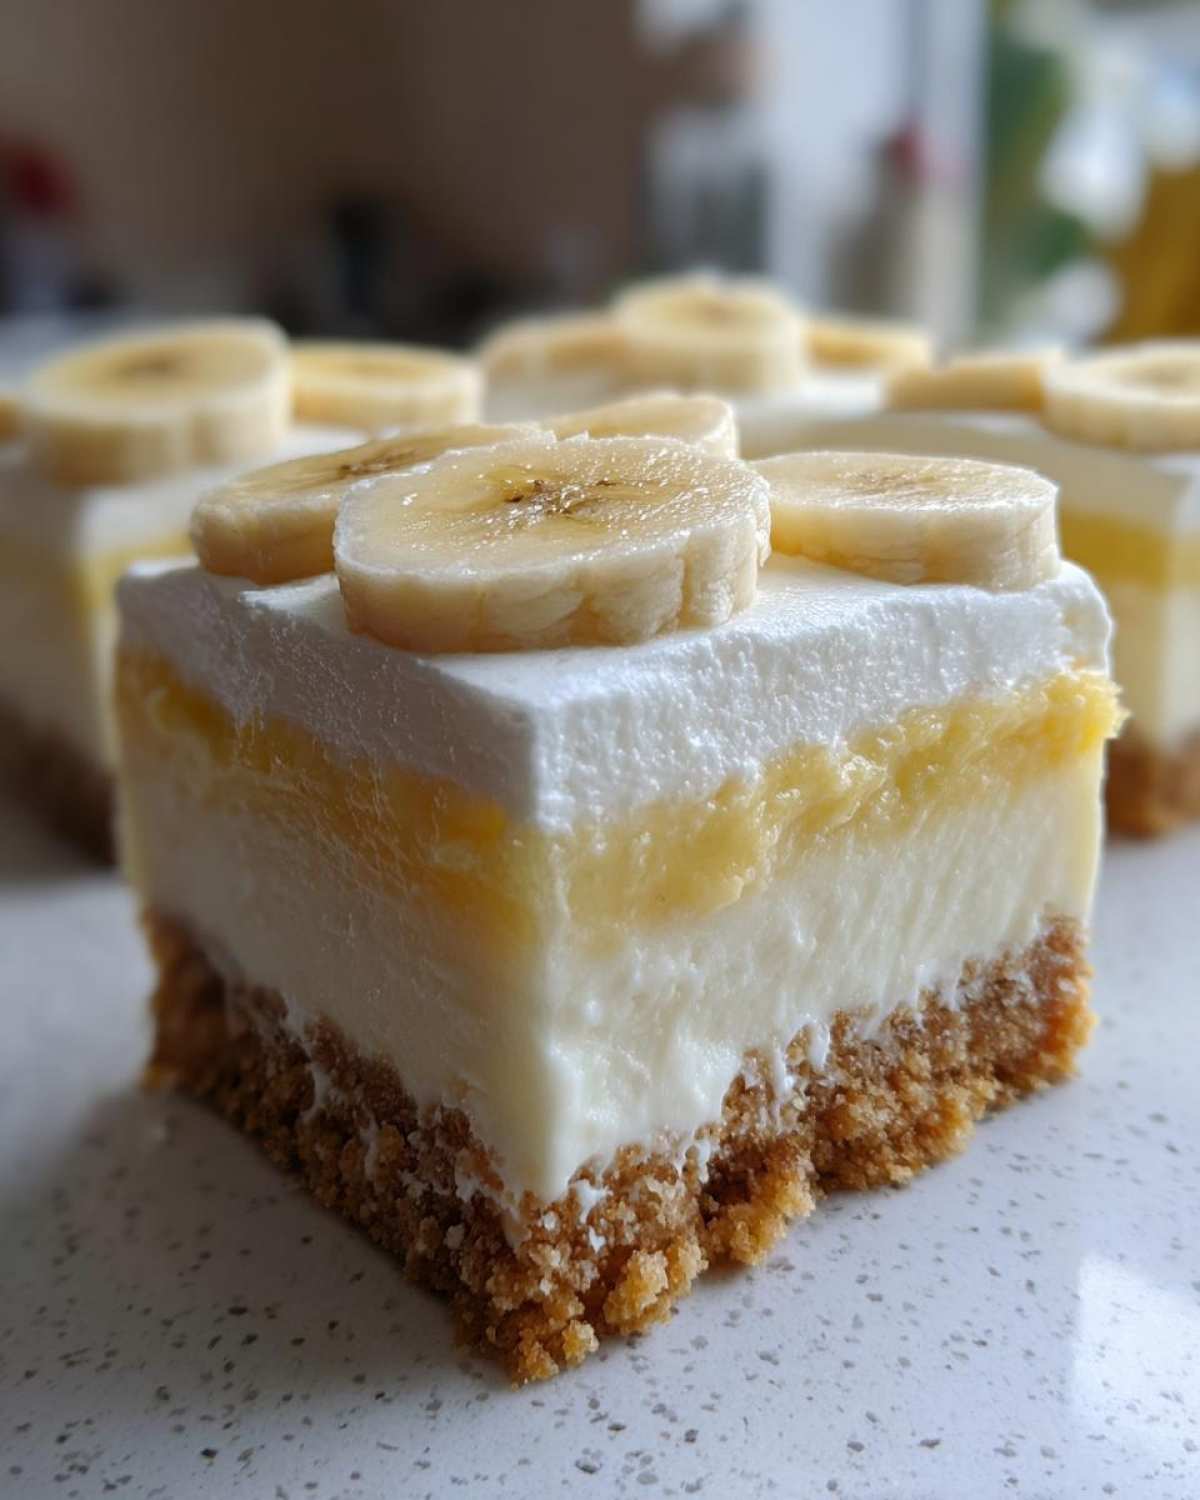
When you use the instant mix—even though it’s quick—it gels up perfectly when combined with the stabilized whipped topping, creating that ideal middle layer that holds its shape when you cut into those rich banana cream cheese squares. Stick to the instant mix for these bars!
How long do these layered banana dessert bars stay fresh in the fridge?
Because these are packed with dairy (cream cheese, pudding, whipped topping) and fresh fruit (the bananas), refrigeration is non-negotiable. You should plan for them to stay perfectly fresh and delicious for about three to four days when stored tightly covered in an airtight container in the fridge.
The main thing that suffers after day three is the visual appeal of the bananas on top—they start weeping a little juice. If you want them to last closer to a week, my advice is to skip putting the banana slices on until just a few hours before you plan to serve the bars. That way, the crust and cheesecake layers stay pristine!
What is the best way to cut clean squares from the chilled dessert?
This is probably the most important tip for presentation! Since these bars are chilled so thoroughly—which is necessary for them to set—the knife has a tendency to drag or crack the delicate pudding layer if you cut cold plastic. Don’t try to cut them straight out of the fridge if you want super clean lines.
Here’s what I do: Run your sharpest chef’s knife under very hot water for about 30 seconds. Wipe the blade completely dry. Make your first cut. Before making the next cut, wipe the knife clean with a paper towel and run it under the hot water again. Repeating this hot water/dry wipe process between every single slice will give you that beautiful, professional, clean-edged square you’re looking for!
Estimated Nutritional Snapshot for Banana Pudding Cheesecake Bars
Look, I’m a cook, not a certified nutritionist, so please keep this information in mind: these values are an educated guess based on standard calculations for all the rich ingredients we used here. This is an estimate, of course, but it gives you a good idea of what you’re enjoying when you indulge in one of these decadent squares!
We are dividing the whole pan into 16 generous servings, so keep that in mind if you decide to cut smaller or larger slices.
- Serving Size: 1 bar
- Calories: 310
- Sugar: 25 grams (That rich sweetness comes from the sugar, butter, and bananas!)
- Fat: 19 grams (Most of this is wonderful, rich fat from the cream cheese and butter needed for that incredible texture!)
- Saturated Fat: 11 grams
- Carbohydrates: 31 grams
- Protein: 5 grams
- Sodium: 210 mg
- Cholesterol: 55 mg
Since we use real butter and full-fat cream cheese to get that perfect structure, the fat count is up there, but that’s what makes them taste so unbelievably good! Enjoy, and don’t worry about the numbers too much—it’s worth every bite!
Share Your Experience Making These Banana Pudding Cheesecake Bars
Whew! We made it through the layers, the chilling, and the temptations to sneak a taste before they were set. Now comes my favorite part: hearing from you! When you put this much love into creating something this delicious, you just have to share the results.
I really, truly hope these Banana Pudding Cheesecake Bars bring a huge smile to your face, whether you’re serving them at a summer barbecue or just enjoying a quiet, indulgent Tuesday night treat!
Let Me Know What You Think!
Did everything set up perfectly? Did your cream cheese stay lump-free? Did the vanilla wafer crust hold strong against the creamy layers? Please, take a moment and leave a rating and a comment down below. Knowing what works for other bakers helps me keep improving things for everyone!
If you managed to get a picture of those gorgeous layers before everyone dug in—and that is a feat in itself—I would absolutely love to see it! Tag me on social media when you post your squares; seeing your creations is the absolute highlight of my week.
Ready for your next kitchen adventure? If you want to browse all my favorite go-to recipes—from quick weeknight meals to show-stopping desserts like these bars—you can always head over to the main blog page. Happy baking, friends!
PrintLayered Banana Pudding Cheesecake Bars with Vanilla Wafer Crust
Make rich, layered dessert bars combining a vanilla wafer crust, a creamy cheesecake layer, and a banana pudding topping.
- Prep Time: 25 min
- Cook Time: 35 min
- Total Time: 4 hours 0 minutes
- Yield: 16 servings
- Category: Dessert
- Method: Baking
- Cuisine: American
- Diet: Vegetarian
Ingredients
- 1 1/2 cups vanilla wafer crumbs
- 1/2 cup unsalted butter, melted
- 16 ounces cream cheese, softened
- 1 cup granulated sugar
- 1 teaspoon vanilla extract
- 3 large eggs
- 1 (3.4 ounce) package instant vanilla pudding mix
- 1 cup cold milk
- 1 (8 ounce) container frozen whipped topping, thawed
- 2 ripe bananas, sliced
Instructions
- Preheat your oven to 350 degrees Fahrenheit. Line a 9×13 inch baking pan with parchment paper, leaving an overhang for easy removal.
- Combine the vanilla wafer crumbs and melted butter in a bowl. Press the mixture firmly into the bottom of the prepared pan to form the crust. Bake for 10 minutes. Let the crust cool slightly.
- In a large bowl, beat the softened cream cheese and granulated sugar until smooth. Beat in the vanilla extract. Add the eggs one at a time, mixing well after each addition. Pour the cream cheese mixture over the cooled crust.
- Bake for 20 to 25 minutes, or until the center is mostly set. Remove from the oven and let it cool completely on a wire rack.
- While the cheesecake cools, prepare the pudding layer. Whisk the instant vanilla pudding mix and cold milk together until thickened, about 2 minutes. Gently fold in the thawed whipped topping.
- Spread the pudding mixture evenly over the cooled cheesecake layer.
- Arrange the sliced bananas over the pudding layer.
- Cover the pan loosely with plastic wrap and chill in the refrigerator for at least 4 hours, or preferably overnight, before cutting into bars.
Notes
- For a firmer crust, chill the crumb mixture for 10 minutes before baking.
- Use firm, slightly underripe bananas for the topping so they do not become mushy when chilled.
- If you prefer a no-bake option, skip step 3 and 4. Press the crust mixture into the pan and chill for 30 minutes, then proceed with the pudding topping and chilling.
Nutrition
- Serving Size: 1 bar
- Calories: 310
- Sugar: 25
- Sodium: 210
- Fat: 19
- Saturated Fat: 11
- Unsaturated Fat: 8
- Trans Fat: 0
- Carbohydrates: 31
- Fiber: 1
- Protein: 5
- Cholesterol: 55