

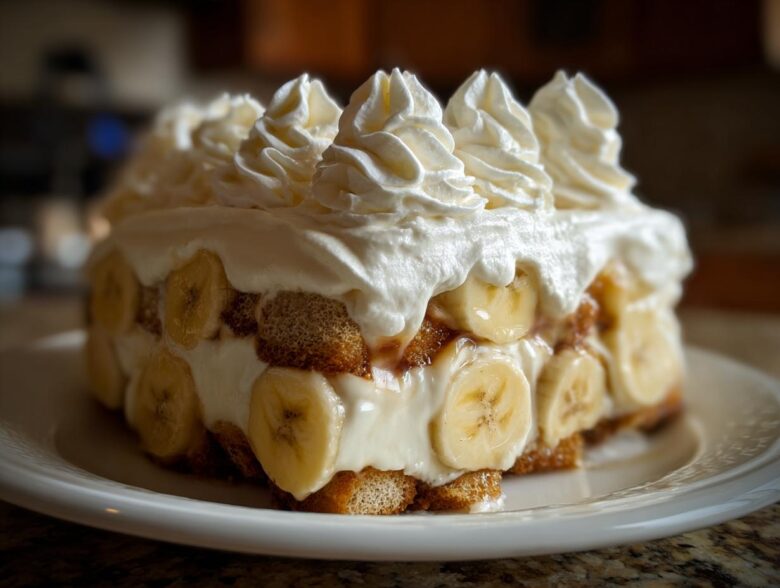
If you’re looking for that dessert that just smells like a big hug from the South, you’ve found your match. Forget the stuff made with instant boxes; we’re going old-fashioned here! Liam always says a good southern comfort food dessert is the fastest way to deliver a message of love, and nothing says that louder than the best homemade banana pudding you can imagine. This recipe is the ultimate dispatch for creamy, vanilla-wafer perfection, made completely from scratch. That’s our whole thing over here at Cookery Courier—turning simple, reliable ingredients into a comforting meal or dessert ready to send straight from your heart to someone else’s table. If you want to know more about how we started sending these warm messages, check out our story here. Trust me, this banana pudding is worth the small bit of extra stirring!
Why This is the Ultimate Old-Fashioned Southern Banana Pudding
I know what you’re thinking: “Why bother with the stovetop when instant pudding exists?” And that’s fair! Life is busy. But when Liam tastes this, he always says it tastes like home, and that’s because we’re committed to the real deal. This isn’t just any dessert; it’s a true Southern comfort food dessert that earns its keep.
- It’s completely banana pudding from scratch, which means no weird stabilizers—just pure, rich custard.
- We nail that decadent, creamy banana dessert texture that sinks right into those vanilla wafers.
- It’s the perfect easy crowd pleasing dessert because even the skeptical eaters go back for seconds!
The Secret to Truly Creamy Banana Pudding Dessert
The major magic happens when we cook the custard and, most importantly, when we temper those beautiful egg yolks. Don’t panic! Tempering just means we introduce the hot milk super slowly to the yolks so they don’t scramble. If you whisk slowly and gently, you get this unbelievably rich, velvety coating.
My pro tip from watching Liam work? After you pour the yolks back into the pot, you have to be patient and keep stirring constantly over low heat for that final minute. That’s what stops it from feeling grainy later. Trust me, that one extra minute makes all the difference in achieving that melt-in-your-mouth silkiness.
Ingredients for the Best Homemade Banana Pudding
Whenever I’m getting ready to dispatch dessert, I lay everything out first—it just keeps things orderly! For this classic banana pudding recipe, we aren’t skimping on anything. Everything you need for those sweet, creamy pudding layers is right here. Just make sure your bananas are ripe enough to be sweet, but not so soft that they’re turning black! We need them to hold up during the chilling process.
- 1 cup granulated sugar
- 1/4 cup cornstarch
- 1/4 teaspoon salt
- 3 large egg yolks, lightly beaten
- 2 cups whole milk
- 1 teaspoon vanilla extract
- 4 large ripe bananas, sliced
- 1 box (11 ounces) vanilla wafers
- 1/2 cup cold heavy cream
- 2 tablespoons powdered sugar
This lineup creates that perfect balance that keeps people asking for the recipe year after year. No weird substitutes allowed in this batch!
How to Make Classic Banana Pudding Recipe from Scratch
Okay, this is where the real work—and the real reward comes in! Making this banana pudding from scratch takes a little focus, but I promise you, the stovetop custard is miles better than anything instant. Remember, we are delivering comfort here, and patience is part of the message! We need a good 10 minutes of cooking time for the custard to reach that thick, glossy point. Don’t ever walk away from the saucepan while the mixture is heating; it burns on the bottom so fast if you do!
Preparing the Scratch Pudding Base
First things first, you combine your sugar, cornstarch, and salt in your saucepan. Whisk that dry stuff up really well so there are no lumps hiding. Then, slowly pour in that whole milk while you’re still whisking. Get that pot over medium heat and stir, stir, stir until it starts bubbling and looks seriously thick—like heavy cream that’s had a hard workout. That’s usually about 9 minutes in my kitchen.
Now for the crucial part: tempering the eggs. Take your three beaten yolks and very slowly drizzle about half a cup of that hot milk mixture into them while you whisk constantly in a separate bowl. If you dump it fast, you’ll end up with sweet, yellow scrambled eggs! Once those yolks are warmed up gently, pour that whole tempered mix back into the saucepan. Return it to low heat for just one final minute. Immediately take it off the heat and stir in your vanilla.
Here is a must-do step for silky pudding: pour it into a clean bowl and press a piece of plastic wrap directly onto the surface. I mean, *directly* onto the surface. This stops that sad, rubbery film from forming while it chills. Pop it in the fridge for at least two hours until it is genuinely cold—this is non-negotiable for the layers!
Assembling Your Vanilla Wafer Banana Pudding
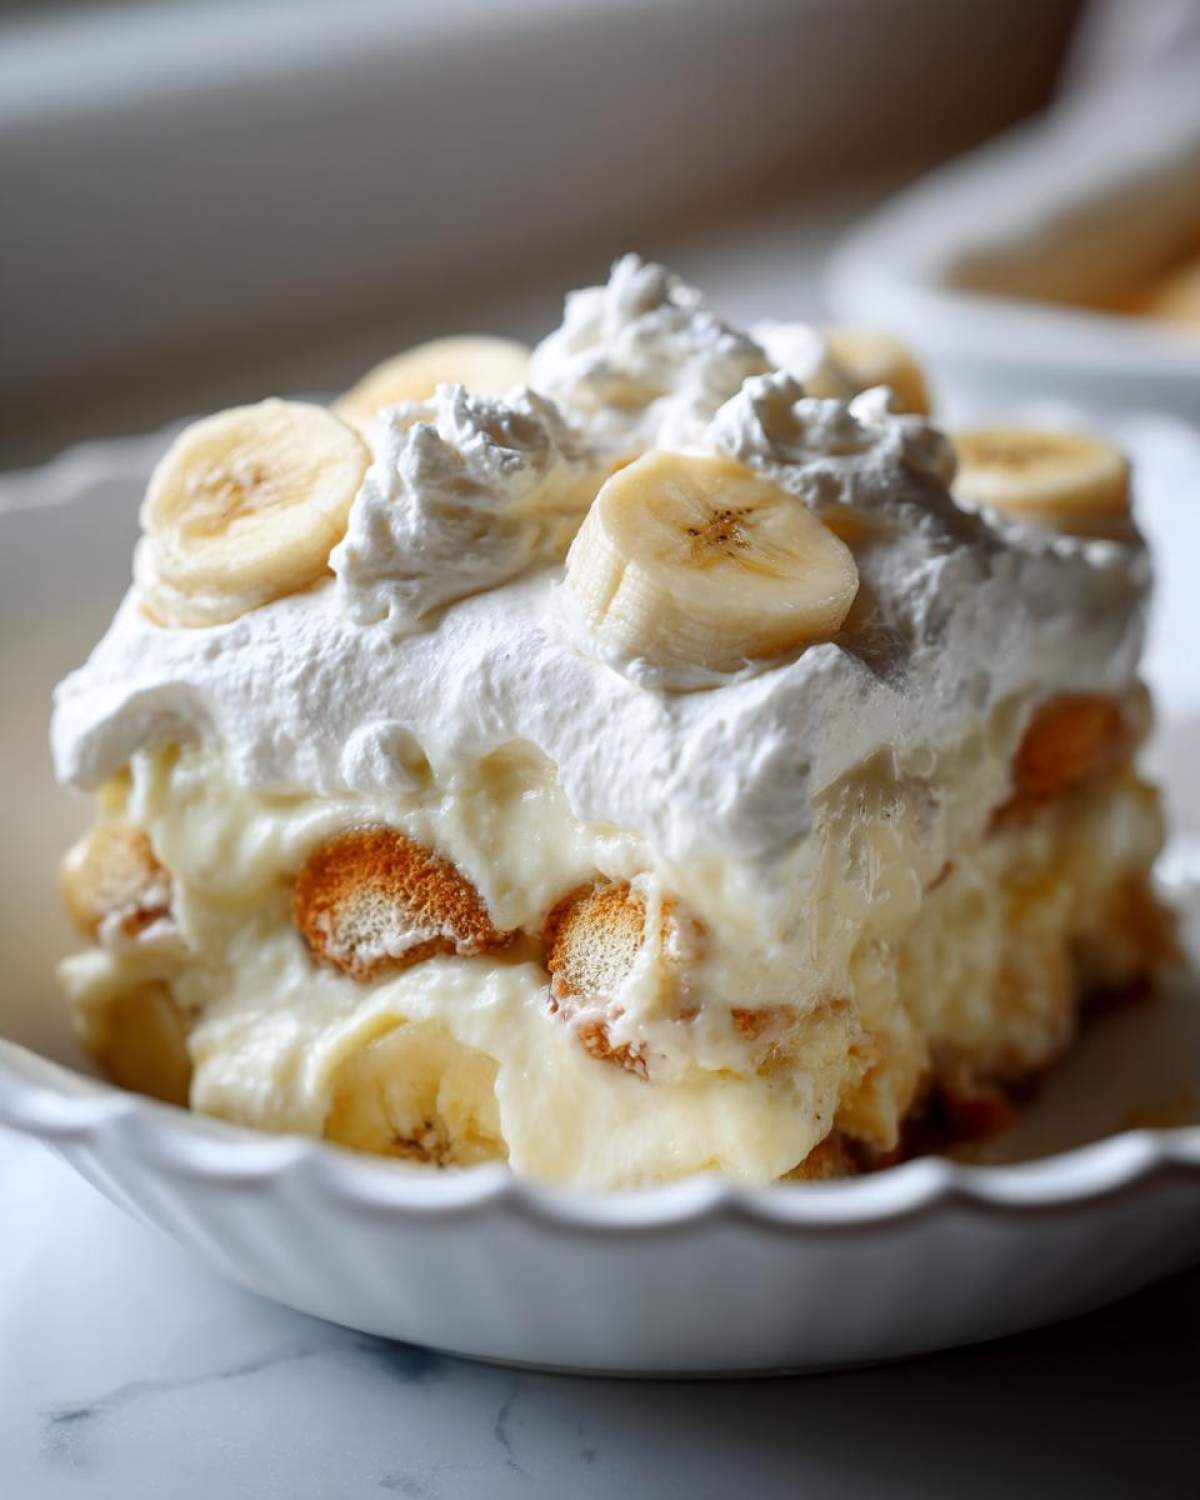
Once your pudding is stone-cold, it’s assembly time! Grab your big, beautiful glass dish, or maybe some cute little individual dessert cups if you’re serving a crowd. We’re building layers here. Start with a layer of those vanilla wafers, then scatter on your banana slices, and cover that with a nice thick swipe of your chilled pudding. Keep repeating: wafers, bananas, pudding. We want that ratio to be perfect in every single bite!
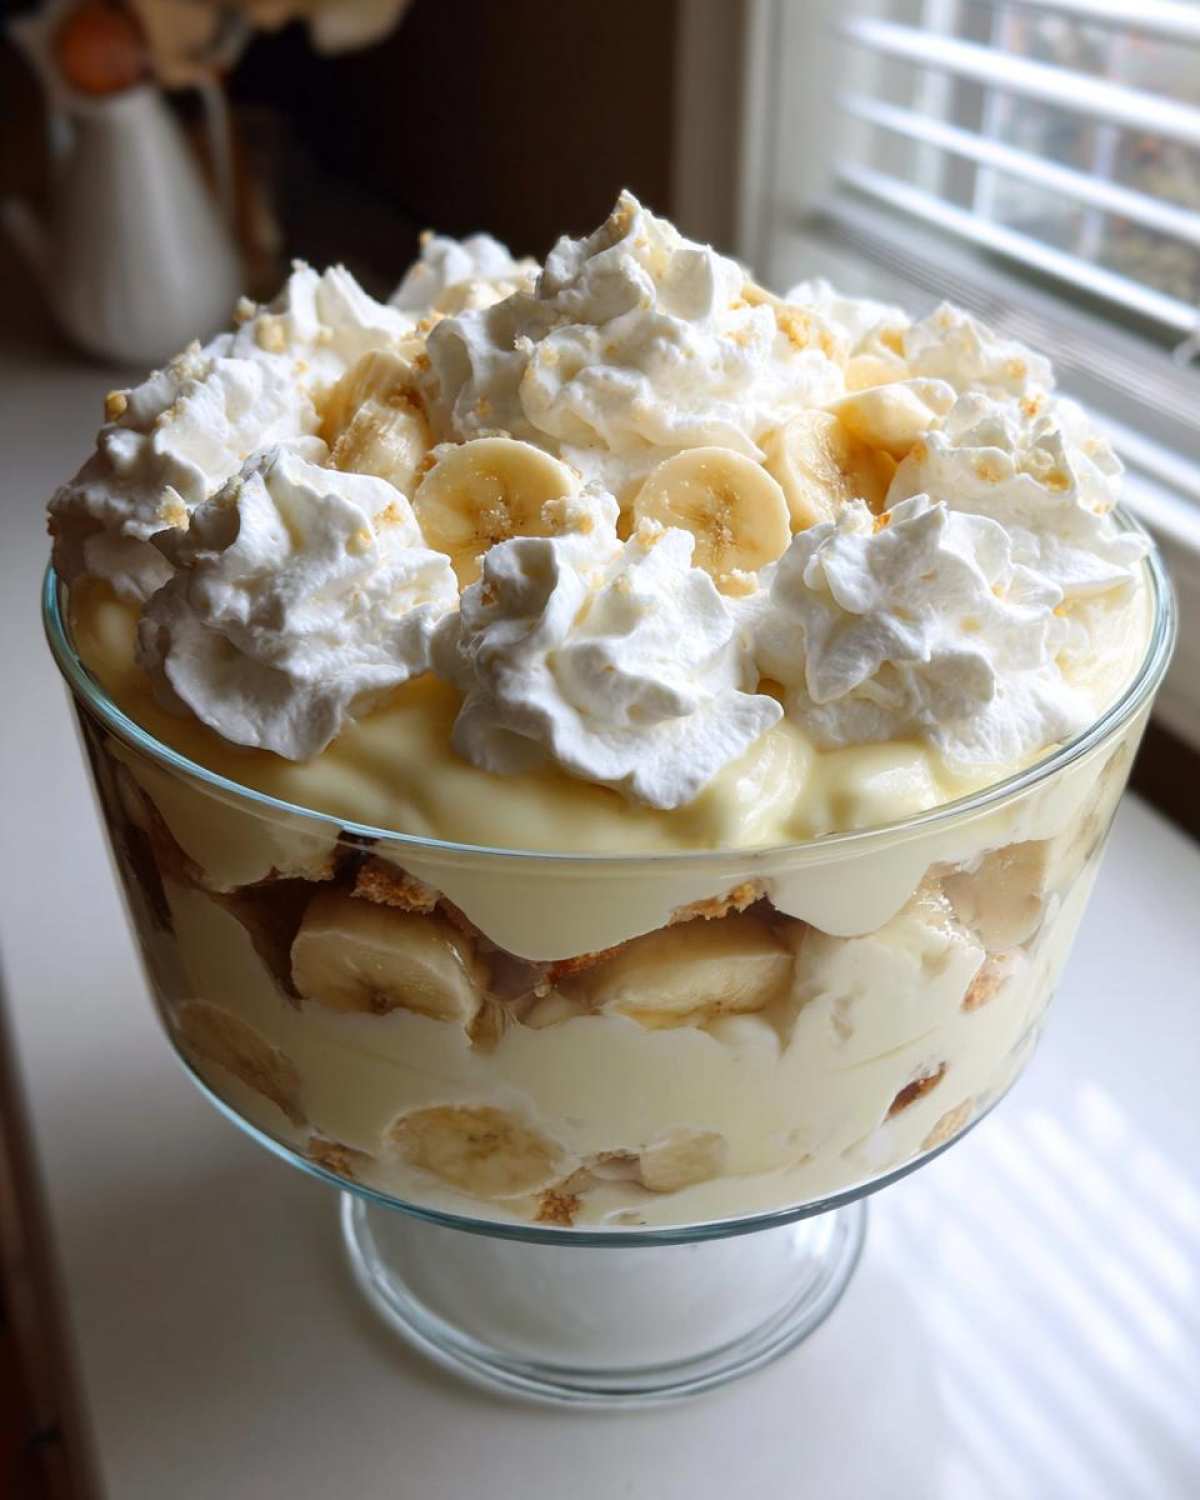
For the top, we whip up that heavy cream with the powdered sugar until it makes stiff peaks—it’s already much lighter than store-bought whipped topping, and it tastes incredible. Spread that lovely whipped cream over the final pudding layer. Here’s my biggest tip for an easy crowd pleasing dessert: this has to chill for at least four hours after assembly, but overnight is best! That chilling time is what turns those firm vanilla wafers into a soft, cake-like texture. That transformation is everything!
Tips for Perfect Banana Pudding Assembly and Texture
Liam and I have learned a few tricks over the years that make assembling this dessert foolproof. Because we’re focusing on that deep, scratch-made flavor, sometimes we need a little shortcut when life gets crazy. Don’t feel guilty if you need a little boost when you’re sending out a comfort message in a hurry!
If you are short on time and just need to get that creamy dessert layered fast, we have a compromise. You can definitely use a semi-homemade approach, often called the Magnolia Bakery style. This means skipping the entire stovetop custard process outlined above and using two boxes of instant vanilla pudding, prepared exactly as the box says, and making sure it gets fully chilled before layering. It’s a different flavor profile, definitely sweeter and lighter, but it still gets the job done when you need a quick family favorite.
Now, back to our from-scratch version—let’s talk bananas. This is an area where people often make a mistake! If you assemble this dessert a whole day ahead, I highly recommend using bananas that are perfectly ripe but haven’t started getting brown spots yet. Why? Because those extra ripe bananas release more liquid once they sit overnight in the cold pudding, and you can end up with a soupier base instead of that lovely, cake-like wafer layer we are aiming for.
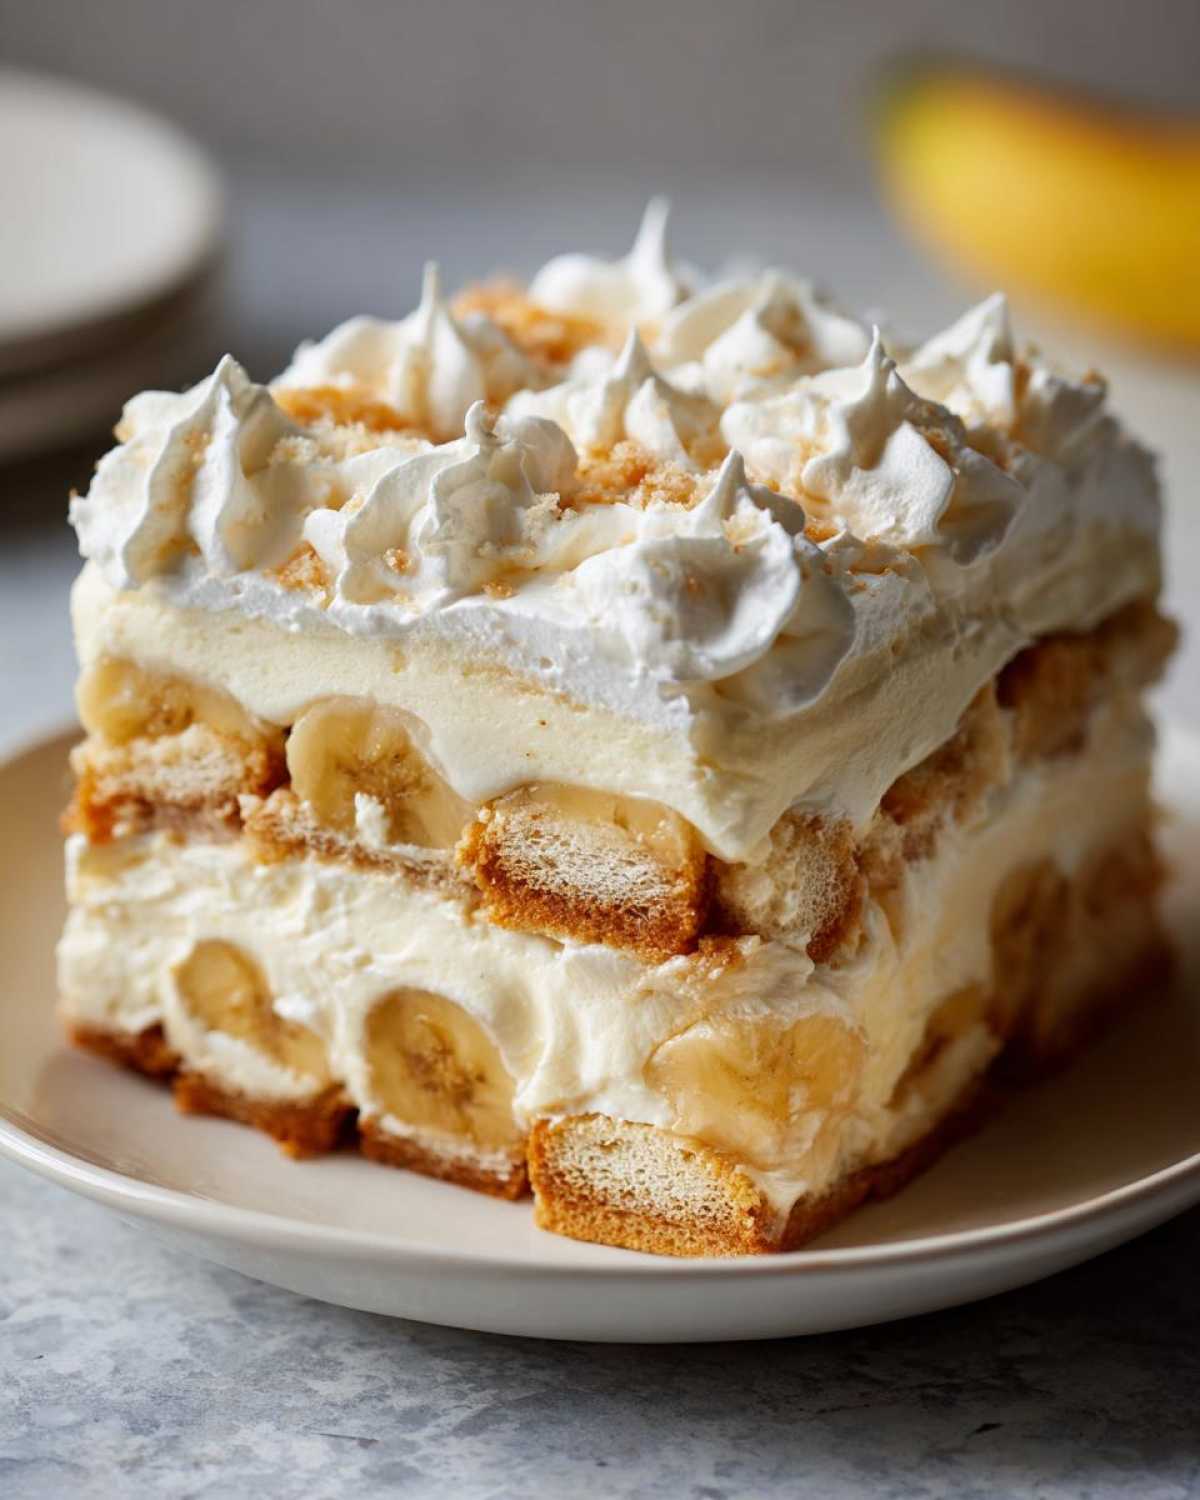
Also, I always make sure my heavy cream is ice-cold before I whip it. Cold cream whips faster and holds those stiff peaks much better, which makes piping or spreading the topping so much easier. Remember, presentation matters when you’re sending a message of love; you want it looking as delicious as it tastes!
Variations for Your Creamy Banana Dessert
This old fashioned southern banana pudding is perfect just the way it is, but I love experimenting when I have extra time! Since Liam is such a traditionalist, I usually make the classic recipe first, and then I experiment with a little flair on the side. It’s fun to twist a traditional recipe just a bit to keep things interesting!
One fun swap is taking away the whipped cream crown completely and opting for a meringue topping instead. Wow, does that change the whole feel of the dessert! Instead of whipping the heavy cream, you’d use egg whites—just a couple whipped stiff with some sugar until they are glossy. Then you spread that meringue right over the top of the entire dish after you’ve assembled all the layers.
Now, here’s the key if you go the meringue route: you have about a 15-minute window where you need to bake it until it’s lightly golden brown, like a toasted marshmallow. It adds a lovely airy texture that contrasts beautifully with the dense pudding layers. Just watch it closely; meringue burns faster than anything in the oven, so you have to be quick!
Another easy textural change that keeps this a no bake banana pudding—though it changes the flavor profile slightly—is swapping out the vanilla wafers. I know, I know, but try it! If you use crisp, buttery shortbread cookies, they offer a richer flavor when they soften up. Or, if you want a slightly more complex spice note hidden in there, use graham crackers instead of vanilla wafers. They give the whole dessert a bit of a honeyed depth. Just remember, no matter what cookie you use, that required chilling time is what turns it into that amazing, soft, sweet creamy pudding layer!
Serving Suggestions for This Southern Comfort Food Dessert
This banana pudding is the definition of a dessert centerpiece, right? It looks spectacular piled high in a clear dish, or you can totally send out individual comfort messages by making little banana pudding cups recipe portions! I love doing the cups for potlucks because everyone gets an equal share of the crispy wafers and the creamy pudding center without anyone having to awkwardly scoop out the bottom layer.
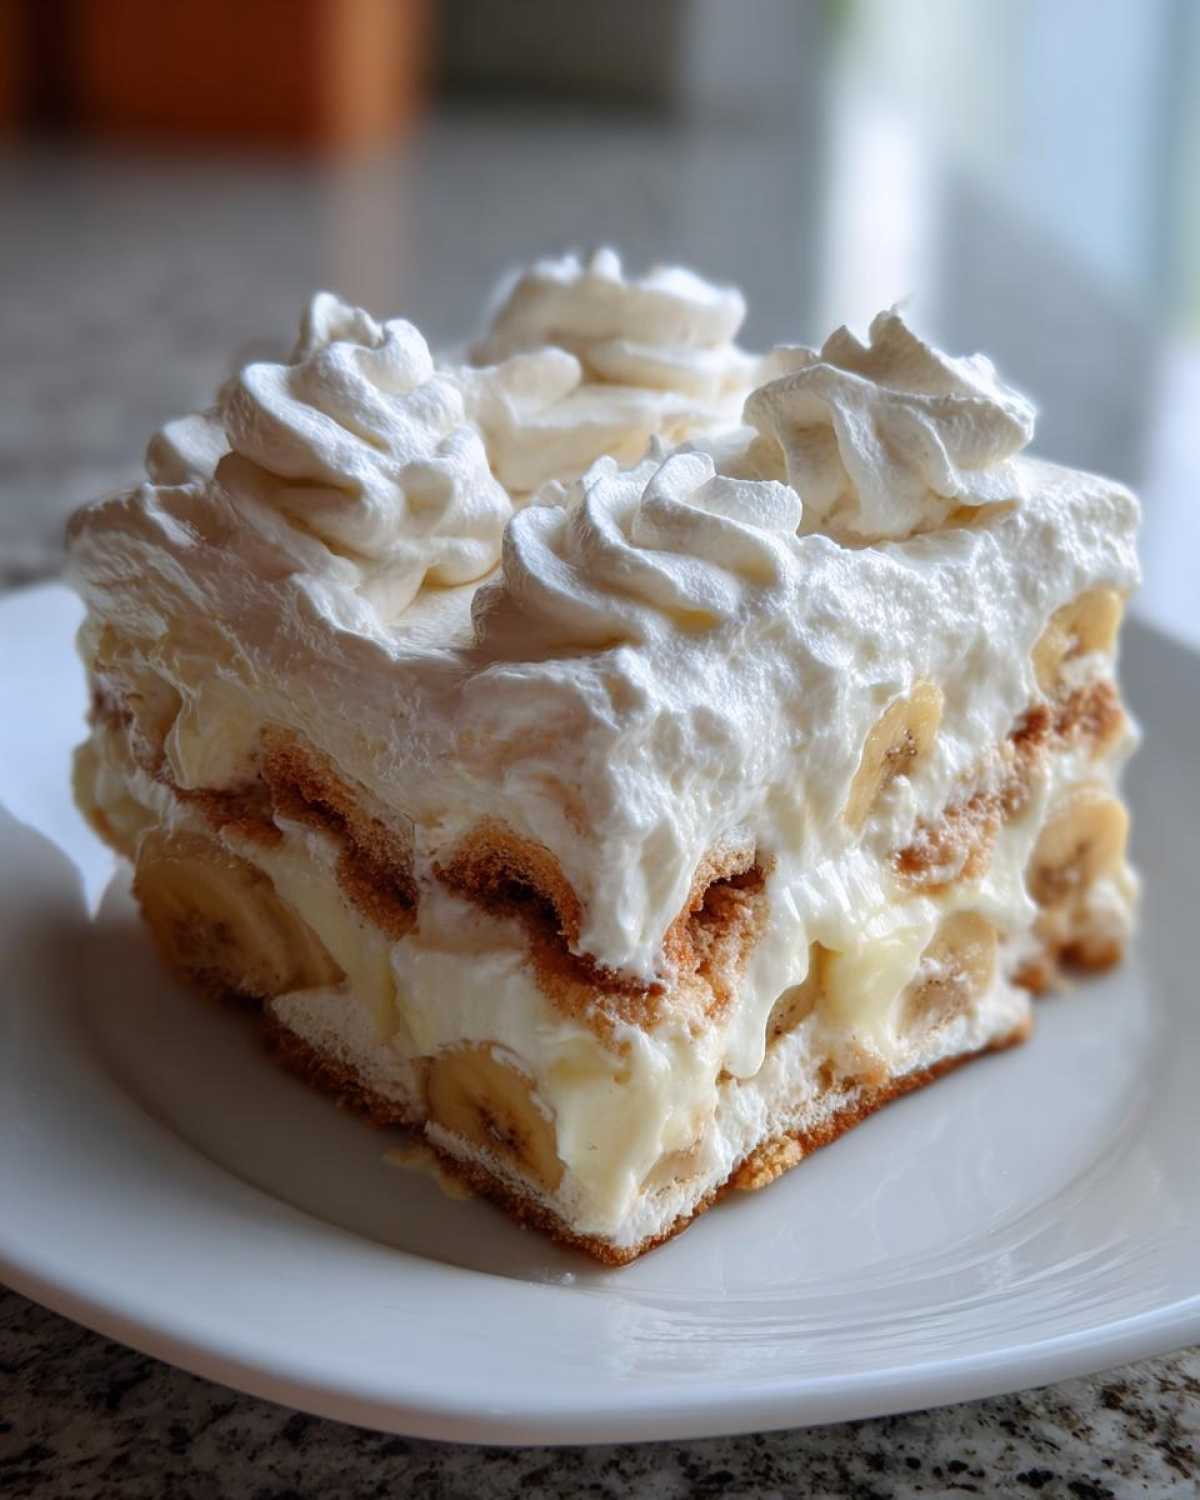
If you’re serving this as part of a big Southern spread, you need accompaniments that match that rich, comforting vibe. Think about what else Liam loves after a long week! This dessert is sweet and creamy enough that it pairs beautifully with something savory or slightly tangy. We always serve this right alongside our candied sweet potatoes because the saltiness of the yams cuts through the pudding sweetness perfectly.
For something simpler, a strong, hot cup of coffee is the absolute best partner. The richness of the coffee cleanses the palate after a big spoonful of the custard and whipped cream. Honestly, though, you don’t need much else when you have this masterpiece sitting out. It truly shines all on its own as the signature southern comfort food dessert!
Storage and Make Ahead Pudding Dessert Tips
Okay, let’s talk about timing, because this is super important for that perfect wafer texture. This is a wonderful make ahead pudding dessert, which is great news for anyone hosting, like us!
If you are planning to serve this the very next day (say, for a Sunday gathering), I recommend waiting until that afternoon to assemble it, maybe giving it a good four-hour chill time before serving. Assembling it the day before means the wafers have that ideal amount of time to soak up the custard and become those soft, almost cake-like structures we love. It’s honestly my favorite way to serve it!
If you assemble it too early—like, two days ahead—you might run into trouble. The bananas, bless their hearts, just keep releasing moisture, and after about 30 hours, the whole dish can start to lean toward mushy rather than creamy. We are aiming for structural integrity in our layers, right?
For storage, always keep your assembled dish covered tightly. Plastic wrap over the top works perfectly fine, but if you’re worried about the whipped cream getting squished, use a large dome cover. You can keep a fully assembled pudding covered tightly in the refrigerator for up to three days, but I promise you, it won’t last that long. If you happen to have leftover pudding, just know that the texture will continue to soften the longer it sits, but the flavor actually gets deeper, which is kind of nice for a Monday night scoop!
Frequently Asked Questions About Classic Banana Pudding Recipe
We get so many amazing messages asking small questions about this recipe, which just proves how many people are out there sending love through delicious food! Liam and I tried to cover all the bases for you here, but if you have more questions about making the ultimate banana pudding recipe, always drop us a line on the blog!
Can I make this a No Bake Banana Pudding?
That is such a smart question! If you look at the assembly steps, we definitely aren’t putting this beautiful dessert *in* the oven, so in that sense, it’s a no bake banana pudding! However, we do require that 10-minute stovetop cook time to make the custard base from scratch. If you want to skip the stove completely for the fastest possible easy banana pudding recipe, just refer back to the notes about the semi-homemade shortcut. You can swap out the scratch custard for instant vanilla pudding mixed per the box directions. That way, all you are doing is slicing bananas and layering wafers—truly no cooking required!
How far in advance can I assemble the banana pudding?
This is the make-or-break question for texture! For the absolute best results, you want to assemble this creamy banana dessert about 4 to 6 hours before you plan to serve it. That gives the vanilla wafers just enough time soaking in the rich custard to become perfectly tender and cake-like. If you assemble it the morning of a party, it’s usually perfect by dinnertime.
If you try to assemble it the night before (say, 12 hours ahead), the wafers might get a little *too* soft, almost dissolving entirely into the pudding base. While some people don’t mind that, I prefer that distinct, soft-but-there texture you only get from a slightly shorter chill time. For any party, I always aim to have this dessert chilling in the fridge by lunchtime at the latest!
What kind of bananas should I really be using?
I touched on this in the assembly section, but it bears repeating because it affects the whole dish! You want bananas that are fully yellow—maybe just starting to show a few tiny freckles. That means they are sweet enough to complement the custard but still firm enough that they won’t disintegrate into sugary mush overnight. If they are green, they aren’t sweet enough; if they are loaded with brown spots, they release too much water and can thin out your perfectly cooked pudding. It’s a delicate balance for the best homemade banana pudding!
Can I use something instead of vanilla wafers?
Absolutely! While the classic recipe sings with Nilla wafers (which are essential for the traditional look), don’t be afraid to mix it up, especially if you’re trying to satisfy different cravings. If you want a slightly richer flavor, use shortbread cookies—they hold up really well! Another popular swap that works beautifully in this traditional banana dessert is graham crackers. The honey note from the graham crackers pairs surprisingly well with the custard! Just remember, no matter what you use, it’s that combination of cookie and cold pudding that really makes this a phenomenal summer banana dessert recipe.
Nutritional Estimates for This Banana Pudding
Now, Liam and I are definitely not dietitians—we’re just two people who believe dessert is necessary for a well-rounded life! So take these numbers with a grain of salt (but hopefully not too much added salt in your actual recipe!). Since this is a completely homemade creamy banana dessert, the exact counts can shift depending on the brand of heavy cream or milk you choose.
We ran the numbers based on the exact amounts listed above, assuming 8 generous servings. While this is definitely a rich, comforting indulgence—perfect for those moments when you really need to send a message of deep self-care—it fits beautifully into a balanced weekend menu!
Here’s a general idea of what you’re looking at per serving:
- Calories: 380
- Fat: 14g
- Protein: 6g
- Carbohydrates: 62g
- Sugar: 45g
See that sugar count? That’s the molasses from the dark brown sugar we *almost* used (we stuck to white in the base, but still!) combined with the natural sweetness of those ripe bananas. It’s packed with good energy for a busy week ahead. Remember, these figures are just estimates based on volume; if you use low-fat milk or skip the whipped cream topping, your numbers will certainly change. But honestly? I recommend just enjoying every single spoonful of this comforting classic!
PrintThe Ultimate Old-Fashioned Southern Banana Pudding
This is the best homemade banana pudding recipe, made completely from scratch for creamy, comforting layers. It is a classic Southern dessert perfect for any gathering.
- Prep Time: 25 min
- Cook Time: 10 min
- Total Time: 3 hours 35 min
- Yield: 8 servings
- Category: Dessert
- Method: Chilling/Layering
- Cuisine: Southern
- Diet: Vegetarian
Ingredients
- 1 cup granulated sugar
- 1/4 cup cornstarch
- 1/4 teaspoon salt
- 3 large egg yolks, lightly beaten
- 2 cups whole milk
- 1 teaspoon vanilla extract
- 4 large ripe bananas, sliced
- 1 box (11 ounces) vanilla wafers
- 1/2 cup cold heavy cream
- 2 tablespoons powdered sugar
Instructions
- In a medium saucepan, whisk together the granulated sugar, cornstarch, and salt.
- Gradually whisk in the whole milk until smooth.
- Cook the mixture over medium heat, stirring constantly, until it thickens significantly and begins to bubble. This takes about 8 to 10 minutes.
- Remove the saucepan from the heat. In a small bowl, whisk the egg yolks lightly. Slowly drizzle about 1/2 cup of the hot milk mixture into the yolks while whisking constantly to temper them.
- Pour the tempered yolk mixture back into the saucepan with the remaining hot milk mixture. Return the pan to medium-low heat. Cook, stirring constantly, for 1 minute more. Do not let it boil after adding the yolks.
- Remove from heat and stir in the vanilla extract. Pour the pudding into a bowl, press plastic wrap directly onto the surface to prevent a skin from forming, and chill in the refrigerator for at least 2 hours, or until completely cold.
- When ready to assemble, slice the bananas.
- In a large glass serving dish or individual cups, create the layers. Start with a layer of vanilla wafers, followed by a layer of sliced bananas, and then a layer of the chilled pudding. Repeat the layers until all ingredients are used, ending with pudding on top.
- In a separate bowl, whip the cold heavy cream with the powdered sugar until stiff peaks form.
- Spread or pipe the whipped cream over the top layer of pudding.
- Chill the assembled banana pudding for at least 4 hours, or preferably overnight, before serving. This allows the vanilla wafers to soften into a cake-like texture.
Notes
- For a quicker, semi-homemade version similar to Magnolia Bakery style, you can substitute the scratch pudding with two boxes of instant vanilla pudding prepared according to package directions, ensuring it is fully chilled before layering.
- Use slightly under-ripe bananas if you plan to assemble the dessert a day ahead, as very ripe bananas can become mushy after extended chilling.
- If you prefer a meringue topping, skip the whipped cream and top the pudding with a baked meringue layer instead.
Nutrition
- Serving Size: 1 cup
- Calories: 380
- Sugar: 45
- Sodium: 250
- Fat: 14
- Saturated Fat: 7
- Unsaturated Fat: 7
- Trans Fat: 0
- Carbohydrates: 62
- Fiber: 2
- Protein: 6
- Cholesterol: 85