

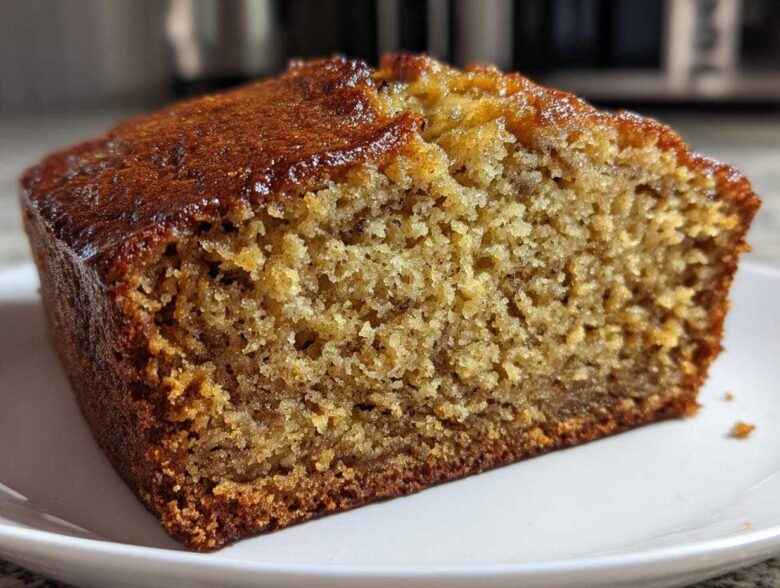
Oh, you know that moment, right? Staring at a bunch of bananas that have gone from happy yellow to deep, sugary brown on the counter? That’s not a problem; that’s a calling! Nothing beats the smell of a true classic filling your kitchen. Forget dry, crumbly disappointments. I’ve spent years trying every trick in the book, and I can tell you, I finally landed on the definitive, melt-in-your-mouth recipe for the **best Banana Bread** you will ever taste. This isn’t complicated stuff; it’s simple, one-bowl magic that always comes out perfectly moist. If you’re looking for honest, tested baking advice, feel free to stick around here on the blog for more tasty finds. Trust me, once you try this version, you won’t need another recipe again. It’s pure comfort food, made easy!
Why This Is the Best Banana Bread Recipe (Moist Banana Bread Secrets)
I’ve tweaked and tested this **Banana Bread** dozens of times, and I finally cracked the code for that incredible moisture that professional bakeries charge a fortune for. It’s not just about grabbing the bananas when they’re starting to turn; it’s how we treat the ingredients. When you follow these steps, you skip the dry loaf lottery entirely.
- We use melted butter instead of softened butter. This coats the flour differently, resulting in a slightly denser, incredibly tender crumb.
- We only use baking soda, which reacts perfectly with the acidity of the bananas and brown sugar for just the right lift.
- The ratio of bananas to flour is spot on—it’s generous without making the loaf gummy.
If you’re searching for truly moist results, you absolutely have to check out my friend’s take on sugar-free banana bread if you sometimes need to cut back on the sweetness, but for the classic version, these ratios are everything.
The Role of Overripe Bananas in Perfect Banana Bread
Listen, if your bananas are mostly yellow, put them back. I need black spots! Seriously, the sugar content skyrockets as those bananas ripen, which means you get more natural sweetness, and more importantly, way more water content. When you mash those super-spotty ones, they break down almost into a syrup. That liquid is what keeps this loaf tender for days on end. Don’t worry about it looking unappetizing; that’s the sign that your moisture bomb is ready for the bowl!
Gathering Ingredients for Your Homemade Banana Bread
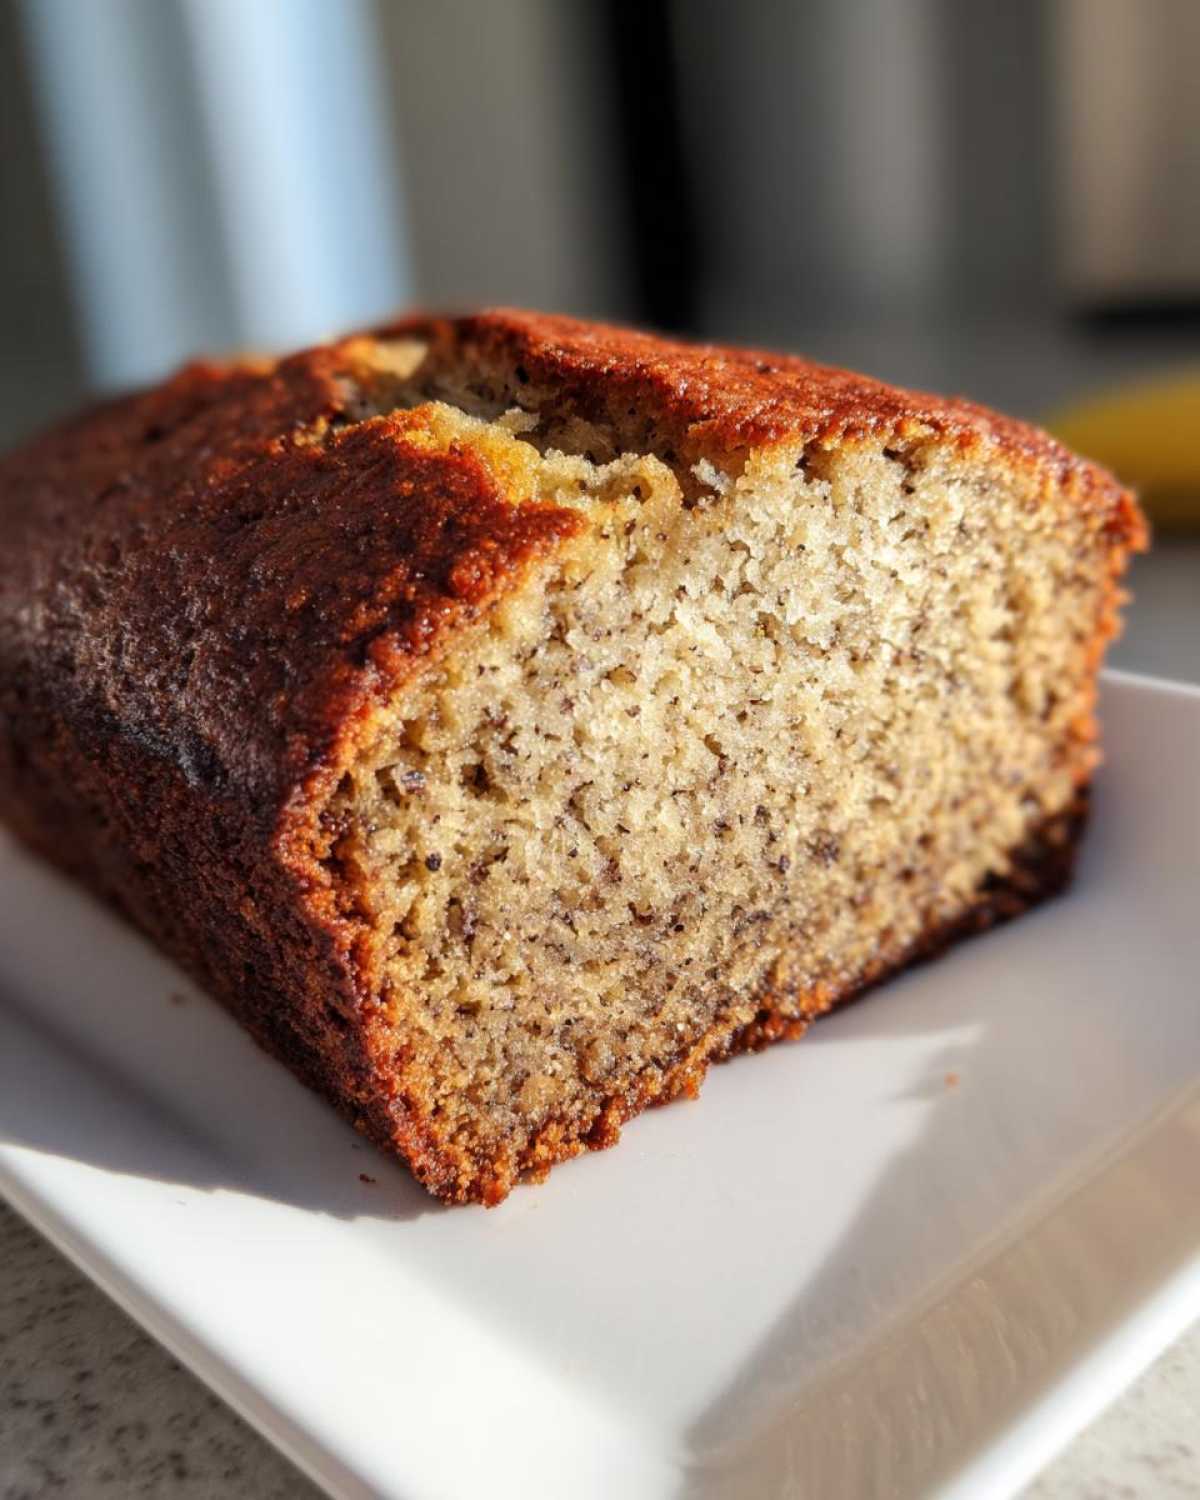
Okay, the beauty of making **Banana Bread** from scratch is that you probably have 90% of this stuff sitting in your pantry right now! There’s no weird chilling time or specialized flours needed here, which is why this is my favorite weeknight project. Before we even touch the mixing bowl, let’s make sure we have everything gathered. For this classic loaf, we keep things simple, focusing on quality ingredients that really make the banana flavor shine.
You’ll need your bananas—remember, they need to look like they survived a rough week! Here is the list. Trust me on the melted butter; it makes the mixing so much easier.
- Three very large, overripe bananas that you’ve mashed up nice and creamy.
- A half cup of good quality, unsalted butter, melted down until liquid.
- Three-quarters cup of regular white sugar.
- One large egg, just whisked lightly!
- A teaspoon of pure vanilla extract—none of that imitation stuff, if you can help it!
- One teaspoon of baking soda and just a quarter teaspoon of salt.
- A cup and a half of all-purpose flour.
- If you’re feeling wild, maybe a half cup of chopped walnuts or some milk chocolate chips!
If you’ve had success pairing bananas with nuts before, you might also want to check out my moist bakery-style banana nut muffins; the ingredients are very similar!
Easy Banana Bread Instructions: How to Bake Banana Bread Perfectly
This is where the fun starts, and honestly, this is why it’s labeled as one of the easiest recipes out there! We aren’t doing any fancy creaming here; we are sticking to the wet-into-dry method that keeps everything simple. First things first: get that oven cranking up to 350°F (175°C) right now. While it heats up, grease and flour your 9×5 loaf pan—don’t skip that greasing part, or you’ll be heartbroken later! If you’ve mastered some of my other one-bowl wonders, like the easy no-bake Oreo balls, you’ll fly through this portion.
Start by smashing those bananas in a big bowl. I like mine a little chunky, but either way works. Stir in the melted butter; it blends so much quicker than trying to mix in softened butter. Then toss in the sugar, the egg, and the vanilla. Give that a quick stir until it looks like a happy, yellow-brown mess.
Now, listen up, because this is the most important step for the best **Banana Bread**: mix your dry stuff—the flour, baking soda, and salt—in a *separate, small* bowl. Then, slowly whisk the dry into the wet ingredients. The key word here is *just* combined. As soon as those last streaks of flour disappear, STOP mixing! Overmixing activates the gluten and turns this beautiful loaf into a brick. If you’re looking for other savory meals, I have you covered, but for baking success, stopping early is key. Check out my easy Salisbury steak recipe if you need a change of pace later!
If you’re adding walnuts or chocolate chips, fold them in gently right at the very end. Pour it all into that prepared pan and pop it in the oven. It needs about 50 to 65 minutes to bake.
Crucial Banana Bread Baking Tips for Success
I’ve learned a couple of things over the years that guarantee success, especially when dealing with loaves that bake unevenly. If you notice the top of your bread getting dark brown way too fast—like after only 30 minutes—don’t panic! Just grab a piece of aluminum foil and gently tent it over the pan. This lets the middle keep cooking without burning the outside crust. It’s a trick my mom always used!
Another thing: when you test it with a toothpick, you want moist crumbs clinging to it, not wet batter, obviously. But the real test happens after it comes out. Resist the urge to slice it immediately! Let it sit in the pan for a good 10 minutes. Banana bread needs that time to set up before you try to free it onto a wire rack to finish cooling. If you try to cut it hot, it will absolutely fall apart on you. Patience is your secret ingredient here!
Variations for Your Simple Banana Loaf Cake
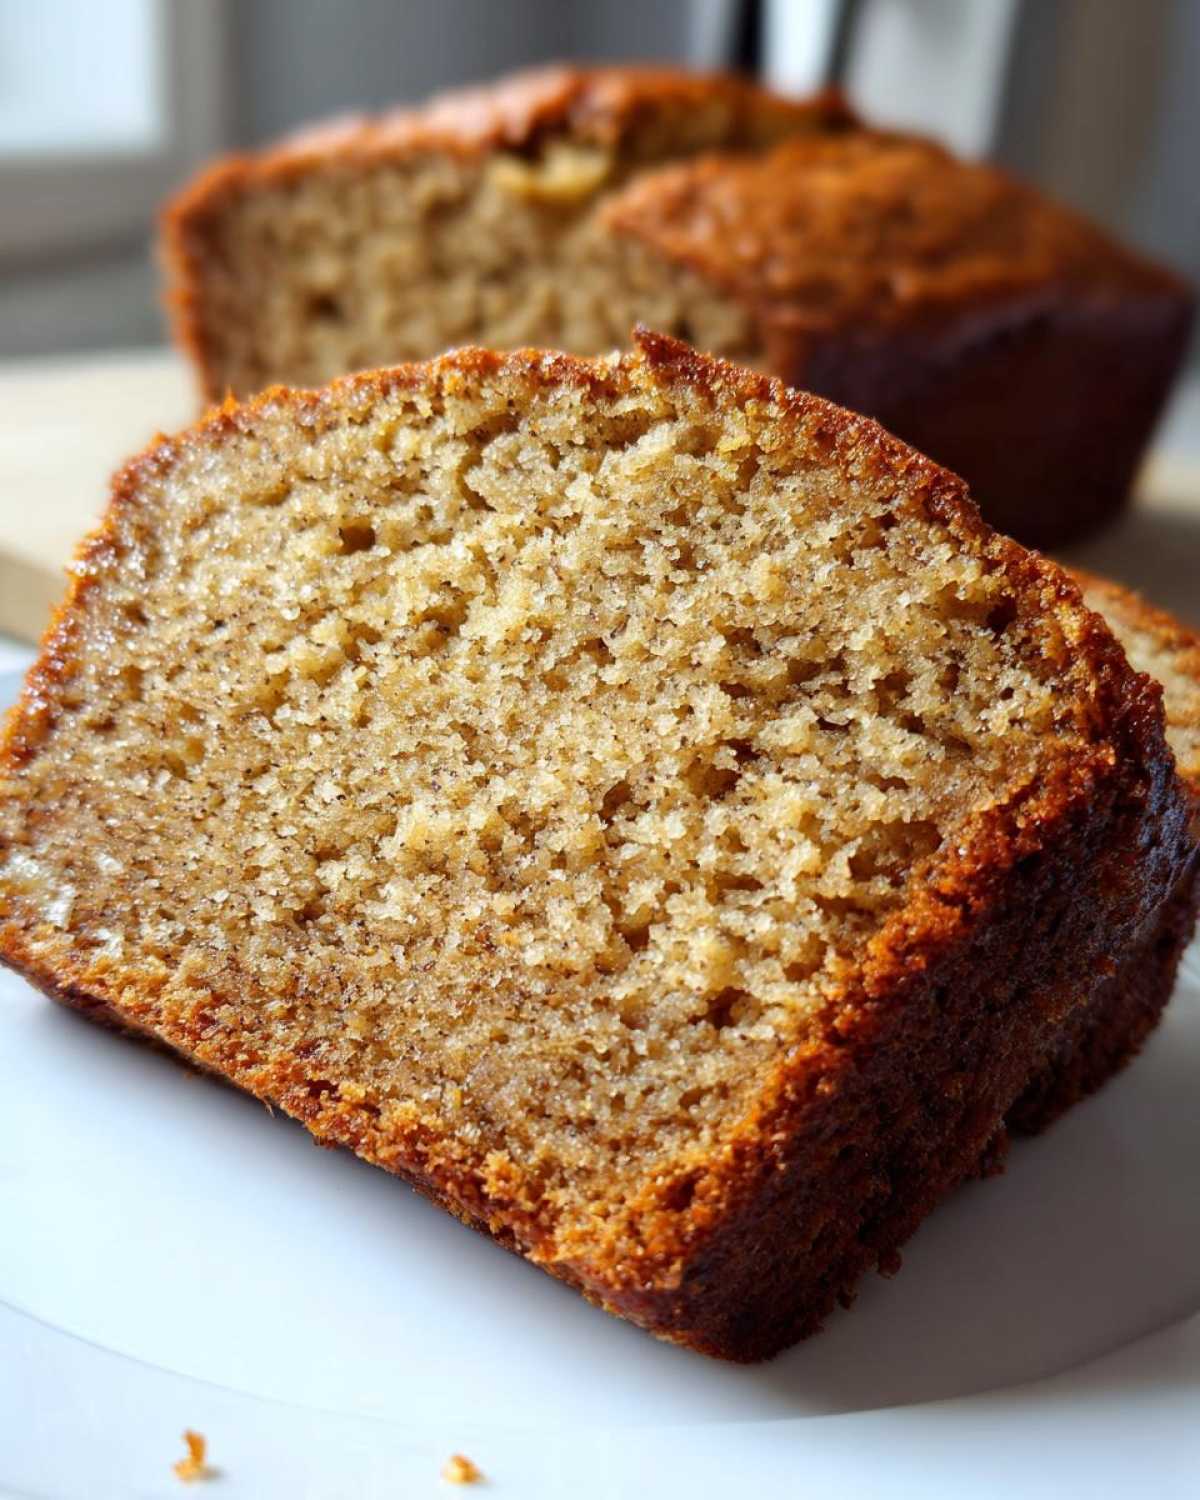
While I truly believe this classic, straightforward **Banana Bread** is unbeatable, that doesn’t mean we can’t have fun with it! The absolute best part about a simple quick bread recipe like this is how easily it accepts additions. I already mentioned walnuts or chocolate chips above, but you can really make this loaf your own.
If you want a little extra zip, try adding a teaspoon of cinnamon or even half a teaspoon of nutmeg to your dry ingredients. It warms up the flavor profile beautifully, especially if you’re serving it for breakfast.
For chocolate lovers, I highly recommend using those dark chocolate chips—they melt into little pockets of heaven against the banana. You can find my favorite dedicated recipe for a super-packed version here: Chocolate Chip Banana Bread Recipe. But sticking just to the base recipe? Feel free to swap out the nuts entirely for shredded coconut, or maybe even some toasted pecans if you have them!
Serving Suggestions for Classic Quick Bread Baking
So, you’ve followed all the steps—you managed not to overmix, and it smells absolutely heavenly coming out of the oven. Now what? Eating warm, homemade baked goods is truly one of life’s great, simple pleasures, and the way you serve this loaf makes all the difference.
Honestly, the best way I’ve ever eaten a slice of this freshly cooled loaf is with a generous smear of real, salted butter. Just a thick layer melts right into the tender crumb. It’s perfection, especially if you catch it while it’s still faintly warm.
If you’re looking for something a little fancier for brunch, a thin layer of cream cheese is fantastic. It adds a wonderful tang that cuts through the sweetness of the bananas perfectly. If you need a great recipe for that accompaniment, my homemade cream of chicken soup uses a similar rich base, which you might appreciate!
And if you’re having this as a simple breakfast loaf, you absolutely need a strong, hot cup of coffee to go alongside it. That’s my preferred way to start a lazy weekend morning. Enjoy every single bite!
Storage and Reheating Instructions for Banana Bread
We all know the hardest part of making a fantastic **Banana Bread** is trying *not* to eat the entire thing in one sitting! Luckily, this recipe is incredibly stable, and thanks to all that mashed fruit, it stays fresh longer than a regular cake. But you still need to store it right to keep that moisture locked in.
My general rule, based on what the recipe notes suggest, is to store it at room temperature for up to three days. You need to wrap it tightly! When it cools completely—and I mean *completely*—wrap the whole loaf or individual slices tightly in plastic wrap, and then maybe wrap that in foil. This dual layer keeps out any air that might dry it out. Keeping it on the counter is best because sometimes fridge time can slightly stiffen the texture.
Thinking ahead? You can definitely freeze this! If you know you won’t finish it within three days, wrap it up super securely (foil is your friend here) and pop it in the freezer. I actually prefer freezing it in individual slices after cooling, so I can just grab one when I want it. If you’re freezing for later, check out how I handle my freezer breakfast stash, which lasts way longer: freezer breakfast burritos are a lifesaver too!
To reheat a slice, just pop it on a microwave-safe plate for about 15 to 20 seconds. If you’re reheating a whole loaf, wrap it loosely in foil and warm it in a low oven (around 300°F) for about 10 minutes. You get that fresh-baked warmth again without losing any of that precious moisture. Enjoy that perfect slice of **Banana Bread**!
Frequently Asked Questions About Making Banana Bread
I get so many questions whenever I post this recipe, which tells me that finding that truly perfect, **Moist Banana Bread** can sometimes feel like a puzzle! Don’t worry, I’ve gathered up the ones I hear most often to try and save you some guesswork. Baking is all about practice, but knowing a few tricks up front makes the whole process so much smoother.
What to make with Overripe Bananas?
This is the number one question I get! Honestly, this recipe is designed specifically for bananas that are so dark they look almost black—that’s when you know you have maximum sweetness and moisture potential. If you have too many, simply leave them in their peels and put them in the freezer! Once frozen, the peel turns completely black, but the inside stays perfect. When you need them for baking, just thaw them right in a bowl (they’ll be super watery, which is great for this recipe!) or use them frozen in smoothies. You can also check out my tips for making a rich date nut bread if you need another way to use up those dark fruits.
Can I make this Banana Bread recipe without an oven?
That’s a tricky one! For this specific recipe, I really rely on the even heat distribution of an oven set to 350°F to get that classic internal structure. Trying to bake a standard loaf on the stovetop usually results in a burned bottom and a raw middle. If you really don’t have an oven, you *might* be able to try a very slow cook in a heavy-bottomed Dutch oven over very low heat—but honestly, you’ll be babysitting it constantly. For guaranteed flavor, the oven is your best friend for this Quick Bread Baking!
How long does it take to cool the Simple Banana Loaf Cake?
This relates directly back to my advice on handling it gently! You need that 10 minutes in the pan because the structure is still a bit fragile when it first comes out of the heat. After that 10 minutes, turn it out onto a wire rack. Then, you need to let it cool for at least 30 minutes more on the rack before you even *think* about slicing it. If you cut it right away, the steam rushes out, and you’ll get that slightly gummy texture near the cut. Let it breathe, and you’ll get those lovely clean slices!
Estimated Nutritional Data for Homemade Banana Bread
Now, I know most of us aren’t looking at calorie counts when we’re diving into a slice of warm, homemade quick bread, but sometimes it’s nice to have a general idea, right? I ran the numbers for this basic recipe—and remember, this is only using the standard ingredients, not piling in extra nuts or chocolate chips!
This information is just a rough guide, of course, because how ripe your bananas were or exactly how much sugar you used can change things slightly. If you’re trying to track macros, I always recommend cross-referencing with a tool, but this gives you a good starting point for understanding what you’re enjoying. If you are interested in making some snacks that are more focused on specific macros, you might find my recipe for easy 5-ingredient protein bars helpful!
Here is the breakdown per slice (based on 10 slices total):
- Calories: About 240 per slice
- Fat: Around 11 grams
- Carbohydrates: Roughly 35 grams
- Protein: A modest 3 grams
- Sugar: Around 14 grams
See? It’s a treat, but a worthwhile one! It’s got some fiber from the fruit, and since we are using real banana, it’s definitely better than grabbing a pre-packaged pastry. We keep things delicious, not overly complicated!
Share Your Perfect Banana Bread Experience
That’s it! You’ve made it through the easiest path to amazing quick bread. Now comes my absolute favorite part: finding out how it turned out in *your* kitchen! I put all my best tips into this article so you could achieve that perfect, **Moist Banana Bread** texture the very first time you tried it.
I seriously want to know what you think. Did you stick with the classic version, or did you sneak in some chocolate chips? Did you serve it with butter, or were you feeling fancy with cream cheese? Please take a minute to leave a star rating below the recipe card—it helps other bakers know this is the real deal!
If you snapped a picture of your gorgeous loaf, please share it! Tag me on social media if you can, or feel free to send your baking stories or any last-minute questions you have over to the contact page whenever you have a free moment. Hearing from you guys is what makes developing and sharing these classic recipes so much fun. Happy baking, and enjoy your incredible **Banana Bread**!
PrintClassic Moist Banana Bread
A simple recipe for making moist, flavorful banana bread using overripe bananas.
- Prep Time: 15 min
- Cook Time: 60 min
- Total Time: 75 min
- Yield: 1 loaf (about 10 slices)
- Category: Baking
- Method: Baking
- Cuisine: American
- Diet: Vegetarian
Ingredients
- 3 large overripe bananas, mashed
- 1/2 cup (1 stick) unsalted butter, melted
- 3/4 cup granulated sugar
- 1 large egg, lightly beaten
- 1 teaspoon vanilla extract
- 1 teaspoon baking soda
- 1/4 teaspoon salt
- 1 1/2 cups all-purpose flour
- 1/2 cup chopped walnuts or chocolate chips (optional)
Instructions
- Preheat your oven to 350°F (175°C). Grease and flour a 9×5 inch loaf pan.
- In a large bowl, mash the bananas until mostly smooth.
- Stir the melted butter into the mashed bananas.
- Mix in the sugar, beaten egg, and vanilla extract until combined.
- In a separate small bowl, whisk together the baking soda and salt with the flour.
- Gradually add the dry ingredients to the wet ingredients, mixing only until just combined. Do not overmix.
- Fold in any optional nuts or chocolate chips if using.
- Pour the batter into the prepared loaf pan.
- Bake for 50 to 65 minutes, or until a toothpick inserted into the center comes out clean.
- Let the bread cool in the pan for 10 minutes before turning it out onto a wire rack to cool completely.
Notes
- For the moistest bread, use very dark, spotty bananas.
- If the top browns too quickly during baking, loosely tent the pan with aluminum foil for the remaining cook time.
- This bread stores well wrapped tightly at room temperature for up to 3 days.
Nutrition
- Serving Size: 1 slice
- Calories: 240
- Sugar: 14
- Sodium: 150
- Fat: 11
- Saturated Fat: 6
- Unsaturated Fat: 5
- Trans Fat: 0
- Carbohydrates: 35
- Fiber: 2
- Protein: 3
- Cholesterol: 35