

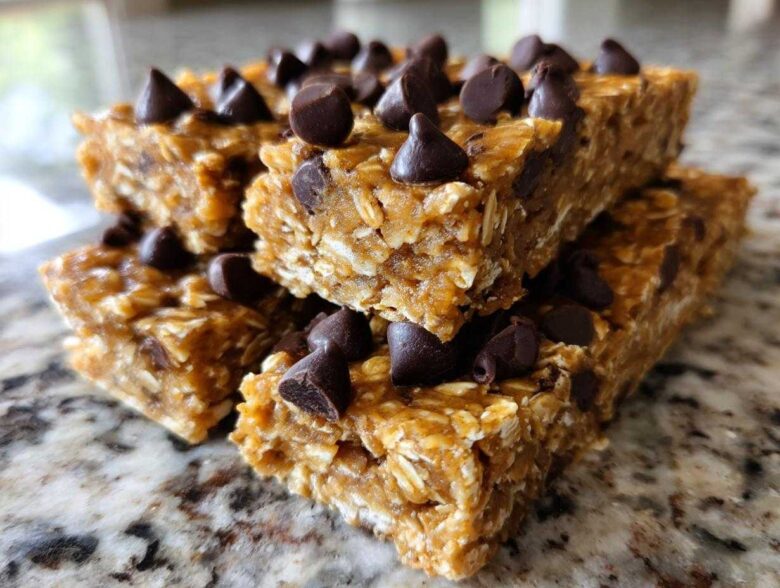
Oh, you know those days, right? The ones where you’re running between meetings, you swore you’d packed a snack, and suddenly you’re staring down the barrel of a sugar crash because the only thing available is that sad vending machine candy bar? Liam and I live by the philosophy that food should be a message of comfort, and sometimes that message just needs to say, “Fuel up, fast!” That’s why I’m obsessed with this recipe. You are going to absolutely love these Easy 5-Ingredient No-Bake Peanut Butter Protein Bars. They are the ultimate reliable dispatcher for our busy lives. If you love learning about how we started sending those warm messages of care, you can read all about us over at Cookery Courier. Seriously, if I can master these incredibly simple, no-cook homemade protein bars, you definitely can too! I promise, they taste worlds better than anything you find in a wrapper.
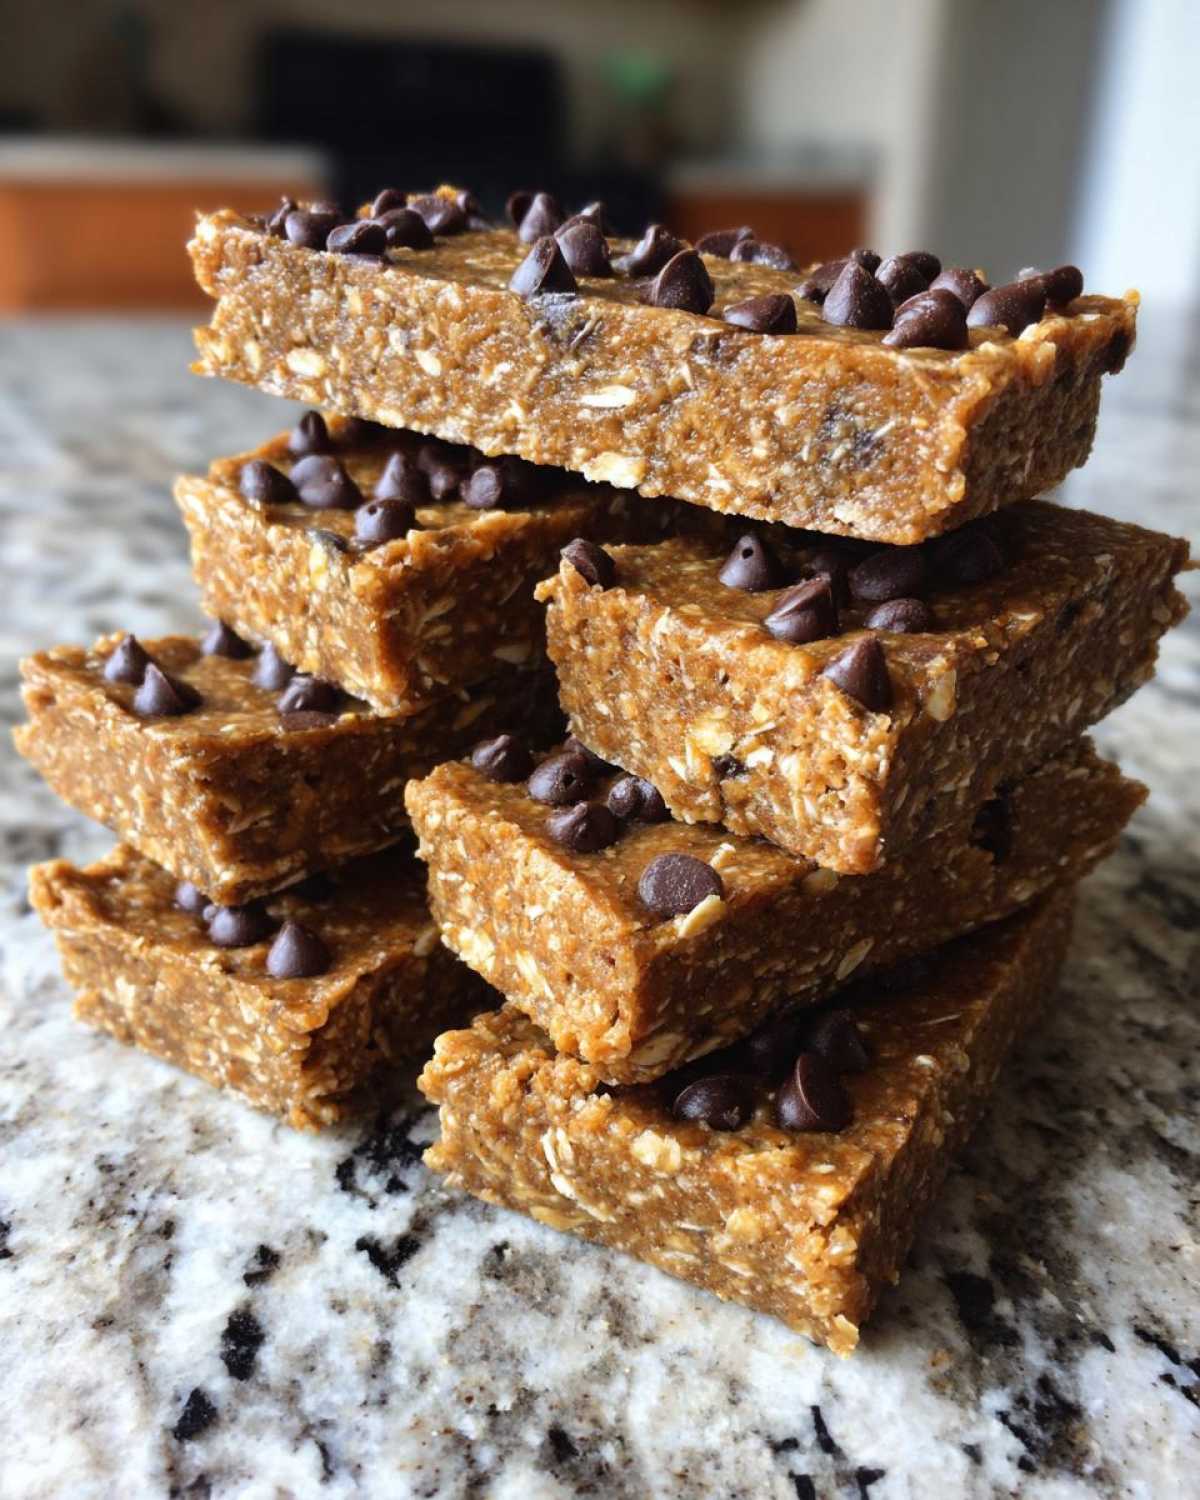
Why These Are the Best Homemade Protein Bars You Will Ever Make
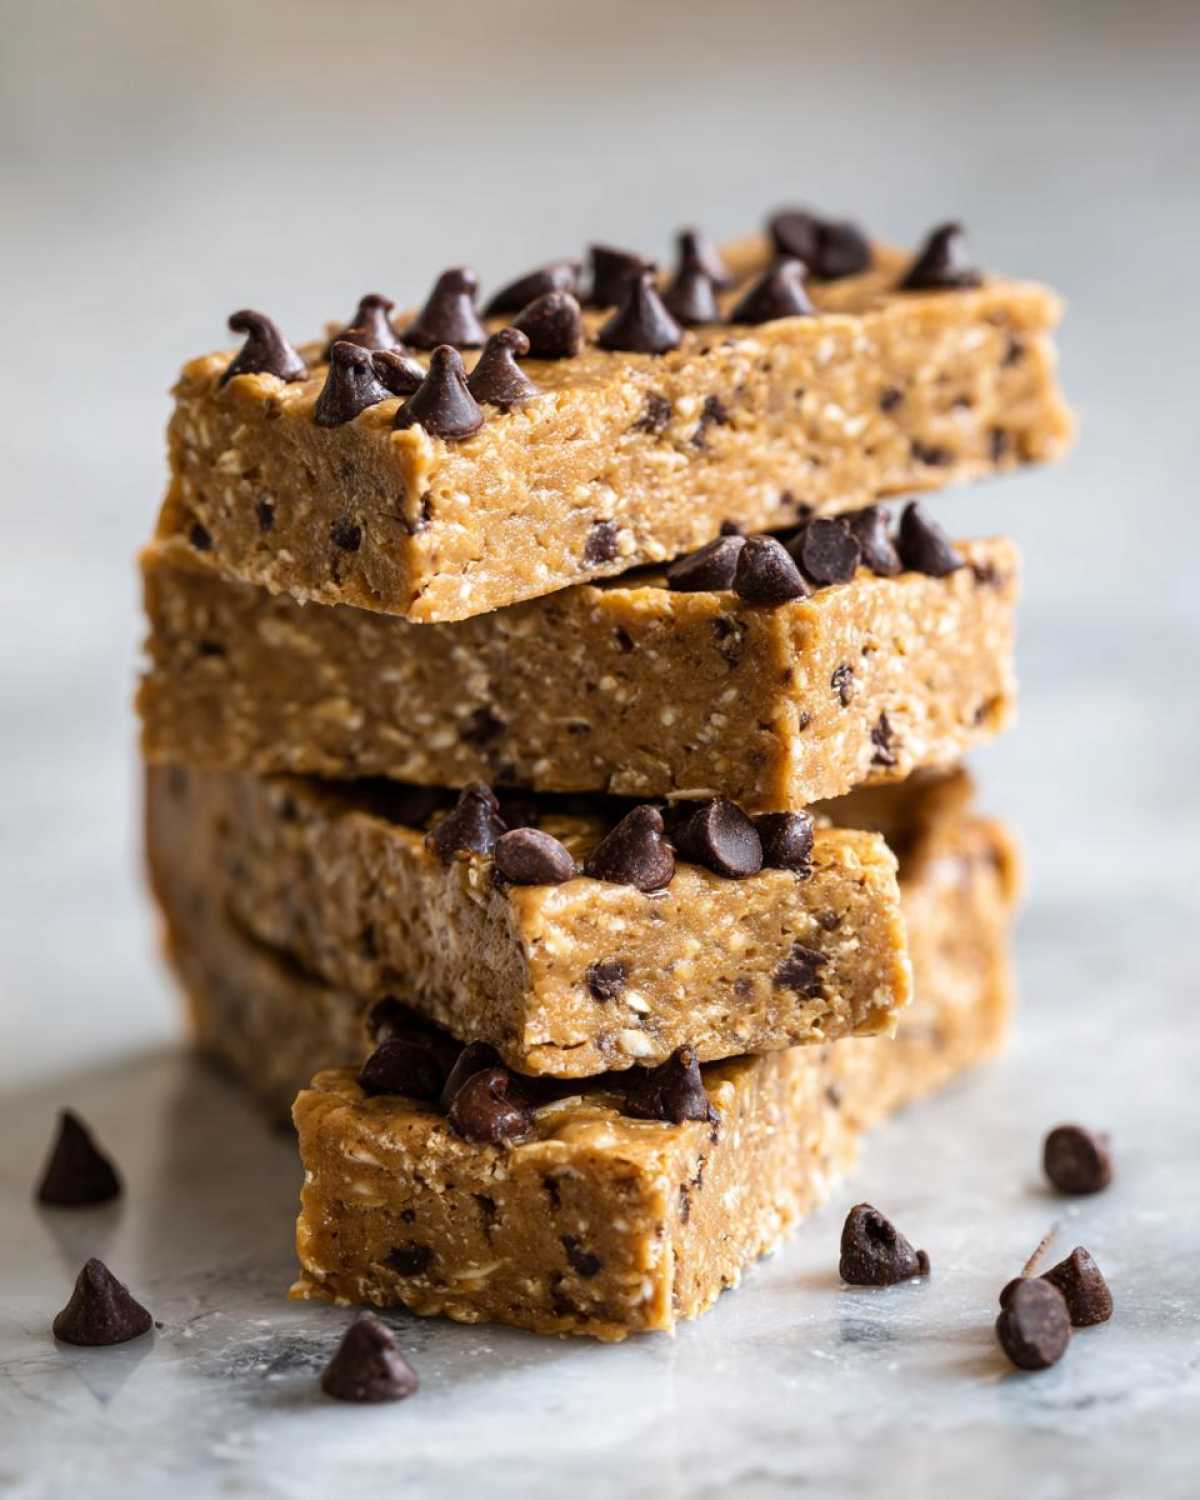
I’ve honestly tried enough of those chalky, weirdly-textured store-bought bars to last a lifetime. That’s why I stand by this specific protein bar recipe. These truly are the best homemade protein bars because they hit that perfect trifecta: five simple ingredients, zero baking required, and they are genuinely chewy. Forget everything you think you know about dry, powdery snacks; these are soft!
Speed and Simplicity: Making Easy Protein Bars
When I say easy, I mean it. We’re talking about 10 minutes of actual hands-on time. That’s it! There’s no heating the oven, no worrying about carryover cooking—nothing. This is prime territory for no cooking required snacks. If you need quick protein snacks for tomorrow morning, you can mix these tonight and have them ready before your coffee is even brewed in the morning.
Flavor Profile: Perfect Peanut Butter Protein Bars
You know Liam loves anything peanut butter and chocolate, and this base recipe is just screaming for that combination. They have that satisfying, rich flavor you crave, but instead of questionable fillers, you’re getting wholesome oats and quality protein powder. Trust me, once you taste these peanut butter protein bars, you won’t look back at the overly processed kind. They feel like a treat, not a chore!
Essential Ingredients for Your 5-Ingredient Protein Bars
Okay, so the magic here really is how few things you actually need. Liam always jokes that I love this recipe because it means fewer dishes. Seriously, having a good running list of core ingredients you can grab anytime is what makes these homemade protein bars a lifesaver. If you want to see another fantastic ingredient breakdown for different kinds of snacks, check out this page on simple ideas!
- One cup of rolled oats. I prefer the old-fashioned kind here, definitely not the instant dust.
- One cup of protein powder. Vanilla or just unflavored works best because it lets the peanut butter shine.
- Half a cup of natural peanut butter. Make sure it’s the creamy kind that usually requires stirring, not the super processed stuff where sugar is listed as the first ingredient.
- A quarter cup of honey or maple syrup. This is where you get your binder and a touch of natural sweetness. You can find some other great ideas for alternative binding ingredients right here.
- A quarter cup of dark chocolate chips—this is totally optional, but why skip chocolate, right? Press ’em right on top!
When you see ingredients like this list, you just know you’re making real, high-quality healthy snack bars. No sketchy chemicals here, just stuff you recognize! These ingredients ensure you get that perfect texture we talked about for easy protein bars.
Step-by-Step Guide to Perfect No Bake Protein Bars
I know you’re excited to get these mixed, but trust me when I say the assembly order is key to making sure these don’t end up as a crumbly mess later. Since we aren’t using heat to bind these babies together, technique is everything! It’s almost like building a beautiful little block of pure fuel. We want solid, chewy results, not powder everywhere. If you’re prepping for the week, you can find some extra tips for making these ahead on Liam’s favorite resource pages for no bake recipes!
Preparing the Pan and Combining Dry Ingredients for Protein Bars
First things first: grab that 8×8 pan and line it with parchment paper. Make sure the paper hangs over two opposite sides—this is our handle later! Now, take your oats and your protein powder and toss them into a big bowl. I always give these a really good whisk first until I know the powder is totally distributed through the oats. You don’t want a patch of pure protein powder hiding somewhere untouched.
Forming the Dough and Pressing Your Homemade Protein Bars
Next, we add the wet stuff: the peanut butter and the honey or syrup. Now is the time to get your hands in there! Use a sturdy spoon at first, but honestly, kneading it in with your hands is the best way to make sure everything incorporates. You’re looking for a thick, cohesive dough. Once it sticks together when you squeeze it, press it firmly—and I mean firmly—into your lined pan. Pack it down like you’re making a solid brick! This step is what prevents those frustrating crumbles later when you try to slice your protein bars.
Chilling and Cutting Your No Bake Protein Bars
If you used chocolate chips, sprinkle them on now and gently press them in so they stick. Then, this is the most important part for clean slicing: into the fridge it goes! You need to chill your pan for a minimum of one whole hour. Seriously, don’t rush this. Once they are super firm, use those parchment overhangs to lift the whole block out onto your cutting board. Then, use a sharp knife to slice it into 10 or 12 nice, neat portions. Don’t try to cut them when they’re even slightly warm or soft, or you’ll just smash them!
Tips for Making the Ultimate Chewy Protein Bars
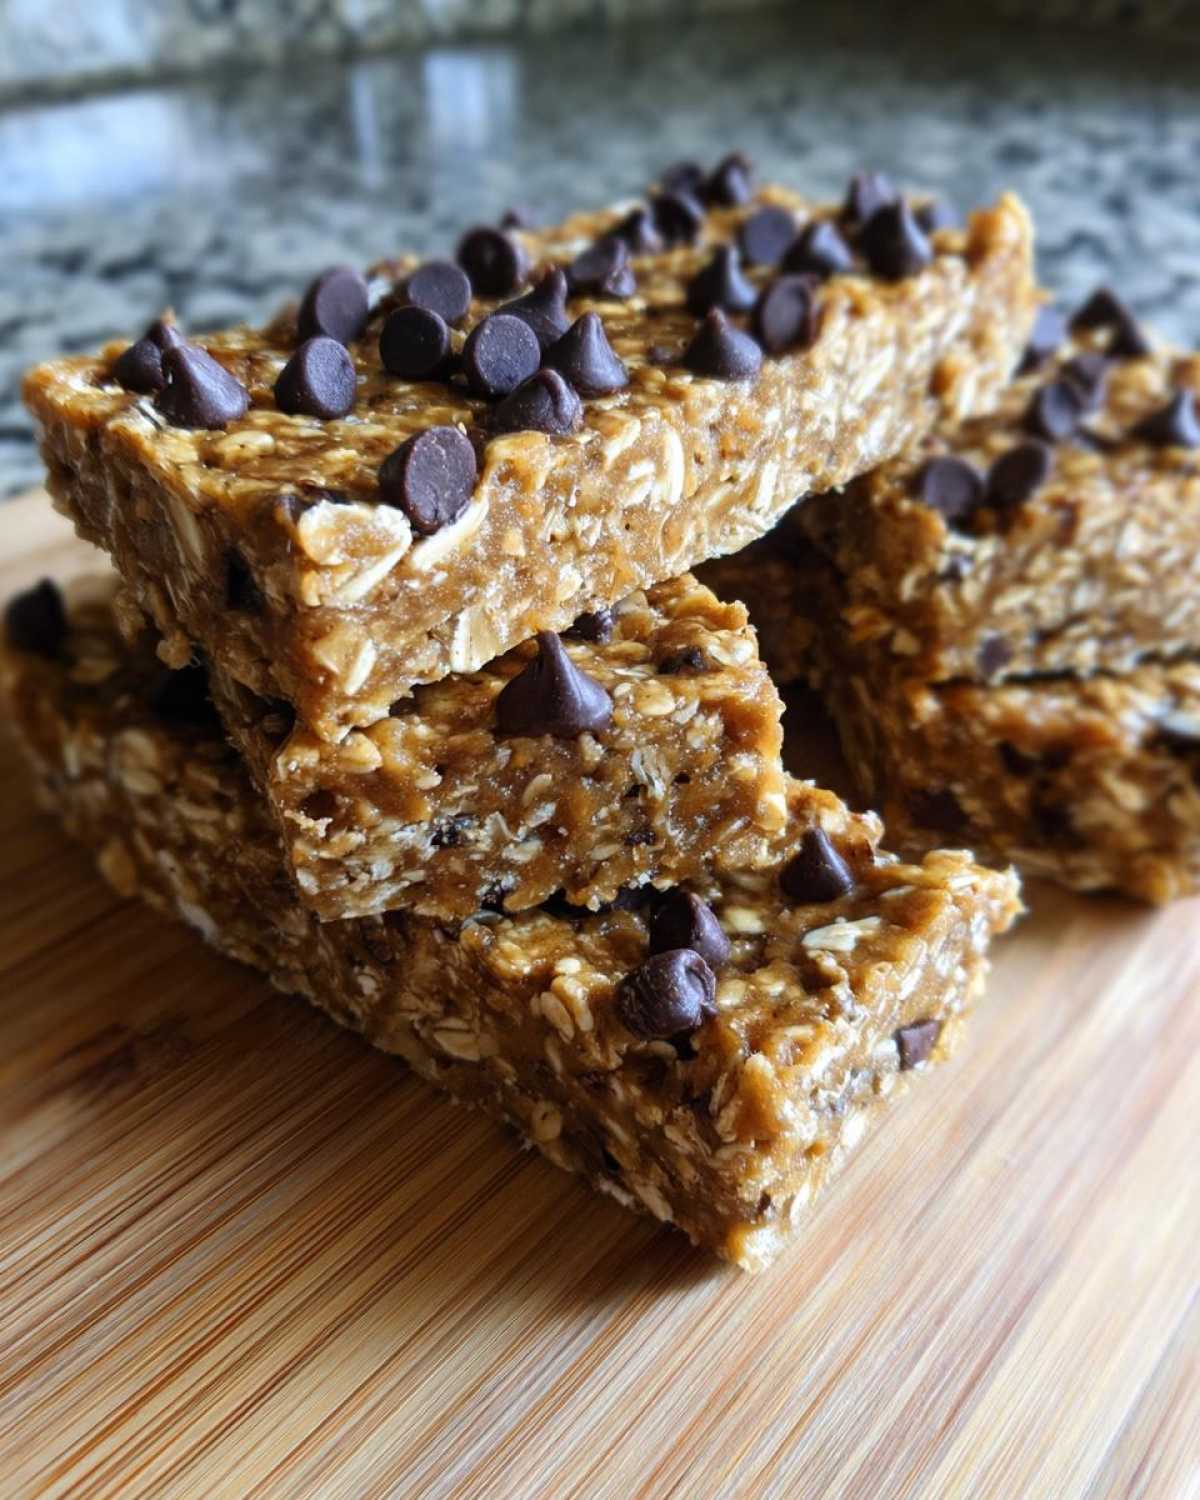
Okay, so we have the basic recipe locked down, but every great baker knows the trick is in the fine-tuning, right? These little pointers are what elevate these from “pretty good” protein bars to the ones you’ll be making every single week. I’ve learned these the hard way—usually involving a batch that turned out way too dry or too sticky on the counter!
Ingredient Notes and Substitutions for Protein Bars
The first thing you need to watch is your protein powder. Not all powders behave the same way! If you’re using a super fine whey isolate, it will soak up moisture like a sponge, meaning you might need an extra teaspoon or two of water or syrup just to get it to stick. If your mix seems crumbly after stirring everything, don’t panic. Just add liquid, one tiny splash at a time, until it just starts to come together in a dough.
We talked about keeping these naturally sweet, and the honey or maple syrup does the heavy lifting there. If you need truly low sugar protein bars, you can try cutting the honey by a third and using a few drops of liquid stevia, but be warned—too much stevia can sometimes leave a weird aftertaste. Play with the sweetener cautiously!
Also, remember the vegan swap we mentioned? If you’re making vegan protein bars, swap that honey for maple syrup, and most crucial, make sure your protein powder is plant-based. Sometimes vegan powders need a little more binder because they absorb liquid differently than dairy-based ones.
And what about powdered peanut butter? You can absolutely use PB2 or a similar brand! But here’s the catch: powdered PB is much drier than creamy peanut butter. If you substitute that in, you’ll need to add back the fat you removed. I usually replace about half the required powdered PB volume with a little extra liquid coconut oil or a couple of extra tablespoons of melted natural peanut butter to keep that glorious chewy texture. Seriously, the texture is everything with these easy protein bars!
How to Store and Keep Your Protein Bars Fresh
One of the best parts about making this recipe is that we get to talk about **meal prep bars**! Because there’s no baking involved, these homemade protein bars are actually better after they sit for a bit and firm up. They rely on the cold to hold their shape, so refrigeration is our best friend here.
The instructions say to store them in an airtight container in the fridge, and honestly, that’s all you need to do for up to a week. I always line the bottom of my container with a small sheet of parchment paper first, just in case they stick to the bottom over time. This way, when you grab the first one, the rest stay perfectly stacked.
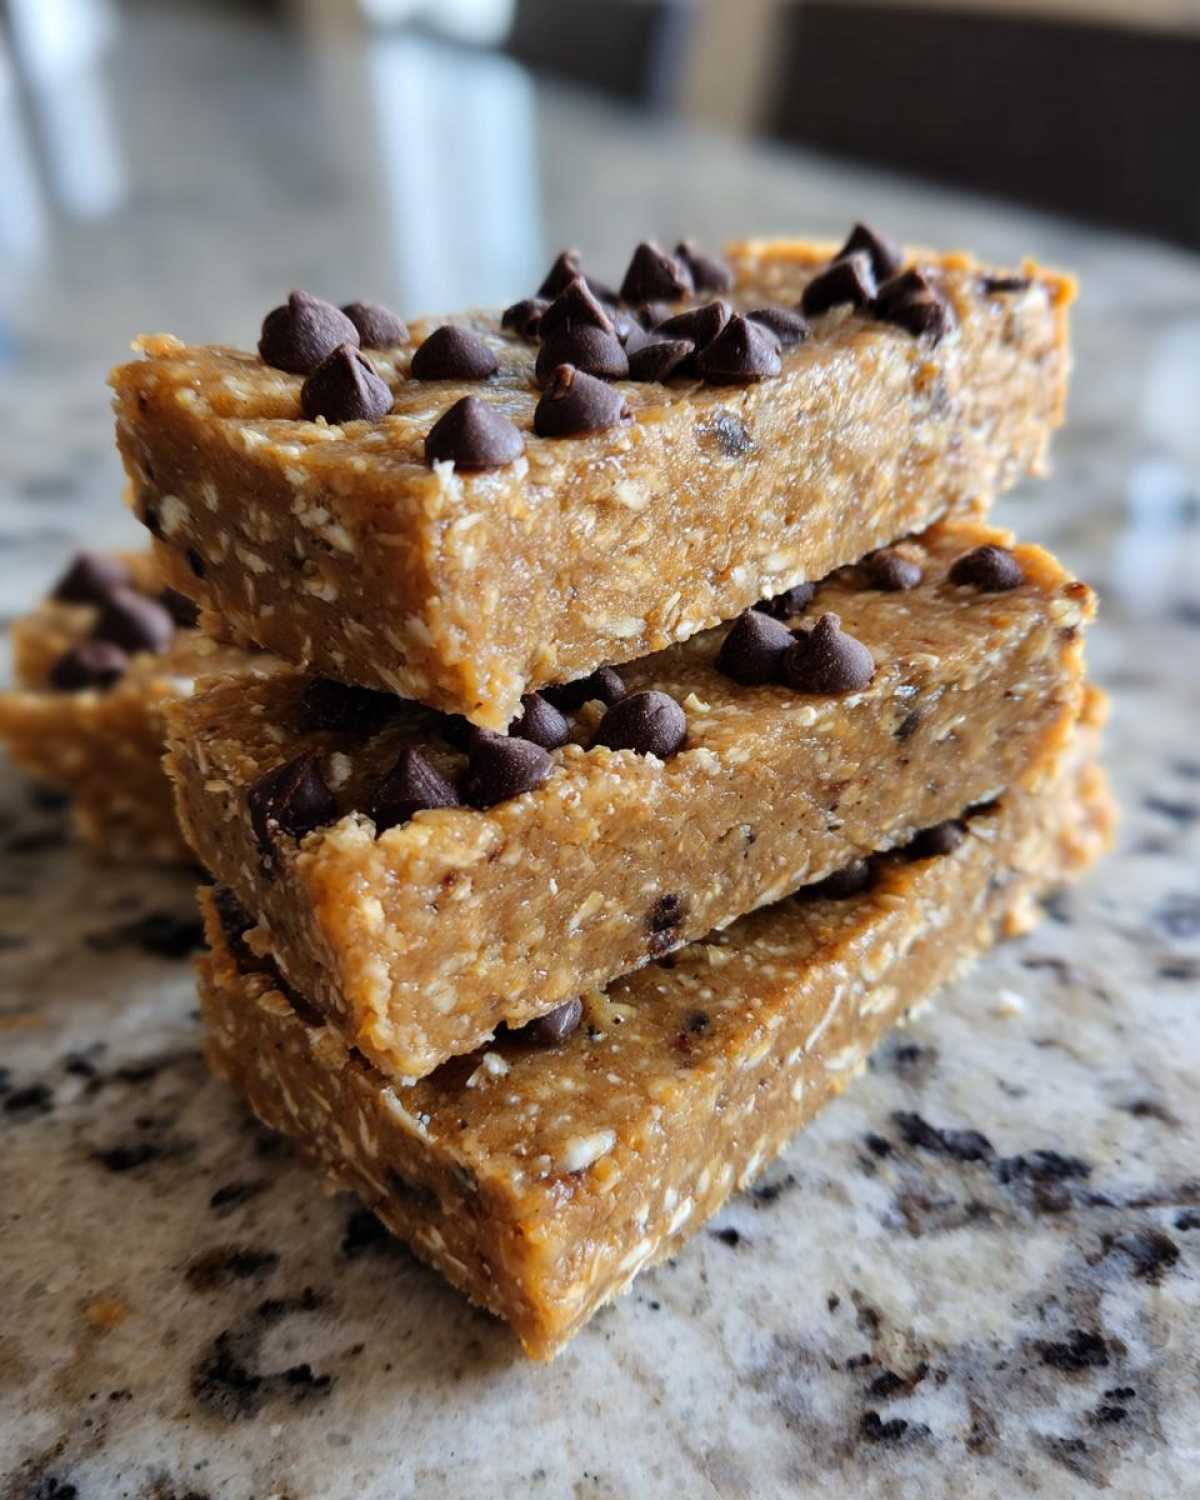
They are truly fantastic grab-and-go snacks just pulled straight from the cold. If you plan ahead—say, you make a double batch on Sunday—you can definitely freeze them for longer storage. Just wrap individual protein bars tightly in plastic wrap or wax paper, and then place those wrapped bars into a freezer-safe zip-top bag. They keep beautifully for up to three months in the freezer!
When you want one, just pull it out of the freezer about 15 minutes before you need it. That little bit of thawing time gets them back to that perfect, slightly soft, chewy texture that we worked so hard to achieve. It’s my favorite way to ensure I always have a healthy snack ready for Liam before he heads out for his lunchtime errands. You can check out some of my favorite quick cooking tips over on the main blog!
Variations for Your Homemade Protein Bars
This five-ingredient base recipe is amazing because it’s so sturdy, which means it’s perfect for customization! Seriously, you can turn this into a totally different type of bar just by tweaking one or two things. If you get tired of the peanut butter classic, don’t worry—we have tons of ways to switch things up and keep things exciting. It’s all about experimenting to find *your* ultimate high-protein snack blend.
My favorite thing to do is play around with the extracts. If you’re making a classic vanilla powder batch, sometimes adding just half a teaspoon of almond extract transforms the whole flavor profile. It gives it a rich, almost almond joy bar feeling, especially when you use chopped almonds as your mix-in instead of chocolate chips.
Speaking of mix-ins, this is where you can really tailor these protein bars to your mood. If you want to skip the chocolate chips entirely, try stirring in things like:
- Shredded, unsweetened coconut for a tropical twist.
- Chia seeds or flax seeds for an extra fiber boost (just a tablespoon or two!).
- A pinch of sea salt flakes right on top to balance the sweetness.
Another fun swap is switching up the core flavor outside of peanut butter. You can often use the same ratios of sweetener and oats if you substitute almond butter or cashew butter for the peanut butter. Suddenly, you have a whole new batch of easy protein bars, but the process is exactly the same—mix, press, and chill! If you’re feeling super indulgent, try folding in a couple of tablespoons of unsweetened cocoa powder right along with your protein powder for instant fudgy chocolate protein bars. It’s that easy to change things up!
Serving Suggestions for High Protein Snacks
So you’ve made the batch, they’re perfectly chilled, and you’re ready to start fueling up! Having these peanut butter protein bars ready is great, but sometimes you want to make it a little more of a *moment*, you know? I’m always looking for ways to turn a quick snack into something that feels a little more pulled-together, especially when Liam and I are grabbing something before we tackle the busy afternoon.
These bars are robust enough to handle a bit of fancy pairing. My absolute favorite, classic courier choice is just a hot cup of strong black coffee. The bitterness of the coffee cuts through the sweetness of the peanut butter and the optional chocolate layer perfectly. It’s my 10 AM dispatch to keep me going until lunch!
For something mid-morning or part of a bigger light breakfast, you can’t go wrong pairing these high protein snacks with fresh fruit. Think crisp apple slices or bright red strawberries. The fresh tang of the fruit balances the richness of the nut butter and oats beautifully. It just feels so clean and satisfying.
If you’re having these as an afternoon pick-me-up and you need a little extra protein punch, I sometimes crumble half a bar over a small bowl of plain Greek yogurt. It adds a nice, almost granola-like crunch without the fuss of actually making granola. It turns a simple snack into a full little bowl of comfort!
If you’re interested in another one of our favorite grab-and-go peanut butter treats that uses a slightly different method—less chewy bar, more crunchy bark—you should definitely check out the recipe for Peanut Butter Pretzel Bark. Sometimes you just need that salty crunch!
Frequently Asked Questions About Making Protein Bars
When I first started messing around with making my own snacks, I had about a million questions floating around my head. It’s totally normal to wonder if substitutions will ruin the whole batch! Here are a few things I get asked most often about these unbelievably simple protein bars.
Can I make these vegan protein bars?
Yes, absolutely! This recipe is really adaptable for vegan protein bars, and it’s so easy. You just have to make two simple swaps. First, make sure you are using maple syrup instead of honey—that takes care of the vegan requirement for the sweetener. Second, and this is important, you must ensure your protein powder is a plant-based option, like pea, soy, or brown rice protein. Sometimes vegan proteins can be a bit drier, so if you find your dough is looking sad and crumbly when you add the liquid, just add a tiny splash of water or almond milk until it comes together. It’s really straightforward!
Why are my homemade protein bars so crumbly when I cut them?
Ugh, that is the worst, isn’t it? Crumbly bars happen when there isn’t enough binder doing its job, or if you didn’t press them down hard enough. The mixture needs to be firm enough to truly hold its shape. My biggest tip here, which I can’t stress enough, is that chilling time! You really need that full hour minimum, or even longer if your fridge isn’t super cold. Chilling turns the fats (the peanut butter) hard, and that’s what locks everything in place. Also, be sure you’re using a good quality, creamy peanut butter and not the runny, natural type that separates easily.
How much protein is in these easy protein bars?
This is a great question, especially since we’re aiming for high protein snacks! Based on the standard amounts I use—especially with a standard scoop of that vanilla whey powder—you’re looking at roughly 18 grams of protein per bar if you cut the batch into 10 servings. If you cut them into 12 smaller portions, that number goes up slightly. It’s a fantastic way to control your macros, far better than buying a generic bar off the shelf where you never really know what’s going on inside, right?
Can I skip the oats and still have good texture?
Technically, yes, but I wouldn’t recommend it if you’re looking for that perfect, satisfying chewiness. The oats add bulk, fiber, and a specific texture that you just can’t replicate perfectly with more protein powder. If you absolutely must skip the oats for a grain-free version, you’ll need to replace that volume (one cup) with something like almond flour or finely ground nuts, but you’ll definitely need more sticky binder, like extra peanut butter or a little melted coconut oil, to make sure they hold together. For the absolute best homemade protein bars experience, stick with the oats!
Nutrition Facts for These Healthy Snack Bars
I know when you’re making high protein snacks, knowing what’s actually in them is super important for tracking your goals. Liam is always looking at the macros, so I compiled the standard breakdown for these healthy snack bars based on our usual ingredients. It really shows off the payoff for choosing a simple recipe!
Here are the estimated stats when you cut the recipe into the full 10 servings:
- Serving Size: 1 bar
- Calories: 220
- Protein: 18 grams (Yes, 18! Hello, muscle fuel!)
- Fat: 11 grams (Mostly good fats from the peanut butter)
- Carbohydrates: 22 grams
- Sugar: 8 grams (That’s natural sugar from the honey/syrup, not loads of processed stuff.)
- Fiber: 3 grams
Now, because we substitute things sometimes—like if you use a different brand of protein powder or swap maple syrup for honey—these numbers are going to shift just a tiny bit. Remember, the beauty of homemade protein bars is that you’re in control! If you want the precise numbers for your exact batch, you might need to plug your specific ingredients into a calculator. For transparency, you can always read our standard recipe disclaimer over on our site just so you know where we stand on ingredient variances. It’s all about honesty in the kitchen, just like sending a clear message!
PrintEasy 5-Ingredient No-Bake Peanut Butter Protein Bars
You need quick, satisfying snacks, and these homemade protein bars deliver. This easy, no-bake recipe uses just five simple ingredients to create chewy, high-protein bars perfect for meal prep or on-the-go fuel.
- Prep Time: 10 min
- Cook Time: 0 min
- Total Time: 70 min
- Yield: 10 servings
- Category: Snack
- Method: No Bake
- Cuisine: American
- Diet: Vegetarian
Ingredients
- 1 cup rolled oats
- 1 cup protein powder (vanilla or unflavored)
- 1/2 cup natural peanut butter
- 1/4 cup honey or maple syrup
- 1/4 cup dark chocolate chips (optional, for topping)
Instructions
- Line an 8×8 inch baking pan with parchment paper, leaving an overhang on the sides for easy removal.
- In a large bowl, combine the rolled oats and protein powder. Mix these dry ingredients well.
- Add the peanut butter and honey (or maple syrup) to the dry mixture.
- Use a sturdy spoon or your hands to mix everything until a thick, uniform dough forms. If the mixture seems too dry, add one teaspoon of water at a time until it holds together.
- Press the dough evenly and firmly into the prepared pan. Pack it down tightly to prevent crumbling later.
- If using chocolate chips, sprinkle them over the top and press them lightly into the surface.
- Place the pan in the refrigerator and chill for at least 1 hour, or until the bars are firm.
- Use the parchment paper overhang to lift the block out of the pan. Cut the block into 10 or 12 equal bars.
- Store your homemade protein bars in an airtight container in the refrigerator for up to one week.
Notes
- You control the sweetness: adjust the honey or syrup amount based on your preference and the flavor of your protein powder.
- For a vegan option, ensure you use maple syrup instead of honey and a plant-based protein powder.
- If you want a richer chocolate flavor, melt the chocolate chips and drizzle them over the chilled bars before cutting.
- These are excellent for meal prep; make a batch on Sunday to cover your snacking needs for the week.
Nutrition
- Serving Size: 1 bar
- Calories: 220
- Sugar: 8
- Sodium: 150
- Fat: 11
- Saturated Fat: 2
- Unsaturated Fat: 9
- Trans Fat: 0
- Carbohydrates: 22
- Fiber: 3
- Protein: 18
- Cholesterol: 0