

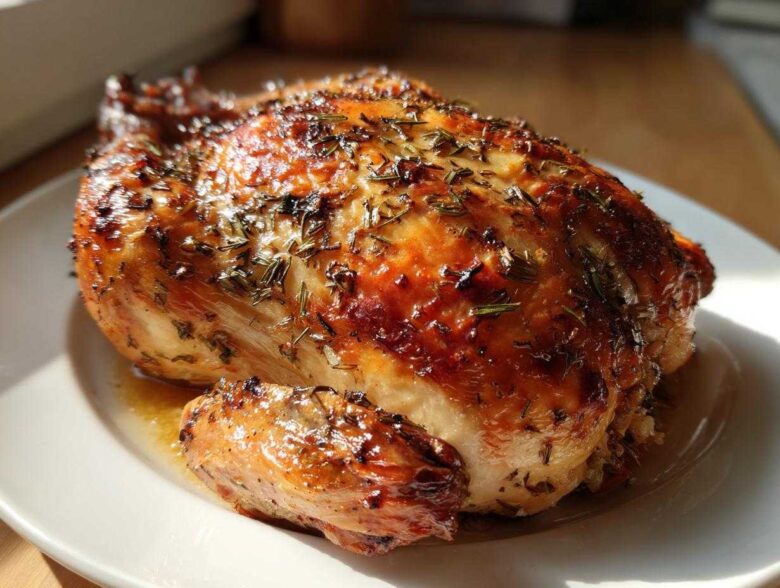
Listen, I have been there. I’ve made dry, sad, pale-looking chickens that tasted more like boiled sadness than a proper comfort food dinner. For years, I thought getting that perfect roasted chicken—the one with the crackly skin and meat so juicy you don’t even need gravy—was some kind of secret held only by professional chefs. Wrong!
But I finally cracked the code, and trust me, this isn’t some fussy French technique you need a culinary degree for. This Ultimate Easy Garlic Herb Butter Roasted Chicken is genuinely my go-to. It guarantees juicy meat and skin so crisp it shatters when you cut it. We’re talking about the easiest weeknight hero that also happens to be amazing when guests show up. Seriously, after burning countless birds, this method is what finally worked, and now I’m never going back.
This recipe relies on a simple butter rub and a smart temperature switch that does most of the hard work for you. If you’ve wanted to learn how to roast a perfect chicken, this is where you start. Let’s dive in!
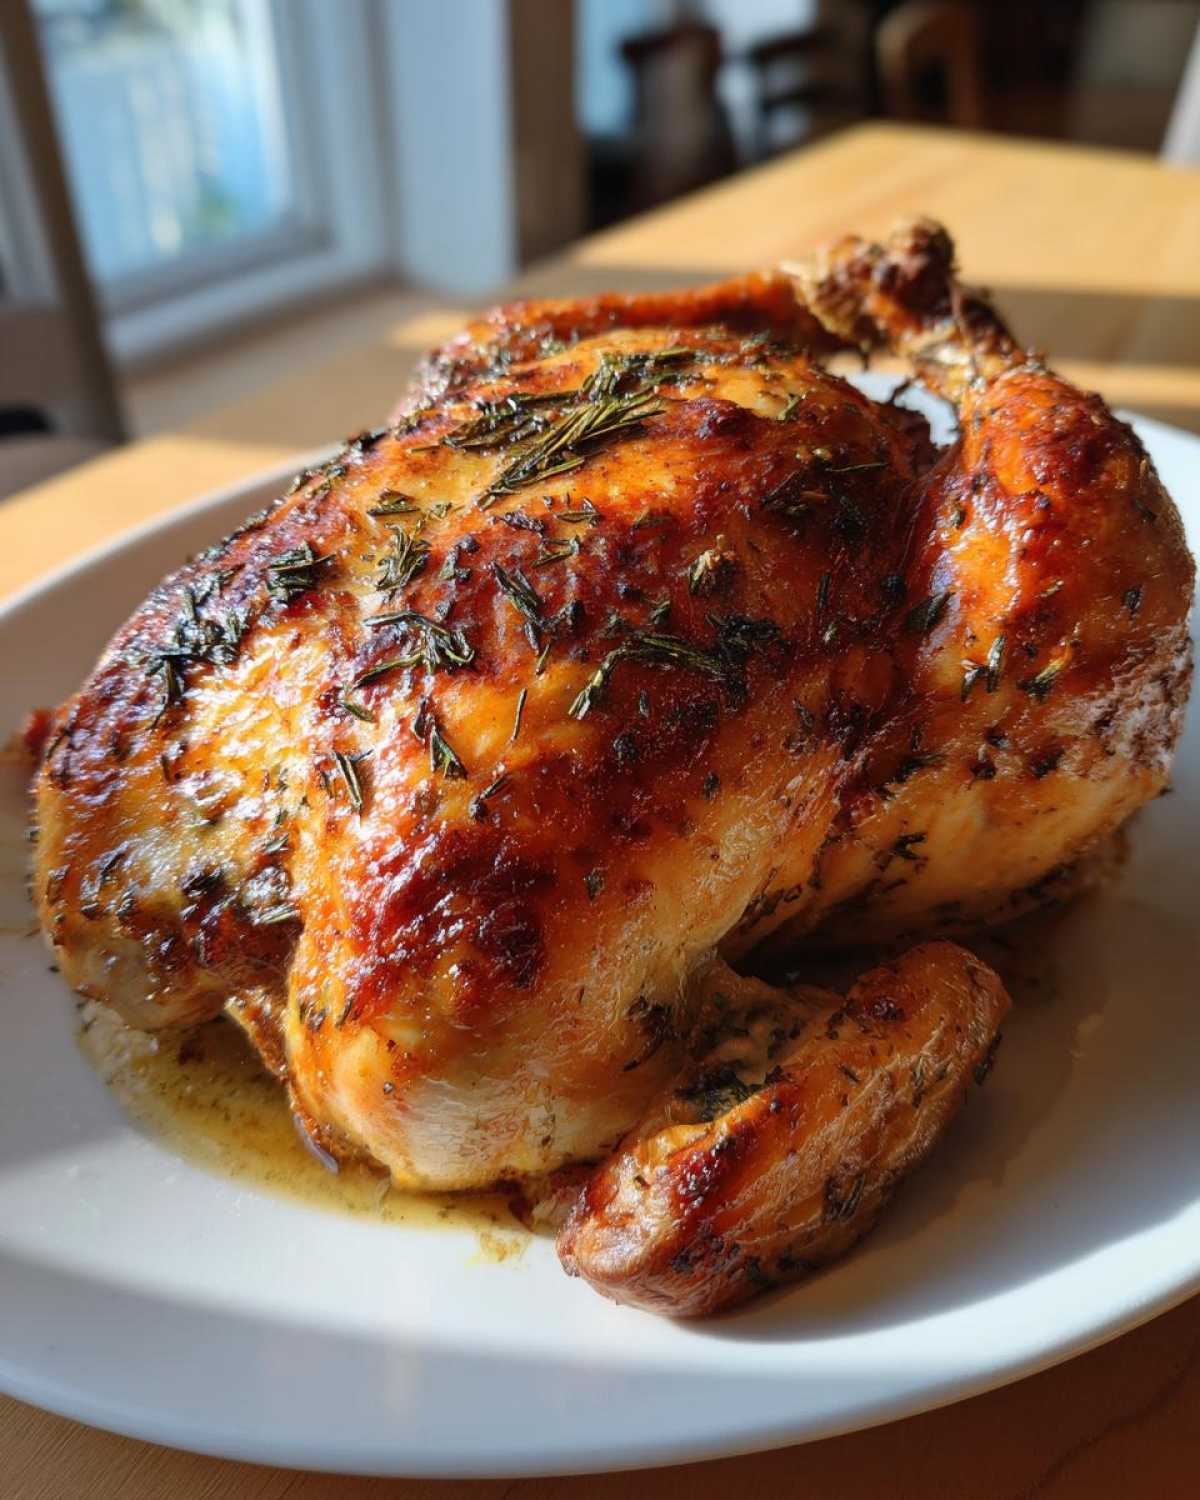
Why This Garlic Herb Butter Roasted Chicken is Your New Favorite
I want you to stop stressing about dinner. This recipe is proof that you don’t need ten specialty ingredients to make a show-stopping meal. It’s designed specifically to tackle the two biggest fears home cooks have: dry breast meat and floppy skin.
- Superior Juiciness: By getting that glorious compound butter *under* the skin, we are bathing the meat in flavor and moisture from the inside out. It holds up beautifully, even if you overshoot the cooking time by a few minutes!
- Foolproof Crispy Skin: That initial blast of high heat followed by the paprika coating acts like a charm. Seriously, I’ve had neighbors ask if I used a deep fryer—it’s that good.
- Simple Ingredient List: We are using pantry staples and fresh herbs that truly sing together. No fancy brine packs or confusing equipment needed.
- Easy Weeknight Roasted Chicken: While it smells incredibly fancy, the prep time is ridiculously fast. You can easily get this into the oven after work and be eating by eight.
Key Attributes of Our Roasted Chicken
The flavor profile hits all the right notes—robust garlic cuts through the richness of the butter, which is perfectly balanced by the earthy freshness of the rosemary and thyme. The texture contrast is what sells it: a shatteringly crisp outer layer giving way to tender, pull-apart meat. It just tastes like a proper, satisfying comfort food dinner.
Ingredients for the Ultimate Easy Garlic Herb Butter Roasted Chicken
Okay, the ingredient list for this absolute winner is short and sweet, which is part of why I love it so much. When you use quality ingredients, you don’t need to mask anything. I always try to buy a chicken that’s around four pounds—anything much bigger takes forever to cook evenly, and anything smaller just isn’t satisfying enough!
Here’s what you need to grab from the kitchen; I’ve listed everything precisely so you don’t have to second-guess your prep!
- 1 whole chicken (about 4 lbs)
- 4 tablespoons unsalted butter, softened
- 4 cloves garlic, minced
- 1 tablespoon fresh rosemary, chopped
- 1 tablespoon fresh thyme leaves
- 1 teaspoon paprika
- 1 teaspoon salt
- 1/2 teaspoon black pepper
- 1 lemon, halved
- 1 small onion, quartered
- 2 tablespoons olive oil
See? So painless! The best part is that the flavor powerhouse comes from that butter mixture. Make sure that butter is actually soft—not melted, but soft enough to easily mix with your fingers or a fork. That’s the key to getting the flavor locked right onto the meat before it even sees the oven.
Mastering the Prep: Preparing Your Roasted Chicken
Before we even think about turning on the heat, we have to get the bird ready. This initial prep is honestly 80% of the reason why this method results in the best roasted chicken you’ll ever make. Step number one, which you simply cannot skip? Pat that chicken bone-dry!
Get a whole stack of paper towels and blot every single surface—top, bottom, inside the cavity—until it feels almost tacky. Moisture is the mortal enemy of crispy skin. If you skip this, the oven wastes time steaming off surface water instead of crisping up that paprika-butter layer we’re about to put on. Trust me, your patience here pays off huge later!
Once it’s dry, it’s time for our magic rub. Mix that softened butter vigorously with the minced garlic, the chopped rosemary, the thyme, paprika, salt, and pepper. It should be a thick, fragrant paste. I like to do this by hand in a little bowl because you can really feel when it’s all incorporated nicely. If you want to see how I pair this chicken flavor with some lovely sides, check out my tips on garlic herb roast chicken recipes!
Creating the Flavor Base: Herb Butter Application
Now for the fun part, the technique that keeps the meat incredibly moist! Take your fingers and gently slide them between the skin and the breast meat on both sides. Be careful not to tear the skin; this might feel a little weird, but it’s necessary. You are creating a pocket!
Take about half of that delicious herb butter and push it right inside those pockets, getting it directly on the meat where you want the flavor the most. Then, use the remaining butter to slather the outside skin vigorously. Get it everywhere! This double-application is what guarantees maximum flavor infusion and moisture retention for a truly juicy roast chicken.
Stuffing the Cavity for Aromatics
Next up, we toss the aromatics inside the chicken. This isn’t about eating the lemon when you carve; it’s about steam! Pop those two lemon halves and the quartered onion right into the cavity. They release steam and fragrance as they cook, basically seasoning the inside of the bird from the steam, which keeps the whole thing tasting fresh and bright. You can tie the little legs together with kitchen twine if you want a neater presentation, but honestly, if you’re rushing, you can skip that step too—it’s purely cosmetic!
Oven Instructions for Crispy Skin Chicken Oven Success
Alright, we have prepped our beauty, and now it’s time for the magic to happen in the oven. The success of this roasted chicken hinges on a two-temperature strategy. Don’t just set it and forget it at one temperature; we need a power blast first!
Preheat your oven way up high to 425°F (220°C). This initial heat is what sets that butter and starts puffing up the skin. Place the prepared chicken in your roasting pan—I often use a skillet if it’s oven-safe—and drizzle it with just a touch of olive oil over the skin. Roast it hard at that high temp for exactly 15 minutes.
After that initial blast, you need to drop the temperature down to 375°F (190°C). Now, you let it cook the rest of the way, about 50 to 70 minutes. How do you know it’s done? You absolutely must check the temperature! Stick a thermometer deep into the thickest part of the thigh without touching bone. We need it to hit 165°F (74°C) for food safety. If you notice the skin getting too dark before it hits temp, just loosely drape a piece of aluminum foil over the top—that’s my shortcut trick to stop the burning without stopping the cooking! If you want to sneak some root veggies under there instead of roasting them separately, check out how I handle my one pan roasted chicken arrangements.
The Crucial Resting Period for Juicy Roast Chicken
When that thermometer hits 165°F, pull that glorious bird out immediately! And here’s the second non-negotiable step for achieving that juicy roast chicken result: you have to let it rest. I know, I know, you want to carve into it right now, but you absolutely cannot.
Move the chicken to a clean cutting board and let it sit undisturbed for a full 10 to 15 minutes. Why? While it’s resting, the juices—all that delicious butter and moisture we worked so hard to keep inside—stop rushing to the center and redistribute throughout the meat fibers. If you cut it too early, all that flavor spills out onto the board, and you end up with dry meat anyway! Give it that time, and that final carving will reward you tenfold.
Tips for the Best Roasted Chicken Every Time
Even with a fantastic map like this recipe, sometimes little things go wrong in the kitchen—it happens to all of us! But mastering a few extra tricks ensures your roasted chicken is perfect, whether it’s your first time or your fifty-first. The main thing I want you focusing on is airflow, which is key for crispy results.
If you have a roasting rack, use it! Placing a wire rack inside your roasting pan elevates the chicken, letting air circulate completely around the bottom. This means the underside doesn’t steam in its own juices, which is how you get that wonderfully all-over crispy skin everyone loves. If you want more detail on the airflow science, I share more about getting that perfect crust on my main roasting guide.
Ingredient Choices and Substitutions
I preach using fresh herbs here, and I really mean it—the smell while this bakes is just unbeatable. But look, life happens. If you’re in a pinch and only have dried rosemary or thyme, just use half the amount listed in the recipe. Dried herbs are potent! Another thing that catches people out is seasoning the butter correctly; don’t skimp on the salt, remember we need to season both the fat layer and the meat layer.
Now, about vegetables. I know some of you want this to be a true one-pan wonder. If you want to toss some potatoes, carrots, or even some robust squash in that roasting pan, go for it! Just don’t put them in at the beginning while the heat is blasting at 425°F. They’ll burn to a crisp before the chicken is half done. Wait about 45 minutes into the cook time before adding those heartier vegetables around the base of the pan. They’ll soak up all those amazing herb and garlic drippings beautifully!
Serving Suggestions for Your Simple Roast Chicken Dinner
You’ve got this incredible, juicy chicken resting, and the aroma filling your house is practically making everyone dizzy waiting for it. Now we need partners for this star performer! The beauty of this garlic and herb flavor profile is that it doesn’t demand complicated sides. It pairs perfectly with things that soak up those amazing little pan drippings.
My first recommendation is always something starchy and simple. Creamy mashed potatoes are a classic for a reason—they are literally sponges for chicken juice. But if you want to be a little fancier without adding any stress, try making some roasted root vegetables right in the pan during the last hour of cooking, as I mentioned earlier. I have a whole guide on the best ways to incorporate sides, roast chicken with vegetables has never been easier!
For vegetables, you want things that either roast well or wilt quickly. Asparagus tossed with a little lemon juice and olive oil is wonderful; it gets tender-crisp in about 15 minutes, so you can blast it in the oven right before you serve, or you can steam it quickly on the stove.
Here are a few no-fuss ideas that always make this into a complete, phenomenal meal:
- Garlic Confit Potatoes: Roast small yellow potatoes alongside the chicken for the last 45 minutes. They soak up the butter runoff and become crispy little nuggets of heaven.
- Simple Sautéed Greens: A quick pan of Swiss chard or kale sautéed quickly with a spoonful of reserved chicken fat (once you carve!) and a splash of balsamic vinegar cuts through the richness perfectly.
- Crusty Bread: Don’t laugh! People always need something good to wipe the plate clean after they finish the meat and potatoes. A nice baguette is essential.
Keep the sides simple, friends. The chicken is the showstopper here, and it deserves all the attention. You’ve done the hard work getting that skin crisp—now sit back and enjoy the compliments!
Storing and Reheating Your Roasted Chicken Leftovers
Look, sometimes you cook a bird this perfect, and you swear you’re going to eat it all right away. But often, you end up with amazing leftovers, and figuring out how to reheat that incredible meat without turning it into cardboard is a genuine challenge. But don’t worry, saving this roasted chicken for lunch the next day is totally easy!
First things first: storage. You need to get that chicken cooled down and tucked away quickly. Once it has cooled off from resting, carve off any remaining meat you know you won’t eat right away. Store the meat in an airtight container in the fridge. It’s good for about three to four days—any longer than that, and I’d look at freezing it instead!
The Secret to Reheating for Juiciness
The absolute enemy of leftover chicken is microwaving it directly. It dries out faster than you can hit the ‘Start’ button. My method brings back the moisture beautifully. If you have a little bit of liquid leftover—maybe you saved some of those garlicky pan drippings? Fantastic!
Here’s what you do: Place the carved meat in an oven-safe dish. Pour just a tablespoon or two of broth, water, or those pan drippings over the meat. Cover that dish tightly with foil. Tightly! This traps all the steam inside, and that steam rehydrates the meat as it gently heats up.
Pop that covered dish into a low oven—say, 300°F (150°C)—for about 15 to 20 minutes. It heats slowly and gently, steaming everything back to life. If you must use the microwave (I get it, sometimes you’re in a rush), put a damp paper towel right on top of the chicken pieces before heating in short 30-second bursts. That damp towel helps create a little micro-steam environment.
If you are looking for an ambitious way to use up every last scrap, don’t forget to save the carcass! I always simmer mine for hours to make a proper stock. You can find my directions for roast chicken with vegetables which often results in the perfect amount of drippings to save for this reheating process!
Frequently Asked Questions About Oven Roasted Whole Chicken
I know you might still have a few little niggles running through your head, especially if you’re new to making a truly delicious oven roasted whole chicken. That’s totally fine! Cooking a chicken perfectly feels like a big deal, but I’m here to tell you that with this recipe, it’s so foolproof. Here are the questions I get asked most often when folks try this garlic butter method for the first time.
Why isn’t my crispy skin chicken oven recipe getting crispy skin?
Nine times out of ten, it comes down to moisture! Did you pat the skin incredibly dry before you even touched the butter? You need to get every last drop of water off the surface. The second crucial point is the temperature—make sure you are starting it high at 425°F for those first crucial 15 minutes. If you skip the high heat start, your skin will just steam instead of crisping up.
Can I adapt this recipe for a spatchcock chicken crispy skin method?
That’s a great thought! While this recipe works perfectly for a whole bird trussed up neatly, spatchcocking is a fantastic way to guarantee even cooking and even crispier skin because everything is exposed to the heat. If you are going to spatchcock, you should definitely skip tying the legs and instead just cut out the backbone. Because spatchcocking exposes more surface area, you might find the initial high-heat blast only needs about 10 minutes before dropping the temp down. It cooks faster overall!
Is this recipe too complex for beginners?
Absolutely not! This is marketed as the best roast chicken for beginners for a reason. The complexity has been removed for you. We are using simple seasonings—butter, salt, garlic, herbs—and the technique is straightforward: dry it, butter it, two temperatures. If you can mix ingredients in a bowl and use an oven thermometer, you can nail this flavorful simple roast chicken dinner. For more foundational tips, you can always review my main roasting science guide here: how to roast a perfect chicken.
What is the trick to keeping the breast meat juicy?
That comes down to the herb butter placement! Remember how I explained rubbing half the butter *under* the skin, directly onto the meat? That’s your insurance policy. The layer of butter melts into the breast meat as it cooks, insulating it from drying out while infusing flavor. It’s the best way to achieve that promised juicy roast chicken result every single time.
Estimated Nutritional Information for This Roasted Chicken
Alright, let’s talk numbers for a minute. I know some of you are tracking macros or just curious about what you’re eating, so I pulled together the estimates for this unbelievably tasty roasted chicken. Remember, this is a guide, not a guarantee!
This information is calculated based on the recipe yielding four generous servings, meaning one serving is about a quarter of that four-pound bird, plus whatever seasonings stuck to it. Since we are using butter and dark meat often retains more fat, the numbers look hearty, but trust me, it tastes absolutely worth it!
Be aware that these values can definitely shift depending on the exact brand of butter you use or if you decide to skip the skin—which I highly advise against if you value that amazing crispy texture we worked for!
- Serving Size: 1/4 chicken (bone-in estimate)
- Calories: 450
- Protein: 45 grams—That’s fantastic staying power!
- Fat: 28 grams (with 12 grams of that being saturated fat from the butter)
- Carbohydrates: 0 grams
- Sugar: 0 grams
- Sodium: 450 mg (This can vary a lot based on how salty you make your rub!)
- Cholesterol: 150 mg
I always say the best part—the vegetables and anything you roast in the pan drippings—doesn’t factor into this count, so you can load up on those!
A quick disclaimer before you use this for strict tracking: These are just estimates based on the ingredients I outlined. If you’re using a six-pound bird or switching to low-sodium butter, your final nutrition facts will look different. Always treat these figures as a helpful starting point for your fantastic simple roast chicken dinner!
PrintUltimate Easy Garlic Herb Butter Roasted Chicken
A straightforward recipe for a whole roasted chicken featuring garlic, herbs, and butter to achieve moist meat and crisp skin.
- Prep Time: 15 min
- Cook Time: 75 min
- Total Time: 90 min
- Yield: 4 servings
- Category: Dinner
- Method: Oven Roasting
- Cuisine: American
- Diet: Low Fat
Ingredients
- 1 whole chicken (about 4 lbs)
- 4 tablespoons unsalted butter, softened
- 4 cloves garlic, minced
- 1 tablespoon fresh rosemary, chopped
- 1 tablespoon fresh thyme leaves
- 1 teaspoon paprika
- 1 teaspoon salt
- 1/2 teaspoon black pepper
- 1 lemon, halved
- 1 small onion, quartered
- 2 tablespoons olive oil
Instructions
- Preheat your oven to 425°F (220°C). Remove the giblets from the chicken cavity and pat the chicken completely dry, inside and out, with paper towels.
- In a small bowl, combine the softened butter, minced garlic, rosemary, thyme, paprika, salt, and pepper. Mix until you form a smooth herb butter.
- Gently loosen the skin over the chicken breasts and thighs. Rub half of the herb butter mixture directly onto the meat under the skin. Rub the remaining butter mixture all over the outside of the chicken skin.
- Place the lemon halves and onion quarters inside the chicken cavity. Tie the legs together with kitchen twine, if desired.
- Place the chicken in a roasting pan or a large oven-safe skillet. Drizzle the skin with olive oil.
- Roast for 15 minutes at 425°F (220°C). Then, reduce the oven temperature to 375°F (190°C) and continue roasting for 50 to 70 minutes, or until a meat thermometer inserted into the thickest part of the thigh registers 165°F (74°C).
- If the skin browns too quickly, loosely tent the chicken with aluminum foil.
- Remove the chicken from the oven. Let it rest on a cutting board for 10 to 15 minutes before carving.
Notes
- For extra crispy skin, place the chicken on a wire rack set inside the roasting pan.
- If you want to roast vegetables like carrots or potatoes, add them to the pan during the last 45 minutes of cooking time.
- Use fresh herbs for the best flavor profile. Dried herbs can be substituted at half the amount listed.
Nutrition
- Serving Size: 1/4 chicken
- Calories: 450
- Sugar: 0
- Sodium: 450
- Fat: 28
- Saturated Fat: 12
- Unsaturated Fat: 16
- Trans Fat: 0
- Carbohydrates: 0
- Fiber: 0
- Protein: 45
- Cholesterol: 150