

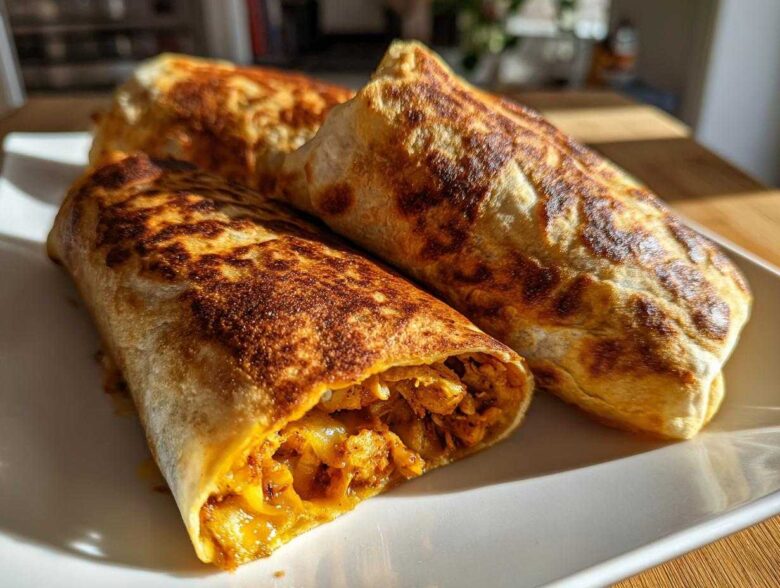
Oh my gosh, who else gets that deep, powerful craving for something crispy, cheesy, and loaded with flavor? We are talking about that crunch you can hear from across the room! Forget ordering delivery; I cracked the code for amazing Chimichangas right in our own kitchens. I’m sharing what I call The Ultimate Crispy Air Fryer Chicken Chimichangas. Seriously, we get that deep-fried deliciousness without all the oil fuss. It’s fast, simple, and makes your weeknights feel like a mini fiesta. Mastering that perfect, non-greasy crunch took a few tries, but trust me, this technique is foolproof!
Why You Will Make These Crispy Air Fryer Chicken Chimichangas Weekly
Honestly, once you try these, they’ll be in your rotation every week. Forget complicated recipes! We unlocked the magic of super crunch without the usual drama. This is the easiest way to get Easy Tex Mex Dinners on the table when you’re totally wiped out after work.
- It’s a true 30-minute miracle—prep goes fast, and they cook even faster!
- That golden, flaky crunch? You get it every single time thanks to the air fryer. No more greasy splatters on the stove!
- The shredded chicken filling is packed with flavor, so you don’t need a complicated sauce, though toppings are always welcome, of course.
- You can totally prepare these ahead of time and freeze them waiting for a busy night.
- They are perfectly portioned; there’s zero guilt knowing you skipped scooping up all that deep-fry oil.
Trust me on this—they are just too good and too quick to skip!
Gathering Ingredients for Your Homemade Chimichangas Recipe
Okay, before we start rocking those air fryer baskets, we need to make sure we have everything ready. I find that having all my little bowls measured out beforehand keeps the assembly line moving smoothly—especially when we are rolling these bad boys up! This recipe is surprisingly simple when it comes to ingredients. You don’t need a hundred things, just the right things. If you want to check out how we handle ingredient sourcing and recipe accuracy, you can peek at our full disclaimer policy right here, just so you know we keep things honest!
Here is exactly what you need to pull together this amazing batch of chicken Homemade Chimichangas Recipe goodness:
- Exactly 1 tablespoon of good old olive oil.
- We need 1 full pound of boneless, skinless chicken breasts. Don’t skip ‘skinless’—we are aiming for crispy, not chewy!
- 1 teaspoon of chili powder—I like the standard medium heat one.
- 1 teaspoon of cumin to give it that earthy, authentic Tex-Mex vibe.
- 1/2 teaspoon of garlic powder. This is just easier than fresh hacking garlic for this quick filling.
- 1/4 teaspoon of salt. You can always add more later, but measure this part!
- About 1/4 cup of water. This helps everything steam just a touch while the chicken cooks down.
- 8 medium flour tortillas—make sure they are the bigger burrito size, not the small taco ones. They need to wrap nicely!
- We are using 1 cup of shredded Monterey Jack cheese. It melts beautifully and gets stretchy.
- And finally, you need some non-stick cooking spray. This is key for the air fryer to get that perfect golden shield on the outside!
See? So simple! Gather these up, and you are halfway to the crispiest dinner ever.
Expert Tips for the Best Shredded Chicken Chimichangas Filling
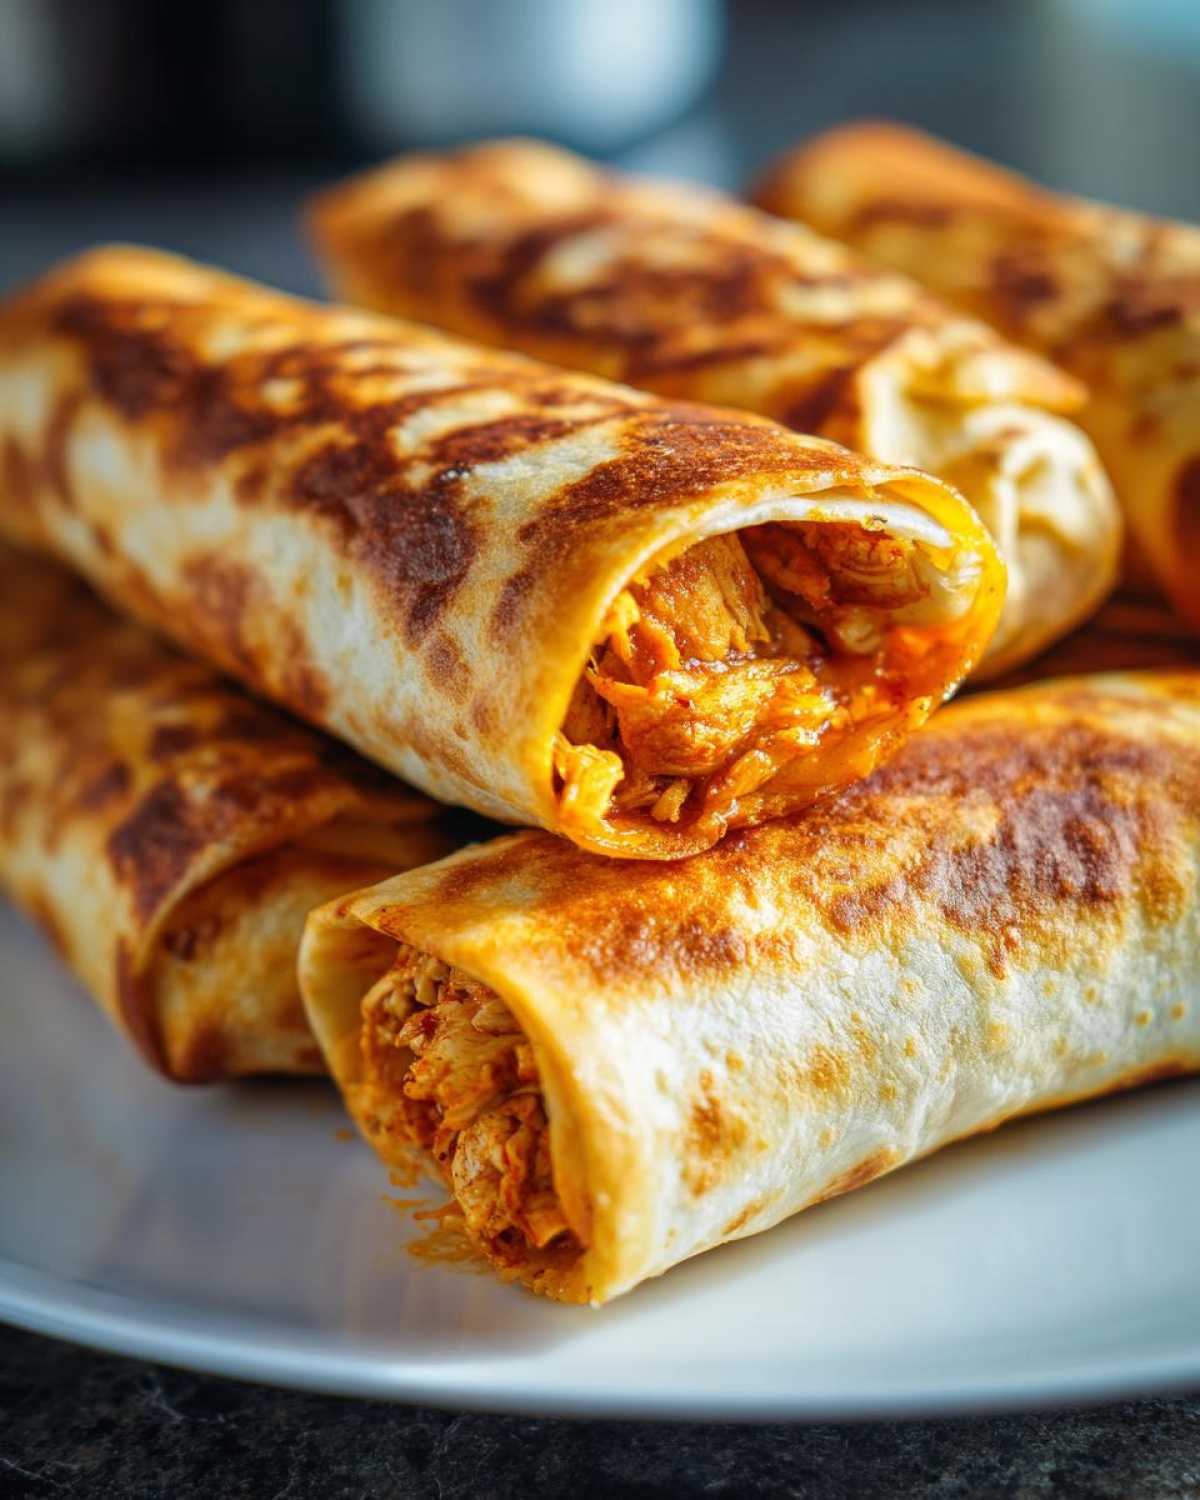
Listen, the outside wrapper gets the glory, but the inside needs to sing! For these Shredded Chicken Chimichangas, your focus needs to be on getting maximum flavor locked into that chicken before we roll everything up. My biggest discovery? Don’t let the chicken just sit in the pot once it’s done. We want all those spiced juices to soak back into the shredded meat!
When you’re mixing your chili powder and cumin, taste your spices beforehand. If they taste dull, you probably need a tiny extra pinch of salt or even a half-teaspoon of onion powder; those brighteners stop your filling from tasting flat. I always cook the chicken just until done, shred it immediately while it’s piping hot, and then toss it right back into that flavor bath in the pan. That’s how you get deep flavor in every single bite!
For more great kitchen tips and if you ever want to reach out with a question, hop over to my contact page!
Achieving the Perfect Texture for Your Chimichangas Filling
Texture here means tender, moist strands, not mushy chunks. The trick to getting that beautiful pull is simple: shred the chicken while it’s still warm—not scalding hot, but warm enough that the muscle fibers separate easily. Use two forks, rake them through the meat, and make sure those strands are relatively uniform.
If your chicken seems too dry when you shred it, add in just a tablespoon of hot water or chicken broth mixed with a tiny bit of cumin to rehydrate those strands. This step keeps the filling tender even after the air frying process dehydrates the tortilla a bit. Nobody wants a tough, dry filling inside their crispy shell!
Step-by-Step Air Fryer Chimichanga Cooking Guide for Maximum Crispiness
Now we get to the fun part—rolling and crisping! This is truly where we achieve that ultimate crunch we’ve been chasing. First things first: preheat your air fryer! Set it to 375 degrees Fahrenheit (that’s 190 Celsius). A hot air fryer basket is non-negotiable for crispy Chimichangas. Start by layering about 1/4 cup of that beautiful shredded chicken and a sprinkle of cheese slightly off-center on your warmed tortilla.
Quickly fold those sides in, then fold the bottom edge up and roll it really snug toward the top edge. Think tight! You want zero air pockets in there so it holds its shape when frying. If you have any loose ends flapping around, just stab a toothpick right through it to keep it secure while it cooks. Once you have all eight rolled, give them a good, even spray of cooking spray all over. Don’t be shy; this is what turns them golden brown!
Assembling Your Chimichangas Tightly
The secret to a good chimney taco—err, chimichanga—is compression! When you’re folding, you really need to tuck in those sides like you’re wrapping a gift, making sure the filling stays centered. If you roll it loose, the ends might unravel when you flip them in the air fryer, and you’ll have shredded chicken bits everywhere. Don’t stack them in the basket either; they need their own space to crisp up! A tight package means a glorious, uniform crunch across the whole wrapper.
Air Frying vs. Deep Fried Chimichangas: The Crispy Difference
I used to deep fry these back in the day, and while that method certainly gives you the deepest color, it’s a whole production involving oil disposal and temperature management that I just don’t have time for on a Tuesday night. With the air fryer, we get about 95% of that addictive texture with a fraction of the fat. If you want to push the crisp factor even higher, try brushing them lightly with melted butter instead of the spray—it really mimics that traditional flavor profile! It’s a fantastic happy medium between the classic Deep Fried vs Baked Chimichangas debate.
Making Restaurant Style Chimichangas at Home: Topping Suggestions
Okay, you’ve got your piping hot, wonderfully crispy beauties out of the air fryer. They are perfect, but they need their entourage! That’s what takes these from just “good” to “I need to post this on social media” good. Think of the toppings as the vibrant accessories for your main dish. Sour cream is a non-negotiable cooling agent, naturally!
But don’t stop there. A good dollop of fresh guacamole—or even just sliced avocado if you’re in a rush—adds creamy healthy fats. I always whip up a quick, chunky salsa to cut through the richness of the cheese. If you’re feeling extra decadent, a little drizzle of warm nacho cheese sauce takes these over the top. These really shine as part of broader Mexican Comfort Food Recipes on your table!
If you want to get even more fun, you absolutely have to check out my recipe for this amazing spicy Mexican street corn—it makes an incredible side dish with these.
Storage and Reheating Instructions for Leftover Chimichangas
I swear, these things taste even better the next day when you are scraping up the last bits for lunch! If you have leftover Chimichangas, wrap them tightly in foil or plastic wrap and tuck them into the fridge; they should be good for about three days. Now, here is the absolute key to reheating: do NOT use the microwave unless you enjoy eating soggy sponges!
To bring back that glorious crispiness we worked so hard for, pop them right back into the air fryer at 350 degrees for about 4 to 6 minutes. They heat up fast and get perfectly crunchy again. Seriously, don’t skip reheating them this way!
Variations: Beef Chimichangas and Cheesy Chimichangas Options
While this chicken version is my current obsession, you absolutely have to know how flexible this basic structure is for making other amazing Chimichangas!
If you want to make amazing Ground Beef Chimichangas, just brown your ground beef with the same spices (chili powder, cumin, garlic powder) and drain *all* the fat really well before adding the cheese. Since beef is pre-cooked, assembly is instant!
What about going for ultimate decadence? Hello, Cheesy Chimichangas! When assembling, just ditch the chicken and double the cheese in the middle—maybe toss in some finely diced green chilies from a can for extra zip. Because cheese melts faster than chicken heats fully, you might need to reduce the air frying time by just a minute or two, or turn the heat down slightly so the tortilla browns perfectly before the cheese completely leaks out!
You can use the same process for vegetarian black bean and corn Chimichangas too. Just mash your beans slightly so they pack tightly!
Frequently Asked Questions About Making Perfect Chimichangas
I know you might have a few burning questions still—that’s totally normal when diving into a new favorite recipe! After all, we want these to be perfect, crispy Tex-Mex treasures every time. Here are the things folks ask me most often, hopefully clearing up any last-minute confusion before you pop these in the basket!
Can I substitute baking for air frying in this Chimichangas recipe?
Totally, you can bake them! The goal is still crispiness, right? If you don’t have an air fryer, just arrange your assembled Chimichangas right on a baking sheet—don’t let them touch! Pop them into a preheated oven at 400 degrees Fahrenheit. You’ll need about 15 to 20 minutes, but you must flip them halfway through so both sides get golden and crunchy. It gives a slightly different, less intense crisp than the air fryer, but it works perfectly for a big batch!
What is the best tortilla size for making Chimichangas?
This is super important for roll integrity! You definitely want the larger, burrito-sized flour tortillas, which are usually around 10 inches. If you use the smaller taco-sized ones, they just don’t have enough wrapper real estate to fold over and hold all the delicious filling without bursting open. Stick to the bigger wraps for the tightest, crispiest seal possible.
Also, don’t even think about trying corn tortillas. They are way too delicate and they crack instantly when folded this tightly and heated—stick to flour for these!
Estimated Nutritional Breakdown for These Chimichangas
Look, I’m a cook, not a certified nutritionist, so just remember these numbers are my very best guess based on the ingredients listed above—they are a snapshot, not a guarantee! Since we are skipping the deep fryer and using the air fryer for the main cooking method, we keep things much lighter than you might expect for such a satisfying meal. This is one of the big reasons I love this recipe so much!
These estimates are based on serving two chimichangas per person, using chicken breast and Monterey Jack cheese. If you go heavy on the sour cream or decide to skip the dietary disclaimer and use a richer filling—well, the numbers will shift a little!
- Serving Size: 2 chimichangas
- Calories: Around 450 (That’s a steal for this much flavor!)
- Fat: Roughly 18g total, with about 8g being saturated fat from the cheese and tortilla.
- Protein: A solid 30g, mainly from the chicken—great for making you feel full!
- Carbohydrates: About 45g per serving.
- Sugar: Very low, just shy of 3g.
- Sodium: This one comes in around 550mg, mostly from the spices and cheese, so go easy on extra salt when seasoning!
It’s comfort food that doesn’t completely derail your weeknight plans. Feel good about digging in!
Share Your Crispy Chimichangas Creations
That’s it! You’ve successfully navigated the world of quick, crispy, homemade Tex-Mex! I really, truly hope you enjoyed making these as much as my family does. Now that you’ve got the secret technique down for getting that perfect golden shell, I want to hear all about it!
Please take a moment to jump down to the comments section below and give this recipe a rating. Did you stick with the chicken, or did you try making those fantastic beef ones we talked about? I’m always curious which toppings win the day—are you loading up on guacamole or keeping it classic with just sour cream and salsa?
If you snapped a picture of your beautiful golden pile, don’t keep it secret! We all love seeing these creations in the wild. Tag us on social media! You can find all our latest recipe experiments and fun behind-the-scenes kitchen chaos over at the main blog page, so come join the fun!
Happy crunching, everyone!
PrintThe Ultimate Crispy Air Fryer Chicken Chimichangas
Make satisfying, crispy chicken chimichangas using your air fryer. This recipe provides a quick, weeknight-friendly Tex-Mex dinner with less oil than traditional deep frying.
- Prep Time: 15 min
- Cook Time: 15 min
- Total Time: 30 min
- Yield: 4 servings
- Category: Dinner
- Method: Air Frying
- Cuisine: Tex-Mex
- Diet: Vegetarian
Ingredients
- 1 tablespoon olive oil
- 1 pound boneless, skinless chicken breasts
- 1 teaspoon chili powder
- 1 teaspoon cumin
- 1/2 teaspoon garlic powder
- 1/4 teaspoon salt
- 1/4 cup water
- 8 medium flour tortillas (burrito size)
- 1 cup shredded Monterey Jack cheese
- Cooking spray (non-stick)
Instructions
- Combine chicken breasts, olive oil, chili powder, cumin, garlic powder, and salt in a small pot or skillet. Add water.
- Cook over medium heat, stirring occasionally, until the chicken is cooked through, about 10 to 12 minutes.
- Remove chicken and shred it using two forks. Return the shredded chicken to the pot and mix with any remaining liquid.
- Lay a tortilla flat. Place about 1/4 cup of the shredded chicken mixture and 2 tablespoons of cheese slightly off-center on the tortilla.
- Fold the sides of the tortilla inward over the filling. Fold the bottom edge up over the filling and roll tightly to create a compact burrito shape. Secure with a toothpick if necessary. Repeat with remaining tortillas.
- Preheat your air fryer to 375 degrees Fahrenheit (190 degrees Celsius). Lightly spray the assembled chimichangas with cooking spray on all sides.
- Place the chimichangas in the air fryer basket in a single layer, ensuring they do not touch. You may need to cook in batches.
- Air fry for 8 to 10 minutes, flipping halfway through, until the tortillas are golden brown and crispy.
- Remove toothpicks before serving. Serve immediately with your preferred toppings.
Notes
- For extra crispiness, lightly brush the tortillas with melted butter before air frying instead of using cooking spray.
- If you prefer a saucier filling, add 2 tablespoons of mild salsa to the shredded chicken mixture before assembling.
- To bake instead of air fry, place on a baking sheet and bake at 400 degrees Fahrenheit for 15 to 20 minutes, flipping halfway.
Nutrition
- Serving Size: 2 chimichangas
- Calories: 450
- Sugar: 3
- Sodium: 550
- Fat: 18
- Saturated Fat: 8
- Unsaturated Fat: 10
- Trans Fat: 0
- Carbohydrates: 45
- Fiber: 3
- Protein: 30
- Cholesterol: 85