

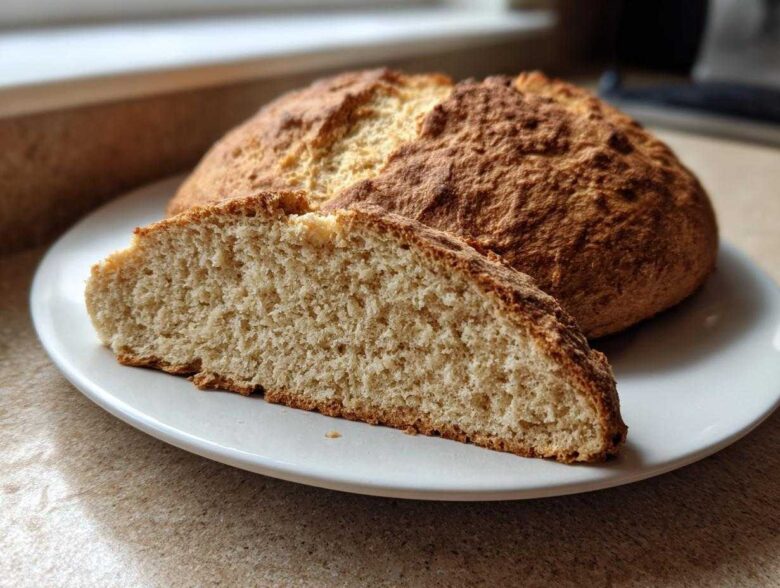
There is absolutely nothing on this earth quite like the smell of fresh bread baking, is there? You know, the kind that makes you halt whatever you’re doing and just breathe it in? I used to think truly good bread meant long hours of kneading, waiting for yeast to bubble, and a whole day lost to the oven. But then I found this recipe, and honestly, it changed everything! We are talking about authentic, rustic **Irish Soda Bread** here. The beauty of this classic is that it needs zero yeast, which is our huge time-saver. I remember the first time I tried making this **Traditional Soda Bread**—I thought I’d mess it up for sure, but I swear, it came out perfectly crusty and soft inside on my very first attempt. It’s truly simple baking magic, and you’re going to master it today!
Why This Is the Best Irish Soda Bread Recipe
I’ve tried a million recipes promising the best **soda bread**, but they always end up too dry or take forever. This one is different. It shines because it’s unbelievably reliable, uses just four core ingredients, and honestly, it requires almost no skill! It’s the definition of an **Easy Homemade Bread** that tastes like it came straight from an Irish farmhouse kitchen. You can whip this up when you realize you forgot to grab bread for dinner. Trust me, you’ll want to bookmark this one!
Quick Bread Recipe Ready in Under an Hour
Forget waiting hours for yeast to double! Because we rely on baking soda and buttermilk, the chemical reaction happens lightening fast. Meaning, you get a fantastic, crackly **soda bread** loaf on the table faster than you can make a reservation somewhere. It’s the ultimate **No Yeast Bread Baking** solution right when you need it most.
Want to see more tips and tricks in my ongoing baking adventures? Check out my main Baking Blog Index!
Gathering Ingredients for Your Soda Bread
Okay, let’s talk about what actually goes into this incredible **soda bread**. It’s shockingly minimalist, meaning the quality of what you use really matters. We only have four main players here: flour, baking soda, salt, and buttermilk. That’s it! When you use so few ingredients, you want them to be the best representation of what they are. I always try to splurge a tiny bit on good quality buttermilk, because that’s the engine running this whole baking process. Don’t skimp there if you can help it. This simplicity is why it’s such a fantastic **Buttermilk Bread Recipe**.
Ingredient Notes and Buttermilk Bread Recipe Substitutions
Since buttermilk is key to this **soda bread** because its acidity reacts with the baking soda to create lift—no yeast needed!—we have to make sure we get that reaction. If you open your fridge and realize you’re out of liquid gold (it happens!), don’t panic. Just take regular milk, add one tablespoon of vinegar or fresh lemon juice, stir it once, and let it sit for five minutes until it looks a little curdled. That’s your homemade buttermilk!
Also, if you want a richer, more rustic flavor—which I highly recommend for serving alongside stew—you absolutely must try making **Brown Soda Bread**. Instead of using all-purpose flour, swap out half of it with whole wheat flour. It makes the crumb a bit denser, the flavor a little nuttier, and it’s so comforting, especially when paired with soup.
Step-by-Step Instructions for Perfect Soda Bread
Alright, get ready for the easiest bread you’ll ever make! Since this is a chemical reaction, not a yeast rise, timing matters a little bit more, but don’t stress. You need to get the oven hot before you even start mixing. Go ahead and preheat that oven right now to 400°F (200°C). We’re lining a baking sheet with parchment paper—this keeps cleanup easy, which is always a win in my book. Once the oven is hot, we move fast!
Mixing the Dough: The Secret to Tender Soda Bread
Once your dry things (flour, soda, salt!) are whisked together in your big bowl, you pour in all that buttermilk at once. This is the moment where restraint is your best friend. Grab a wooden spoon or just use your hands, and mix until *just* combined. I mean it—stop stirring the second you don’t see any dry flour streaks left. Seriously! If you keep messing with it, you instantly start developing gluten, and that turns beautiful, rustic **soda bread** into a tough, chewy brick. We want soft, slightly shaggy, and sticky dough. That’s the sign you’re on the right track!
Shaping and Scoring Your Rustic Loaf Recipe
Now, since this dough is too soft for real kneading, just gently turn it out onto a floured spot on your counter. Use your hands to coax it into a round shape, maybe about an inch and a half to two inches high. Don’t fuss over making it perfect; this is the charm of a **Rustic Loaf Recipe**! Once it’s sitting on your sheet, you have to cut the traditional cross deep into the top. Make sure that knife cuts almost all the way down to the bottom. This isn’t just tradition; it actually helps the middle of that dense **soda bread** cook through properly without the top burning.
Once you’ve got that cross cut, pop it into the hot oven! If you’re thinking about trying out my No-Bake Peanut Butter Pie next week, remember this one rule: hot oven, fast bake!
Baking Times and Testing Your Soda Bread
Remember how we got the oven blazing hot before we even started mixing? That was important! We want to get the outside crust setting nicely while the inside finishes cooking. You’ll bake this **soda bread** for about 30 to 40 minutes. Don’t rely on the clock alone, though! My go-to test—the one Grandma swore by for all quick breads—is the sound check. Carefully take the loaf out (use good oven mitts!) and gently tap the bottom with your knuckles. If it sounds truly hollow, like knocking on a wooden door, you’re done! If it still sounds dull or flat, give it another 5 minutes and test again.
Once it passes the sound test, you need to get it off that hot baking sheet right away. Place the loaf directly onto a wire cooling rack. This step is crucial! If you leave it sitting on the metal sheet, the bottom keeps cooking from residual heat and it will steam the crust right off the bottom of your lovely **soda bread**. Let it cool down completely on that rack before you slice into it. Seriously, try to wait! Cutting it while it’s piping hot often makes the crumb gummy.
Savory Soda Bread Variations for Meal Pairing
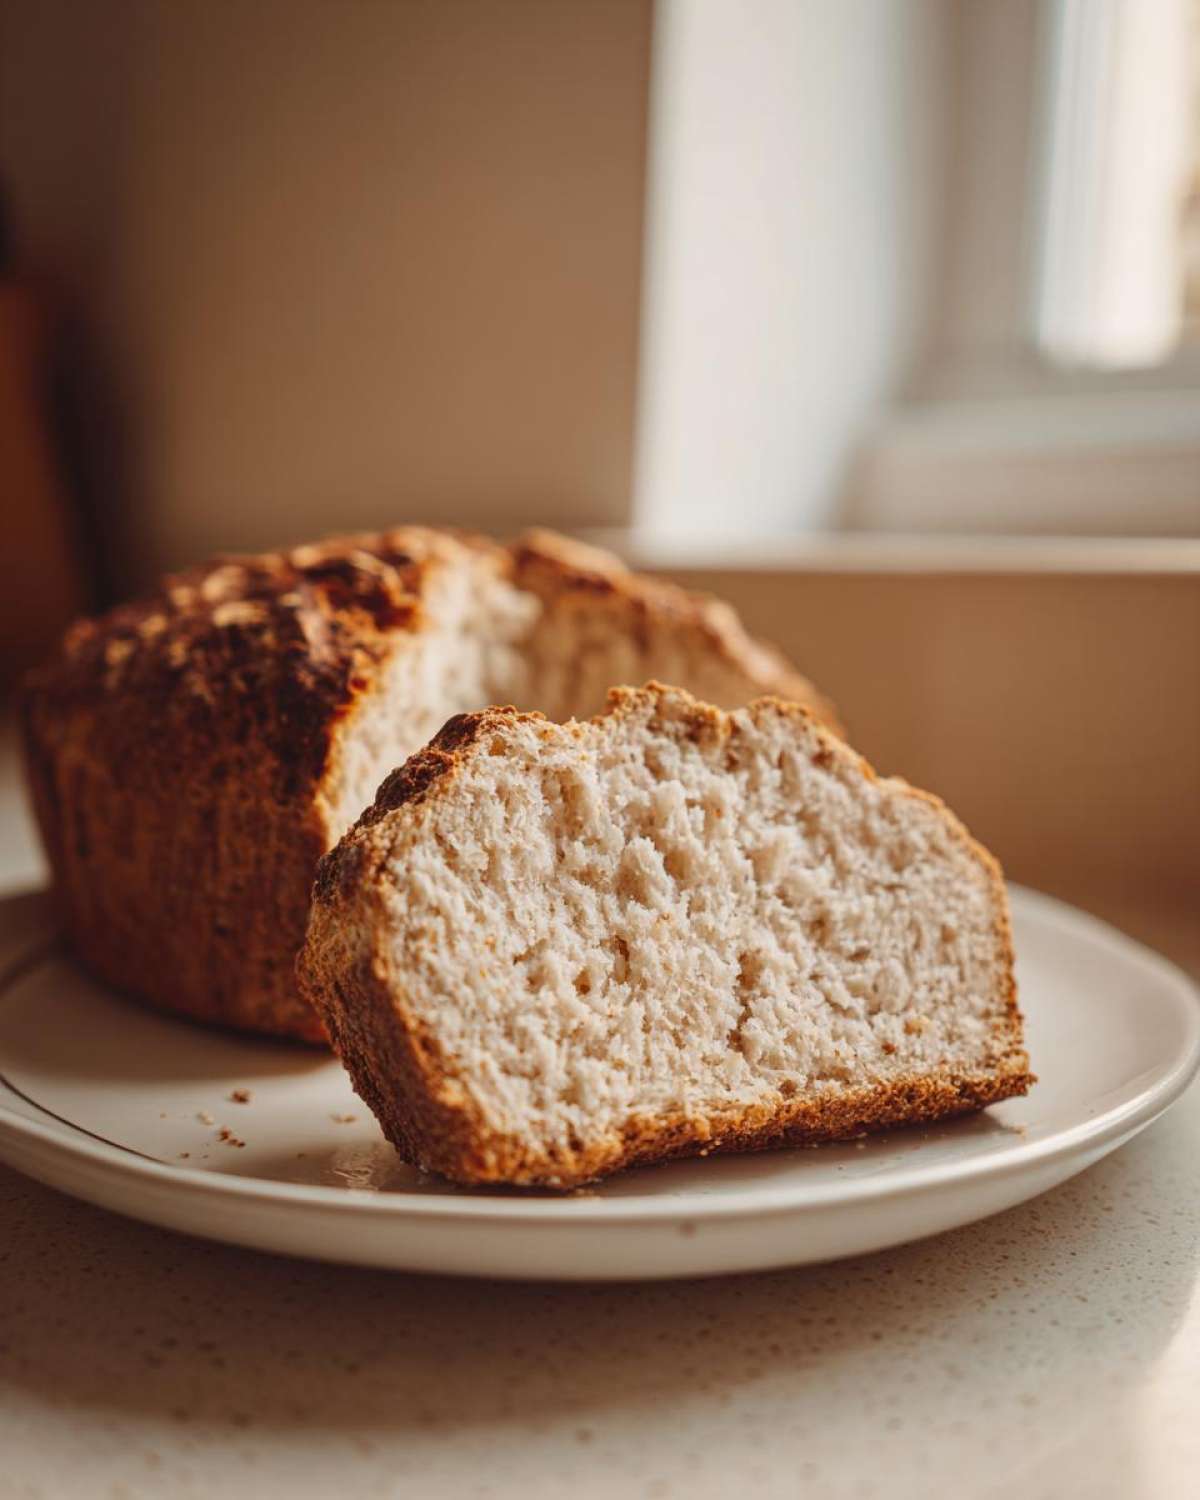
While the traditional plain loaf is heaven with butter and jam, sometimes you need your **soda bread** to stand up next to something really hearty, like a thick stew or a big bowl of soup. That’s when we get to play around with savory flavors! The secret here, which is important when you’re adding extra ingredients to your **Buttermilk Bread Recipe**, is to make sure you mix the additions into the dry ingredients first. This keeps them from clumping together when the liquid hits.
My absolute favorite is a **Cheddar Herb Bread**. I usually fold in about a cup of sharp, grated cheddar cheese. Mix that right in with the flour, baking soda, and salt before you add the buttermilk. A sprinkle of dried rosemary or even some chopped chives in there? Wow! It makes the most incredible **Soup Side Bread**. It’s rustic, flavorful, and it toasts up beautifully the next day.
If you love jalapeno flavors in your baked goods, you might also want to check out how I use cheese combinations in my Jalapeño Cheddar Cornbread Muffins—the principle of mixing cheese into the dry is the same!
Making Sweet Soda Bread Variations
Now, don’t think we’ve forgotten the sweet side of life! For **Sweet Soda Bread Variations**, you gently fold in things like dried currants or sultanas with the dry ingredients. A tablespoon or two of sugar mixed right into the flour bumps up the sweetness just enough. The key difference between savory and sweet is that you want to be *very* careful not to add too much bulky fruit when making this **soda bread**; extra weight can sometimes make it sink a tiny bit in the middle. Keep it light, and you’ll have a beautiful loaf perfect for afternoon tea!
Serving Suggestions for Your Homemade Soda Bread
So, what do you do with your beautiful, freshly baked loaf of **soda bread**? Oh, the possibilities! Honestly, the best way is still warm, broken apart, and spread thick with real, cold butter—just let that butter melt right into the nooks and crannies! It’s the perfect **Soup Side Bread**; seriously, try dipping a thick chunk into a creamy tomato soup or my favorite, the Broccoli Cheddar Soup. If you’re making this for **St Patricks Day Baking**, serve it alongside corned beef and cabbage. If you happen to have leftovers (unlikely!), it’s fantastic toasted the next morning with a smear of raspberry jam. Simple comfort, right there!
Storing Your Soda Bread to Maintain Freshness
Listen, this **soda bread** is made to be eaten immediately, I won’t lie to you. That first slice when it’s just barely cool enough to handle? Unbeatable. But if, by some miracle, you actually have leftovers, we need to handle storage right so it doesn’t turn hard as a rock by morning. The absolute best thing you can do is wrap it tightly—and I mean tightly—once it has cooled completely. Use plastic wrap, then put that in a zip-top bag or wrap it again in a clean kitchen towel or aluminum foil. This keeps that precious moisture inside where it belongs.
If you store it this way on the counter, it should stay wonderfully soft for about two days. If you need it to last longer, popping it in the freezer is your best bet; just make sure it’s wrapped super well to avoid freezer burn, because nobody likes stale bread!
Now, what happens when you pull that **Traditional Soda Bread** out of storage a day later and it seems just a little… stiff? Don’t toss it! That’s the beauty of real flour and buttermilk bread. Just take the slice you want, dampen it ever so slightly with water (a light spritz from a spray bottle works wonders), and pop it back into a hot oven (350°F is perfect) for about five minutes. It steams itself back to life! That crust will crisp up again, and the inside softens up beautifully. It’s cheating, but it’s honest cheating when it comes to this lovely **Quick Bread Recipe**.
Frequently Asked Questions About Soda Bread
I know sometimes sticking to a new recipe can bring up little questions, especially when we are diving into traditional baking! I tried to cover all the main points in the main recipe steps, but here are a few things I get asked all the time about keeping our **soda bread** perfect. Don’t hesitate to reach out if you have anything else after you bake!
Can I use yogurt instead of buttermilk in this soda bread?
You absolutely can in a pinch! If you don’t have the buttermilk or the milk/vinegar mixture handy, you can substitute that liquid amount with plain yogurt. Because yogurt is thicker than buttermilk, you might need to thin it out *slightly* with a splash of water or regular milk just to get it to pourable consistency. Just remember, yogurt is often a bit richer, so the final texture might be a touch heavier or denser than the super light crumb you get with true buttermilk. It’s still wonderfully tasty, though, and definitely counts as an **Easy Homemade Bread** variation!
What is the difference between white and brown soda bread?
That’s a great question that gets right to the heart of **Irish Soda Bread Recipe** history! Essentially, the difference comes down to the flour we use. White **soda bread** is made with all-purpose white flour, which gives you that classic, pale crumb and a milder flavor. Brown **soda bread**, which I love for winter nights, substitutes about half of the white flour with whole wheat flour. The whole wheat adds a nuttier, earthier flavor and makes the loaf a bit heartier and darker throughout. Both use the exact same chemical leavening process, so neither requires yeast, keeping them both fast options for **No Yeast Bread Baking**.
For more about my baking philosophy and kitchen hacks, you can always check out my About Me Page!
Share Your Simple Baking Magic
Well, that’s it! You’ve officially mastered the purest, simplest, most rewarding recipe in my baking book. This **soda bread** should have taken you less than an hour from start to finish, and you’ve created a beautiful, rustic loaf all on your own. I really hope you take a moment to appreciate that—it’s truly special!
Now, I absolutely live for seeing your creations! Did you make the savory version with cheddar? Did you try the tricky buttermilk substitute? Please, please leave a star rating for this recipe right here on the page so other folks know how easy and wonderful it is. Better yet, snap a picture of your crackly-topped **soda bread** and share it with me on social media; tag me so I can swoon over your bake! There is nothing better than seeing my readers successfully create this **Simple Baking Magic** in their own kitchens. Drop your thoughts and questions in the comments below; I read every single one!
PrintTraditional Irish Soda Bread
Make a simple, rustic loaf of Irish soda bread using only four main ingredients. This quick bread requires no yeast and is ready fast.
- Prep Time: 10 min
- Cook Time: 35 min
- Total Time: 45 min
- Yield: 1 loaf (8 servings)
- Category: Baking
- Method: Baking
- Cuisine: Irish
- Diet: Vegetarian
Ingredients
- 4 cups all-purpose flour
- 1 teaspoon baking soda
- 1 teaspoon salt
- 1 3/4 cups buttermilk
Instructions
- Preheat your oven to 400 degrees Fahrenheit (200 degrees Celsius). Line a baking sheet with parchment paper or lightly flour it.
- In a large bowl, whisk together the flour, baking soda, and salt.
- Make a well in the center of the dry ingredients. Pour in the buttermilk all at once.
- Mix the ingredients quickly with a wooden spoon or your hands until just combined into a soft, slightly sticky dough. Do not overmix.
- Turn the dough out onto a lightly floured surface. Gently shape it into a round loaf, about 1.5 to 2 inches high.
- Place the loaf on the prepared baking sheet. Cut a deep cross into the top of the loaf, cutting almost through to the bottom.
- Bake for 30 to 40 minutes, or until the loaf sounds hollow when tapped on the bottom.
- Cool on a wire rack before slicing.
Notes
- For a traditional brown soda bread, substitute half of the white flour with whole wheat flour.
- If you do not have buttermilk, mix 1 3/4 cups of regular milk with 1 tablespoon of white vinegar or lemon juice and let it sit for 5 minutes before using.
- Wrap cooled bread tightly in plastic wrap or a clean cloth to keep it soft.
Nutrition
- Serving Size: 1 slice
- Calories: 220
- Sugar: 3
- Sodium: 350
- Fat: 1
- Saturated Fat: 0.5
- Unsaturated Fat: 0.5
- Trans Fat: 0
- Carbohydrates: 47
- Fiber: 2
- Protein: 7
- Cholesterol: 5