

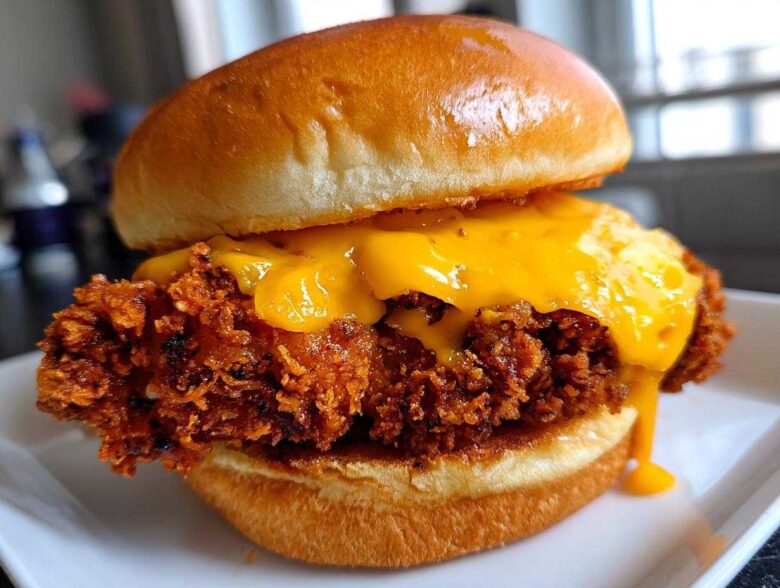
Oh, you know those days. You’re scrolling through endless takeout apps, thinking you deserve something *truly* magnificent, something that makes noise when you bite into it? That moment you crave a burger that hits every single spot: impossibly crispy on the outside, unbelievably juicy inside, and then—the glorious cheese pull?
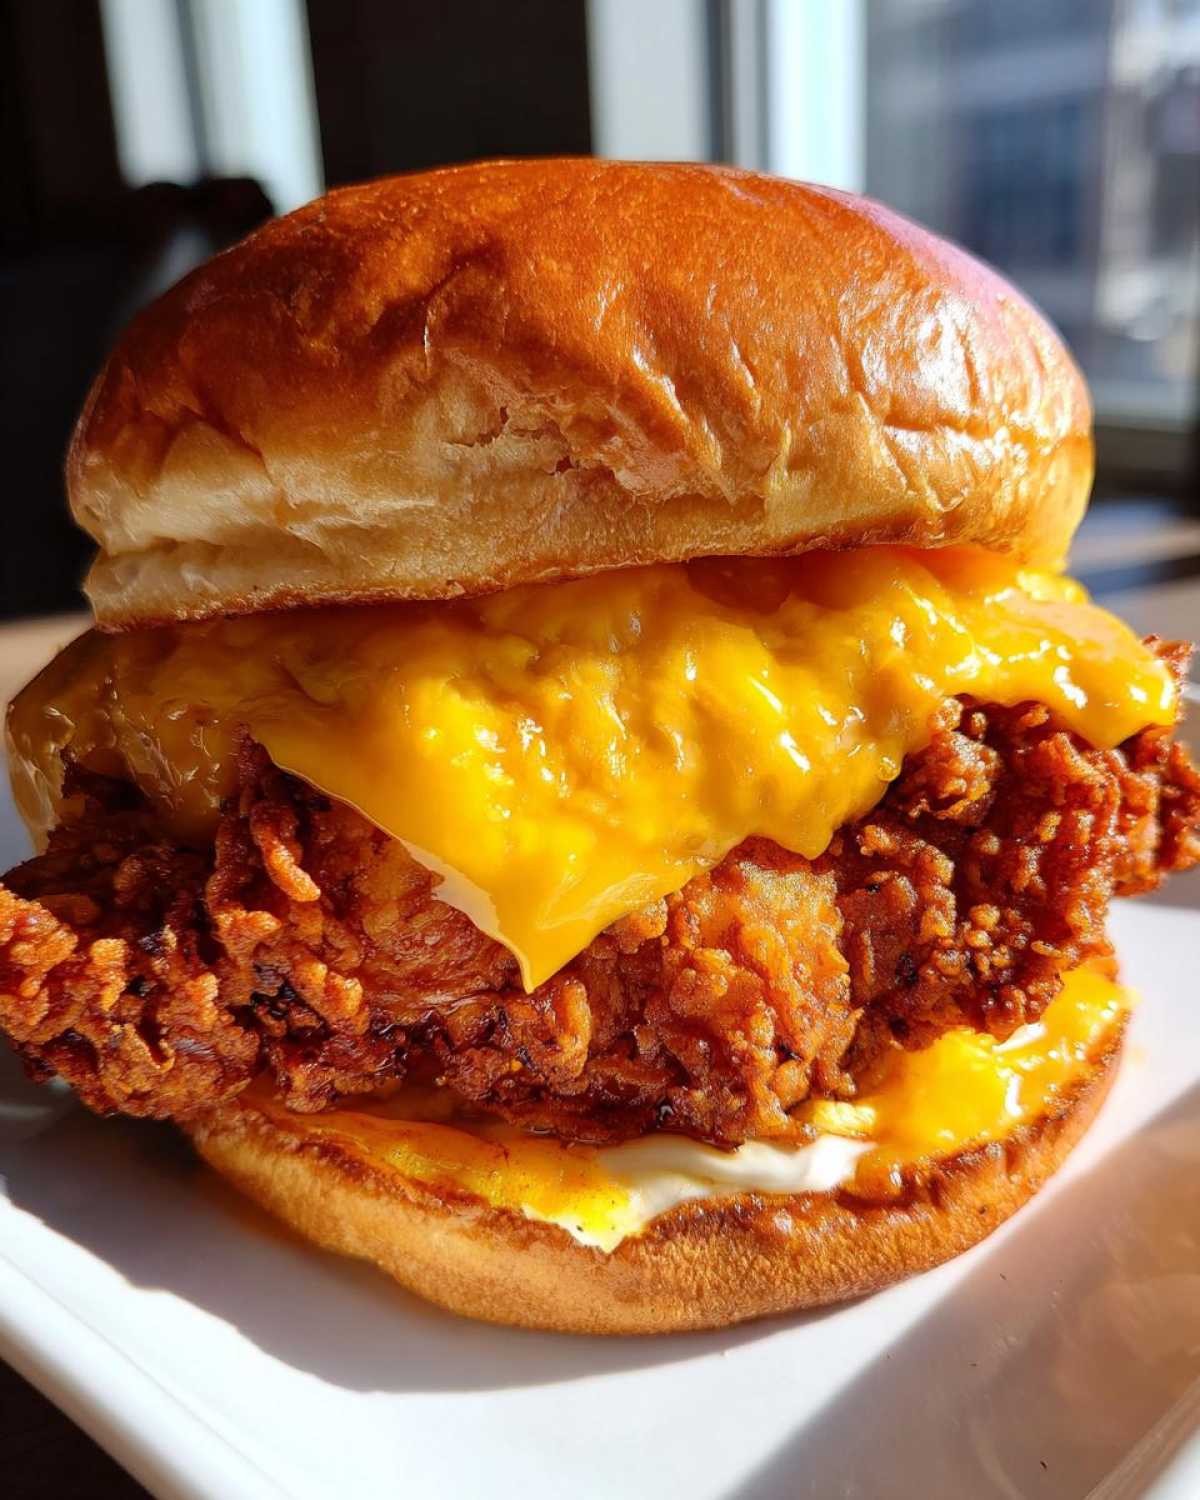
Well, stop scrolling, because I cracked the code. For ages, my homemade chicken burgers were just… fine. They were breaded, sure, but the crunch would deflate five minutes later. Not anymore! Trust me when I say that mastering the Crispy Chicken Burger with Melty Cheese is all about a few simple, tried-and-true steps. I’ve tested the dredging, the oil temperature, and the resting time until I achieved peak crunch. If you follow my method closely, particularly the coating technique, you’re going to get a restaurant-style sandwich every single time. I even keep a little marinade recipe handy; you can check out my favorite flavor booster here: simple chicken marinade. Get ready for burger night perfection!
Why This Crispy Chicken Burger with Melty Cheese Recipe Works (E-E-A-T Focus)
So, why is this recipe better than every other fried chicken disaster you’ve had at home? It’s all about setting up the chicken for success before it even sees the hot oil. We aren’t just dumping chicken into flour; we are engineering a textural masterpiece. Once you get this down, you’ll know the secret to crispy chicken texture forever! It’s all about building that trust that your cook is going to deliver.
- The buttermilk soak does the hard work of ensuring your chicken stays unbelievably juicy, even when you cook it hot and fast.
- The breading system we use builds up layers, creating those epic crags and peaks that hold all the crunch when fried.
The Buttermilk Soak for Juicy Crispy Chicken Sandwich Tutorial
Look, I know 30 minutes sounds long when you’re hungry, but you simply have to let that buttermilk get to work. Buttermilk is slightly acidic, and that acid is what slightly breaks down the proteins in the chicken. This means when it hits the heat, moisture gets locked in. I usually try to let mine go for at least an hour, but if you do less than 30 minutes, you are missing out on the juiciness factor.
How to Make Crispy Chicken Coating: The Double Dredge Technique
This is where we build the structure for the ultimate Crispy Chicken Burger with Melty Cheese. It’s not just the cornstarch in the flour mix that helps—it’s the repetition! After your first dredge in the seasoned flour, you dip it quickly back into the egg and then give it a *second*, heavy coat of flour. When you press that second layer on, you are creating ridges. These ridges are what get unbelievably crispy and golden brown in the fryer. Don’t shake too hard; you want those craggy bits!
Gathering Ingredients for Your Crispy Chicken Burger with Melty Cheese
Okay, let’s talk supplies! You can’t conquer flavor without having everything lined up right beside your stove. This is not a recipe where you just ‘eyeball’ things, especially for the coating—precision means crispness! Having everything ready makes the assembly line technique we used above so much faster. Trust me, you want the dredging stations set up before you pull that chicken from the buttermilk bath. We need the right mixture for a perfect crust and the perfect cheese situation!
For the Chicken and Breading
First up is the star, the chicken! We need two boneless, skinless breasts, but we’re going to slice them right down the middle horizontally to get thinner cutlets—aim for about 1/2 inch thick after you pound them a bit. For our marinade, grab 1 cup of buttermilk and 1 tablespoon of hot sauce. For the dry dredge, whisk together 1 cup of all-purpose flour, 1/2 cup of cornstarch (that cornstarch is crucial for crunch!), 1 teaspoon each of salt and black pepper, 1 teaspoon of paprika, 1/2 teaspoon of garlic powder, and just a pinch of cayenne for a little kick. Don’t forget those two beaten eggs, too!
For Assembly and Melty Cheese Burger Topping Ideas
Now for the good stuff that brings this all home. You can’t have a Crispy Chicken Burger with Melty Cheese without the cheese! I always go for 4 slices of good quality sharp cheddar or Monterey Jack because they melt like a dream. You’ll need 4 hamburger buns—never skip toasting them! Grab 4 tablespoons of mayonnaise. If you want to load it up, have your lettuce, tomato slices, and those tangy pickles ready to go. That’s everything we need for the ultimate sandwich experience!
Best Crispy Chicken Patty Cooking Method: Frying Instructions
Alright, we’ve got our beautifully craggy, perfectly breaded chicken cutlets ready to go. Now comes the moment of truth: frying. This is where so many people mess up their chance at a truly great Crispy Chicken Burger with Melty Cheese. You can have the best coating in the world, but if your oil isn’t humming at the right temperature, that coating will just soak up grease and turn sad and floppy. We are aiming for the sound of a satisfying, audible CRUNCH when that chicken hits the oil!
Get a deep skillet or, even better, a Dutch oven ready with about two inches of vegetable oil. You absolutely must use a thermometer here; I learned the hard way trusting my eyes! We need that temperature locked between 325°F and 350°F (175°C). If it drops much below 325°F, you’re asking for sogginess. If it spikes above 350°F, you’ll burn the beautiful outer shell before the inside cooks through. If you want to read more about the process of frying these beauties, I wrote a whole piece on handling the deep fried chicken sandwich recipe in detail.
Carefully lower two pieces of chicken in at a time. Do *not* try to squeeze in more than two! Overcrowding drops the oil temperature instantly, and then we are back to square one with greasy chicken. Fry them for about 4 to 6 minutes per side. You’re looking for deep, golden brown perfection. When they seem done, pull them out immediately and set them on a clean wire rack situated over a baking sheet. This lets the air circulate completely around the chicken, letting that excess oil drip away properly. This draining step is just as important as the frying itself!
Achieving the Perfect Temperature for Frying
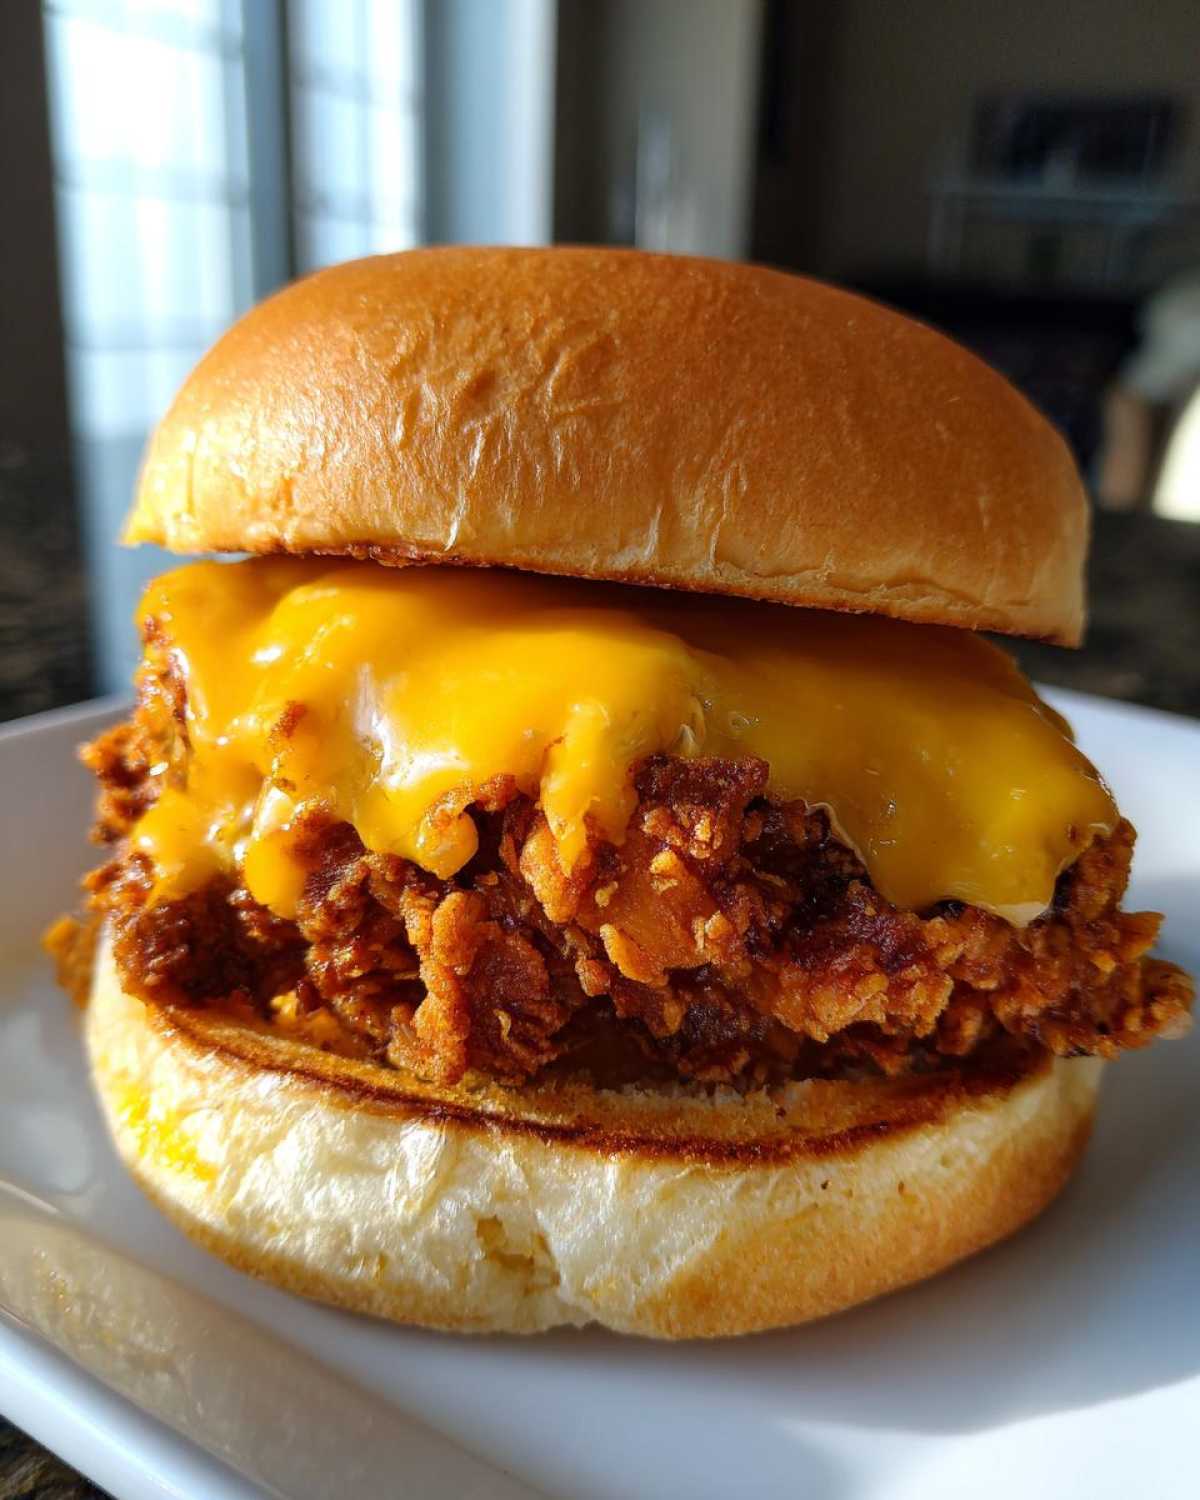
I cannot stress this enough: temperature monitoring is non-negotiable for this recipe. If the oil is too cool when you drop in your coated chicken, the coating acts like a sponge, soaking up oil instead of crisping up. That’s the number one reason for a floppy, heavy fried chicken sandwich. When you drop the pieces in, you’ll see the oil bubble vigorously—that means it’s working! Keep an eye on the thermometer and adjust your burner as needed to keep that temperature steady. If you are frying a huge batch, let the oil rest and come back up to temperature between batches. And please, for the love of crunch, don’t overcrowd the pan. Give those lovely craggly pieces some space to breathe!
Melting Cheese Perfectly on Burgers After Frying
Okay, picture this: your chicken fillet just came out of that beautiful, hot oil bath. It’s golden, it’s crunchy, and it’s piping hot. This is the moment we secure the “melty” part of our Crispy Chicken Burger with Melty Cheese! You might be tempted to just put the cheese on while it’s in the skillet, but no, no, no! We rely on residual heat here—it’s cleaner, and it stops the bottom of the cheese from sliding off while you’re trying to assemble the sandwich.
As soon as that fillet hits the wire rack to drain, go grab one of those beautiful slices of cheddar or Monterey Jack. Lay it right on top of the hot chicken. The heat radiating off that crispy crust is intense enough to start softening the cheese instantly. Because we are draining the oil on a rack and not a flat plate, we have just the right amount of heat rising up.
Here’s the game-changer: once the cheese is nestled on top, take a piece of aluminum foil—just a loose piece, don’t seal it tight!—and drape it over the chicken and cheese for about sixty seconds. That little dome traps the steam and heat generated by the freshly fried chicken, and voila! You get beautifully melted, gooey cheese blanketing that craggy crust. It’s the secret to maximizing the visual appeal of your Crispy Chicken Burger with Melty Cheese without making anything soggy. Try that next time; it works like magic every time I make this!
Alternative: Air Fryer Crispy Chicken Burger Instructions
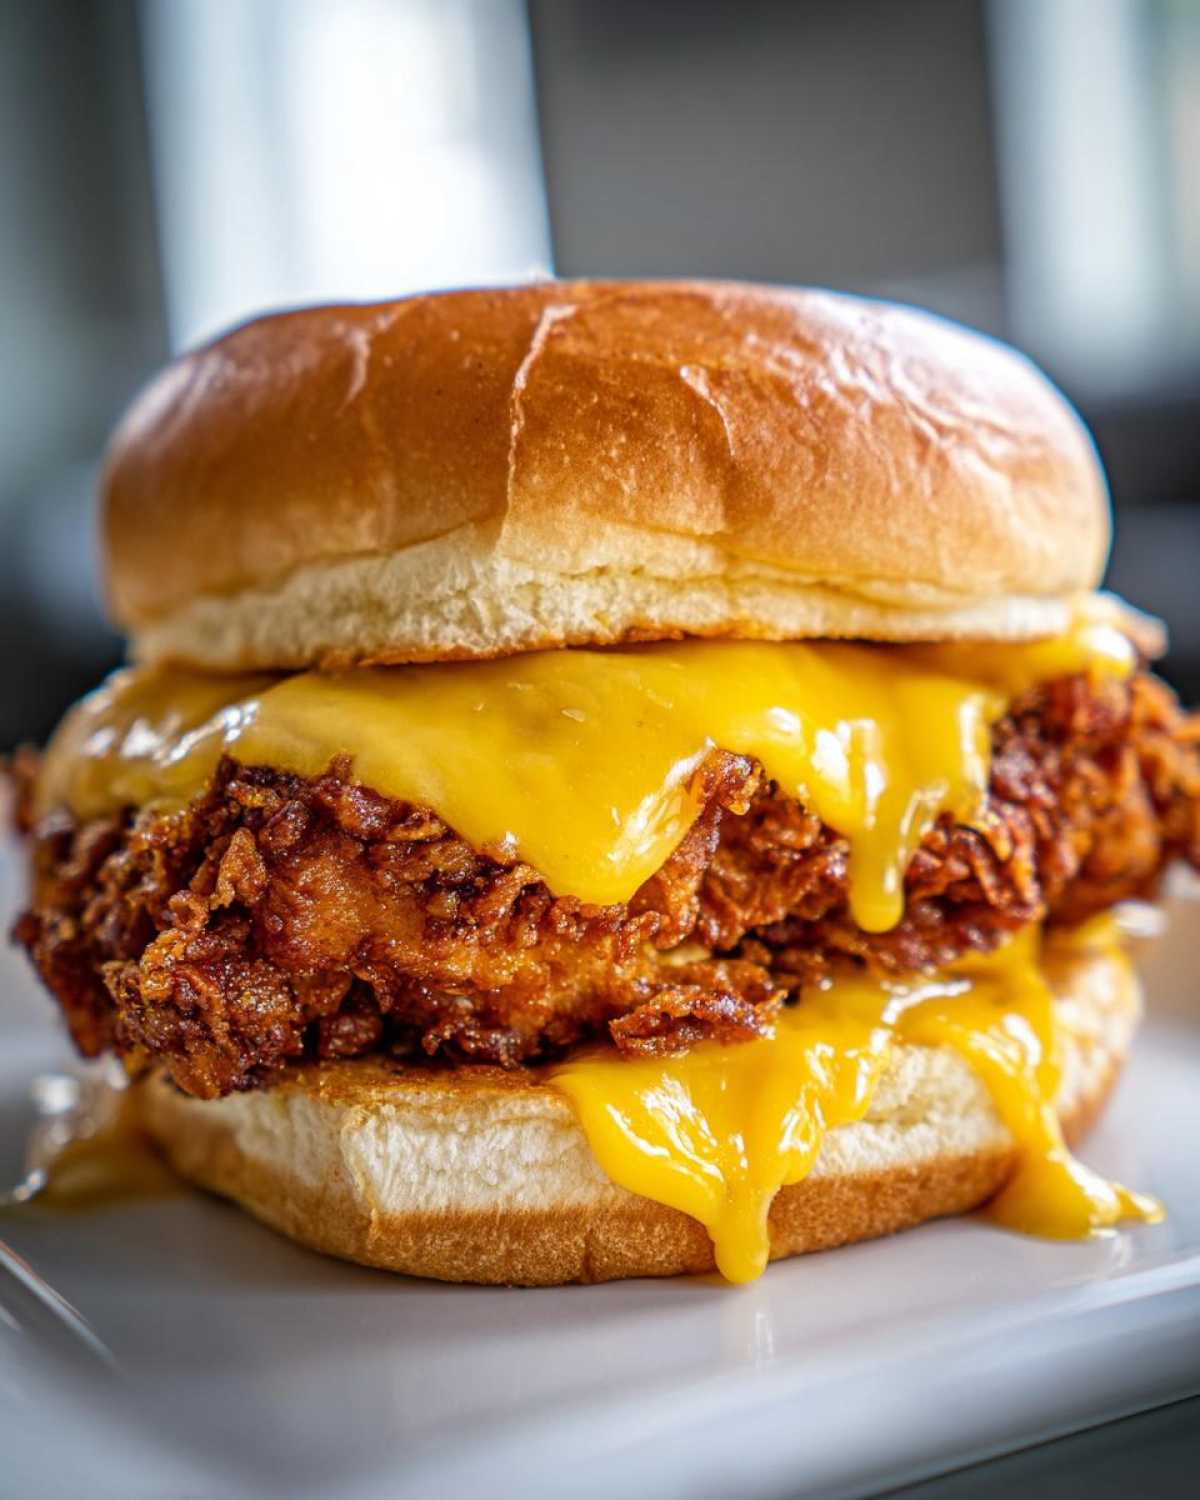
I know not everyone wants to pull out the deep fryer—and honestly, sometimes I just don’t want that much oil on the stove! If you’re looking for a slightly lighter way to achieve that legendary crunch on your Crispy Chicken Burger with Melty Cheese, the air fryer is your best friend. It’s super easy, and you don’t have to worry about oil splatter, which is a huge win in my messy kitchen!
The key here is that we are already using that amazing cornstarch-heavy dredge. That coating holds up beautifully in the air fryer. You don’t need to do anything special to the chicken preparation—the full buttermilk soak and the double dredge are still your best bet for juiciness and texture building. I even have a little trick for crispy things in the air fryer you might want to check out sometime: air fryer frozen shrimp! It’s all about circulating that dry heat.
Once your chicken cutlets are fully breaded and sitting nicely on a wire rack, it’s time to transfer them over. Lay them in the air fryer basket in a single layer. Seriously, don’t stack them! If they overlap, they steam instead of crisp, and that defeats the whole purpose of making a Crispy Chicken Burger with Melty Cheese.
You want to set that air fryer temperature to 380°F (195°C). That heat setting seems to give us the best balance between internal doneness and exterior crunch. Cook them for about 15 to 20 minutes total. Because air fryers vary wildly in power, about halfway through—say, around the 8-to-10-minute mark—you want to carefully pull the basket out and flip each fillet over. This ensures both sides get that gorgeous golden color.
Once they look done and register 165°F internally, pull them out immediately. You’ll want to melt that cheese right away, just like we discussed for the deep-fried version! Lay that slice of cheddar or Jack right on top and tent it lightly with foil for a minute. The residual heat will get it gooey and perfect for assembling your homemade crispy creation!
Melty Cheese Burger Assembly Guide
We’ve done the hard work! The chicken is perfectly fried (or air-fried!), it’s juicy, and we’ve just achieved that magnificent, gooey cheese melt using residual heat. Now comes the grand finale: assembling your incredible Crispy Chicken Burger with Melty Cheese. This is where you tie everything together, and trust me, presentation counts when a burger looks this good!
First things first: you cannot put a hot, crispy chicken fillet onto a cold, untoasted bun. It’s just wrong! Take those buns and give the cut sides a quick toast—either in a dry skillet over medium heat for about a minute or two, or right under the broiler until they are just barely golden brown. Toasting creates a barrier; it stops that wonderful mayonnaise we’re about to spread from soaking straight into the soft bread and making it squishy too quickly. We are aiming for textures here, remember?
Once toasted, grab your mayonnaise. I usually spread a generous layer on both the bottom and the top halves of the bun. It adds richness, moisture, and a bit of necessary tang against the salty, crispy coating. Don’t be shy with it!
Now for the stacking order for the ultimate Crispy Chicken Burger with Melty Cheese. Because these fillets are so gloriously crunchy, we want to protect the bottom bun just slightly. I place the mayonnaise-slathered bottom bun down, then immediately top it with my fresh, cool lettuce leaf. Some people like lettuce on top, but I find putting it under the hot, cheesy chicken helps buffer that initial heat transfer.
Next, gently place that beautiful, cheese-draped chicken fillet directly onto the lettuce. The cheese is warm, the chicken is hot, and the crispness is at its absolute peak right now! Top that with your pickles and any tomato slices you are using. Finally, crown the whole majestic creation with the top bun, mayo side down.
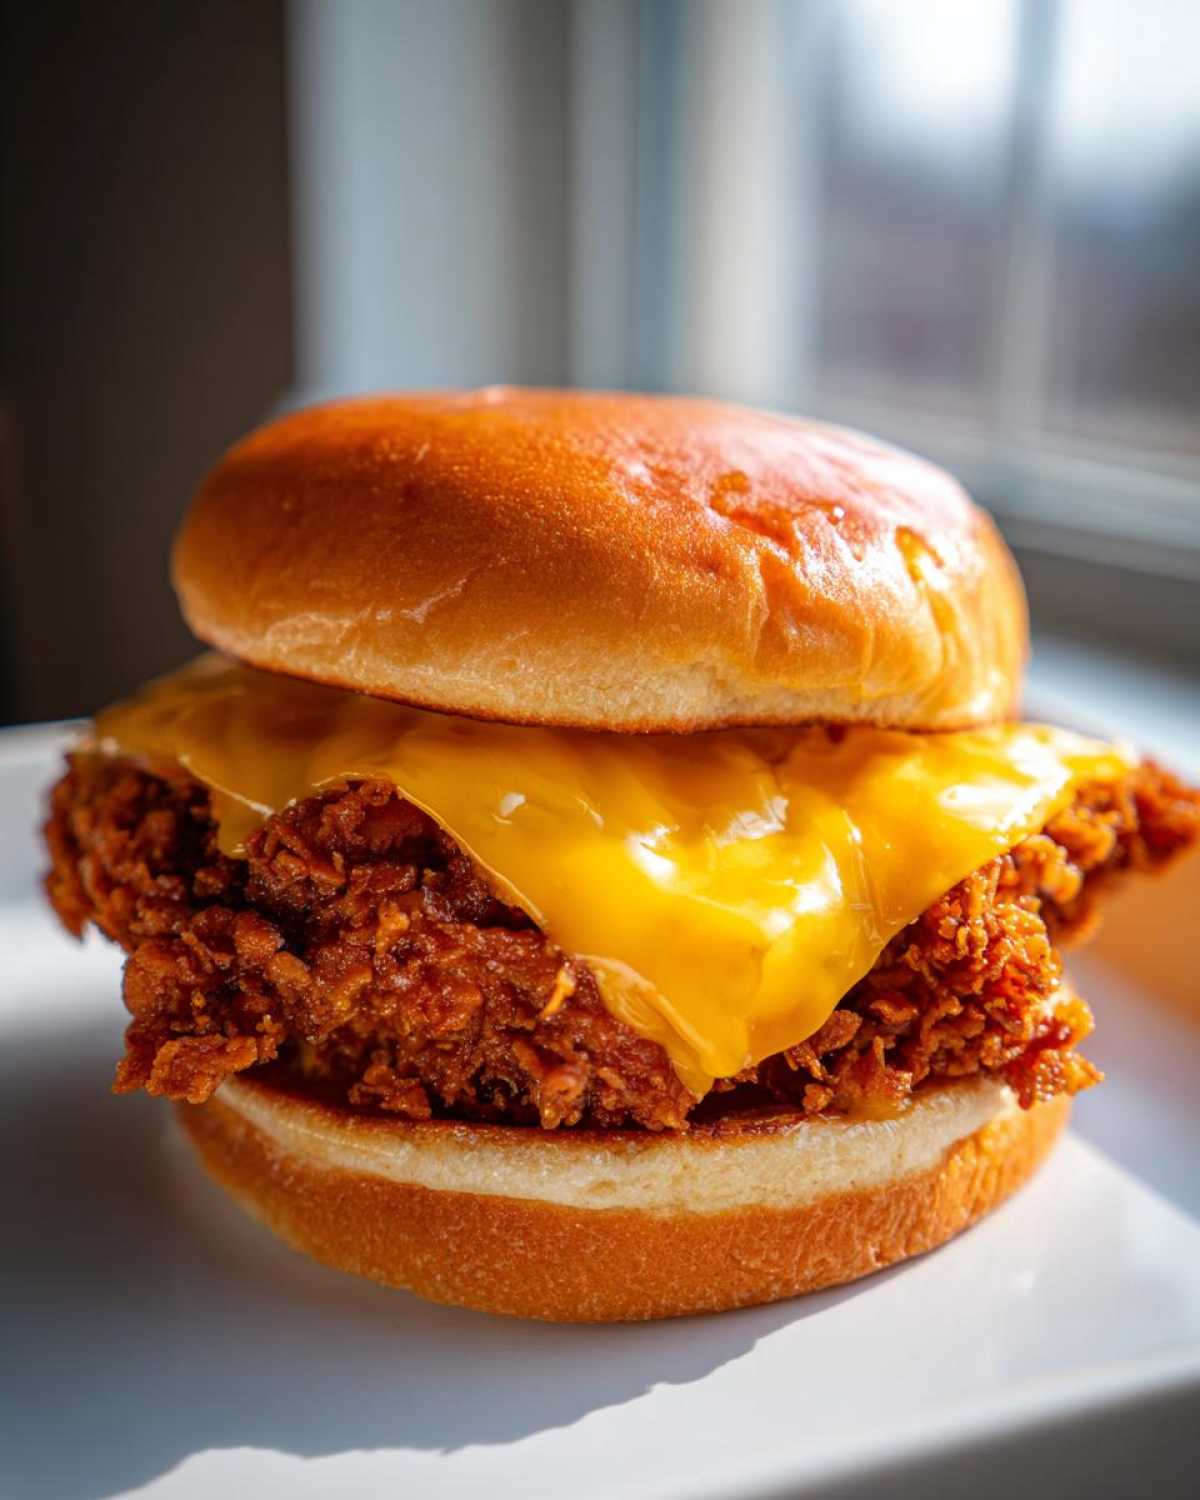
And there you have it! The perfect assembly for your Crispy Chicken Burger with Melty Cheese. Serve it immediately while the crust is still singing and the cheese is still pulling. Enjoy every glorious, crunchy bite!
Tips for Success with Your Crispy Chicken Burger
We’ve been through the whole process now—the marinade magic, the texture-building coating, and the glorious cheese melt. I want to make sure that when you take that first bite, it’s everything you dreamed it would be: audibly crispy and unbelievably juicy. A few tiny things can derail that perfection, so let’s just double-check the critical points we learned while developing this ultimate Homemade Crispy Fried Chicken Sandwich Recipe. Think of these as the final wisdom checks before you dive in!
I’ve learned over years of frying too many batches that humidity and oil temperature aren’t suggestions; they are absolute rules if you want that restaurant-style crunch. If you ever need a fantastic, creamy pairing for these burgers, you have to try my homemade cream of chicken soup recipe! But for now, back to the crisp!
Preventing Soggy Coating: Oil Management
This is the number one reason a perfect dredge fails. If your oil temperature dips below 325°F (175°C) while the chicken is frying, that gorgeous, craggy coating starts drinking the fat instead of setting up crispy. It literally melts into sogginess from the inside out! So, my tip is twofold: use that thermometer religiously, and please, please, *please* do not overcrowd the pan. You want that oil to stay happy. Once that chicken comes out, you have about 30 seconds before the steam starts to soften the outermost layer, so make sure your wire rack is ready and waiting right next to the fryer. Get it up and draining immediately so air can circulate underneath the patty. That little bit of air exposure solidifies the crust and locks in that perfect texture we worked so hard to build.
Serving Suggestions for Your Homemade Crispy Fried Chicken Sandwich Recipe
Wow, you’ve made the king of all chicken sandwiches! When you have something this rich, crunchy, and cheese-laden loaded onto a bun, you need sides that either cut through that richness or complement the savory vibe without competing for attention. We don’t want anything heavy that’s going to put you into a food coma five minutes after dinner is over, right?
My first instinct, honestly, is usually crispy fries! But we are talking about *homemade* here, so let’s elevate that a little. Think about texture contrast. That burger is crunchy and soft; let’s go for something zesty or creamy that still has a little bite to it. I adore a crisp, vinegary slaw alongside it. It cuts right through the richness of the fried coating and the cheese melt beautifully. If you like pickle flavor, you absolutely must try my creamy and tangy pickle pasta salad recipe—it’s shockingly good next to fried chicken!
If you need something lighter, a simple, bright green salad dressed very lightly with lemon vinaigrette works wonders. It’s amazing how a little acidity can refresh your palate between bites of that incredible sandwich. Another great option is classic sweet potato fries—the natural sweetness plays really nicely with the savory spice in the chicken dredge we used.
Whatever you choose, make sure your side dish can stand up to the incredible flavor you just created in that kitchen. If you’re serving kids, you can never go wrong with a side of crunchy cucumber slices or maybe some carrot sticks—anything that gives a nice, solid crunch contrast to the main event. Enjoy that amazing meal!
Storage and Reheating a Crispy Chicken Burger with Melty Cheese
So, you made the best Crispy Chicken Burger with Melty Cheese known to humankind, and, against all odds, you managed to have leftovers. Congratulations! Now, we have to be very careful here because reheating fried food is a minefield. If you just toss the whole assembled burger into the microwave, you are guaranteed to end up with a sad, steamed, soggy mess. I speak from sad, soggy experience!
The absolute golden rule for leftovers is storage separation. Don’t keep the assembled burger together! The moisture from the toppings, the mayo, and the bun will destroy that beautiful crisp coating we worked so hard to build. Take everything apart: store the chicken fillet (with the solidified cheese, if you can manage it) in an airtight container. Keep the buns, lettuce, pickles, and sauces separate in the fridge.
When you are ready to eat it tomorrow—because leftovers taste even better sometimes, right?—we have to focus entirely on bringing that crisp back to life. Do not, under any circumstances, use the microwave for rehashing this chicken! The microwave heats water molecules, which means it steams the breading from the inside out. That is the enemy of crunch.
Your two best friends for bringing back a crispy crust are your oven or your air fryer. If you’re reheating just one or two fillets, the air fryer is lightning fast. Set that air fryer to about 370°F (185°C) and pop the chicken in there for just about 4 to 6 minutes. You want it hot all the way through, but this quick blast of dry heat re-crisps the coating beautifully. Check it around the 4-minute mark!
If you’re warming up a bigger batch of Crispy Chicken Burger with Melty Cheese components, the oven is great. Preheat your oven to a moderate 350°F (175°C). Place the chicken fillets directly on a wire rack set over a baking sheet—we need air circulation underneath here too! Bake for about 8 to 10 minutes. This heat gently warms the chicken through and crisps the outside up nicely. If the cheese is still on, it might get a little oily, so if your cheese didn’t survive the fridge well, you might want to snack on the chicken plain and then melt a fresh slice on top after reheating.
Once the chicken is hot and crispy, toast those buns again quickly, spread your condiments, and reassemble. If you follow these steps, that second-day Crispy Chicken Burger with Melty Cheese will taste almost as amazing as the first time around!
Frequently Asked Questions About Making the Best Crispy Chicken Patty
I know when you’re about to deep-fry at home, a million little worries pop into your head. Do I have enough oil? Will the coating stick? Will the cheese even melt before the chicken burns? These are all totally valid questions! I’ve gathered up the most common things people ask me about achieving that perfect crunch and gooey center when they are trying to make this amazing chicken patty at home.
Can I use chicken thighs instead of breasts for this recipe?
Oh, absolutely you can! I actually prefer thighs sometimes because they are naturally tougher to dry out, which keeps them super juicy. The big difference you need to watch out for is cooking time. Breasts are leaner, so they cook through relatively fast when pounded thin. Thigh meat is a bit thicker and has more fat, even after trimming. So, if you use thighs, just stick them in that hot oil and keep an eye on the internal temperature—you might need an extra minute or two per side compared to the breast fillets we used in the main recipe.
What is the best cheese for melting quickly on a hot burger?
For the fastest and most reliable melt, especially since we are relying on residual heat, you need a cheese with high moisture and good fat content. If you want that classic, smooth, glossy melt, nothing beats a high-quality American cheese slice! But if you want more flavor without sacrificing the melt, Monterey Jack is my runner-up, hands down. Young Cheddar (the mild stuff) is also great because it relies less on aging and melts beautifully. Avoid very aged cheeses like sharp provolone or Gruyère unless you plan on putting them under the broiler for a bit, because they tend to get oily or greasy before they turn fully gooey on top of a hot fillet.
How long can I safely marinate the chicken?
That buttermilk is magic for tenderizing, but because it’s dairy and it contains acid, you can’t leave it marinating for days on end—we don’t want the chicken to start turning mushy! For the best results, aim for at least 30 minutes, but if you have time, sticking it in the fridge for up to 4 hours is fantastic. If you go beyond that? I personally stop at 5 hours maximum. Anything longer, and you risk the acid starting to break down the meat structure too much, which can lead to a texture that’s just a little too soft when it comes out of the fryer. Longer is not always crunchier, in this case!
If you have any other burning questions about heat control or breading finesse, feel free to reach out to me anytime over at the contact page: Let’s chat about your kitchen adventures!
Estimated Nutritional Data for One Crispy Chicken Burger with Melty Cheese
Now, I know we aren’t making this Crispy Chicken Burger with Melty Cheese because we are counting calories, right? We are making it because we deserve the kind of crunchy, cheesy masterpiece that makes you close your eyes while you eat it! But for those of you who need to keep track, I’ve put together the estimated nutritional breakdown based on the ingredients list provided.
Remember, these numbers are just a guideline—a starting point! How thick you pound your chicken, how much mayo you slather on, and exactly which type of cheese you pick can change these values quite a bit. If you use less oil during frying or opt for the air fryer method, you’ll definitely drop the fat content down. Consider this your ballpark estimate for one glorious, fully loaded sandwich!
- Serving Size: 1 burger
- Calories: 550
- Sugar: 5g
- Sodium: 850mg
- Fat: 30g
- Saturated Fat: 10g
- Unsaturated Fat: 20g
- Trans Fat: 0g
- Carbohydrates: 35g
- Fiber: 2g
- Protein: 38g
- Cholesterol: 110mg
There you have it! All the delicious details laid out. Enjoy every single bite of that crunchy, melty perfection!
PrintCrispy Chicken Burger with Melty Cheese
Follow these steps to prepare a homemade chicken burger featuring a very crispy coating and perfectly melted cheese.
- Prep Time: 20 min
- Cook Time: 15 min
- Total Time: 35 min
- Yield: 4 servings
- Category: Main Course
- Method: Deep Frying
- Cuisine: American
- Diet: Low Fat
Ingredients
- 2 boneless, skinless chicken breasts, halved horizontally
- 1 cup buttermilk
- 1 tablespoon hot sauce
- 1 cup all-purpose flour
- 1/2 cup cornstarch
- 1 teaspoon salt
- 1 teaspoon black pepper
- 1 teaspoon paprika
- 1/2 teaspoon garlic powder
- 1/4 teaspoon cayenne pepper
- 2 large eggs, beaten
- Vegetable oil, for frying (about 2 inches deep)
- 4 slices cheddar or Monterey Jack cheese
- 4 hamburger buns
- 4 tablespoons mayonnaise
- Optional toppings: lettuce, tomato slices, pickles
Instructions
- Pound the chicken halves between plastic wrap until they are about 1/2 inch thick.
- In a bowl, mix the buttermilk and hot sauce. Soak the chicken pieces in this mixture for at least 30 minutes, or up to 4 hours in the refrigerator.
- In a shallow dish, whisk together the flour, cornstarch, salt, pepper, paprika, garlic powder, and cayenne pepper. This is your dry dredge.
- Remove one piece of chicken from the buttermilk, letting excess drip off. Dredge it thoroughly in the flour mixture, pressing firmly to coat.
- Dip the floured chicken piece quickly back into the beaten egg, then immediately return it to the flour mixture. Press and shake to create a thick, craggy coating. Set the coated chicken aside on a wire rack. Repeat for all pieces.
- Heat about 2 inches of vegetable oil in a deep skillet or Dutch oven to 350°F (175°C). Use a thermometer to monitor the temperature.
- Carefully place two chicken pieces into the hot oil, ensuring you do not overcrowd the pan. Fry for 4 to 6 minutes per side, until golden brown and cooked through (internal temperature reaches 165°F or 74°C).
- Remove the cooked chicken and place it on a clean wire rack set over a baking sheet to drain excess oil.
- While the chicken is hot, immediately place one slice of cheese on top of each fillet. Cover the rack loosely with foil for 1 minute to trap heat and melt the cheese.
- Lightly toast the hamburger buns.
- Spread mayonnaise on the bottom and top halves of each bun.
- Assemble the burgers: place the cheesy chicken fillet on the bottom bun, top with desired lettuce, tomato, and pickles, then place the top bun on. Serve immediately.
Notes
- For extra crispiness, use a double-dredge technique: flour, then egg, then flour again, then egg again, then a final coating of flour.
- Maintain the oil temperature between 325°F and 350°F. If the oil is too cool, the coating will absorb too much oil and become soggy.
- If you prefer not to deep fry, you can air fry the coated chicken at 380°F (195°C) for 15-20 minutes, flipping halfway, until golden and cooked through.
Nutrition
- Serving Size: 1 burger
- Calories: 550
- Sugar: 5
- Sodium: 850
- Fat: 30
- Saturated Fat: 10
- Unsaturated Fat: 20
- Trans Fat: 0
- Carbohydrates: 35
- Fiber: 2
- Protein: 38
- Cholesterol: 110