

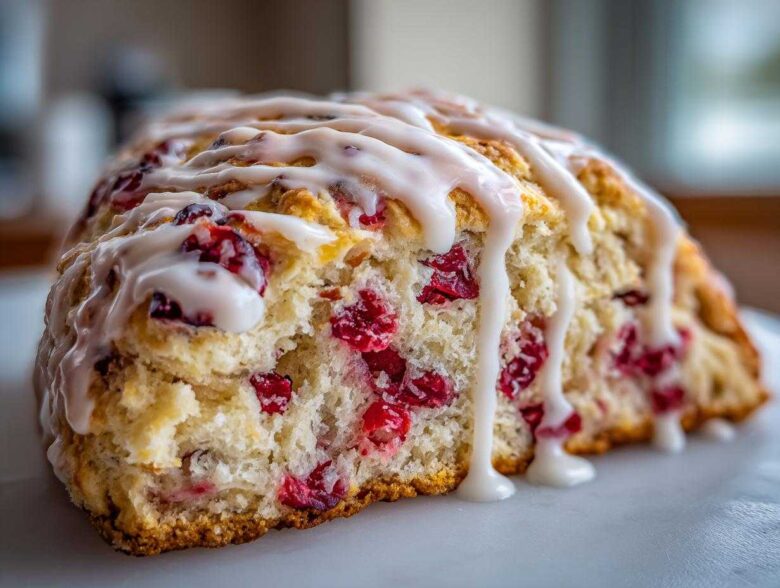
There is just something magical about biting into a truly perfect scone, especially when the air gets crisp or you’re planning a beautiful brunch spread. Forget those dry, crumbly things you find sometimes; we are aiming high here! I’m talking about the ultimate cranberry orange scones. Seriously, the search for the best homemade pastry ends right here.
After years of messing around—and believe me, I’ve made some hockey pucks in my day—I finally cracked the code to get that incredible, light, and flaky texture you usually only find in fancy bakeries. This recipe is quick, uses the brightest orange zest you can imagine, and balances that tartness with sweet, plump cranberries. You won’t believe how easy this is to pull off. If you’re looking for tasty breakfast ideas that feel fancy but are totally manageable, this is it.
Why These Cranberry Orange Scones Are Your New Favorite Breakfast Treats
I totally get it—scones sound intimidating, right? People think you need years of training to get that perfect crumb. Nope! This is the definitive Easy Scone Recipe because it gives you big bakery results without requiring any complicated dough handling. You get all the buttery goodness in about thirty minutes total!
- You finally get that Flaky Scones Tutorial secret down pat, meaning no more dense hockey pucks on your counter.
- They scream fancy but are perfect for quick weekday treats or impressive Holiday Scones displays.
- They are adaptable! Use them for cozy breakfasts or as standalone Brunch Baking Ideas.
Achieving True Bakery-Style Flakiness
The real secret, which I’ll detail next, is keeping that butter rock hard! When the cold butter hits the hot oven, it steams, creating those glorious pockets that make the scone lift up and flake apart beautifully. It’s simple science applied with good cold ingredients.
Bright Flavor from Fresh Orange Zest Recipes
Don’t even *think* about using orange extract here; it tastes fake! The punch in these Citrus Scones comes 100% from fresh zest. That bright, beautiful oil marries perfectly with the tartness of the cranberries and the sweetness of the sugar. It just lights up the whole pastry!
Gathering Ingredients for Perfect Cranberry Orange Scones
Okay, let’s talk about what you need to grab from the pantry! Having everything measured out ahead of time—we call this *mise en place* in fancy cooking circles, but really, it’s just being prepared so you don’t panic—is half the battle won. I always lay everything out on the counter before I even turn the oven on. Remember, for cranberry orange scones to turn out right, the cold ingredients have to *stay* cold!
When you check out the full list, you’ll see we rely on standard staples, but the magic truly lies in the specifics of how we approach things like butter and zest. If you end up needing other kitchen inspiration later, check out my thoughts on homemade orange sauces—it’s surprising how much flavor that little orange can pack!
Key Ingredient Notes and Substitutions for Cranberry Orange Scones
This is where we build that expertise, folks! Pay close attention to this part, because it separates a “good” scone from a truly *great* one. First, the butter:
- It absolutely has to be cold unsalted butter, cut into small cubes. If it starts to get soft while you’re cutting it in, just pop the bowl into the freezer for five minutes. I can’t stress this enough—cold butter creates steam, steam creates flakes!
- For the cranberries, you have options! I love using dried cranberries because they plump up nicely during the bake. But if you have frozen ones on hand, don’t thaw them first! Toss them straight from the freezer into the dry mix. Thawing them will just make your dough wet before you even start mixing.
- We need heavy cream here, not milk, for richness and that desirable buttery texture. If you are dead set on substituting, half-and-half is the closest you’ll get, but the scones might be slightly less tender, so this is one place I suggest sticking to the recipe for our Buttery Scones dream!
Step-by-Step Instructions for Easy Scone Recipe
Alright, seeing all that gorgeous, cold butter cut into the dry mix? That’s the start of your Quick Scone Recipe success! We are moving fast now, but gently! Remember, the rule for Buttery Scones is minimal handling. We want layers, not gluten development that results in tough cookies!
First things first, make sure you’ve got your oven set to 400°F (200°C) and have that baking sheet lined with parchment paper waiting. Preheat time is your friend; you want that oven roaring hot when the cold dough goes in! If you’re looking for other ways to jazz up your mornings, check out this easy peach butter recipe sometime!
Mixing the Dough for Tender Cranberry Orange Scones
We already whisked our dry ingredients, and you’ve hopefully got coarse crumbs with some pea-sized chunks of butter still visible—that’s exactly what we’re looking for. Now, take your wet mixture—that’s the egg whisked with the heavy cream—and pour it right into the center of those crumbs. Don’t pour it around the edges!
Mix it together with a fork, just until it barely comes together. You’re aiming for shaggy, not smooth! When I mix, I stop the second I see no dry flour pockets left. If you see streaks of liquid mixing with the flour, that’s fine; this dough should look messy. If you mix too much here, you lose all the flaky potential we worked so hard setting up with that cold butter.
Shaping and Baking Your Glazed Scones Recipe
Turn that shaggy mess out onto a lightly floured surface. Now, use your hands to gently press and pat the dough together. Don’t knead it; just coax it into a thick circle or square, about 3/4 of an inch thick. Think thick hockey puck, but softer! Cut that shape into 8 even wedges or squares.
Place these beauties onto your prepared baking sheet, giving them a little room to breathe—about an inch apart. Before they go into the heat, brush the tops lightly with that remaining tablespoon of heavy cream. This helps them get that lovely golden color. Bake them hard and fast for just 15 to 18 minutes. They should be lightly golden brown on top. Trust me on the timing; a shorter, hotter bake keeps the inside tender while setting those layers we love! This quick heat is what makes this a great Glazed Scones Recipe!
Crafting the Zesty Orange Glaze for Your Cranberry Orange Scones
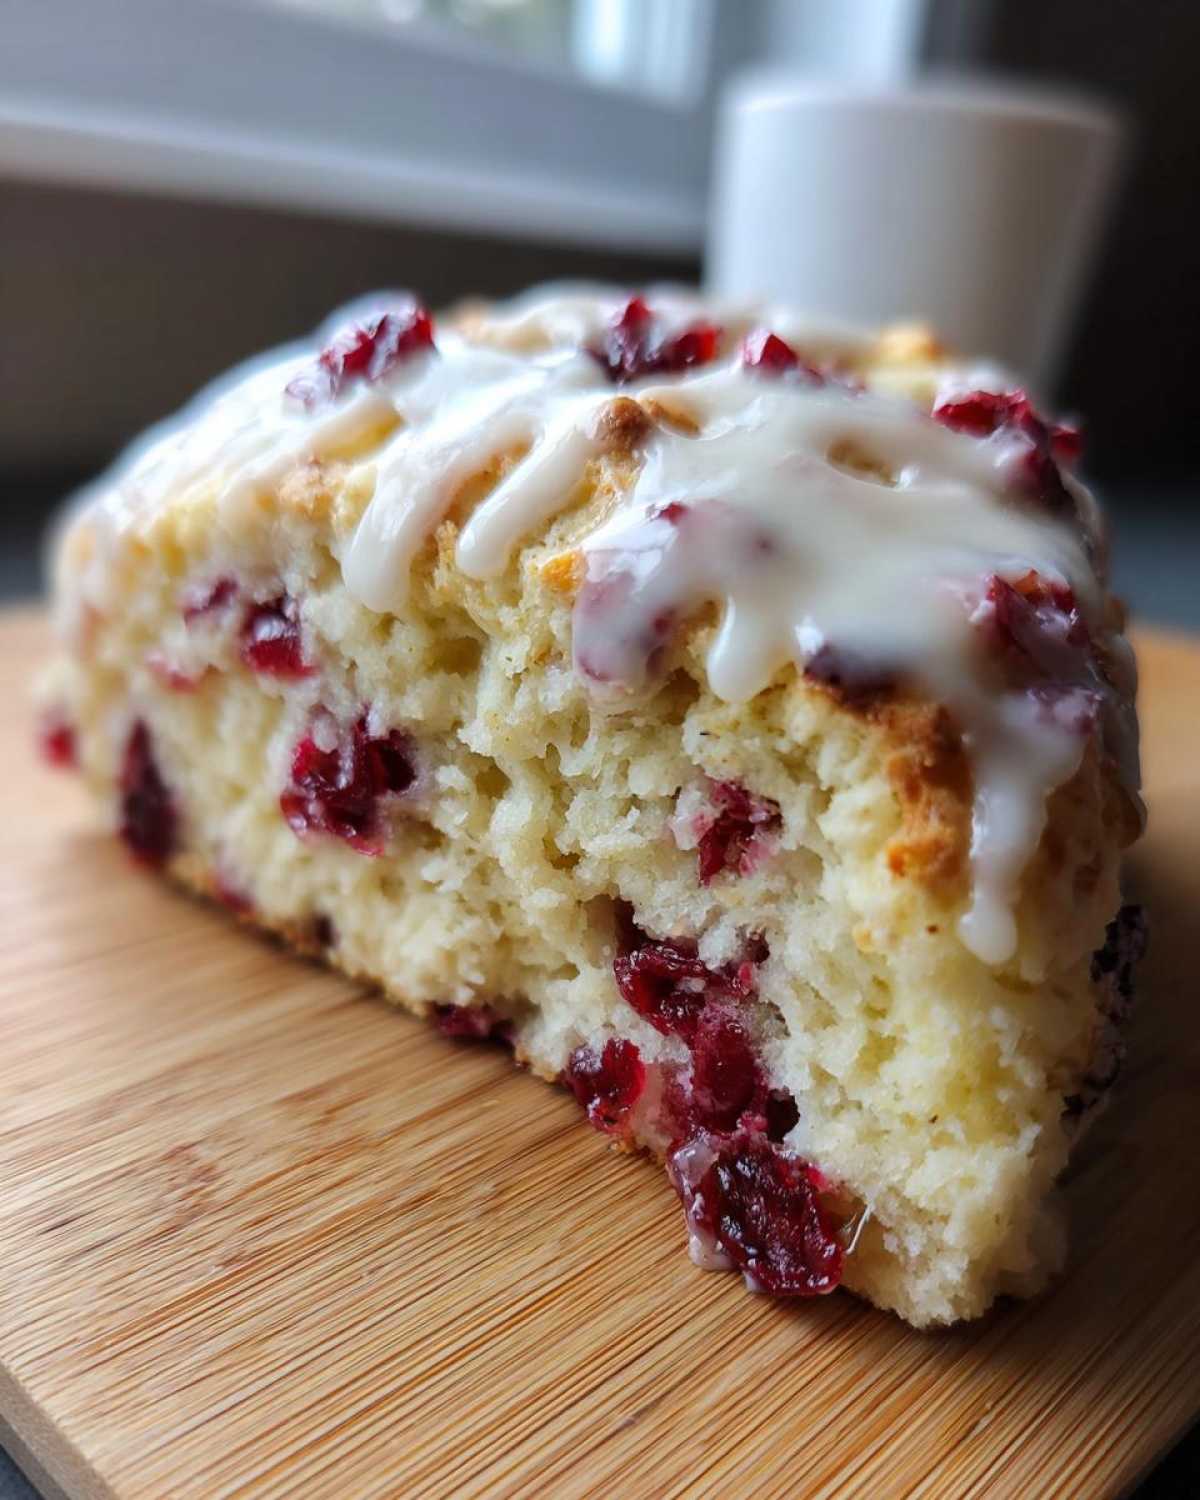
Okay, the scones are hot and fragrant coming out of the oven, but they aren’t *finished* until that glaze hits them! This bright glaze is what really pulls the orange flavor right up front and gives these cranberry orange scones that signature bakery look. Honestly, it’s so simple, you might feel guilty adding it to the recipe, but it’s non-negotiable for me!
You only need two things for this glaze: powdered sugar and the fresh juice you squeezed from that beautiful orange—remember that zest you used earlier? Now we use the juice! Just whisk the cup of powdered sugar with about two tablespoons of fresh orange juice until it’s totally smooth. If it seems way too thick, splash in just a few more drops of juice. You want it pourable, but certainly not runny!
Here’s the timing trick for the best results with this Glazed Scones Recipe: You need to wait just a little bit. If you glaze them when they are piping hot, the sugar will melt right into the scone and disappear. If you wait until they are totally cold, the glaze dries too stiffly. Let those scones cool on the rack for about 10 minutes. They should still be visibly warm to the touch, but not hot enough to instantly dissolve the glaze. Then, just drizzle it over the tops, or if you want that classic Starbucks look, use a spoon to drag lines across the top third of each stack. Seriously, watching that bright white glaze set against the warm scone color is one of my favorite cooking moments!
Tips for Success: Mastering Homemade Pastries
So, you’ve got your cranberry orange scones mixed and baked, but maybe they spread outwards instead of upwards? Don’t worry! This happens, but we can conquer it next time. Achieving the Best Scones Homemade is all about controlling three things: ingredient temperature, handling time, and oven heat.
The biggest mistake people make is letting the butter get warm. If you see the butter starting to look greasy when you cut it into the flour, stop immediately and chill your bowl for ten minutes. Warm butter melts before it steams, and that’s what causes your scones to spread flat instead of rising high and flaky.
Also, resist the urge to smooth the dough perfectly when you pat it out. That heavy handling activates the gluten and makes the scones tough! Keep it light and quick. If you want to see how I handle delicate doughs for other recipes, check out my bakery-style blueberry muffin tips—the principles are similar!
Make Ahead Scones and Freezer Friendly Baking for Holidays
This is the section I’m so excited about for all you planners out there! Seriously, these cranberry orange scones are one of my favorite Freezer Friendly Baking projects for stocking up before the busy season hits. Having something that tastes fresh-from-the-oven ready for a last-minute visitor or a lazy Saturday morning is the best feeling. You can totally save these for amazing Holiday Scones when things get hectic!
I use two main methods depending on what stage of baking I’m at. Why bother cleaning up today when you can enjoy the fruits of your labor next month? If you’re into prepping big batches of food way ahead of time, check out how I handle my freezer breakfast burritos—it follows a similar mindset!
Let’s look at how to keep these beauties perfect using Make Ahead Scones strategies.
Freezing Unbaked Scone Dough for Freshness
This approach gives you the absolute freshest taste, because you bake them right when you want them. After you cut your wedges or squares (Step 6 in the instructions!), place them on a baking sheet lined with parchment paper, but don’t brush them with cream yet. You want them stacked flat, not touching, for easy separation later.
Pop this tray straight into the freezer. Once they are totally solid—usually in about an hour or so—you can gently transfer them to a heavy-duty freezer bag. They will keep great for about three months this way. When you are ready to bake, just move them from the freezer directly onto the parchment-lined baking sheet. Add the little brush of cream on top, and add about 5 to 7 extra minutes to the baking time. They bake up perfectly!
Freezing Baked Cranberry Orange Scones
If you bake them all at once and just can’t stop eating them, it’s okay to freeze them after cooling. Once those Glazed Scones are completely cool and the glaze is hard, you can freeze them. The key here is protecting that glaze!
I wrap each scone tightly first in plastic wrap, making sure the glaze is covered, and then tuck them all into a big freezer bag or airtight container. When you want one, pull it out, let it thaw on the counter for an hour or two, or warm it in a toaster oven for about 5 minutes. They taste surprisingly good, even after being frozen baked!
Serving Suggestions for Festive Baked Goods
Look, these cranberry orange scones are delicious enough to stand alone, absolutely, but why stop there? When you’ve put in the effort to get that perfect flaky texture, you want to show them off! These treats are practically begging to be the star of any Winter Breakfast Ideas spread.
Since the flavor profile is so bright—that sharp citrus cutting through the naturally tart cranberries—you want accompaniments that either lean into that brightness or offer a gentle, creamy contrast. Skip the heavy jams for these; they don’t need them!
Pairing with Beverages for Brunch Baking Ideas
When I serve my Festive Baked Goods, the drink pairing is almost as important as the pastry itself. Since the orange is so forward, a hot black tea with a little lemon wedge is fantastic—it keeps the palate clean between bites.
If you’re looking for something bubbly and celebratory, especially around the holidays, forget plain juice! I love making a batch of sparkling cider drink to serve alongside these scones. The apple notes blend surprisingly well with the orange, and it feels instantly special. Even making a simple hot cider on the stove fills the whole house with the best cozy smells!
The Perfect Complementary Spreads
If you must have a spread, keep it light. A plain, high-quality cream cheese works wonders—just let it soften slightly so you can spread it easily without squishing the scone layers. It offers a lovely, mild tang that complements the orange zest.
For something subtly sweet, a light brushing of pure maple syrup is incredible, especially if you warm the scones up just slightly before serving. Heat releases those wonderful citrus oils in the glaze, and the warm maple just melts right into the crumb. It makes for a gorgeous presentation on a simple white platter!
Frequently Asked Questions About Cranberry Orange Scones
It’s funny the things people worry about when baking! I get so many messages asking the same questions about these cranberry orange scones, so I thought I’d put the most common ones right here for you. Honestly, most of the worry comes from recipes that aren’t written clearly, but since we’ve established the rules for achieving the Best Scones Homemade, you should be totally fine!
Can I make these Starbucks Copycat Scones without a glaze?
Yes, you absolutely can skip the glaze if you’re looking for a less sweet breakfast treat! However, you are removing a key component of the moisture shield. The glaze locks in the fresh flavor, so if you leave it off, your Citrus Scones might dry out a tiny bit faster. If you skip it, I recommend brushing them with a little melted butter immediately after they come out of the oven instead—it helps keep that buttery crumb soft!
What is the best way to store leftover cranberry orange scones?
For leftovers, treat them like any good homemade pastry. I don’t recommend storing them in the fridge since the cold environment can really toughen up the texture. Instead, keep them in a single layer in an airtight container at room temperature for up to two days. If they start to feel just a little stale on day two, pop one in the toaster oven for 3 minutes—it will revive them instantly! If you need longer storage, see my tips above on Freezer Friendly Baking!
And trust me, if you want to recapture that coffee shop vibe, pair these with a slightly sweet drink like the blended pumpkin cream cold brew I shared.
Nutritional Estimates for This Recipe
Now, I know some of you might be watching what you eat, and that’s totally fine! While my focus in the kitchen is always flavor first, I do like to keep track of what we are enjoying. I ran these cranberry orange scones through a general calculator to give us a ballpark idea of what we are looking at here for a single serving. These are based on the recipe yielding 8 scones, so remember, what you see here is just an estimate!
Keep in mind that the actual numbers can shift based on the brand of butter you use, exactly how much zest you pack into that tablespoon, and what kind of cranberries you select. But this gives us a great starting point for these beautiful Buttery Scones!
- Serving Size: 1 scone
- Calories: 320
- Fat: 18g
- Saturated Fat: 11g
- Carbohydrates: 37g
- Sugar: 18g
- Protein: 5g
- Cholesterol: 65mg
- Sodium: 180mg
See? Not bad at all for something that tastes so decadent! It shows you can totally make incredible Brunch Baking Ideas without worrying too much when you control the ingredients yourself, unlike store-bought pastries. Enjoy every single bite!
PrintEasy Bakery-Style Flaky Cranberry Orange Scones with Zesty Glaze

Make tender, flaky cranberry orange scones at home. This simple recipe uses fresh orange zest and a sweet orange glaze for a bright, buttery breakfast treat perfect for brunch or holidays.
- Prep Time: 15 min
- Cook Time: 18 min
- Total Time: 33 min
- Yield: 8 servings
- Category: Breakfast
- Method: Baking
- Cuisine: American
- Diet: Vegetarian
Ingredients
- 2 cups all-purpose flour
- 1/4 cup granulated sugar
- 1 tablespoon baking powder
- 1/2 teaspoon salt
- 1/2 cup (1 stick) cold unsalted butter, cut into small cubes
- 3/4 cup dried or frozen cranberries
- 1 tablespoon orange zest (from about 1 large orange)
- 1/2 cup heavy cream, plus 1 tablespoon for brushing
- 1 large egg
- For the Glaze: 1 cup powdered sugar
- For the Glaze: 2 tablespoons fresh orange juice
Instructions
- Preheat your oven to 400°F (200°C). Line a baking sheet with parchment paper.
- In a large bowl, whisk together the flour, granulated sugar, baking powder, and salt.
- Cut the cold butter into the dry ingredients using a pastry blender or your fingers until the mixture resembles coarse crumbs with some pea-sized pieces of butter remaining.
- Stir in the cranberries and orange zest until evenly distributed.
- In a small bowl, whisk together the 1/2 cup heavy cream and the egg. Pour this wet mixture into the dry ingredients. Mix gently with a fork until just combined; do not overmix. The dough will be shaggy.
- Turn the dough out onto a lightly floured surface. Gently pat or press the dough into a 3/4-inch thick circle or square.
- Cut the dough into 8 wedges or squares. Place the scones on the prepared baking sheet, leaving about 1 inch between them.
- Brush the tops of the scones lightly with the remaining 1 tablespoon of heavy cream.
- Bake for 15 to 18 minutes, or until the tops are lightly golden brown. Let the scones cool on a wire rack for 10 minutes.
- While the scones cool, prepare the glaze: Whisk together the powdered sugar and orange juice until smooth.
- Drizzle the orange glaze over the slightly warm scones. Let the glaze set before serving.
Notes
- For the flakiest results, keep your butter very cold before mixing it into the flour.
- If using frozen cranberries, do not thaw them before adding them to the dough.
- You can make these scones ahead; store unglazed scones in an airtight container for up to 2 days, or freeze them baked or unbaked for up to 3 months.
Nutrition
- Serving Size: 1 scone
- Calories: 320
- Sugar: 18
- Sodium: 180
- Fat: 18
- Saturated Fat: 11
- Unsaturated Fat: 7
- Trans Fat: 0
- Carbohydrates: 37
- Fiber: 1
- Protein: 5
- Cholesterol: 65