

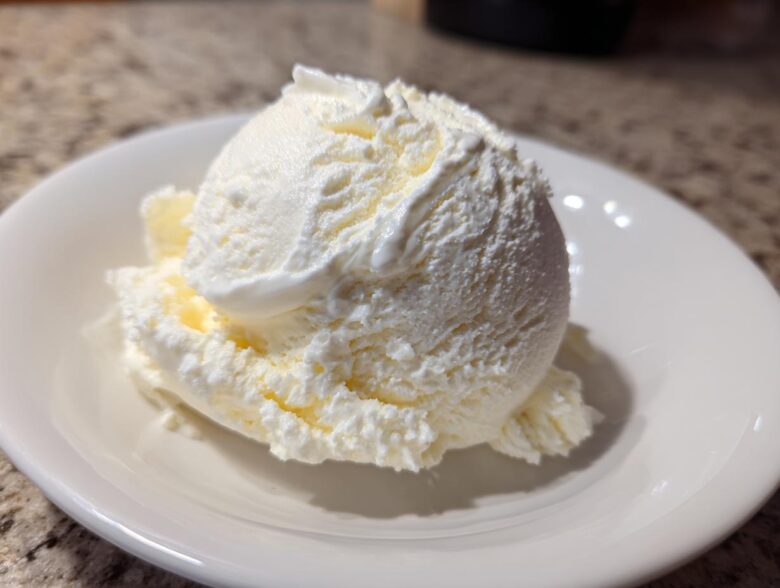
It used to feel impossible, didn’t it? Finding a dessert that is truly decadent but still fits into your healthy eating goals. Well, I’m here to tell you that dream is now a reality, and it starts with that container of cottage cheese lurking in your fridge! I’ve cracked the code to the ultimate creamy cottage cheese ice cream, and trust me, the texture is shocking—it’s unbelievably smooth. This isn’t some grainy, sad imitation of dessert; this is rich, high-protein goodness you can eat straight from the pint. This simple recipe has become my go-to for satisfying every single dessert craving without the guilt. If you want to know more about my journey in the kitchen, check out the About Us page!
My biggest struggle was avoiding that slightly chunky texture, you know? But after so much trial and error—and maybe a little too much blending—I finally perfected the secret to getting that perfect, smooth texture. If you need a boost of protein in your sweet treats, forget those expensive tubs in the store. You can whip up this batch in five minutes flat!
Why This Creamy Cottage Cheese Ice Cream Beats Store-Bought Options
Honestly, why would you buy those tubs filled with stabilizers and loads of sugar when you can make this at home? This isn’t just a treat; it’s a strategic move for your snack game. This high protein ice cream is the answer to those late-night protein dessert cravings that you just can’t ignore. We’re talking about a genuinely healthy frozen dessert that tastes like you should be guilty eating it.
If you love my fluffy cottage cheese pancakes, you’ll appreciate how I use that same base ingredient here for something totally different! Check out that recipe if you get a chance: my famous cottage cheese pancakes.
The Protein Powerhouse: Making cottage cheese ice cream
The best part, the real magic, is the protein count. You get an incredible amount of muscle-loving protein from such a simple base—way more than you’d ever find in a traditional dessert. Because it’s so packed with good stuff, it actually keeps you satisfied longer. I find myself reaching for this instead of sugary snacks when dinner settles.
Achieving That Smooth Texture Recipe Secret
Now, we have to talk texture, because that’s where most homemade versions fail. The secret behind this smooth texture recipe is pure brute force blending. You absolutely need to get the cottage cheese totally liquidated before it even thinks about hitting the freezer. If I see even one little lump, I put it back in the blender. Don’t settle for grainy!
Essential Ingredients for Your Cottage Cheese Ice Cream
You won’t believe this, but this amazing recipe only asks for three main things to create the base! It’s the definition of a simple ingredient frozen dessert, which is fantastic when you’re craving something fast. We rely on the cottage cheese for structure and protein, the milk for blendability, and the sweetener to make it taste like actual ice cream.
You need exactly one cup of low-fat cottage cheese, a quarter cup of milk, and just two tablespoons of your chosen sweetener. That’s it for the core recipe. I always keep these things stocked because you never know when that frozen dessert craving will hit!
Ingredient Notes and Substitution Guidance
Since we are aiming for a lower-sugar ice cream, I rely heavily on erythritol or a good stevia blend. These granulated sweeteners dissolve beautifully when blended, which is key for texture.
Now, about that cottage cheese: I stick to low-fat because it keeps the calories down, but I’ve definitely played around with full-fat blends. Full-fat will give you a richer mouthfeel, maybe a little closer to a nice dairy ice cream, but it does bump up the fat content considerably. Low-fat works perfectly when you blend it smooth, so start there!
Step-by-Step: How to Prepare Your Cottage Cheese Ice Cream Base
Okay, getting the base right is half the battle, maybe even three-quarters! This is where we turn those curds into magic. You’re going to need a high-speed blender or a really powerful food processor for this part; don’t even try with a weak stick blender, you’ll end up frustrated.
First things first: toss your cottage cheese, your milk—I use unsweetened almond milk usually—and your sweetener right into the blender jar. Now, this is critical, and I can’t stress this enough: you need to blend this mixture until it is totally, completely, unequivocally smooth. I mean, no lumps visible whatsoever. You will have to stop the blender a couple of times to scrape down the sides, but keep going!
You’re looking for a texture that resembles thin, pourable heavy cream, not cottage cheese dip. If you see any texture remaining, your final ice cream will be icy, and we definitely don’t want that compromise on creaminess! Once it looks like liquid silk, you’re good to move to the freezing stage. Just a few minutes of blending is all it takes to set up this perfect foundation.
Two Freezing Methods for Perfect Cottage Cheese Ice Cream
Here’s the best part: this ultra-creamy base works whether you own fancy gadgets or you’re sticking to the tried-and-true no churn ice cream recipe method. You choose your adventure! Both ways get you that amazing spoonful of healthy frozen dessert, but the technique is slightly different.
If you want to check out another surprisingly easy dessert while you wait for this to freeze, you have to see my recipe for no-bake peanut butter pie. It’s dangerously good!
The No-Churn Cottage Cheese Ice Cream Technique
When you go the traditional route, you have to fight those ice crystals! Pour that silky smooth mixture into a freezer-safe loaf pan or container. You need to be disciplined here: you must pull it out every single hour for the first three hours and stir it vigorously. I use a fork and just mash through it, breaking up anything solidifying on the edges.
This active work is what prevents big chunks of ice from forming, guaranteeing you get a scoopable, better-than-store-bought texture. After that third stir, you can let it be. It usually takes about four to six hours total, depending on your freezer temperature, before it’s firm enough to serve.
Adapting This Recipe for the Ninja Creami
If you have a Ninja Creami, this recipe is practically built for it—it truly excels as Ninja Creami cottage cheese base. The trick here is freezing: you absolutely must freeze the filled pint completely solid, which means letting it sit for a full 24 hours minimum. Seriously, don’t rush this step!
Once it’s rock solid, use the ‘Lite Ice Cream’ setting, and watch the magic happen. Nine times out of ten, it comes out perfectly smooth. But if you pull it out and it looks a little powdery or crumbly (it happens!), don’t panic! Just add one single tablespoon of milk, use the ‘Re-Spin’ function, and it will transform into the creamiest frozen treat you’ve ever had.
Flavor Variations for Your High Protein Ice Cream
The three-ingredient base is fantastic on its own—it’s a perfect, plain canvas for healthy eating—but where’s the fun in always eating plain vanilla? Customizing this is so simple, which is why I call it my favorite high protein ice cream foundation. You only need to add a little something during that crucial blending stage, and you can switch up your dessert completely!
If you are into rich, dark desserts, you have to try my double chocolate approach. I just toss in a tablespoon of unsweetened cocoa powder along with the base ingredients before blending. Wow, it cuts the sweetness perfectly and gives you that creamy chocolate dessert flavor everyone craves. For that recipe, I usually reference my notes from the Double Chocolate Zucchini Bread to ensure the powder mixes evenly.
For something bright, especially when the weather warns up, go for strawberry! I blend half a cup of frozen strawberries totally smooth in a tiny separate cup first. Then, once the base is blended and ready to freeze (or before you spin it in the Creami), gently fold in that bright red puree. Don’t over-mix it—you want those pretty swirls. I love making this swirl because it reminds me of a homemade strawberry cheesecake!
And for the absolute simplest lift? Vanilla. Just a teaspoon of good quality vanilla extract added during the blend adds sophistication without changing the process one bit. Seriously, keep these combinations handy!
Tips for the Best Ever Cottage Cheese Ice Cream
Even with the perfect recipe, a few extra kitchen tricks can take your frozen treat from “good” to “I can’t believe this is healthy!” Since you’ve already nailed the blending part, let’s talk about maximizing creaminess and flavor for what I swear is the best vanilla cottage cheese ice cream you’ll ever make.
First, you absolutely must use a high-powered blender if you have one. I mentioned it before, but I’m hammering it home because this machine makes all the difference in pulverizing those curds. If your blender struggles, you’ll end up adding too much liquid to compensate, and that leads straight to those dreaded ice crystals. A Vitamix or Blendtec will turn that cottage cheese into something so fine it resembles heavy cream before you even pour it into your container.
My second tip relates to temperature control, especially if you’re going the no-churn route. Make sure your milk—whatever kind you use—is ice cold when you add it to the blender. That little bit of extra chill helps the mixture stabilize faster when it hits the freezer, giving you a head start on that smooth texture.
Third, when you’re making any vanilla version, don’t skimp on the extract! Since this dessert is naturally low in sugar, a high-quality pure vanilla extract really shines through and masks any slight tang from the cheese base. If you’re a big fan of warm flavors, maybe sneak in a tiny, tiny pinch of ground cardamom along with the vanilla. It tastes amazing, and it works so well with the base foundation of my pumpkin spice waffles, so you know it brings the cozy flavor!
Finally, if you are letting it sit in the freezer longer than two days, try this: empty the container into a bowl, give it a quick, rough stir with a rubber spatula—just ten seconds—and put it back. This minor agitation after the initial hardening really helps smooth out the structure so it doesn’t become rock solid on you.
Storing and Serving Your Guilt Free Ice Cream Recipe
So you made this perfect batch of guilt free ice cream recipe! Now we need to keep it good until you eat it all—which, let’s be honest, might be later today. Luckily, since this recipe is so protein-forward, it freezes up nicely, but it does get quite firm.
If you put it in the freezer and forget about it, you can generally keep this creamy treat good for a couple of weeks, though the texture is always best within the first 3 or 4 days. If you want a scoop that’s ready to eat right away without waiting around, take the container out of the freezer about 10 to 15 minutes before you plan on serving.
If you are in a rush, you can scoop out a serving and let it sit on the counter for about five minutes. It softens up fast! This is such a simple cottage cheese dessert that you can even eat it slightly frozen and firm, like a very thick frozen yogurt consistency, especially if you’re using it as a protein boost right after a workout.
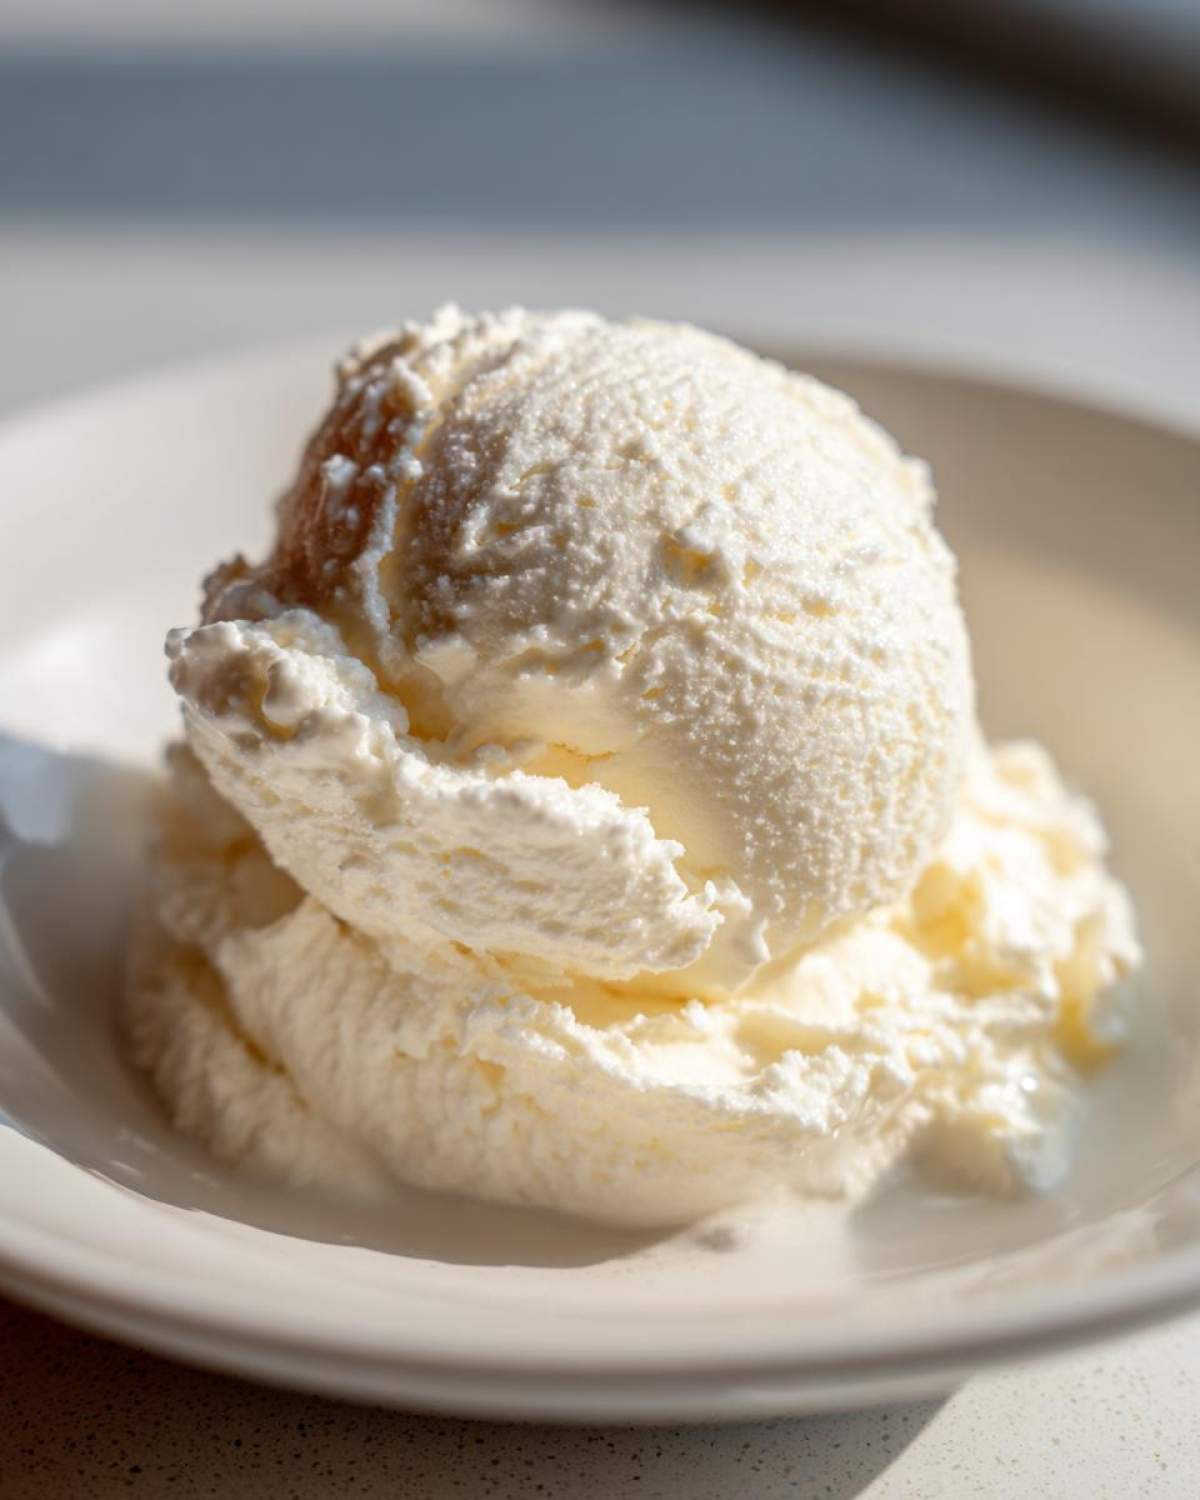
Don’t worry if you forget to soften it; just a quick zap in the microwave—literally two or three seconds—is usually enough to make it perfectly scoopable again. Enjoy every bite of that healthy goodness!
Frequently Asked Questions About Cottage Cheese Ice Cream
I know you must have questions! When you start experimenting with non-traditional bases like this, the queries always pop up. I’ve gathered the ones I get asked the most about achieving that perfect, guilt-free spoonful. Ask away, because I’ve probably tried every variation out there!
Does this cottage cheese ice cream really taste like cottage cheese?
This is the number one question, and I promise you, the answer is a huge NO! If you blend it properly—and I mean *completely* smooth—the slight tang gets totally overpowered by the sweetener and vanilla you add. It finishes tasting just like a really light, airy frozen yogurt. It’s a fantastic low carb ice cream alternative because you get the texture without that heavy cream taste.
Can I use full-fat cottage cheese instead of low-fat?
Absolutely! You can definitely use full-fat cottage cheese if you want a richer, more indulgent experience. Full-fat blends up wonderfully, and it will give you an amazing mouthfeel, closer to premium commercial ice cream. Just know that full-fat will increase the overall calorie and fat content for your portion, so keep that in mind for your personalized tracking!
How do I ensure this recipe stays sugar-free and low-carb?
Stick to non-caloric sweeteners like erythritol, xylitol (if you don’t have pets!), or stevia blends for your sugar replacement. The recipe calls for 2 tablespoons, but you’ll need to taste test the base before freezing, as different sweeteners have different intensities. As long as you skip honey or maple syrup, you’re keeping this in the low-carb ice cream territory!
What’s the secret to avoiding a crumbly texture later on?
If you’re using the no-churn method, the secret is that hourly stirring! You break up those ice crystals before they can form large, unwelcome structures in your batch. If you’re using the Ninja Creami, remember that the Re-Spin function is your best friend for fixing that slightly dry/powdery texture you get sometimes. A splash of milk and a re-spin fixes everything; no need to waste the batch!
If you’re interested in how we handle data privacy on this site after all this baking talk, you can always check out our Privacy Policy here.
Understanding the Nutrition of This Protein Packed Frozen Treat
Okay, let’s look at the numbers for this amazing, protein packed frozen treat. This is the part where we confirm that yes, you can absolutely enjoy dessert while crushing your fitness goals! Based on the foundational three-ingredient recipe (using low-fat cheese and a lighter sweetener), the estimates are fantastic.
Each serving gives you roughly 140 Calories, which is wild for ice cream! But the real star is the protein—about 22 grams per serving. We’re looking at only 4 grams of sugar and just 2 grams of fat. Remember, because this is homemade, these are estimates based on the base recipe, not exact science, so take a peek at the full disclaimer!
PrintThe Ultimate Creamy 3-Ingredient Cottage Cheese Ice Cream
Make a smooth, high-protein, guilt-free ice cream using only three base ingredients. This recipe works for no-churn preparation or adaptation in a Ninja Creami.
- Prep Time: 5 min
- Cook Time: 0 min
- Total Time: 5 min
- Yield: 2 servings
- Category: Dessert
- Method: Freezing
- Cuisine: American
- Diet: Low Fat
Ingredients
- 1 cup low-fat cottage cheese
- 1/4 cup milk (dairy or unsweetened almond)
- 2 tablespoons sweetener (like erythritol or stevia blend)
Instructions
- Combine the cottage cheese, milk, and sweetener in a high-speed blender or food processor.
- Blend until the mixture is completely smooth and creamy, scraping down the sides as needed. This step is crucial for texture.
- For No-Churn Method: Pour the mixture into a freezer-safe container. Freeze for 4 to 6 hours, stirring vigorously every hour for the first 3 hours to break up ice crystals.
- For Ninja Creami Method: Pour the mixture into the Creami pint container, leaving headspace. Freeze solid (at least 24 hours). Process using the ‘Lite Ice Cream’ setting. If the texture is crumbly, add 1 tablespoon of milk and re-spin using the ‘Re-Spin’ function.
- Serve immediately for a soft-serve texture or freeze longer for a firmer scoop.
Notes
- For a vanilla flavor, add 1 teaspoon of pure vanilla extract before blending.
- For a chocolate flavor, add 1 tablespoon of unsweetened cocoa powder during blending.
- For a strawberry swirl, blend 1/2 cup of frozen strawberries separately and gently fold them into the base mixture before the final freeze or Creami processing.
- If you prefer a thicker base, substitute 1/4 cup of Greek yogurt for the milk.
Nutrition
- Serving Size: 1/2 of recipe
- Calories: 140
- Sugar: 4
- Sodium: 350
- Fat: 2
- Saturated Fat: 1
- Unsaturated Fat: 1
- Trans Fat: 0
- Carbohydrates: 8
- Fiber: 0
- Protein: 22
- Cholesterol: 10