

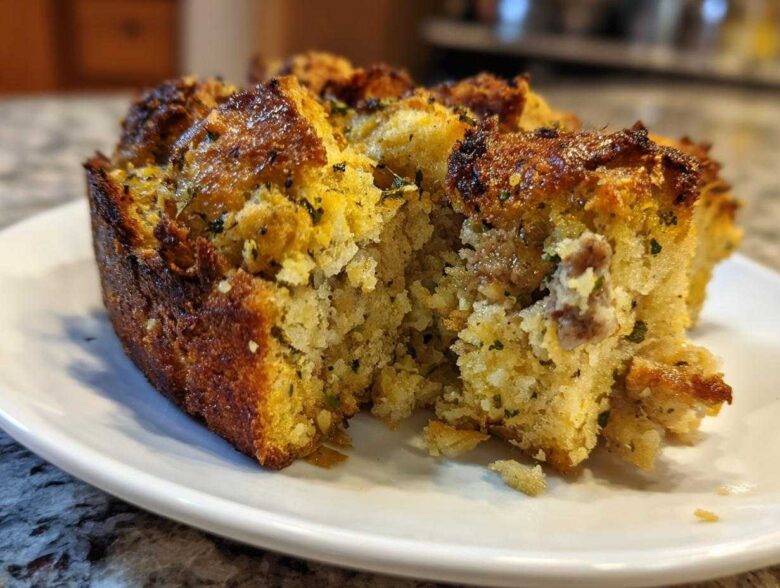
If you’re planning a holiday meal, you know the turkey gets all the attention, but let’s be honest—the real star of the show is always the side dish sitting right next to it. I’m talking about the perfect homemade stuffing. Forget that bland, dry stuff; I spent years chasing the dream of a stuffing that’s deeply savory, packed with herbs, and has that incredible textural contrast: unbelievably moist down in the middle, but with a glorious, crunchy, golden-brown top layer.
This Classic Herb and Sausage Stuffing recipe is the one that finally broke the internet at my family’s Thanksgiving table—it’s the recipe I turned to after years of disappointing, soggy failures. We use pork sausage, tons of fresh sage, and a secret drying method for the bread that guarantees this savory bread pudding never lets you down. Trust me, once you try this, you won’t ever go back. You can read a little more about our mission here at the site if you’re ever curious about where my cooking philosophy comes from: why we cook the way we do.
Why This Classic Homemade Stuffing Recipe Works (Best Thanksgiving Side Dish)
This isn’t just another holiday side dish; it’s the gold standard! If you want a truly successful stuffing, you need a recipe that respects texture above all else. This method gives you exactly what you want.
- It’s an easy stuffing idea based on traditional stuffing recipe fundamentals.
- It delivers that sought-after moist and crispy stuffing result every single time.
- It’s loaded with savory pork sausage and fresh, earthy herbs—the perfect blend for your best Thanksgiving side dish.
Achieving the Perfect Moist and Crispy Stuffing Texture
The secret sauce here is preparation. We dry the bread cubes out a bit first, which makes them act like tiny sponges, ready to soak up the liquid without turning mushy. Then, the balance between the egg quantity and the chicken broth is spot-on. Too much liquid, and it’s soggy; too little, and it’s dry. This specific ratio gives you that phenomenal contrast!
Ingredients for the Ultimate Sausage Stuffing Recipe
When it comes to making truly amazing homemade stuffing, you can’t skimp on the quality, but you also don’t need a million fancy things. This recipe relies on straightforward ingredients that just work beautifully together. I always look for high-quality bulk sausage because it releases just the right amount of flavorful fat when it cooks down. And please, use dried bread cubes for this one! It makes such a difference in how your stuffing soaks up the flavor without collapsing into a puddle.
You’ll notice we use chicken broth—that’s where so much of the savory depth comes from. If you want to explore other savory breakfast or brunch ideas later, check out my recipe for Savory Oatmeal; it uses a similar principle of building savory flavor layers where you least expect it!
Here is exactly what you need:
- 1 pound dried white bread cubes (about 10 cups)
- 1 pound bulk pork sausage
- 1 cup unsalted butter
- 2 cups chopped yellow onion
- 2 cups chopped celery
- 1 tablespoon dried sage
- 1 teaspoon dried thyme
- 1 teaspoon dried rosemary
- 1 teaspoon salt
- 1/2 teaspoon black pepper
- 4 large eggs
- 3 cups chicken broth
How to Prepare This Traditional Stuffing Recipe Step-by-Step
Okay, this is where the magic happens! While it’s called a simple recipe, the technique makes all the difference between good stuffing and the absolute best holiday side dish you’ll ever serve. We start by making sure our bread is ready to absorb flavor—not water! Remember, we want texture, not soup. If you’ve already got your main protein roasting, having this stuffing ready to go in the oven when the protein comes out is key. If you’re looking for a wonderful pairing that uses similar flavors, you might want to peek at my Garlic Herb Roast Chicken and Veggies guide!
Preparing the Bread Base for Your Stuffing
First things first: grab that 9×13 inch dish and give it a light grease. Next, check your bread. If your cubes feel spongy, you absolutely must dry them out a bit. Spread them on a baking sheet, pop them into a 300-degree oven for about ten minutes. They shouldn’t be rock hard! Just slightly dried out. Once they’re ready—and they should be nice and light—toss those cubes into the biggest bowl you own. This gives us room to mix without everything falling onto the counter!
Combining Aromatics and Sausage for Flavorful Stuffing
Time to build the flavor foundation! In a skillet, cook that full pound of bulk pork sausage over medium heat. You need to break it up as it cooks until it’s nicely browned. Then, drain off almost all that excess grease; we want flavor, not oil slicks! Melt your butter right into that same skillet—that residual flavor is pure gold. Toss in your chopped onion and celery and let them soften up gently for about eight minutes. Now, throw in your herbs—sage, thyme, and rosemary—and the salt and pepper. Cook for just one minute until you can really smell those beautiful herbs waking up. Pour this savory, herby mix right over your dry bread cubes, along with the cooked sausage.
Final Assembly and Baking the Classic Holiday Stuffing
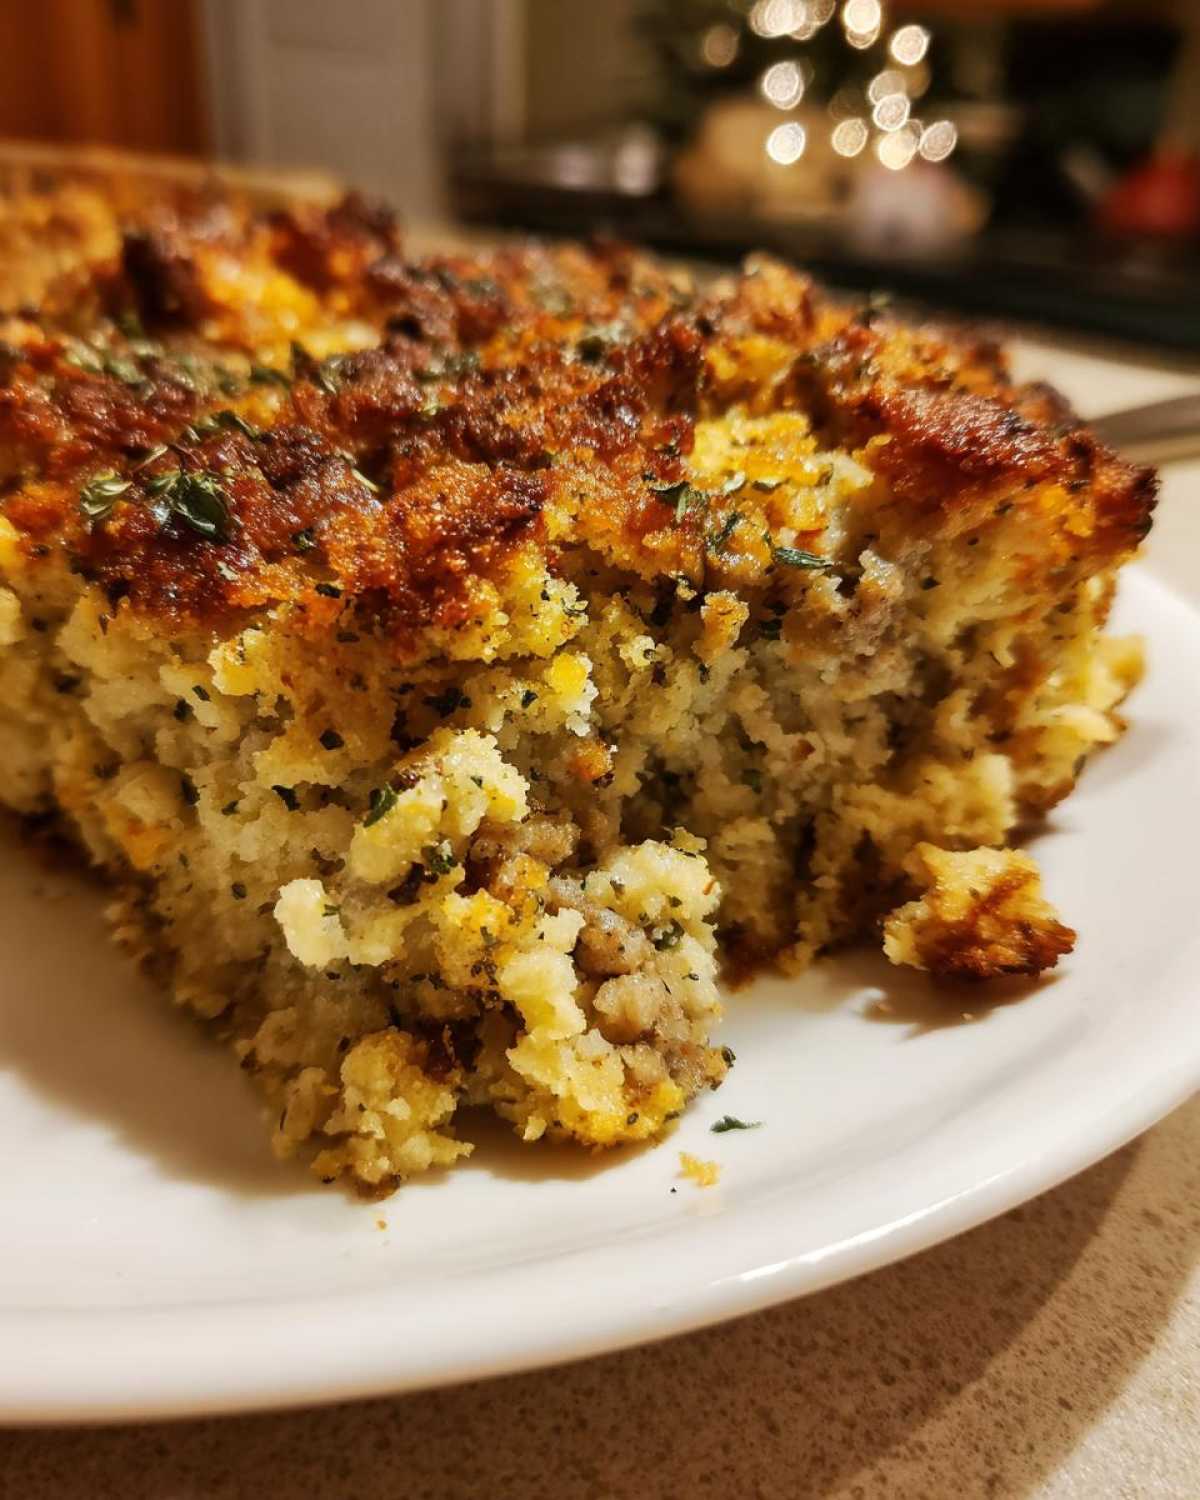
In a separate little bowl, whisk those four large eggs together with the three cups of chicken broth until they’re just combined. Now, pour that liquid gently over your bread mixture. This is the most important part: toss everything together very gently! We call it ‘tossing,’ not ‘stirring’ or ‘beating.’ Overmixing develops gluten and destroys that desired fluffy texture. Once everything looks evenly moistened, transfer the glorious stuffing mixture into your prepared dish. Pop it into a 350-degree oven and bake it for 40 to 50 minutes. You are looking for that crispy, golden top and an internal temperature of 165 degrees F for safety. That’s how you make a no fail stuffing!
Tips for Success with Your From Scratch Stuffing
I swear, anyone can make good stuffing once they know these little tricks I picked up over the years. It’s all about controlling the atmosphere in the pan! If you trust the process and follow my guidance on moisture retention, you’ll nail this traditional stuffing recipe; I promise it will be the best stuffing you’ve ever had.
- Don’t overcrowd the pan! If you pile the stuffing too high, the middle will steam instead of bake, and you lose that beautiful crust.
- Use good quality broth. Homemade is best, but if you’re using store-bought, make sure it’s low sodium so you can control the saltiness later.
- Always let the bread dry! This is non-negotiable for the best structural integrity of your final baked stuffing.
Baking Variations for Perfect Stuffing
The way you choose to bake this stuffing really dictates the final texture. If you are dreaming of that moist and crispy stuffing experience, you need to pay attention to coverage.
For the crispiest possible topping—the kind that shatters a little when you press it with a serving spoon—bake this uncovered the entire time. But hey, what if you want it super soft and pudding-like all the way through? Try covering your 9×13 dish loosely with foil for the first 30 minutes of baking. The steam trapped underneath keeps everything incredibly tender. Peel that foil off for the last 15-20 minutes to let the top brown beautifully!
Now, about stuffing it inside the turkey—because every family has that one person who insists! If you absolutely must bake this inside the bird, you have to cut back on the liquid. Remember, baking inside the turkey traps *tons* of steam. You should reduce that chicken broth amount by a full cup. Also, be extra cautious checking the temperature; the USDA says the center of the stuffing for turkey absolutely must hit 165 degrees F before you pull it out. Frankly, I prefer baking it outside as a side dish, but I won’t stop you if that’s your tradition!
Make Ahead Stuffing Tips for Easy Entertaining
Holidays are supposed to be fun, right? But standing over the stove fussing with every single side dish when the main event is already cooking sounds like my personal nightmare! That’s why this recipe is amazing for planning ahead. Being able to prep most of the work for this stuffing the day before is a total game-changer. Seriously, the day of the big meal feels so much calmer when you’re not scrambling!
You can totally nail the make-ahead prep safely, as long as you stop right before you add that final bath of liquid. Follow the instructions right up until Step 6—that’s where you gently combine all the bread, the sausage, the cooked veggies, and the herbs. Mix it all together until it’s just combined. Now, instead of adding the egg and broth mixture, just cover that big bowl tightly with plastic wrap and tuck it into the fridge. It keeps perfectly for up to 24 hours, waiting patiently for its big moment!
Now, here’s the one crucial thing you can’t forget if you make it ahead: When you pull that chilled stuffing bowl out for the final push, it’s going to be denser and colder than usual. To make sure it bakes up beautifully and still achieves that soft interior, you absolutely must add about an extra 1/2 cup of chicken broth before you pour in the eggs. That extra bit of liquid gets absorbed while baking, compensating for any moisture loss overnight. Don’t skip it!
If you’re planning ahead for all your meals, not just holidays, you should check out my thoughts on freezer breakfast burritos—those are another make-ahead hero that save my mornings!
Once you add the liquid mixture back in (with that extra splash of broth!), give it one last gentle toss, transfer it to the pan, and you’re ready to bake later according to the main instructions. This simple organization means you just have to focus on getting that turkey out of the oven before popping in the best classic holiday stuffing!
Serving Suggestions for Your Herb Stuffing
While this sausage stuffing sings next to a big roasted turkey, don’t let yourself be tied down! This is one of the best holiday side dishes because it plays well with everything. I love pairing a small scoop with simple roasted chicken, too. If you’re feeling fancy, skipping the 9×13 pan and rolling the mixture into individual bite size stuffing balls is a great presentation trick—they get extra crispy edges!
The earthy herbs pair wonderfully with pork, so consider serving this alongside roasted pork tenderloin or thick-cut chops. If you try my recipe for Caramelized Onion and Apple Pork Chops, this stuffing is the absolute must-have accompaniment!
Storing and Reheating Leftover Stuffing
First off, if you have leftovers of this amazing stuffing, count yourself lucky! It’s one of those rare side dishes that tastes genuinely great the next day. But we need to handle those leftovers correctly to maintain that fantastic texture we worked so hard for—we don’t want sad, gummy stuffing!
The most critical thing is storage temperature. Since this stuffing contains sausage, eggs, and broth, it is absolutely essential that you cool it down quickly. Get the leftovers scraped out of the baking dish and into airtight containers within two hours of pulling it from the oven. Stored properly in the fridge, it’ll keep well for three to four days. Don’t push it past four days; you want to be safe with your holiday comfort food!
Now, reheating is where people make mistakes. Microwaving the whole thing turns it instantly into a sponge, right? We are going for crispy edges back!
Bringing Back the Crisp: The Best Way to Reheat Stuffing
If you just want a small portion, say for lunch the next day, use the oven or even a toaster oven. Spread a small layer of the leftover stuffing on a baking sheet. Don’t pile it deep; keeping it shallow helps the edges crisp up again. You want to heat it at about 350 degrees F until it’s piping hot all the way through.
If you’re reheating a big batch you saved in one large container, you might need to add a splash of moisture back in, just a tablespoon or two of chicken broth or even just water sprinkled over the top before you cover it lightly with foil. Heat it covered for about 15 minutes to warm it through gently, then peel the foil off and pop it back under the broiler for 3 to 5 minutes. Watch it like a hawk under the broiler, though! Those crispy bits can go from golden-brown to burnt very fast, and nobody wants charred stuffing!
This two-step heating process—gentle heat to warm, quick broiler blast to crisp—is the trick to making your leftovers taste almost as good as the day they were baked. It proves that even leftovers deserve a little bit of love!
Frequently Asked Questions About Making Stuffing
I get asked questions about this recipe all the time, especially right before Thanksgiving when everyone is trying to lock down their final plans. Dealing with bread moisture and terminology can trip people up, but once you know the answers, you’ve got yourself a truly foolproof, no fail stuffing recipe for life. I’ve gathered the ones I hear most often!
Can I use fresh bread instead of dried bread for this stuffing?
You *can*, but remember that lovely moist and crispy stuffing we talked about? If you use fresh bread, it acts like a sponge that hasn’t been wrung out yet. It will soak up the broth and eggs way too fast, and you’ll end up with something more like a dense, wet casserole than a fluffy stuffing. It’s why my Grandmas stuffing recipe always involves that pre-drying step! You really need that initial drying phase so the bread can absorb the savory liquid slowly and maintain its shape during baking.
What is the difference between dressing and stuffing?
Oh, this is a classic culinary debate that drives everyone nuts! Technically, there’s zero difference in the recipe itself. The difference is *where* you cook it. If you assemble this mixture and bake it in a dish outside the bird, it is traditionally called dressing. If you pack it inside the turkey cavity before roasting, then it becomes stuffing. I tend to bake mine outside for better temperature control and that superior crispy topping, but if you are a purist, just call it stuffing!
If you have any other burning questions about measurements, substitutions, or troubleshooting your holiday cooking, please don’t hesitate to reach out to me via my contact page. Happy baking!
Nutritional Estimates for This Savory Bread Pudding
Now, before we wrap up, I know some of you are watching the macros, even when indulging in the supreme comfort food that is this savory bread pudding. It’s important to know what you’re diving into, especially when dealing with sausage and butter! I ran this Classic Herb and Sausage Stuffing through a calculator so you have a rough idea of what an average serving contains.
Remember, this is just an estimate! The exact values can shift quite a bit depending on whether your sausage is leaner or fattier, or the exact brand of chicken broth you decided to use. Cooking is science, but family recipes are fluid, you know?
Here are the general figures per serving size (about 1 cup):
- Serving Size: 1 cup
- Calories: 380
- Fat: 22g (with 8g being saturated fat)
- Carbohydrates: 30g
- Sugar: 3g
- Protein: 15g
- Sodium: 550mg
Because we use a good amount of salt and the sausage contributes heavily, the sodium count is higher, which is typical for a rich side dish like this. If you’re watching your salt intake, consider cutting the added salt in Step 5 by half and relying more on the natural saltiness from using a quality sausage.
As always when sharing figures like this, please remember that these numbers are derived from standard ingredient sourcing and preparation methods outlined in the recipe. For the most precise figures, you’d need to use the exact brands and measurements you use in your own kitchen. You can always read our full disclaimer policy here: See our full disclaimer policy.
PrintClassic Herb and Sausage Stuffing
This recipe yields a traditional stuffing with a moist interior and a crisp top layer, perfect as a side dish for roasted poultry.
- Prep Time: 20 min
- Cook Time: 50 min
- Total Time: 70 min
- Yield: 10 servings
- Category: Side Dish
- Method: Baking
- Cuisine: American
- Diet: Low Fat
Ingredients
- 1 pound dried white bread cubes (about 10 cups)
- 1 pound bulk pork sausage
- 1 cup unsalted butter
- 2 cups chopped yellow onion
- 2 cups chopped celery
- 1 tablespoon dried sage
- 1 teaspoon dried thyme
- 1 teaspoon dried rosemary
- 1 teaspoon salt
- 1/2 teaspoon black pepper
- 4 large eggs
- 3 cups chicken broth
Instructions
- Preheat your oven to 350 degrees F. Lightly grease a 9×13 inch baking dish.
- If your bread cubes are not dry, spread them on a baking sheet and bake at 300 degrees F for 10 minutes until slightly dry. Place bread cubes in a very large bowl.
- In a large skillet over medium heat, cook the sausage, breaking it up, until browned. Drain off excess grease and add the sausage to the bowl with the bread cubes.
- Melt the butter in the same skillet. Add the onion and celery and cook until softened, about 8 minutes.
- Stir the sage, thyme, rosemary, salt, and pepper into the vegetables. Cook for 1 minute until fragrant.
- Pour the vegetable and herb mixture over the bread and sausage. Toss gently to combine.
- In a separate bowl, whisk the eggs and chicken broth together. Pour this liquid mixture over the bread mixture. Toss gently until all the bread is evenly moistened. Do not overmix.
- Transfer the stuffing mixture to the prepared baking dish.
- Bake for 40 to 50 minutes, or until the top is golden brown and crisp. The internal temperature should reach 165 degrees F.
Notes
- To make ahead, prepare the mixture up to step 6, cover, and refrigerate for up to 24 hours. Add 1/2 cup more broth before baking if refrigerating.
- For a crispier top, bake uncovered. For a moister result, cover the dish loosely with foil for the first 30 minutes of baking.
- You can bake this mixture inside a turkey, but you must use 1 cup less broth and ensure the turkey reaches a safe internal temperature of 165 degrees F in the deepest part of the stuffing.
Nutrition
- Serving Size: 1 cup
- Calories: 380
- Sugar: 3
- Sodium: 550
- Fat: 22
- Saturated Fat: 8
- Unsaturated Fat: 14
- Trans Fat: 0
- Carbohydrates: 30
- Fiber: 2
- Protein: 15
- Cholesterol: 85