

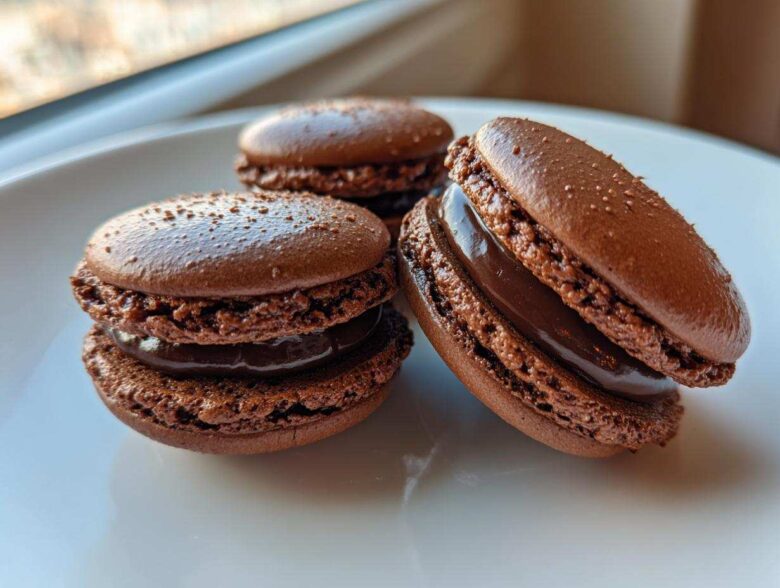
Oh my gosh, let’s talk about something truly magical: biting into a perfect, delicate French macaron. For years, I thought these little meringue kisses were exclusive to fancy Parisian patisseries. I truly believed I needed a culinary degree just to attempt them! I went through batches of cracked shells and flat desserts feeling so defeated. But trust me, making beautiful, shiny **chocolate macarons** at home is totally achievable.
This recipe isn’t just another set of steps; it’s the one that finally worked for me, turning out glossy shells with those famous ruffled ‘feet’ every single time. We are using the classic French meringue method because it’s the most straightforward path to truly **chewy chocolate macarons**. Forget the stress—grab your scale, and get ready to bake some truly elegant treats that will blow your friends away. You can check out a bit more about our kitchen philosophy if you’re curious!
Why This Chocolate Macaron Recipe Delivers Perfect Results
What makes this recipe different from all the others out there? Honestly, it comes down to ditching the guesswork. We are relying on the tried-and-true French meringue method, which is the most reliable route for beginners wanting that **foolproof macaron technique**. But precision is king here; you absolutely must weigh your ingredients. Trust me—a scale is non-negotiable for achieving those **perfect macaron shells** without the constant fear of cracking!
This method cuts out the lengthy aging sometimes required in other techniques, giving you faster results without sacrificing quality.
Key Benefits of Our Easy Chocolate Macarons
- Consistent Texture: Expect shells that are delightfully chewy inside.
- Glossy Tops: We nail that smooth, shiny look that everyone wants.
- Guaranteed Feet: Follow the steps for those signature ruffles every time.
- Simplified Process: It’s the quickest French technique that actually works at home.
Gathering Your Ingredients for Decadent Macarons
Okay, before we even think about turning on the mixer, we need to talk about weighing! These **chocolate macarons** are French pastry, and that means they demand precision. If you take one thing away from this, please let it be this: use a kitchen scale. Volume measurements simply won’t cut it here; they lead straight to cracked tops and zero feet. But don’t worry, once you see how accurate the **Chocolate Macaron Recipe** is, you’ll feel so much more confident! You can read about our official stance on ingredient integrity if you’re interested.
Ingredients for the Chocolate Macaron Shells
Everything needs to be room temperature, especially egg whites! Remember, these dry ingredients—almond flour and powdered sugar—must be sifted together twice with the cocoa powder. This helps keep things incredibly smooth for those **glossy macaron shells**.
- 100 g aged egg whites (room temperature)
- 100 g granulated sugar
- 100 g almond flour, finely ground
- 100 g powdered sugar
- 30 g unsweetened cocoa powder, sifted
- 1/4 tsp cream of tartar
- Pinch of salt
Ingredients for the Rich Chocolate Ganache Filling
This is where we get that rich, decadent center. The simplicity of the filling lets the chocolate really shine through, making these true **gourmet chocolate desserts**!
- 100 g dark chocolate, chopped
- 100 ml heavy cream
Step-by-Step Guide: Making Perfect Chocolate Macaron Shells
Alright, deep breath! This is where the magic happens, and also where most people panic. But remember, we’re aiming for that flowing lava batter—that’s the secret to achieving **no crack macarons** later on! A little patience here guarantees those show-stopping results.
Preparing Dry Ingredients and Aging Egg Whites
First things first: if you haven’t already, sift your almond flour, powdered sugar, and that beautiful cocoa powder together *twice*. I can’t stress how much this helps keep your final batter smooth, which is vital for getting those **glossy macaron shells**. Also, make sure those egg whites are at room temperature. If you remembered to age them—separating them a day ahead and chilling them—your meringue will be stronger and way more stable. It’s a small step that makes a huge difference in your **step by step macaron guide**!
Mastering the Meringue for Your Chocolate Macarons
This is the structure of your cookie! Pop those foamy egg whites (with your pinch of salt and cream of tartar) into the mixer. Once they start looking cloudy, slowly stream in that granulated sugar. Keep going until you have stiff, glossy peaks that hold their shape perfectly when you lift the whisk. They should look shiny, not dull or soapy. If it holds a firm peak when you flip the bowl upside down, you’re golden.
The Crucial Macaronage Technique
This mixing step is called ‘macaronage,’ and it’s the make-or-break moment for any batch of **homemade French macarons**. Take one-third of your dry mix and gently fold it in—don’t stir aggressively! Then add the rest. You need to deflate just enough air so the batter flows like thick, slow-moving lava, or ribbons when you lift the spatula. Stop mixing the second you can draw a figure-eight across the surface, and the line only slowly melts back into the batter. Overmix, and your **foolproof macaron technique** turns into a flat puddle!
Piping, Tapping, and Resting the Shells
Transfer that beautiful batter into a piping bag fitted with a plain round tip. Pipe 1.5-inch circles onto your parchment. Now, this tapping is super important for getting those **macaron feet tutorial** results: slam the baking sheet down on the counter five or six times. You’ll see air bubbles pop on the surface—we want those out! Then, let them rest. Seriously, walk away. They need to form a dry skin, usually 30 to 60 minutes until you can gently touch the top without any batter sticking to your finger. That skin is what forces the air out the bottom during baking, creating the feet!
Baking Your Chocolate Macarons for Success
Okay, the tapping is done, the skins feel exactly right, and now it’s time for the oven! This is where many ambitious bakers run into trouble, but if you follow my temperature advice, you’ll get those wonderfully **chewy chocolate macarons** we are aiming for. Make sure your oven is fully preheated to 300°F (150°C). Don’t just trust the light on your oven; use an oven thermometer to be sure!
Slide those sheets in, and honestly, don’t touch them for about 10 minutes. Around the halfway mark, rotate the tray—this is vital for even baking. You’ll know they are done when the little shells have clear feet and, even better, when you gently nudge the top of one shell with your finger, and it doesn’t wobble at all on its base. That means the inner structure is set! You can check out my guide on baking perfect meringue cookies for more general meringue safety tips, but for these chocolate macarons, the wobble test is the final word.
Preparing the Chocolate Ganache Filling for Your Chocolate Macarons
While the shells are cooling perfectly (don’t rush this part!), we can whip up the filling. This **chocolate ganache filling** is so simple, but it makes these **homemade French macarons** taste like they came straight from a chocolatier shelf. Seriously, it’s just two ingredients, but the balance is everything.
You want to start by chopping up your dark chocolate very finely. The smaller the pieces, the faster and smoother they melt! Heat your heavy cream in a small saucepan until it’s just simmering—don’t let it boil over, or you’ll mess up the whole texture!
Pour that hot cream right over your chopped chocolate. Now, here’s the biggest rule for ganache: *do nothing* for about five minutes. Just let that heat work its magic. Then, start stirring gently right in the middle until the mixture starts to emulsify and turns into this super glossy, smooth chocolate pool. You can check out my recipe for simple Nutella brownies if you ever need a quick chocolate fix, but this ganache is different!
The final step is patience! You can’t pipe this liquid chocolate onto your shells, right? You need to let this ganache cool down until it’s thick enough to hold a soft peak—that’s the perfect ‘pipeable consistency.’ If you chill it too much, it gets hard, so I usually just leave it on the counter, stirring every ten minutes. Once it’s easily piped but doesn’t droop, we’re ready to assemble!
Assembling and Maturing the Chocolate Macarons
The shells are cool, the ganache is perfectly pipeable—it’s time for the fun part! Lay out your cooled **chocolate macaron** shells and start pairing them up. You want shells that are kissing cousins in size; it makes for a much prettier final look. If you have a few that are slightly bigger or smaller, just set those aside for quality control tasting (don’t worry, those are the cook’s treats!).
Fill your piping bag with the cooled ganache. Gently pipe a generous dollop into the center of one shell. Don’t go too close to the edge! Then, take the corresponding shell, place it gently on top, and give it the slightest little twist as you press down. You want the filling to spread almost to the edge, but not spill out entirely.
Now comes the most important, and honestly, the hardest part: you have to wait! When I first started making these, I was so impatient. I assembled them, waited maybe an hour, and then ate one. It was crunchy, the filling tasted separate, and the shell crumbled into dust. It was a sad, sad experience.
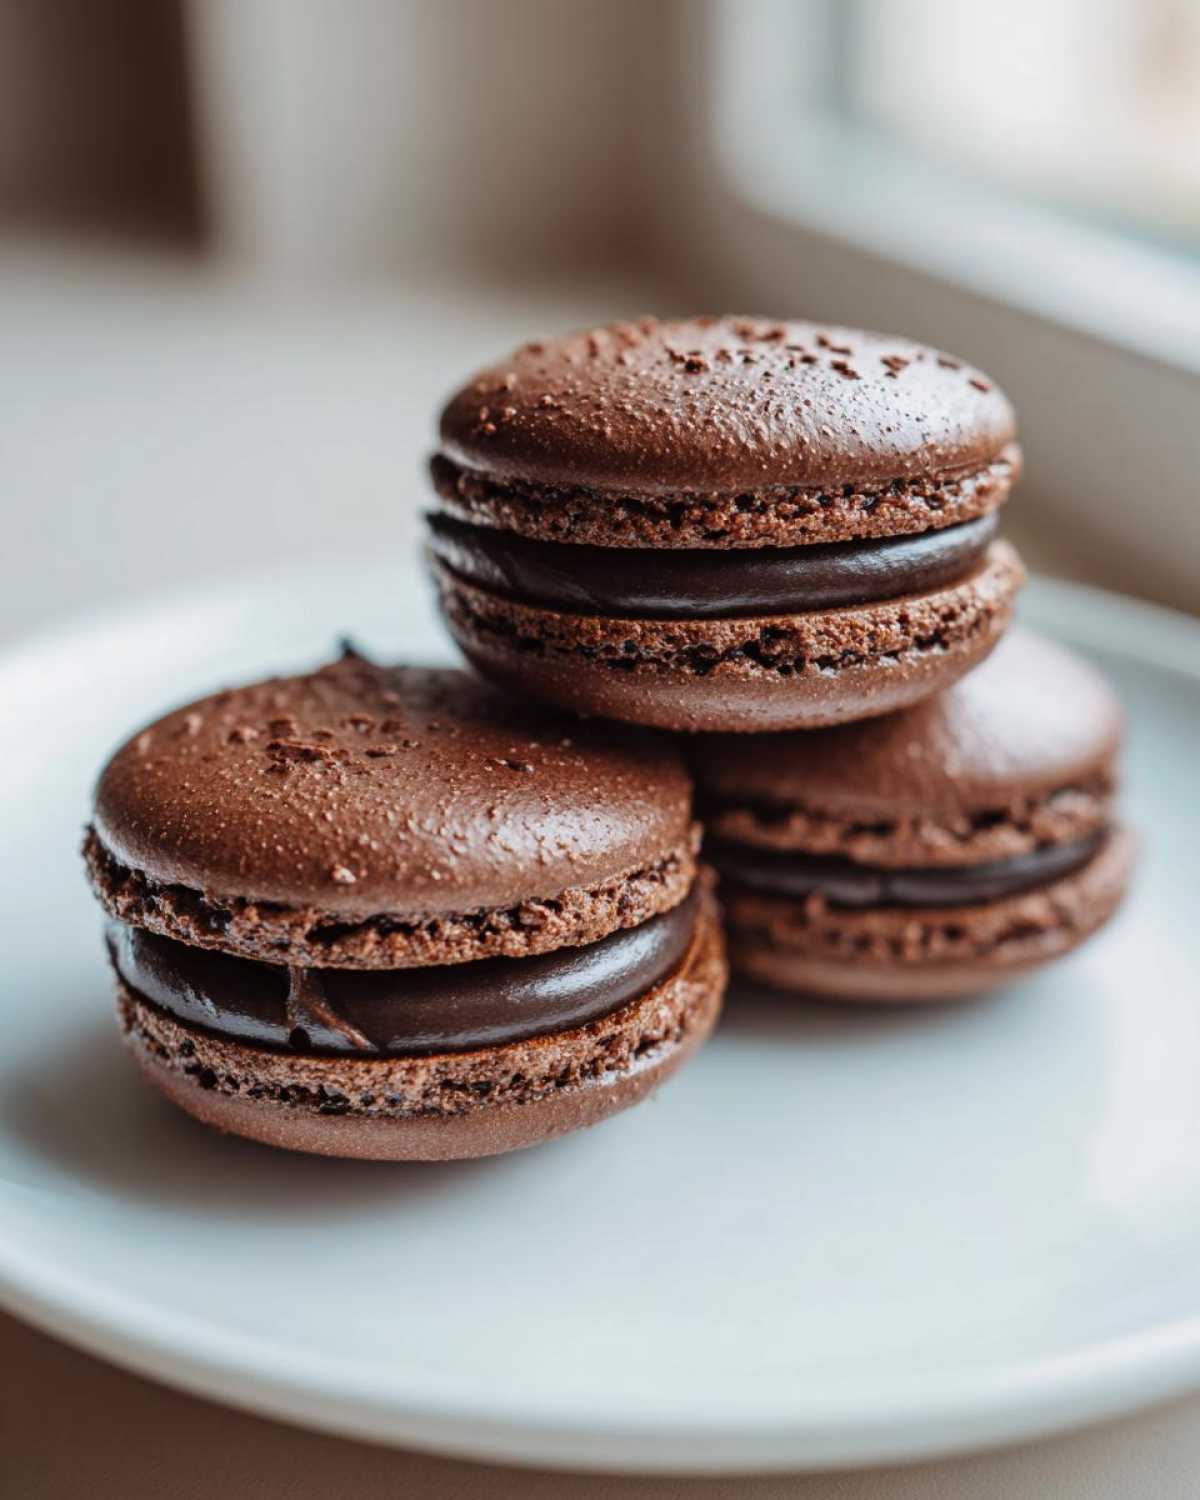
The secret to those perfect, **chewy chocolate macarons** is maturation. You absolutely must store the assembled macarons in an airtight container in the refrigerator for a full 24 hours. That waiting time lets the moisture leech from the filling into the delicate shell. It transforms the texture from brittle cookie into that perfect, slightly yielding, chewy center. It’s tough waiting, but trust me, the payoff is gourmet quality! If you want to keep them longer (and who wouldn’t?), they freeze beautifully too; just pop them in an airtight container and they are good for a couple of months. When you’re ready to serve, let them thaw in the fridge first. You can check out my recipe for brownie bottom cheesecake for another dessert that requires a little nap time, but these macaron naps are worth it!
Tips for Troubleshooting Common Chocolate Macaron Issues
Look, even with the best recipe in the world, macarons can be dramatic! They are sensitive little things, and if something goes wrong, it’s easy to feel like you ruined the whole batch. Don’t panic! Almost every baking disaster in the world of **chocolate macarons** has a simple fix if we know what caused it. Building up that knowledge is part of mastering the **foolproof macaron technique**.
If you’ve ended up with shells that cracked or look sad and flat, stick with me. We’ll go through the usual suspects so your next batch will be completely **no crack macarons**! If you ever run into trouble and need to send a picture of your creation (or disaster!), feel free to reach out on our contact page.
Why Didn’t My Chocolate Macarons Develop Feet?
The dreaded flat-bottomed macaron! When you see no ‘feet’—those little ruffled bases—it almost always points back to two possibilities. First, under-mixing during the macaronage stage. If your batter was too stiff (you couldn’t draw that figure-eight), the batter didn’t spread correctly in the oven, and the air couldn’t lift the base.
The second, and very common reason, is rushing the rest time. If the skin didn’t form properly on top of the shell, the air baked out through the top surface instead of being forced down and out to create that beautiful foot. They need that dry barrier to push against!
Dealing with Cracked or Hollow Chocolate Macaron Shells
Cracks mean trapped air escaped violently during baking, usually right through the top! This is most often fixed right at the beginning: hitting that baking sheet hard on the counter after piping. Really give it a good slam to release those big internal air bubbles we talked about. If they crack halfway through baking, it often signals an oven temperature issue. Is your oven running too hot? Too much heat too fast will cause the exterior to set before the inside has expanded enough.
Hollow shells—that awful gap between the dome top and the base—is trickier, but usually related to meringue stability (hence why we age the whites!) or under-baking. If you pull them out too soon, the internal structure collapses as it cools. Always double-check that ‘no wobble’ test before you pull them out!
Frequently Asked Questions About Homemade French Macarons
It’s totally normal to have a bunch of questions when you’re diving into **homemade French macarons**! They are finicky, and I get so many emails asking about specific issues. Think of these FAQs as your essential **macaron baking tips** cheat sheet. Don’t worry if your first few batches look wonky—we all started there!
Can I substitute almond flour when making chocolate macarons?
Oh, honey, I really, truly advise against it. Almond flour isn’t just a nut flour here; it’s the structural backbone of the entire shell, working directly with the sugar and meringue. It provides the necessary fat content and the specific fine grind needed to create that smooth, glossy top and the perfect chewy interior for your **gourmet chocolate desserts**. If you swap it for regular flour or another nut flour, you’re going to end up with something that behaves totally differently in the oven, and likely a cracking disaster!
What is the best way to store finished chocolate macarons?
Storing them correctly is actually crucial for achieving that perfect **chewy chocolate macaron** texture we’ve worked so hard for! Once you’ve assembled them, put them straight into an airtight container. They *must* stay refrigerated. The fridge is actually where they finish maturing, allowing the ganache to soften the shell just right. They are best eaten within 4 days, but you can freeze them for up to a month if you wrap that airtight container nicely in foil first. Do *not* store them on a plate on the counter; the humidity will make them sticky and ruin the shell structure overnight!
If you’re concerned about your data privacy while browsing sites like mine, you can read our privacy policy anytime!
Storage and Reheating Instructions for Your Chocolate Macarons
You’ve done the hard work—you’ve waited the 24 hours, and now you have the most perfect, **chewy chocolate macarons** imaginable. The question is, how do we keep them perfect? Because these aren’t like regular cookies, storage is actually part of the recipe!
Remember how I stressed that 24-hour maturation period in the fridge? That process continues even after you eat the first few. The humidity inside the airtight container keeps softening that shell just enough so it melts in your mouth. If you skip the fridge nap, they’ll be too brittle when you eat them!
For short-term storage (up to 4 days), an airtight container in the refrigerator is perfect. Just make sure you let them sit out on the counter for about 20 minutes before serving. This little bit of warming lets the chocolate ganache soften up nicely again, making them sublime.
If you’re making these **chocolate macarons** for a holiday or just a massive baking binge, freezing is your best friend! We want to freeze the *assembled* macarons, not the shells alone. Place them on a small cookie sheet in a single layer, put that sheet in the freezer for about an hour until they are rock solid, and *then* transfer them to a heavy-duty freezer bag or an airtight container. Layer them with wax paper in between if you need to stack them high. They keep beautifully for up to one month this way. If you’re looking for other no-fuss baking ideas, check out some of my go-to recipes in the snacks category!
When you’re ready to serve those frozen beauties, the thaw is simple: move them straight from the freezer to the refrigerator for about 12 hours, and then let them sit on the counter for that final 20 minutes before enjoying. Trust me, preserving that perfect texture is worth the patience!
PrintFoolproof Chocolate Macarons with Classic Ganache Filling
A step-by-step guide to making perfect, chewy chocolate macaron shells with glossy tops and well-developed feet, filled with rich chocolate ganache.
- Prep Time: 45 min
- Cook Time: 15 min
- Total Time: 60 min
- Yield: About 20 assembled macarons
- Category: Dessert
- Method: Baking
- Cuisine: French
- Diet: Vegetarian
Ingredients
- 100 g aged egg whites (room temperature)
- 100 g granulated sugar
- 100 g almond flour, finely ground
- 100 g powdered sugar
- 30 g unsweetened cocoa powder, sifted
- 1/4 tsp cream of tartar
- Pinch of salt
- For Ganache: 100 g dark chocolate, chopped
- For Ganache: 100 ml heavy cream
Instructions
- Prepare the dry ingredients: Sift the almond flour, powdered sugar, and cocoa powder together twice. Set aside.
- Make the meringue: In a clean bowl, whisk the egg whites and cream of tartar until foamy. Gradually add the granulated sugar while continuing to whisk until stiff, glossy peaks form (French meringue method).
- Macaronage: Gently fold one-third of the dry ingredients into the meringue. Add the remaining dry ingredients and fold carefully until the batter flows like lava or a slow ribbon. Stop mixing when you can draw a figure-eight without the batter breaking.
- Pipe the shells: Transfer the batter to a piping bag fitted with a round tip. Pipe 1.5-inch circles onto baking sheets lined with parchment paper or silicone mats.
- Tap and rest: Firmly tap the baking sheets on the counter several times to release air bubbles. Let the macarons rest at room temperature until a dry skin forms (about 30-60 minutes). They should not stick to your finger when lightly touched.
- Bake: Preheat your oven to 300°F (150°C). Bake for 12 to 15 minutes, rotating the tray halfway through, until the shells have feet and do not wobble when gently touched.
- Cool: Let the shells cool completely on the tray before removing them.
- Make the ganache: Heat the heavy cream until just simmering. Pour the hot cream over the chopped dark chocolate. Let it sit for 5 minutes, then stir until smooth and fully emulsified. Let the ganache cool and thicken to a pipeable consistency.
- Assemble: Pair similar-sized shells. Pipe a dollop of ganache onto one shell and gently press another shell on top.
- Mature: Refrigerate the assembled macarons for 24 hours for the best texture.
Notes
- Use a kitchen scale for accurate measurements; macaron success depends on precise ratios.
- Ensure your egg whites are aged (separated a day ahead and left covered in the fridge) for better meringue stability.
- If you see no feet, your batter was likely under-mixed or the shells were not rested long enough.
- For a darker shell, use Dutch-process cocoa powder.
Nutrition
- Serving Size: 1 macaron
- Calories: 120
- Sugar: 12
- Sodium: 25
- Fat: 7
- Saturated Fat: 4
- Unsaturated Fat: 3
- Trans Fat: 0
- Carbohydrates: 14
- Fiber: 1
- Protein: 2
- Cholesterol: 10