

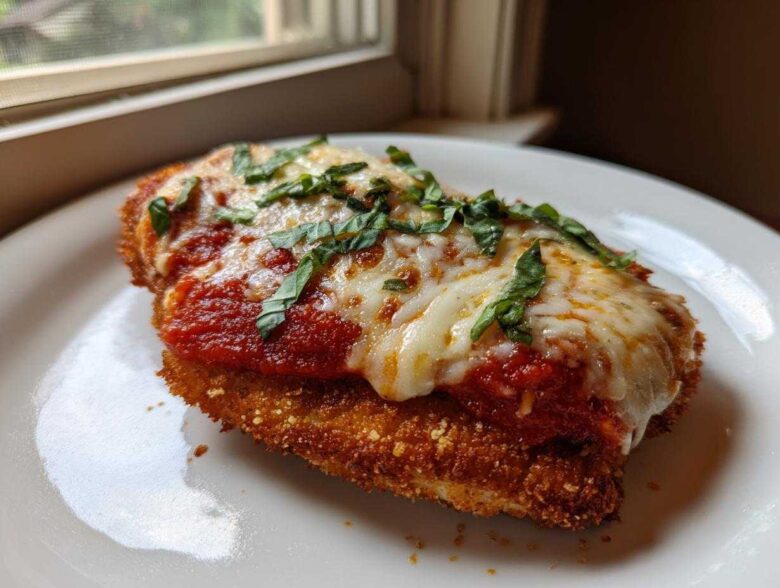
Oh my goodness, when I need that ultimate cozy hug on a plate, nothing beats a magnificent Chicken Parmesan. Forget those mediocre versions you’ve tried; this chicken parmesan recipe is my nonna’s secret weapon, tweaked slightly for modern kitchens! I spent years messing up breading and dealing with soggy messes until I cracked the code for that perfect crunch. The best part? You get a choice! I’ll walk you through the traditional pan-fried way for that deep, golden crispness, *and* the healthier, just-as-delicious baked option. Trust me, whether you’re aiming for a quick weeknight win or a restaurant-quality Italian American dinner, this method guarantees juicy chicken under a blanket of bubbly cheese. Get ready to make the best batch ever!
If you’re looking for more amazing weeknight meals, don’t forget to peek at my general dinner category for inspiration!
Why This Chicken Parmesan Recipe Delivers Weeknight Flavor
Honestly, this recipe solved my dinner dilemma! It hits that sweet spot because it’s genuinely fast. You’re looking at maybe 35 minutes total, which is amazing for something that tastes this rich. This makes it the ultimate Easy Chicken Parmesan Dinner.
- You choose your adventure: quick pan-fry or the lighter baked route.
- It’s the perfect Weeknight Chicken Dinner that tastes like weekend fare.
- Crispy crust, juicy inside—we nail the texture every time!
Ingredients Needed for the Ultimate Chicken Parmesan Recipe
Precision is everything here, especially when we’re dealing with that glorious crust. You need the right gear before you even think about turning on the stove! Having everything measured out—mise en place, right?
I’ve broken down what you need below. Pay special attention to separating that Parmesan cheese; some goes into building the coating, and the rest is for the final, gooey topping!
- 4 boneless, skinless chicken breasts, roughly 6 ounces each—if they look huge, slice them horizontally first!
- 1 cup all-purpose flour—your first layer of defense!
- 2 large eggs, beaten—gently!
- 1 1/2 cups Panko breadcrumbs—you absolutely need Panko for that supreme crunch.
- 1/2 cup finely grated Parmesan cheese (this is the shaker stuff for the breading).
- 1 teaspoon salt and 1/2 teaspoon black pepper (and a little extra salt for sprinkling later).
- 1/2 teaspoon garlic powder—don’t skip this in the crust!
- 1/4 cup olive oil if you’re pan-frying, or just oil spray for the baked folks.
- 2 cups of your favorite marinara sauce—seriously, use one you love!
- 8 oz fresh mozzarella cheese, thinly sliced—get the fresh stuff, it melts better.
- 1/4 cup extra grated Parmesan cheese (this is the good stuff for sprinkling on top of the mozz).
- Fresh basil, chopped, for that final pop of color and freshness.
For more handy recipes that keep your kitchen stocked with tasty ideas, check out my guide on chicken avocado lettuce wraps.
Preparation Steps for Your Crispy Chicken Parmesan Recipe
Okay, this is the meaty part! Getting the chicken right is half the battle for a successful chicken parmesan recipe. First things first: those chicken breasts usually come out of the package too thick. If you try to cook them thick, the outside burns before the inside is safe, which is the worst!
You absolutely must pound them down evenly to about half an inch thick. I slip them between plastic wrap or inside a big Ziploc bag and just use the bottom of a heavy pan—gently, of course! Season both sides lightly with salt and pepper after pounding. Now, let’s build that epic crust.
Setting Up the Breading Station for Perfect Parmesan Crusted Chicken
You need a classic three-part setup ready to go. Shallow dishes are your best friend here because things get messy fast. First dish gets the flour—make sure you shake off any extra flour clinging to the chicken; we don’t want clumps!
Next, that beaten egg bath—let the excess drip off, don’t let it soak. The magic station is the third dish: mix your Panko, that half-cup of Parmesan, garlic powder, and the rest of your salt and pepper right there. Now, dip, dip, press! When you push the cutlet into the Panko mix, press down hard with your palm. That pressure is what gives you that amazing Parmesan Crusted exterior that holds up against the sauce. Firm pressure equals maximum adherence!
Cooking Method Choice: Pan-Fried or Baked Chicken Parmesan Recipe
This is where you decide your flavor journey! Both ways deliver a great result for your Chicken Parmesan Recipe, but they achieve crispness slightly differently.
If you’re going traditional Pan-Fried: Heat your olive oil in a sturdy skillet over medium-high heat. It needs to be hot enough so that the breading sizzles immediately but not so hot that it smokes furiously. Cook each side for about three to four minutes until that gorgeous golden-brown color appears and the chicken hits 165°F internally. Set them on a baking sheet—we aren’t done shaping them yet!
If you prefer the lighter Baked Chicken Parmesan Recipe: Preheat your oven to a hot 400°F (200°C). This is key! Place the breaded cutlets on a wire rack set directly over a baking sheet. That rack lets the air circulate underneath, which is my secret for avoiding a slightly soggy bottom! Bake those beauties for about 15 minutes until they look done.
Once you’ve chosen your frying path, head over and see how I transform pumpkin puree into a ridiculously good sauce in my Halloween-themed post for inspiration on next-level flavor boosting!
Finishing Touches: Melting the Cheese on Your Chicken Parmesan Recipe
The chicken is cooked, the crust is crispy—now for the payoff! This is where we turn a breaded chicken cutlet into the glorious, melty showstopper we crave. Grab your marinara sauce; you’ll need about 1/4 cup per piece of chicken. Don’t be shy here, but you don’t want to drown the crust underneath, either. Just enough to coat the top layer!
Next comes the fresh mozzarella. I slice mine thin so it melts evenly and quickly across the entire surface. Layer it generously! This is what gives you that gorgeous, stringy pull when you take that first bite.
Once the mozz is down, hit it with the last sprinkle of that reserved Parmesan cheese. This second dusting melts down beautifully and adds that sharp, salty bite that cuts through the richness of the mozzarella. This final layering is non-negotiable for a proper Chicken Parmesan Recipe assembly!
Now, back into the heat they go. If you pan-fried, you can usually just pop the baking sheet into the 400°F oven for about 5 to 7 minutes until the cheese is fully melted and bubbly. If you want that *real* restaurant look, switch the oven to broil for the very last 60 to 90 seconds. I mean it—watch it like a hawk! Broilers are fast, and you go from perfect golden spots to burnt black in about ten seconds. You want that cheesy top gorgeous, not charcoal!
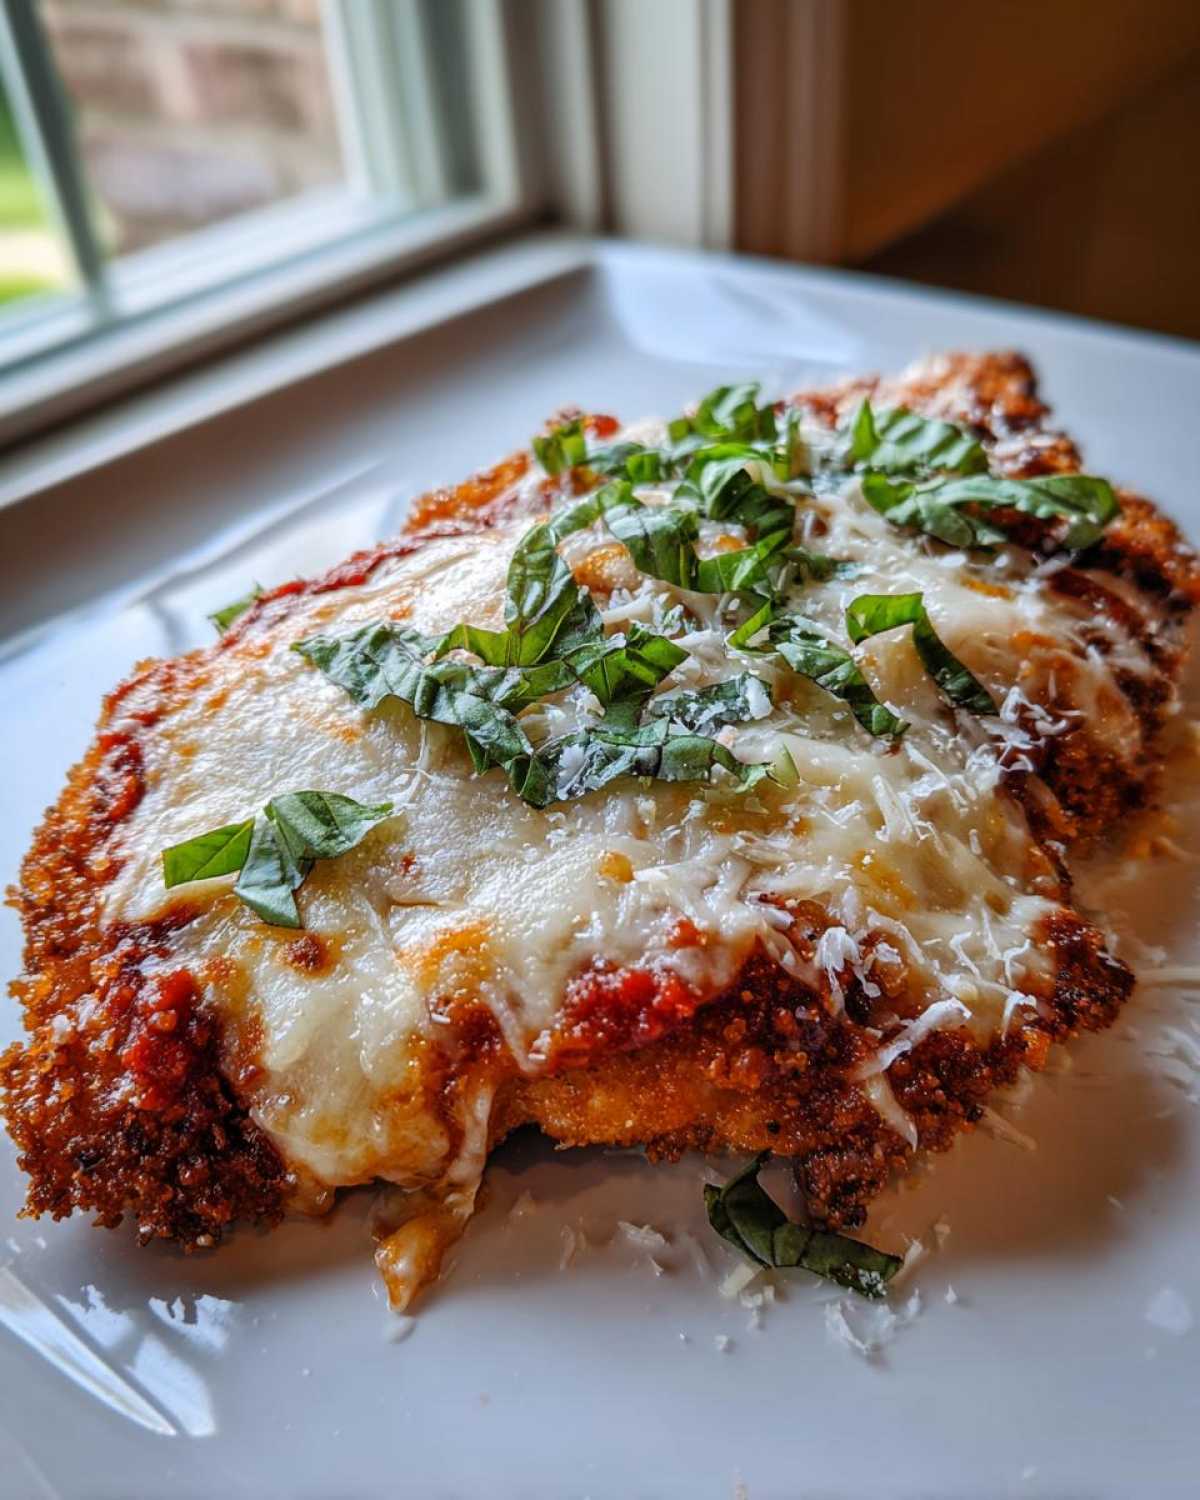
Let the cutlets rest for just two minutes once they come out; the cheese settles a tiny bit so it doesn’t slide right off when you move it. Serve it hot, garnished with that bright, fresh basil. You deserve this cheesy perfection!
If you’re looking for other cheesy dinners, my creamy garlic Tuscan chicken is another unbelievable comfort food classic!
Tips for Achieving Restaurant Style Chicken Parm Texture
Getting that professional, Crispy Chicken Parm texture at home is all about respecting the breading. Soggy chicken is the absolute enemy here, no matter how good the sauce is! It comes down to tiny science steps that I learned through, well, years of tasting my own flops, unfortunately.
For the baked version, listen closely: if you skip the little trick of toasting your Panko breadcrumbs with a tablespoon of oil first, you are missing out! Just toss them in a dry skillet for about three minutes until they smell fragrant and look slightly golden before you start your breading station. This pre-toasting helps the crumbs stay crunchy even after soaking up the little bit of moisture from the sauce later on. It’s a game-changer!
Also, never skip the resting period! Just like any good steak or roast, letting the chicken sit for two minutes after it comes out of the oven or oil lets those juices reabsorb. It ensures the chicken breast stays unbelievably tender inside while the crust firms up just a tiny bit more. Don’t immediately slice into it!
For more foolproof dinner strategies, bookmark my garlic herb roast chicken guide. It follows similar logic about creating crispy skin!
Ingredient Notes and Substitutions for This Recipe
Okay, I know recipes seem rigid, but sometimes you’re staring into your fridge and you’re missing one tiny thing. Don’t panic! While I swear by the list above, especially the Panko, we can make smart swaps if we need to. The key is understanding *why* we chose that specific ingredient in the first place.
Let’s talk marinara sauce first. This is my biggest expert tip. If you only have fifteen minutes to pull this dinner together, you can’t spend half an hour simmering sauce from scratch. But please, please don’t grab the cheapest jar you see. High-quality sauce—one that tastes like real tomatoes, maybe with a little basil already in it—makes the entire dish taste like you’ve owned an Italian restaurant for twenty years. If your jarred sauce tastes flat, stir in a pinch of sugar and maybe a splash of red wine vinegar before you put it on the chicken. That brightens it up instantly!
When it comes to the cheese topping, fresh mozzarella is the gold standard. It just blankets the chicken perfectly and becomes that beautiful, slightly browned pool of dairy goodness. If you only have the low-moisture block, slice it very thin, and you might want to mix in a little Provolone. Provolone melts beautifully and adds a tiny bit of that smoky flavor that pairs wonderfully with the Parmesan base.
Now, the Panko. I’m going to be stubborn here: use Panko. It shatters when you bite it, giving you that audible crunch. If you absolutely cannot find it, you can blitz up some dried, plain white bread in a food processor until you get coarse crumbs. But avoid Italian seasoned breadcrumbs because our recipe has all our own custom seasoning planned out!
If you want to try making something else amazing in your slow cooker next time, you should check out my recipe for slow cooker honey garlic chicken. Sometimes you just need an appliance to do the heavy lifting for you!
Serving Suggestions for Your Cheesy Italian Chicken Dinner
Now that you have the star of the show—a perfectly crisp, ridiculously cheesy cutlet—you need the supporting cast! What you serve with this Cheesy Italian Chicken can completely change the vibe of the meal. Are you going for pure, unadulterated comfort, or are you trying to sneak in a few extra veggies?
For the classic, utterly satisfying restaurant experience, you simply must pair this with pasta. My go-to traditionally involves a big mound of spaghetti or linguine, all tossed lightly in a little extra marinara sauce. Since the chicken is rich, don’t over-sauce the pasta itself; let the chicken be the main event you pour that extra sauce over on the plate!
But hey, we aren’t all about carbs every night, right? If you want something lighter that doesn’t mean sacrificing flavor, I have a couple of beautiful alternatives. A big, lightly dressed Caesar salad is unbelievably good alongside this. The tanginess of the dressing is a great contrast to the richness of the cheese and the savory breading.
If you’re really trying to keep it light, I highly recommend spiralizing some zucchini! It feels indulgent but it’s so fresh. I have a fantastic zucchini noodle Caprese bowl recipe that uses bright lemon and fresh mozzarella—it’s exactly the kind of zesty counterbalance you need to cut through the richness of the Parmesan. Just toss the noodles quickly with olive oil and garlic, and you’re good to go. It makes the whole plate feel vibrant!
Don’t forget about crusty Italian bread! You need something sturdy to mop up every last bit of that sauce pooled around your chicken. That last swipe of bread dipped in the leftover cheese and sauce? That’s the best part, guaranteed.
Storage and Reheating the Chicken Parmesan Recipe
Okay, let’s talk about leftovers, because there are rarely leftovers of my Chicken Parmesan Recipe, but when there are, you have to treat them right! You do not want to ruin that beautiful crust you worked so hard to achieve the next day by throwing it in the microwave. That’s a one-way ticket to a soggy, rubbery nightmare, and we simply can’t allow that to happen.
First, make sure your chicken has cooled down completely before you try to store it. If you seal up warm chicken, you create steam, and steam is the enemy of crunch! Once cool, you need to separate the components if you can. If you stored it already sauced and cheesed, that’s fine, but know that the crust will have softened significantly—it will taste like comfort food, but not crispy food.
Store everything tucked away in an airtight container in the fridge. Honestly, it stays great for three days, maybe four if you’re being super careful. It keeps the chicken breast nice and juicy, even with the sauce layered on top.
Now for the reheating, this is the part that saves the day!
Reheating the Baked Chicken Parmesan for Maximum Crispness
If you opted for the baked version of the Chicken Parmesan Recipe, you’re usually in better shape for reheating because the breading didn’t soak up as much oil initially. The oven is always my first choice here, hands down. Preheat your oven (or toaster oven!) to 375°F (190°C). Place the leftover chicken directly onto a wire rack set over a baking sheet—remember that trick? It’s crucial for reheating too!
Pop it in for about 10 to 12 minutes. You are just trying to heat it through and dry out that crust a little bit. If the cheese has solidified and looks pale, you can turn the oven to broil for the absolute last minute, but watch it closely! That broiler acts fast, and we don’t want to burn the sauce.
The Air Fryer Trick for Leftover Crispy Chicken Parm
If you have an air fryer, you might as well use it! It’s like a miniature, turbocharged convection oven, and it brings back that amazing crunch better than almost anything else, even if you have the full sauce and cheese topping on it.
Set your air fryer to 360°F. Place the cutlets in a single layer—don’t stack them, or they steam! They usually only need about 6 to 8 minutes. When it comes out, that crust should have a lovely little snap back to it! This is the best method if you want to quickly reheat the fully assembled dish.
Why I Avoid the Microwave for Reheating Chicken Parmesan
Look, I get it. Sometimes you’re running out the door, and you just need something hot in 60 seconds. But please, if you can manage it, avoid the microwave for anything that was ever breaded or fried! The microwave heats by exciting water molecules, which means it turns your perfectly crisp Panko crust into hot, wet mush almost instantly. It cooks everything from the inside out using steam, effectively re-steaming your dinner!
If you absolutely must use the microwave, blast it for 45 seconds just to take the chill off, then immediately transfer it to a regular toaster oven or broiler for 2 minutes to try and salvage some texture. But seriously, take the extra five minutes for the oven or air fryer; your taste buds will thank you! Your Chicken Parmesan Recipe deserves a proper recovery.
Frequently Asked Questions About Making Chicken Parmesan
I know you might still have a few lingering questions! Cooking comfort food like this means getting the little details just right. I’ve gathered the questions I get asked most often after sharing this Crispy Chicken Parm over the years. Check below to see if yours is here!
How can I stop my baked chicken parmesan breading from getting soggy?
This is the #1 complaint I hear about the baked method! The trick isn’t just baking; it’s about minimizing moisture contact before the cheese goes on. Remember how I recommended pre-toasting your Panko breadcrumbs with that little bit of oil? Do that! It helps the coating become more like a shell than a sponge. Also, make sure you are baking on a wire rack—if the bottom is sitting in chicken juices or oil pooling on the pan, it will steam itself soggy.
Can I substitute chicken thighs for the breasts in this recipe?
Yes, you absolutely can use boneless, skinless chicken thighs! Thighs are naturally richer and stay juicy no matter what you do to them, which is a huge bonus. The main thing to watch for is thickness. Thighs are often uneven, so make sure you pound them down to a consistent thickness so they cook through at the same time. Because they have more fat, they might brown slightly slower than the leaner breasts, but the internal temperature goal stays the same: 165°F.
What’s the best way to make a quick, punchy marinara sauce?
If you’re running late, don’t worry about a three-hour simmer! The best way to elevate a jarred sauce—which is perfect for this Easy Chicken Parmesan Dinner—is all about acidity and freshness. Once you heat your sauce, stir in a small splash of balsamic vinegar or a teaspoon of lemon juice. It wakes up the tomato flavor immediately! Also, tear up a few fresh basil or oregano leaves right before you pour it over the chicken. That fresh herb punch makes it taste homemade instantly.
I don’t have Panko. What’s the next best thing for a crunchy texture?
While I truly believe Panko is king for that airy crispness you see in Restaurant Style Chicken Parm, fine breadcrumbs will work in a pinch. However, they absorb oil (or moisture) much faster. If you have to use regular breadcrumbs, you absolutely must toast them first, just like the air fryer note suggests! And make sure you press them onto the chicken extra hard during the dredging stage to force the coating to stick before it gets wet.
Can I prep the breaded cutlets ahead of time for my quick dinner?
Yes, and this is how you conquer a busy weeknight! You can absolutely set up your whole breading station, coat all four cutlets beautifully, and then lay them out flat on a baking sheet lined with parchment paper. Cover them tightly with plastic wrap and pop them in the fridge for up to 24 hours. When you are ready to eat, you just go straight to the frying or baking step outlined above. This saves you the messy setup time right before dinner!
If you’ve got follow-up questions or want to tell me how your batch turned out, please feel free to reach out through my contact page anytime!
PrintCrispy Chicken Parmesan (Pan-Fried or Baked)
Make classic, cheesy Chicken Parmesan using this recipe. You can choose the traditional pan-fried method for maximum crispiness or a baked method for a lighter meal.
- Prep Time: 15 min
- Cook Time: 20 min
- Total Time: 35 min
- Yield: 4 servings
- Category: Dinner
- Method: Pan-Frying or Baking
- Cuisine: Italian American
- Diet: Meat
Ingredients
- 4 boneless, skinless chicken breasts (about 6 oz each)
- 1 cup all-purpose flour
- 2 large eggs, beaten
- 1 1/2 cups Panko breadcrumbs
- 1/2 cup grated Parmesan cheese (for breading)
- 1 teaspoon salt
- 1/2 teaspoon black pepper
- 1/2 teaspoon garlic powder
- 1/4 cup olive oil (for pan-frying)
- 2 cups marinara sauce
- 8 oz fresh mozzarella cheese, sliced
- 1/4 cup grated Parmesan cheese (for topping)
- Fresh basil, chopped (for garnish)
Instructions
- If the chicken breasts are thick, place them between two sheets of plastic wrap and pound them to about 1/2 inch thickness. Season both sides with salt and pepper.
- Set up a standard breading station: Place flour in one shallow dish. Whisk eggs in a second dish. In a third dish, combine Panko breadcrumbs, 1/2 cup Parmesan cheese, garlic powder, and 1/2 teaspoon salt.
- Dredge each chicken cutlet first in flour, shaking off excess. Dip into the egg mixture, letting excess drip off. Finally, press firmly into the Panko mixture to coat completely.
- For Pan-Fried Method: Heat olive oil in a large skillet over medium-high heat. Cook chicken for 3 to 4 minutes per side until golden brown and cooked through (internal temperature 165°F). Remove chicken and place on a baking sheet.
- For Baked Method: Preheat your oven to 400°F (200°C). Lightly spray the breaded chicken cutlets with cooking spray or brush with 1 tablespoon of olive oil. Place on a wire rack set over a baking sheet. Bake for 15 minutes.
- Pour about 1/4 cup of marinara sauce over each cutlet. Top each piece generously with slices of fresh mozzarella and a sprinkle of the remaining 1/4 cup Parmesan cheese.
- Return the chicken to the oven (or place under the broiler for 1-2 minutes if using the pan-fried method) until the cheese is melted and bubbly.
- Let the chicken rest for 2 minutes before serving. Garnish with fresh basil. Serve immediately over pasta or with a side salad.
Notes
- For extra crispiness in the baked version, toast the breadcrumbs with 1 tablespoon of oil in a pan for 3 minutes before mixing them with the cheese.
- Use high-quality marinara sauce; this makes a big difference in the final flavor.
- If you prefer a thinner cutlet, slice the breasts horizontally to create four thinner pieces before pounding.
Nutrition
- Serving Size: 1 cutlet
- Calories: 550
- Sugar: 8
- Sodium: 850
- Fat: 28
- Saturated Fat: 12
- Unsaturated Fat: 16
- Trans Fat: 0
- Carbohydrates: 35
- Fiber: 3
- Protein: 45
- Cholesterol: 150