

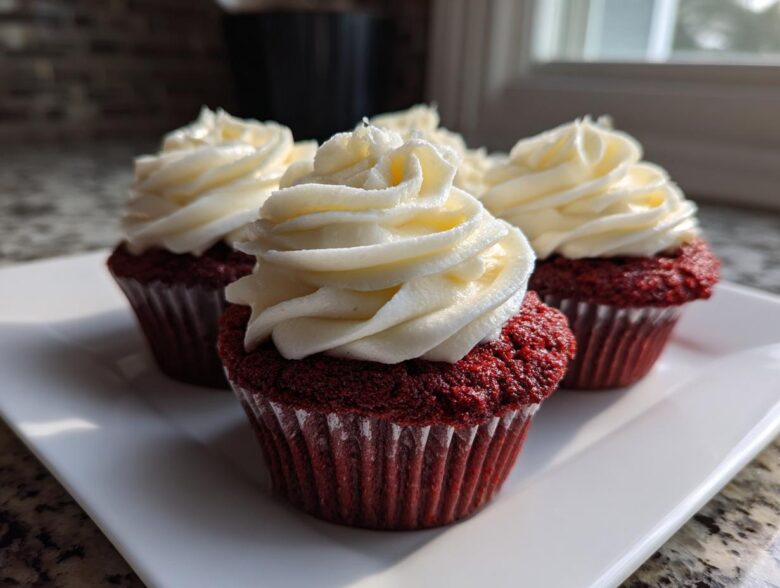
Oh my goodness, seriously, throw away any recipe that promises you dreamy baked goods and ends up giving you sad, dry little hockey pucks. I spent years chasing that perfect, tender crumb that only the best bakeries seem to manage. But I finally cracked the code! This recipe for red velvet cupcakes is the one you need. It’s absolutely foolproof, delivering rich, deep chocolate notes balanced by the signature tang, all topped with the fluffiest, dreamiest cream cheese frosting imaginable. Trust me, once you try these, you won’t look back. Knowing how much work goes into perfecting a classic like this just makes sharing these secrets with you all feel so wonderful. We can all bake bakery-style treats right here in our own kitchens. If you ever want to read more about our mission in baking, check out our story here!
Why This Is the Best Red Velvet Cupcake Recipe (Moist Red Velvet Cupcakes)
I know you’re looking for the best red velvet cupcake recipe because you’ve probably been burned before. The biggest secret to keeping these moist red velvet cupcakes from drying out is moving away from butter as the primary fat. We use vegetable oil here! Oil stays liquid at room temperature, which means your cupcakes feel wonderfully soft straight out of the wrapper and stay that way for days. That’s a huge win, right?
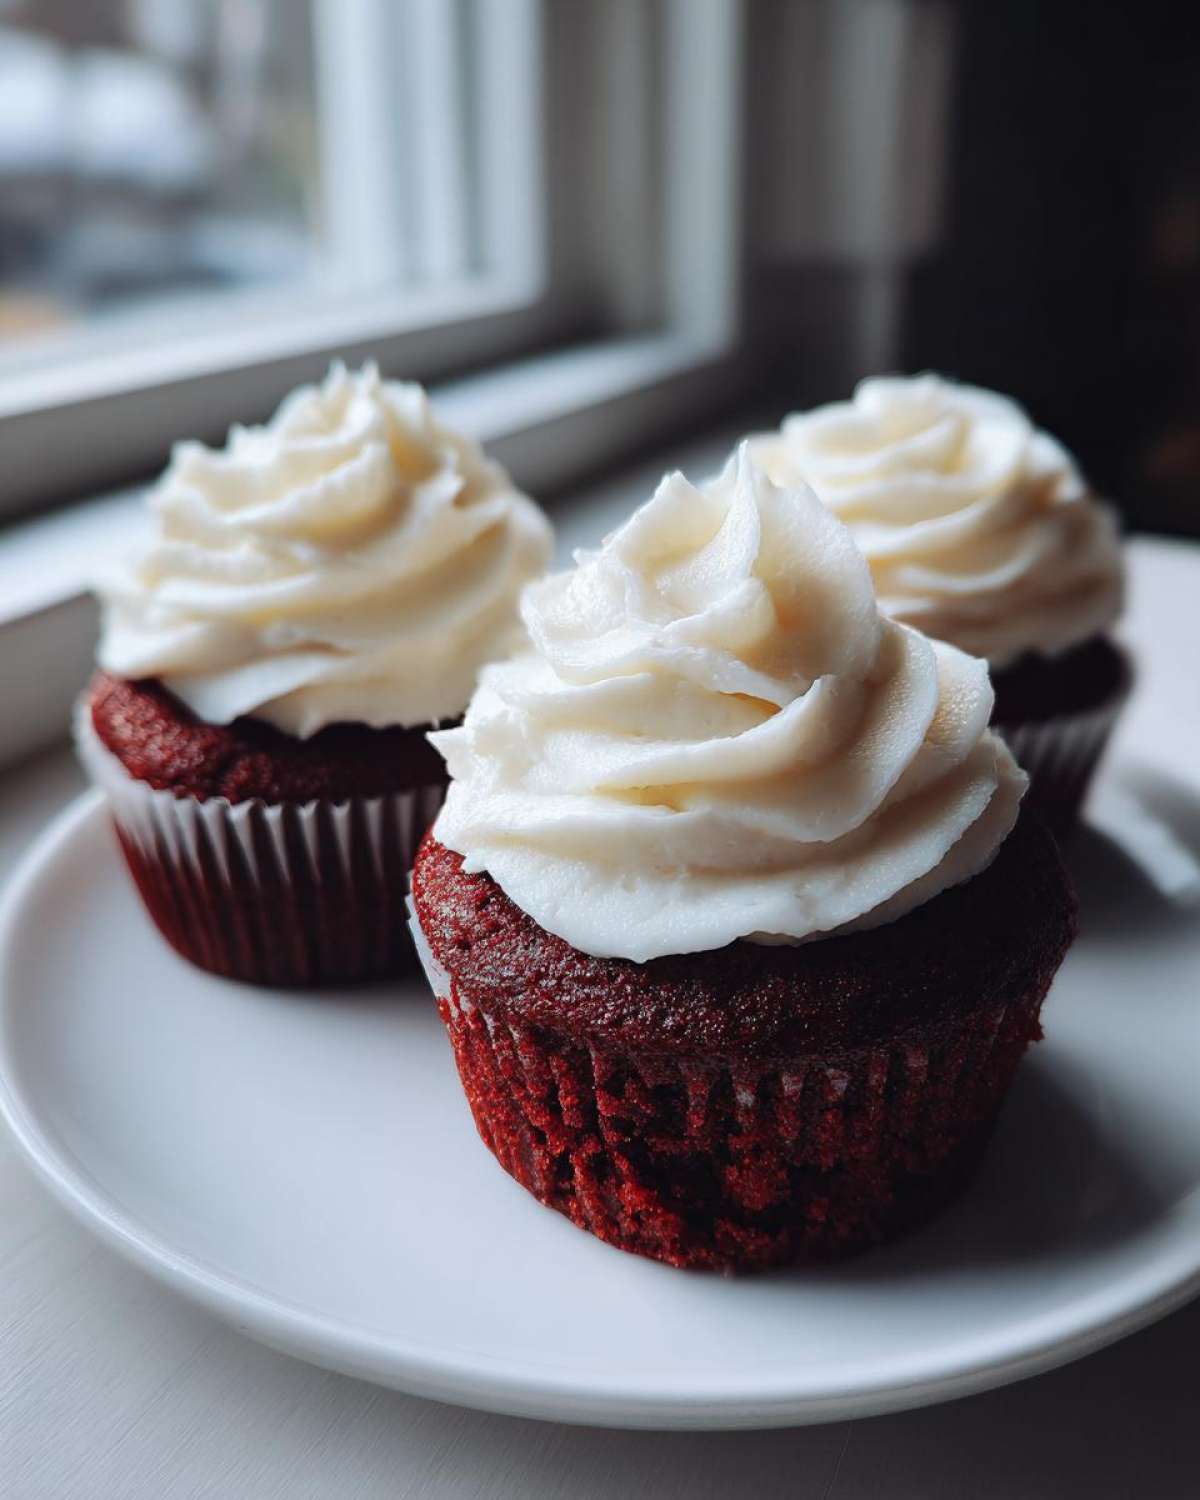
The other non-negotiable is the acid. We don’t just use buttermilk; we add that little splash of white vinegar too! That combination is what gives us that signature rise and the perfect balance against the sweetness.
Achieving the Signature Velvety Crumb
This is where the magic chemical reaction happens, and it’s super simple, I promise. When the acid in the buttermilk and vinegar hits the baking soda—that’s the base—it creates tons of tiny carbon dioxide bubbles.
These bubbles are what lift our batter and give you that distinct, light, yet dense texture we call the ‘velvet crumb.’ It’s softer than a standard chocolate cake because the acid tenderizes the flour proteins. Don’t skip that vinegar; it’s crucial for that fantastic texture and our brilliant baking blog is full of other great chemical baker tricks!
Ingredients for Ultimate Moist Red Velvet Cupcakes
Gathering your things is half the battle, and I want you to have everything ready to go so you can mix and bake without hunting around the kitchen. Seriously, getting things temperature-right makes all the difference when we are making delicate red velvet cupcakes cream cheese frosting!
We’ve broken the list down so you can see exactly what goes into the treats versus what goes into that perfect tangy topping.
For the Red Velvet Cupcakes
- 1 1/2 cups all-purpose flour
- 1 1/2 cups granulated sugar
- 1 teaspoon baking soda
- 1 teaspoon unsweetened cocoa powder
- 1/2 teaspoon salt
- 1 cup vegetable oil
- 1 cup buttermilk, shaken (shake that carton before measuring!)
- 2 large eggs, room temperature (this is non-negotiable!)
- 1 teaspoon white vinegar
- 1 teaspoon vanilla extract
- 1-2 teaspoons red food coloring (liquid or gel)
For the Tangy Cream Cheese Frosting
For the frosting, make absolutely sure your cream cheese and butter have been sitting out long enough. If they aren’t truly soft, your frosting will end up lumpy, and nobody wants that!
- 1 (8 ounce) package cream cheese, softened
- 1/2 cup (1 stick) unsalted butter, softened
- 3 cups powdered sugar, sifted
- 1 teaspoon vanilla extract
Step-by-Step Instructions for Easy Red Velvet Cupcakes
I designed this process to make your life easier, so you can have these amazing red velvet cupcakes ready in under an hour total. The key here is keeping your wet things and dry things separated until the absolute last second. Trust me, this shortcut to a beautiful batter makes clean-up simple and ensures these come out fluffy every time!
First things first, get your oven humming at 350°F (175°C) and get those paper liners nestled into your 12-cup tin. Nobody likes a stuck cupcake!
Mixing the Red Velvet Cupcake Batter
Grab your biggest bowl for the dry ingredients—that’s the flour, sugar, baking soda, cocoa, and salt. Give those a good whisk together. Now, in a separate, smaller bowl, mix up everything wet: the oil, your shaken buttermilk, eggs, vinegar, and all that bright red coloring. I always add the coloring to the wet mix so it distributes evenly right away!
Here is the absolute most important part: Pour the wet ingredients right into the dry bowl. You want to mix this on the absolute lowest speed, or honestly, just use a spatula and mix by hand until everything is *just* coming together. Don’t even think about overmixing! If you see a few streaks of flour, stop! Then, just gently stir in the vanilla and you are done. Perfect batter!
Baking and Cooling for Perfect Results
Spoon that beautiful red batter evenly into your lined cups—remember, only fill them about two-thirds full. Pop them into that hot oven and set your timer for 18 minutes. You’re looking for that classic test: insert a toothpick near the center, and if it slides out clean, they’re done! Bake them too long and all the moisture we worked so hard to keep in there vanishes!
Once they are done, leave the warm cupcakes alone in the pan for exactly five minutes. That short rest helps them firm up just enough. Then, carefully move them over to a wire rack to cool completely. If you try to frost warm cupcakes, you’ll just end up with a messy, melted puddle of deliciousness. Wait ’til they are stone cold before you even *think* about the frosting—I promise the wait is worth it! You can find some great tips on making an easy frosting for cupcakes next door.
Crafting the Perfect Cream Cheese Frosting for Red Velvet Cupcakes
Okay, now for the real star of the show! If the cupcake is the main stage, the cream cheese frosting is the glittering curtain call. This is where we get that perfect marriage of tangy and sweet that makes red velvet cupcakes legendary. The most vital thing here is taking your time when mixing the fats.
Start by beating your super-softened cream cheese and butter together until they look like one happy, pale, creamy paste. If you try to dump the sugar in while they are still chunky, you’ll end up with a cloud of powdered sugar covering your entire kitchen—and nobody wants that mess!
Once those two fats are perfectly blended, add your sifted powdered sugar one cup at a time. Beat it slowly at first until it just incorporates into the mixture. Then, you can crank the mixer up and beat it until it’s fluffy, light, and perfectly spreadable for topping your deep red treats.
Tips for Classic Red Velvet Recipe Success
I swear, the difference between an okay batch and the absolute best batch of red velvet cupcakes comes down to listening to just a few little rules. My grandmother always used to say that the ingredients tell you what they need; you just have to pay attention!
The initial recipe notes I gave you had some underlined secrets, and I want to expand on those because they truly make or break the texture. If you’re looking for more fun tips on using that magical ingredient, check out my post on buttermilk cupcakes recipe!
Ingredient Temperature and Color Depth
First up: room temperature eggs and dairy. Cold ingredients don’t emulsify well with the oil, leading to a batter that looks slightly curdled. Take your eggs out an hour before you plan to bake. It’s a tiny step that makes the final product so much silkier.
Now, about that gorgeous red color! Most people use the throwaway liquid coloring, but if you want that deep, vibrant hue—the kind that screams ‘bakery standard’—you absolutely must use a gel food coloring. A little dab of gel goes an incredibly long way. You’ll use less coloring overall, which means our flavor profile stays clean and slightly chocolatey, not tasting like dye.
My personal trick? I always mix the food coloring into the buttermilk and vinegar first. This lets the color bloom a little before it hits the dry stuff. It just gives the final result a little extra depth, I swear!
Storage and Serving Suggestions for Your Red Velvet Cupcakes
Now that you have the best red velvet cupcakes resting perfectly on your counter, we need to talk about keeping them gorgeous! Because we use that lovely, tangy cream cheese frosting, these treats absolutely must live in the refrigerator if you aren’t planning to eat them all within a few hours. Don’t worry, they taste great cold, but I always let mine sit on the counter for about 20 minutes before serving just to take the chill off that velvety crumb.
These are perfect for so many things! They look festive when you make them around the holidays, but they are certainly a classic for any celebration, like homemade birthday cupcakes or just a random Tuesday treat. Enjoy every marvelous bite!
Frequently Asked Questions About Red Velvet Cupcakes
I always get so many questions after people try this recipe because they can’t believe how soft they turned out! Here are the things I hear most often about achieving that perfect texture and color in your velvety red desserts.
Can I use regular milk instead of buttermilk in red velvet cupcakes?
You certainly can, but you have to make your own buttermilk substitute! The acid is what we need for the proper lift and tang, not the thickness of the milk itself. Just measure out one cup of regular whole milk and stir in one tablespoon of white vinegar or lemon juice. Let that mixture sit on the counter for about five to ten minutes until it looks slightly curdled. Voila! Instant, functional buttermilk for your red velvet cupcakes.
How do I get the deepest red color without tasting the food coloring?
This is all about using the right tool for the job! Skip the grocery store liquid dye; it takes way too much to get a deep color, and that’s when you start tasting the dye itself. You need red gel coloring. You use basically half the amount but get double the impact. Just mix that tiny bit of gel right into your wet ingredients—the oil, eggs, and buttermilk—and give it a good whisk before you pour it into the dry stuff. A little goes a long way to achieve that perfect deep hue without impacting the subtle cocoa flavor cupcakes should have!
Estimated Nutritional Information for Red Velvet Cupcakes
I always feel a little funny about posting nutrition facts, because honestly, when you bite into one of these perfect, fluffy treats, you aren’t thinking about macros! But since you asked, here’s a breakdown based on the serving size of one cupcake. Remember, this is just an estimate, especially since frosting amounts can vary wildly based on how generously you pipe them on!
- Serving Size: 1 cupcake
- Calories: 380
- Sugar: 45g
- Fat: 20g
- Protein: 4g
- Carbohydrates: 50g
This chart should give you a general idea, but the real number you need to focus on is how much joy these red velvet cupcakes bring!
Share Your Fluffy Red Velvet Treats
Now that you’ve made your own batch of the most amazing, moist red velvet cupcakes, I absolutely need to hear how they turned out! Did you get that perfect buttermilk tang? Was the cream cheese frosting smooth as silk? Don’t keep all that fluffy goodness to yourself!
Please, please, leave a comment down below and give this recipe a rating. Hearing about your success with our classic red velvet recipe makes my whole week. If you snapped a picture of your beautiful, towering creation, tag us on social media! I love seeing these velvety red desserts pop up all over the place. It lets me know that all these kitchen secrets are making their way into your happy homes.
If you ran into any sneaky trouble or have a question that wasn’t covered above, don’t hesitate to reach out! You can always send us a note through our contact page. Happy baking, everyone!
PrintUltimate Moist Red Velvet Cupcakes with Tangy Cream Cheese Frosting
Follow these steps to make moist and fluffy red velvet cupcakes with a classic, slightly tangy cream cheese frosting. This recipe focuses on achieving a perfect velvety crumb.
- Prep Time: 20 min
- Cook Time: 20 min
- Total Time: 40 min
- Yield: 12 servings
- Category: Dessert
- Method: Baking
- Cuisine: American
- Diet: Vegetarian
Ingredients
- 1 1/2 cups all-purpose flour
- 1 1/2 cups granulated sugar
- 1 teaspoon baking soda
- 1 teaspoon unsweetened cocoa powder
- 1/2 teaspoon salt
- 1 cup vegetable oil
- 1 cup buttermilk, shaken
- 2 large eggs, room temperature
- 1 teaspoon white vinegar
- 1 teaspoon vanilla extract
- 1-2 teaspoons red food coloring (liquid or gel)
- 1 (8 ounce) package cream cheese, softened
- 1/2 cup (1 stick) unsalted butter, softened
- 3 cups powdered sugar, sifted
- 1 teaspoon vanilla extract
Instructions
- Preheat your oven to 350°F (175°C). Line a 12-cup muffin tin with paper liners.
- In a large bowl, whisk together the flour, sugar, baking soda, cocoa powder, and salt.
- In a separate medium bowl, whisk together the oil, buttermilk, eggs, vinegar, and red food coloring until well combined.
- Pour the wet ingredients into the dry ingredients. Mix on low speed or by hand until just combined. Do not overmix. Stir in the vanilla extract.
- Divide the batter evenly among the 12 cupcake liners, filling each about two-thirds full.
- Bake for 18 to 20 minutes, or until a toothpick inserted into the center comes out clean. Let the cupcakes cool in the pan for 5 minutes before transferring them to a wire rack to cool completely.
- Prepare the frosting: In a large bowl, beat the softened cream cheese and butter together until smooth.
- Gradually add the sifted powdered sugar, beating until fully incorporated and smooth. Beat in the vanilla extract.
- Once the cupcakes are completely cool, pipe or spread the cream cheese frosting onto each one.
Notes
- Use full-fat buttermilk for the best texture and tang.
- For a deeper red color, use gel food coloring instead of liquid.
- Do not overbake the cupcakes; this is the main cause of dry results.
- Ensure the cream cheese and butter for the frosting are at true room temperature for a smooth consistency.
Nutrition
- Serving Size: 1 cupcake
- Calories: 380
- Sugar: 45g
- Sodium: 250mg
- Fat: 20g
- Saturated Fat: 8g
- Unsaturated Fat: 12g
- Trans Fat: 0g
- Carbohydrates: 50g
- Fiber: 1g
- Protein: 4g
- Cholesterol: 55mg