

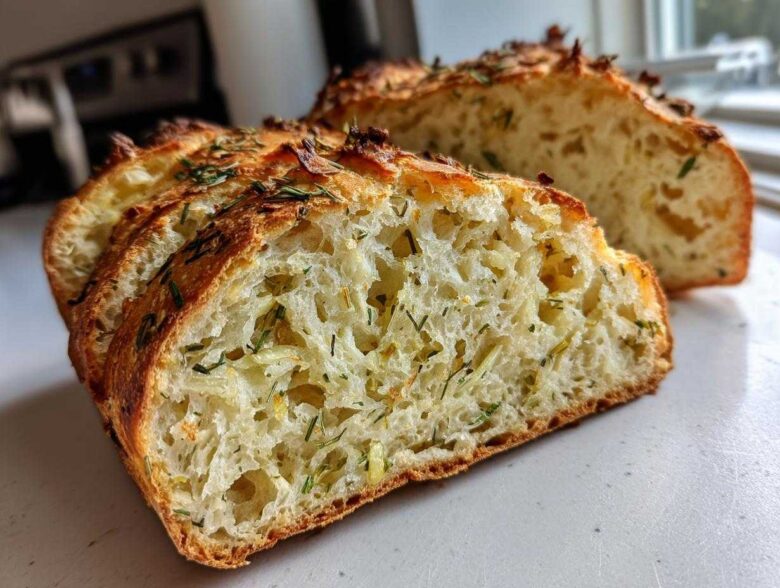
Honestly, can anything beat walking into the kitchen on a cool morning and smelling bread baking? That warm, yeasty aroma mixed with sharp garlic and earthy rosemary? It just fixes everything, doesn’t it? I’ve spent years messing around with different flour ratios and water temperatures, trying every trick in the book to master the no-knead method. And I’m not kidding when I say I’ve finally cracked the code for the most incredible loaf: this Garlic Herb Dutch Oven Bread recipe. It uses that super simple process you love—no heavy kneading required!—but we load it up with fresh flavor until it becomes something truly spectacular and rustic. If you enjoyed our experiments with the Italian herb and cheese bread recipe, you are going to instantly fall in love with this savory version!
If you’ve ever been scared of making artisan bread at home, this is the loaf that will change your mind. We use the cast iron magic of the Dutch oven to trap all the steam, giving us that shatteringly crisp crust and a perfectly soft, airy interior every single time. Seriously, trust me on this. I’m practically shouting this from the rooftops because I want everyone to experience how unbelievably good this savory bread tastes!
Why This Garlic Herb Dutch Oven Bread Recipe Works (The Flavor Secret)
So, what makes this recipe stand leagues above just regular no-knead dough? It’s all about layering flavor strategically. We’re not just sprinkling things on top, oh no! The real magic for this savory bread recipe happens when you mix the minced garlic and those pungent herbs—rosemary and thyme—right into the flour mixture before the water even goes in. That lets the dough absorb all that deliciousness during the 18-hour rest period.
That long rest, by the way, is what develops that incredible depth you normally only find in a bakery. Plus, the environment inside that hot, covered Dutch oven acts like a miniature professional steam injection system. That’s precisely how we nail that deeply browned, crusty homemade bread exterior while keeping the inside super light and airy. Honestly, when you pull this flavorful homemade loaf out, the scent alone is worth the very minimal effort involved!
If you enjoy baking things that really pack a punch, you should totally check out my recipe for easy homemade garlic breadsticks—they use a similar flavor combination!
Ingredients for the Ultimate Garlic Herb Dutch Oven Bread
When you gather your mise en place for this loaf, pay close attention to those herbs! Since we are skipping the kneading, every ingredient needs to be perfectly prepped before we step away for that long rest. Don’t try to substitute the fresh garlic or herbs with dried ones (we’ll talk ratios later!), because you lose so much vibrancy. Trust me, a little effort upfront gets you a huge payoff later.
You’ll notice we use a good amount of olive oil, too—that contributes to both flavor and keeping the outside texture just right. Having everything ready to go makes the mixing process lightning fast. For another great recipe using simple pantry staples for amazing results, you have to try my easy Italian bread crusty homemade recipe!
- 3 cups All-Purpose Flour
- 1 1/2 teaspoons Salt
- 1/4 teaspoon Instant Dry Yeast
- 1 1/2 cups Cool Water
- 2 cloves Fresh Garlic, minced finely
- 1 tablespoon Fresh Rosemary, chopped
- 1 tablespoon Fresh Thyme leaves
- 1 tablespoon Fresh Parsley, chopped
- 2 tablespoons Olive Oil
Step-by-Step Instructions for Perfect Garlic Herb Dutch Oven Bread
Okay, this is where the magic really happens, and honestly, it requires more waiting than actual work. As I learned over the years perfecting the no-knead dough method, patience is the main ingredient here. We’re going to break this down into four easy parts so you don’t miss anything that contributes to that perfect bake. Remember to have your Dutch oven ready to go because timing that blast of heat is what gives us the ultimate crust! I always keep my guide on the no-knead dough method handy, just in case I need a refresher on the timing.
Mixing the Dough and Infusing Flavor
First things first, grab your large bowl. Whisk together the flour, the salt, and that tiny bit of instant yeast. Now, gently toss in your minced fresh garlic, that chopped rosemary, and the thyme leaves. I like to give this a quick stir before adding liquids just to make sure the herbs don’t all clump in one spot later. Next, pour in the cool water and the olive oil. Grab a wooden spoon—that’s all you need—and stir until you see a shaggy, sticky mass form. Stop! Seriously, resist the urge to mix until smooth. We want it messy!
The Long Rest: Developing the No-Knead Dough Method
This is the most crucial waiting game in this entire Easy Dutch oven bread recipe. Cover that messy bowl tightly with plastic wrap—no peeking! You need to let this dough chill out on your counter for a good 12 to 18 hours at room temperature. I usually mix mine up after dinner and let it go overnight. Over time, you’ll see visible bubbles forming; that’s the yeast doing its amazing work, building strength, structure, and flavor without you lifting a finger. It’s incredible!
Preheating the Dutch Oven and Preparing the Loaf
About half an hour before your dough seems ready, fire up your oven to 450°F (232°C) with your empty Dutch oven sitting right inside it with the lid on. It needs to get screaming hot for success! While that’s heating, lay out a big piece of parchment paper and lightly flour it. Gently scrape your bubbly dough out onto the paper—don’t punch it down! This is when you sprinkle that beautiful fresh parsley right over the top. This parsley won’t mix in like the others; it toasts nicely on the outside, adding a nice pop of color and fresh taste to the final rustic loaf recipe.
Baking Your Garlic Herb Dutch Oven Bread
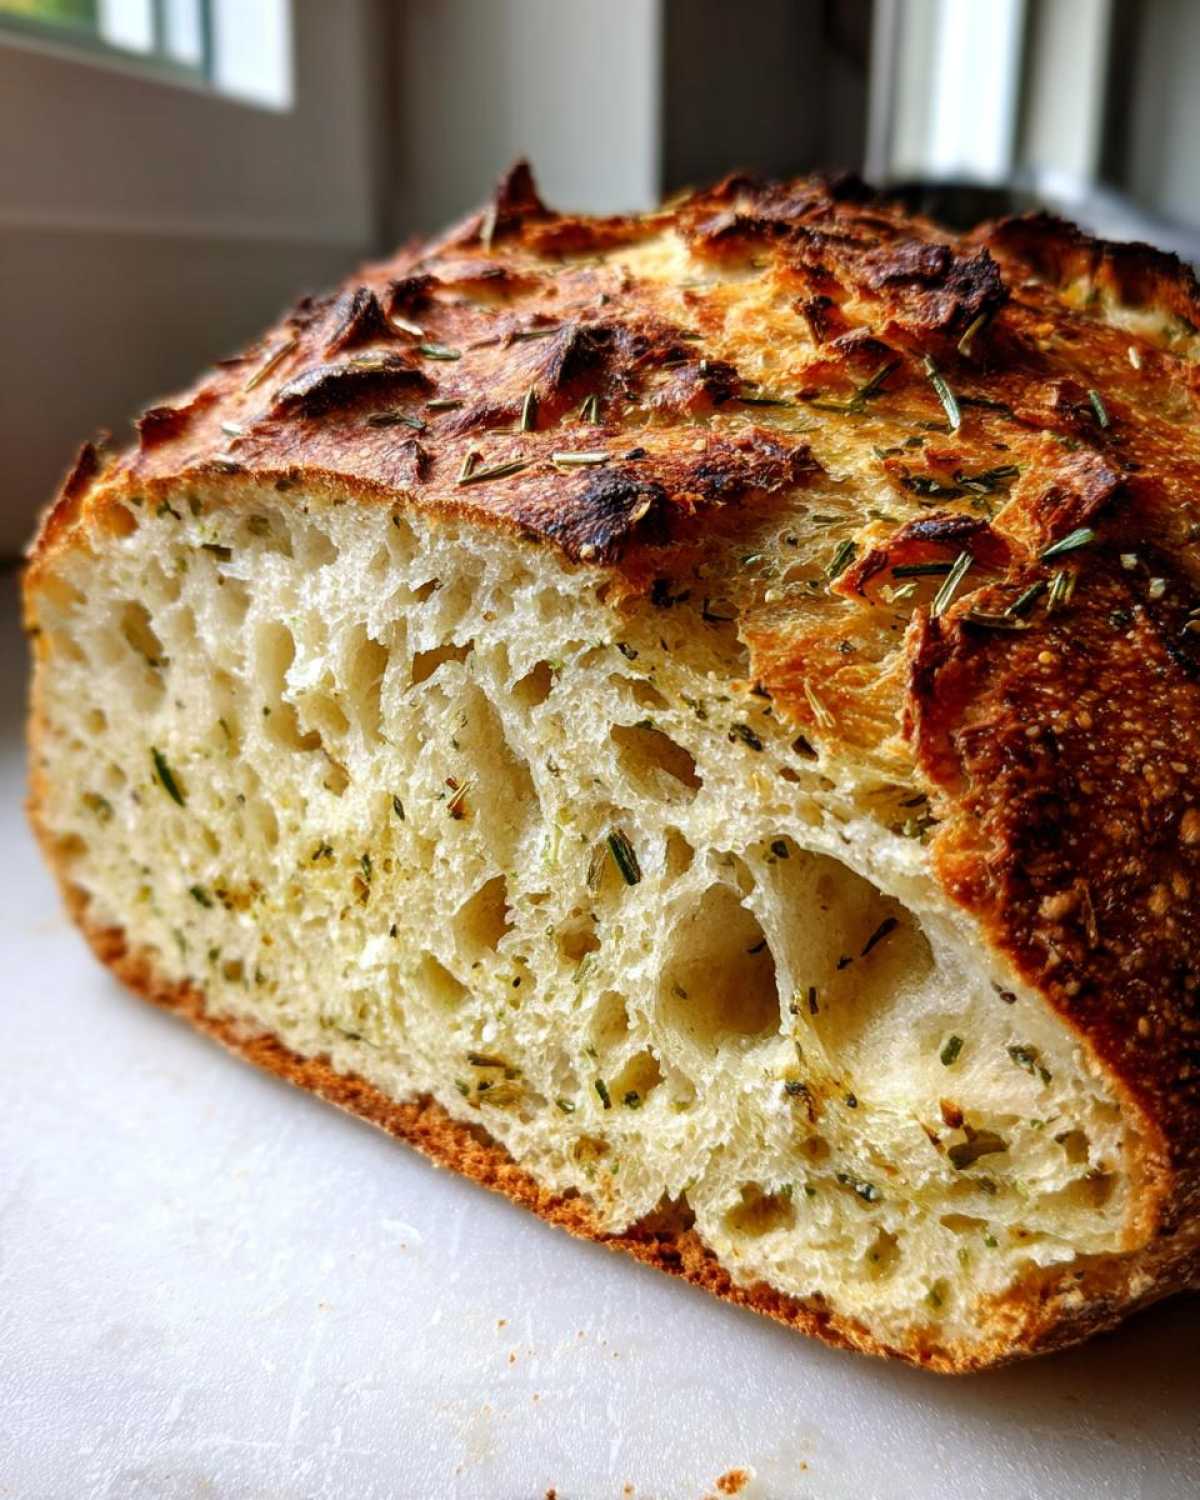
When the oven is blazing hot, carefully—and I mean *carefully*—pull that cast iron pot out. The pot will be scorching, that’s the point! Use the parchment paper as a sling to gently lower your entire dough mass right into the hot Dutch oven. Pop the lid back on quickly. We bake it covered for the first 30 minutes. This traps the steam, making the dough rapidly expand—hello, oven spring! After 30 minutes, take the lid off. Now we focus on achieving those Crispy crust bread tips: keep baking for another 15 to 20 minutes until that crust is a deep, glorious golden brown. Following the best Dutch oven bread technique, I carefully remove the loaf using the sling and let it cool completely on a wire rack before you slice the first piece. Wait for it to cool—I promise it’s worth it!
Tips for Success with Your Garlic Herb Dutch Oven Bread
I know this might sound basic, but let’s talk troubleshooting for a second. The number one thing I hear when someone tries their first artisan bread baking at home loaf is that it stuck! Please, please ensure your Dutch oven is absolutely screaming hot before the dough goes in—I mean scorching! If you skip that step, the dough hits cold iron and instantly bonds to it. Secondly, use the parchment paper sling every single time, even if you think you can manage it without. It keeps handling to a minimum, which preserves those precious air bubbles we worked so hard to create during the rest.
If you truly want that garlic flavor to sing in your final rustic loaf recipe, try one of my favorite little tricks: sauté the minced garlic gently in that 1 teaspoon of olive oil for just about 60 seconds until you can smell it strongly. Then, let it cool slightly before adding it to your dry ingredients. This little bit of infusion really brings out a deeper, sweeter garlic note instead of harsh rawness. If your loaf seems a little dense, chances are you didn’t let that 12-hour rest happen, or your yeast was old! Don’t skip the long wait.
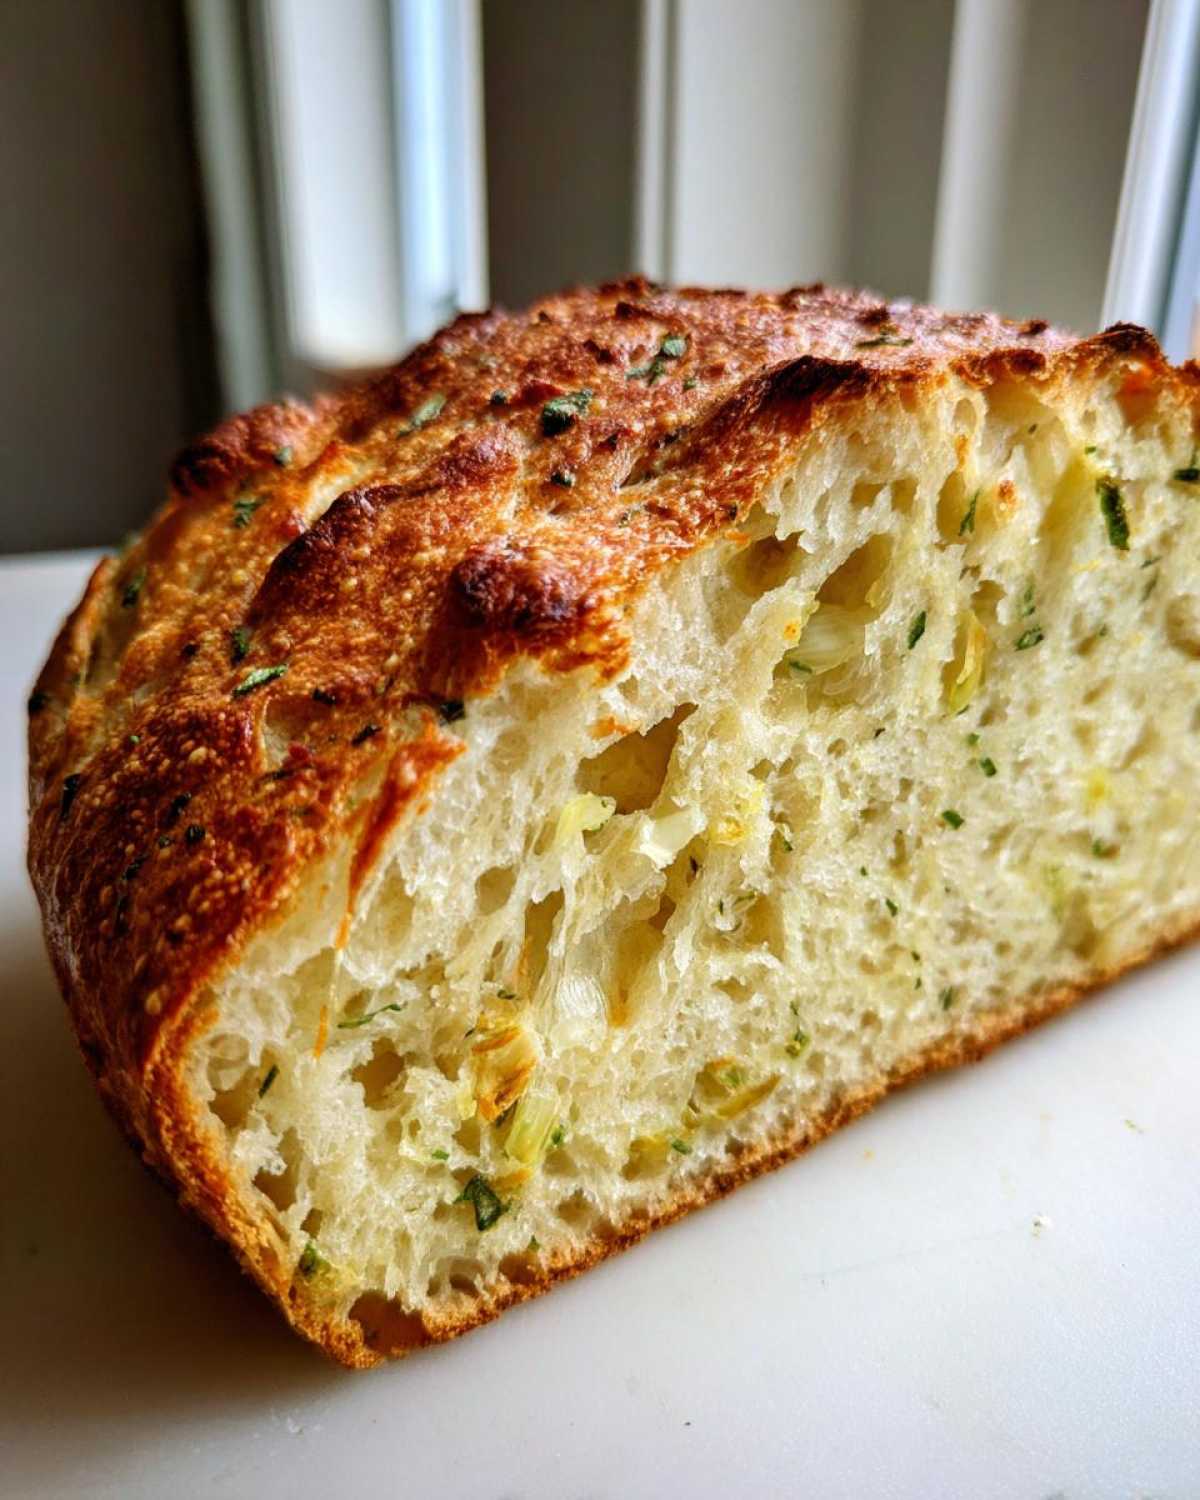
If you’re looking for more crusty achievements, my guide on french bread recipe easy homemade crusty loaf has some great non-Dutch oven crust tips too. And if you ever want to try baking something soft and chewy after this experience, check out my homemade naan bread recipe easy!
Ingredient Notes and Substitutions for Garlic Herb Dutch Oven Bread
I get so many questions about swapping ingredients, and I totally get it—sometimes you’re missing something! For the herbs, if you absolutely have to use dried rosemary or thyme, drastically cut back. Dried herbs are way more potent, so use about one-third of what I listed for fresh, and make sure to crush them between your fingers before tossing them in.
For the garlic, if you only have garlic powder, use just a tiny pinch—maybe 1/2 teaspoon max. The fresh stuff we use here gives such a tender texture to the crumb that powder just can’t replicate, so it’s a definite downgrade for this rustic loaf, but it’ll work in a pinch!
As for the olive oil, it helps keep the dough slightly supple during that long rest. You can substitute it with melted butter if you want a richer flavor, but just remember that butter acts a bit differently in cold dough. If you want to see how I use oil in another amazing recipe, my easy homemade garlic breadsticks recipe plays with infused oils really well too!
Serving Suggestions for Your Flavorful Homemade Loaf
Now for the best part—eating this beautiful herbed bread recipe! Because this loaf is so packed with savory herbs and garlic, you don’t need much dressing up. Slice it warm (after it has cooled for at least an hour, I know, it’s hard!) and slather it with good quality, slightly salted butter. Imagine that melting right into those airy holes!
But if you’re feeling fancy, this bread absolutely begs to be dipped. I highly recommend serving it alongside a big bowl of soup or stew. For dipping, you can’t beat plain olive oil mixed with a splash of balsamic vinegar. Honestly, if you want to go all out, try whipping up some of my Cowboy Butter dipping sauce recipe; the spice cuts through the richness of the bread perfectly!
Storage and Reheating Instructions for Garlic Herb Dutch Oven Bread
I know you won’t want any leftovers because this goes so fast, but if you manage to save a slice or two, listen up! Don’t wrap it up tight in plastic wrap right away; that locks in moisture and kills the crust! Instead, let the loaf cool completely, then store it at room temperature wrapped loosely in a clean kitchen towel or a paper bag. This keeps the crust from getting soft.
To bring it back to life, the best method is a quick reheat. Slice the bread and place those pieces directly onto a baking sheet. Pop them in a 350°F oven for five to seven minutes. That blast of dry heat re-crisps that gorgeous crust instantly. If you’re looking for something a little sweeter after you finish this loaf, my bread pudding recipe with bourbon sauce is the perfect contrast!
Frequently Asked Questions About Garlic Herb Dutch Oven Bread
It’s totally normal to have questions when you’re trying a new technique, especially when dealing with cast iron magic! Baking is forgiving, but the initial setup for this Garlic Herb Dutch Oven Bread is key. We want you to succeed on your first try at beginner bread making, so here are a few things folks often ask me. If you’re looking for more general tips on getting started, check out my main beginner bread making guide!
Can I use dried herbs instead of fresh in this Garlic Herb Dutch Oven Bread?
Oh, I knew this question was coming! You absolutely can, but I have to be honest—fresh herbs are just miles better here because they release their volatile oils into the dough during that long rest. If you only have dried herbs, you need to cut the amount way down, maybe to about one-third of what I listed for fresh herbs. Also, take those dried leaves and crush them really well between your palms before tossing them in with the flour. It helps wake up the flavor, but trust me, next time, grab some fresh rosemary!
What is the best way to get a truly crispy crust bread?
This technique is all about high heat and steam! The absolute best way to achieve that restaurant-quality, truly crispy crust bread texture is the preheat. You must preheat your empty Dutch oven inside the oven while it comes up to 450°F (232°C). You want that cast iron screaming hot! Then, once you drop the dough in (on parchment paper, always!), you bake it covered for the first 30 minutes. That trapped steam inflates the loaf and sets the structure. It’s the combination of high heat hitting the iron and the initial steam bath that guarantees that crackly exterior you’re looking for.
I used instant yeast. Do I need to bloom it first?
Nope! That’s the beauty of using instant yeast with the no-knead dough method—you don’t have to fuss with proofing it in warm water first. You can literally just whisk it right in with the flour and salt and move on. The cool water it meets later will hydrate it just fine during the long, slow fermentation period. Save your blooming technique for when you’re making rolls or something that needs a faster rise!
Do I have to let this bread cool completely before slicing?
I know, I know, that cooling time feels like torture when the house smells this good! But yes, I strongly recommend letting it cool almost completely on a cooling rack. If you cut into it while it’s still hot, all that steam trapped inside rushes out, and you’re left with a gummy, sticky crumb in the center. Giving it an hour or so lets the internal structure set up properly, ensuring you get the light, airy texture that makes this flavorful homemade loaf so perfect.
Nutritional Estimates for Garlic Herb Dutch Oven Bread
If you’re keeping track of macros or just curious about what’s in this glorious savory loaf, here’s the rundown. Now, remember this is just an estimate! Since this is made from scratch, things like the exact brand of flour you use or how much olive oil you brush on at the end will change the final numbers. But as a general guide for one slice, it’s pretty reasonable for an artisan bread baking at home treat!
I always stress that because we aren’t adding any sugar other than what’s naturally in the flour, the sugar content is super low, which I love. Here are the details based on my best calculations for this Garlic Herb Dutch Oven Bread recipe:
- Serving Size: 1 slice
- Calories: 185
- Fat: 2.1g
- Carbohydrates: 36.5g
- Protein: 5.8g
We are doing great on the cholesterol front—zero! And you get a touch of fiber in there too. If you’re finding eating homemade bread hard to fit into your goals, remember, this is a whole-food recipe, so way better than anything processed you pick up at the grocery store!
Share Your Rustic Loaf Recipe Experience
Well, that’s it! You’ve reached the end of the journey, and now your kitchen should smell absolutely heavenly thanks to this Garlic Herb Dutch Oven Bread. Seriously, I just can’t wait to hear how yours turned out.
Did the crust crackle just right for you? Did the rosemary and garlic really shine through? I really want to know if you tried my little trick of lightly sautéing the garlic first! Don’t be shy—jump down to the comments below and leave me a rating—five stars if you loved it, of course!
If you snap a photo of your beautiful rustic loaf recipe crackling on the cooling rack, please tag me! I absolutely love seeing your creations. You can find all my latest baking adventures over on my main blog category page right here: Find More Delicious Recipes Here! Happy baking, friends!
PrintGarlic Herb Dutch Oven Bread
Make a flavorful, crusty artisan loaf using the simple no-knead method in your Dutch oven. This recipe infuses the dough with fresh garlic and savory herbs.
- Prep Time: 10 min
- Cook Time: 50 min
- Total Time: 13 hours 0 min
- Yield: 1 loaf
- Category: Bread
- Method: Baking
- Cuisine: American
- Diet: Vegetarian
Ingredients
- 3 cups All-Purpose Flour
- 1 1/2 teaspoons Salt
- 1/4 teaspoon Instant Dry Yeast
- 1 1/2 cups Cool Water
- 2 cloves Fresh Garlic, minced finely
- 1 tablespoon Fresh Rosemary, chopped
- 1 tablespoon Fresh Thyme leaves
- 1 tablespoon Fresh Parsley, chopped
- 2 tablespoons Olive Oil
Instructions
- In a large bowl, whisk together the flour, salt, and yeast.
- Add the minced garlic, rosemary, and thyme to the dry ingredients. Mix briefly.
- Pour in the cool water and olive oil. Stir with a wooden spoon until a shaggy, sticky dough forms. Do not overmix.
- Cover the bowl tightly with plastic wrap and let the dough rest at room temperature for 12 to 18 hours. The dough will become bubbly and increase in volume.
- About 30 minutes before baking, place your empty Dutch oven (with the lid on) into your oven. Preheat the oven to 450 degrees Fahrenheit (232 degrees Celsius).
- Once preheated, carefully remove the hot Dutch oven from the oven.
- Lightly flour a piece of parchment paper. Gently scrape the dough onto the paper. Sprinkle the chopped parsley over the top of the dough.
- Using the parchment paper as a sling, carefully lower the dough into the hot Dutch oven. Cover with the lid.
- Bake covered for 30 minutes.
- Remove the lid and continue baking for another 15 to 20 minutes, or until the crust is deep golden brown.
- Carefully remove the bread from the Dutch oven and let it cool completely on a wire rack before slicing.
Notes
- For a stronger garlic flavor, you can lightly sauté the minced garlic in 1 teaspoon of olive oil for 1 minute before adding it to the dry ingredients.
- If your dough sticks to the bottom, ensure you use enough parchment paper and that the Dutch oven was fully preheated.
- This bread pairs well served warm with butter or dipped in olive oil and balsamic vinegar.
Nutrition
- Serving Size: 1 slice
- Calories: 185
- Sugar: 0.3
- Sodium: 380
- Fat: 2.1
- Saturated Fat: 0.3
- Unsaturated Fat: 1.8
- Trans Fat: 0.0
- Carbohydrates: 36.5
- Fiber: 1.3
- Protein: 5.8
- Cholesterol: 0