

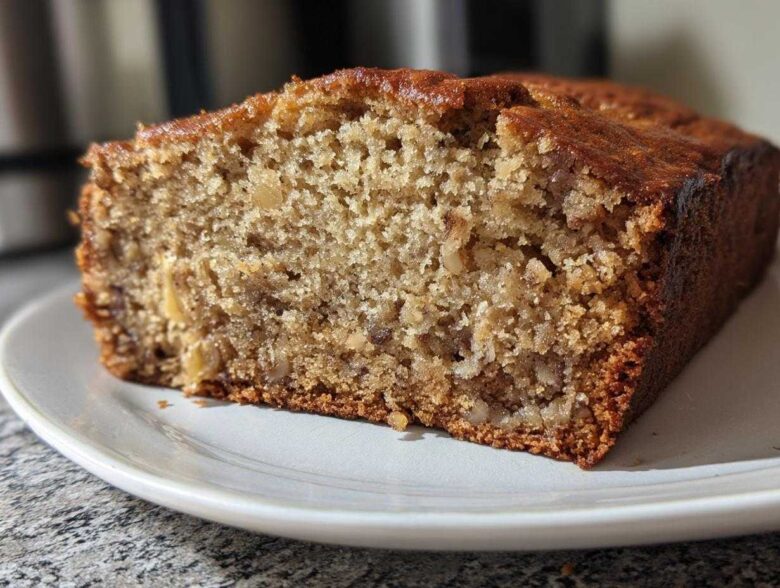
There is nothing quite like pulling a loaf of warm, sweet bread out of the oven, right? That smell—cinnamon, vanilla, and the deep caramel note of browned bananas—it just instantly teleports me back to my childhood kitchen. My Grandma always said baking saves food and feeds the soul, and honestly, that’s why I’ve perfected this particular recipe. I swear, I have tried every version out there, but the secret to achieving that impossibly moist result when you bake banana bread comes down to a few simple steps and using bananas that are practically black!
Forget those dry, crumbly loaves you sometimes get. This straightforward method, which I’ve honed over years of kitchen experimentation—and yes, a few heartbreakingly dense failures—is the definitive guide. Trust me, after you try this, you’ll never look at another recipe again. We’re talking about a classic banana bread loaf that stays tender for days.
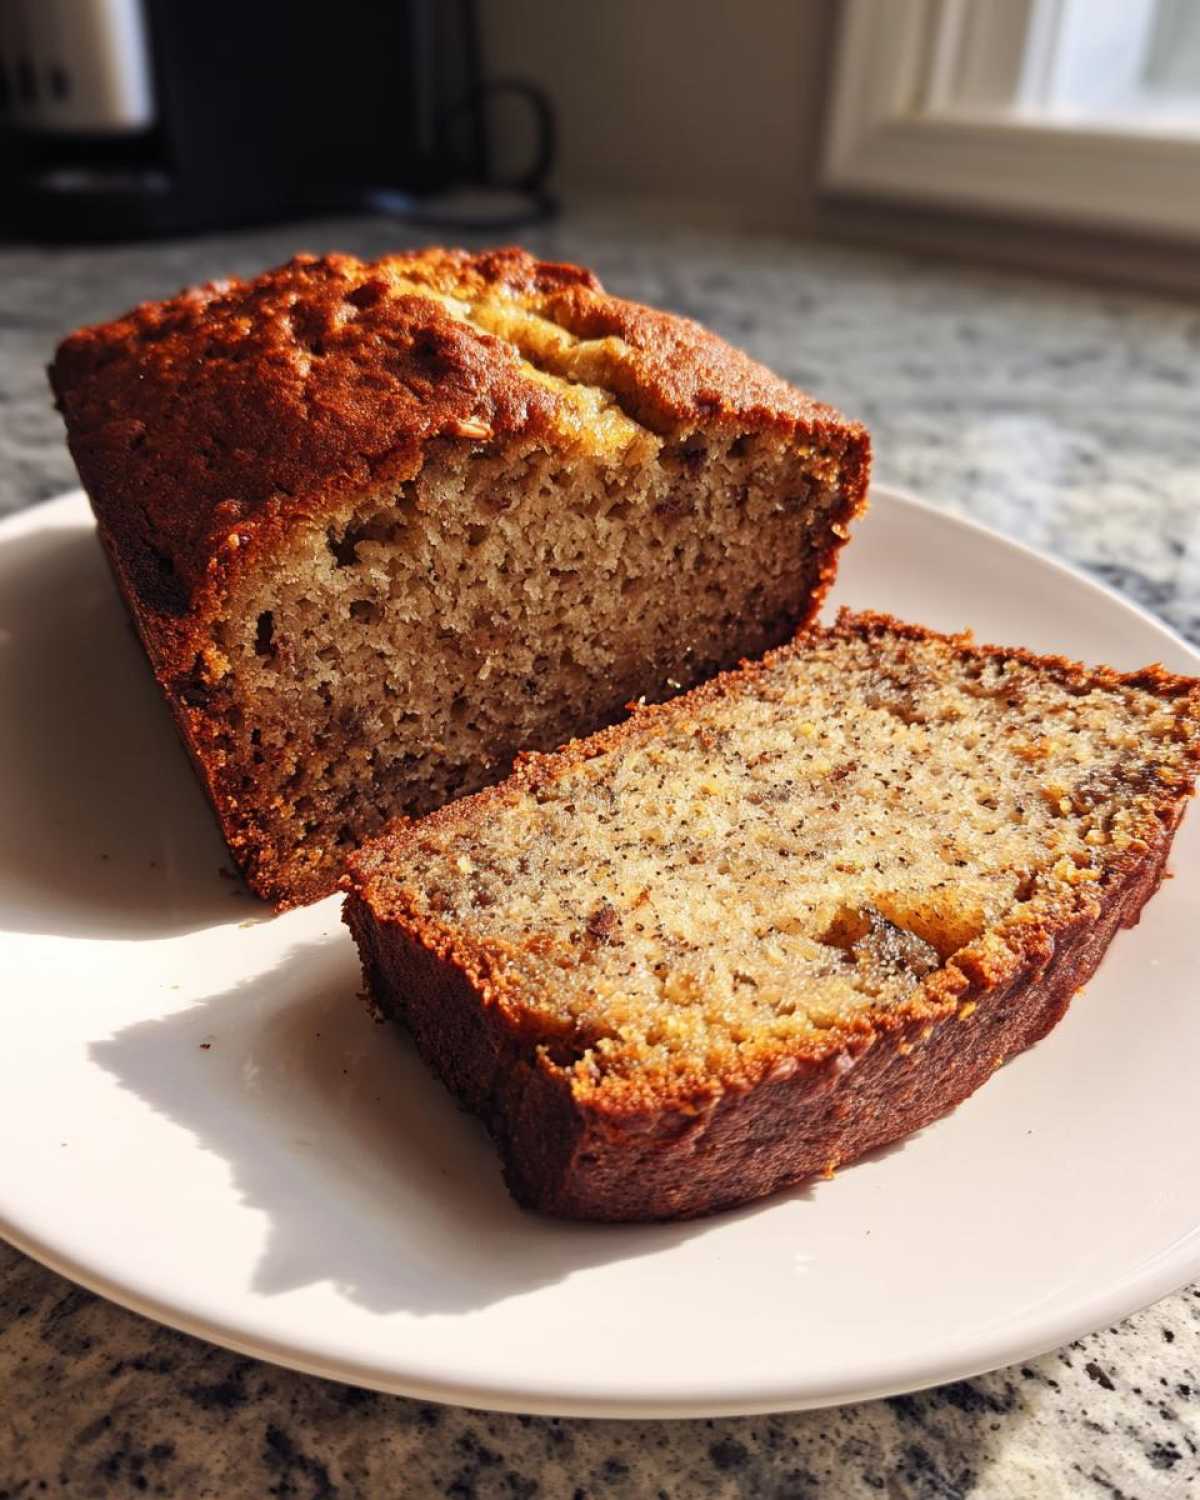
Why This is the Best Banana Bread Recipe for You
I know the internet is flooded with recipes, so why should you trust this one? Well, because it actually works, especially when you’ve got those sad, spotty bananas staring you down! This isn’t some complicated pastry class recipe, I promise. It’s the kind of sweet bread baking you can whip up right after work.
Here’s what makes this the best banana bread recipe around:
- You need virtually zero special equipment. Grab a bowl and a whisk!
- It is the ultimate solution for reducing food waste; we want those bananas looking really, really brown.
- The texture is consistently spot-on—moist, tender, and never gummy.
- It freezes beautifully, so you can make a double batch and save the other one for later.
If you want to see more of my favorite kitchen shortcuts and general musings on why we love homemade food, check out my main blog page here. But first, let’s get these bananas mashed!
Essential Ingredients to Bake Banana Bread Perfectly
The foundation of great banana bread is simple, but you have to respect the quality of those few ingredients. If you don’t have the right base, you’ll never unlock those moist banana bread secrets we talked about. I always lay everything out on the counter before I start, which is just good sense when you’re ready to bake banana bread.
You will need:
- 3 large overripe bananas, mashed until they are liquidy and wrinkly. Seriously, the spottier, the better!
- 1/3 cup melted unsalted butter—don’t skimp on the quality here, it adds so much flavor.
- 1 teaspoon baking soda—this is our main lift.
- A small pinch of salt to balance out that sweetness.
- 3/4 cup granulated sugar.
- 1 large egg, just beaten lightly; you don’t want it foamy.
- 1 teaspoon vanilla extract—pure, always!
- 1 1/2 cups all-purpose flour. That’s it for the main structure.
- Optional additions: 1/2 cup chopped walnuts or your favorite chocolate chips.
The biggest piece of advice I can give you: use truly brown bananas. Yellow bananas just don’t have the deep, complex sugar content needed for that naturally sweet, moist result. If you’re in a pinch and want to see how you can adapt this for less sugar, check out my take on sugar-free banana bread, but for this classic loaf, we need those dark fruits!
Ingredient Notes and Substitutions for Your Bake Banana Bread
When it comes to swaps, I usually preach sticking to the recipe, especially for tried-and-true formulas like this. However, I know people like options! If you want a deeper, richer flavor profile, try swapping half the white sugar for packed light brown sugar. That molasses in the brown sugar really complements the fruitiness.
Butter is ideal because of the richness it delivers, but if you absolutely must, you can substitute it with neutral oil like canola or vegetable oil, just use 1/4 cup instead of 1/3 cup of melted butter, as oil is 100% fat. Also, if you need a nut-free option (which is crucial for school lunches!), just skip the walnuts entirely and maybe boost the chocolate chips!
Simple Banana Bread for Beginners: Step-by-Step Instructions
This is where the magic happens, and truly, this recipe is so forgiving! Even if you’ve never baked anything beyond toast, you can nail this classic loaf. The goal here is speed and gentleness. We want to mix just enough to bring everything together, nothing more.
First thing’s first: get organized! Here are the quick directions:
- Preheat and Prep: You need the oven nice and hot. Set it immediately to 350°F (175°C). While that’s warming up, grease and flour your 9×5 inch loaf pan really well. No one likes a stuck loaf!
- In a large bowl, take those dark, mushy bananas and mash them until they are mostly smooth. A few small lumps are totally fine, but you want most of the banana broken down.
- Pour that melted butter right into the mashed banana mixture and stir it through.
- Now add the baking soda and salt. Give it a quick mix. You might see a tiny bit of action here—that’s good!
- Stir in the sugar, the lightly beaten egg, and your vanilla extract until it all looks consistent.
- Pay Attention Here (Step 6!): It is time for the flour. Gently add the 1 1/2 cups of flour all at once. Mix it with a rubber spatula only until *just combined*. I mean it—stop stirring the second you don’t see dry streaks of flour anymore.
- If you decided to use nuts or chocolate chips, fold those in very gently now.
- Pour that beautiful batter into your prepared pan.
- Into the oven it goes! Bake for 50 to 65 minutes.
- Let it rest in the pan for 10 minutes. This is critical! Then, flip it out onto a wire rack to cool completely.
If you’re looking for more guidance on making sure everything comes out perfectly, I’ve linked my recipe for banana bread brownies, which also relies on similar mixing techniques.
Achieving Moist Banana Bread Secrets During Mixing
The biggest difference between dry bread and the moist banana bread secrets I promised you lies right in Step 6. When you mix flour, you develop gluten. Too much gluten development means a tough, chewy, and decidedly *not* moist bread. We want tender crumb, not bread that fights back!
That’s why we mix the wet ingredients completely separately first. We fully hydrate the sugar and activate the leavening agent (the baking soda) with the fruit. When you finally introduce the flour, all you need to do is incorporate it barely enough to wet the dry parts. Think about folding it over itself gently, not whipping it like you’re making meringue. If you see a little bit of flour still showing when you pour it into the pan, that’s better than overmixing! That gentle folding keeps the texture light, even though it’s a dense loaf.
How Long to Bake Banana Bread: Checking for Doneness
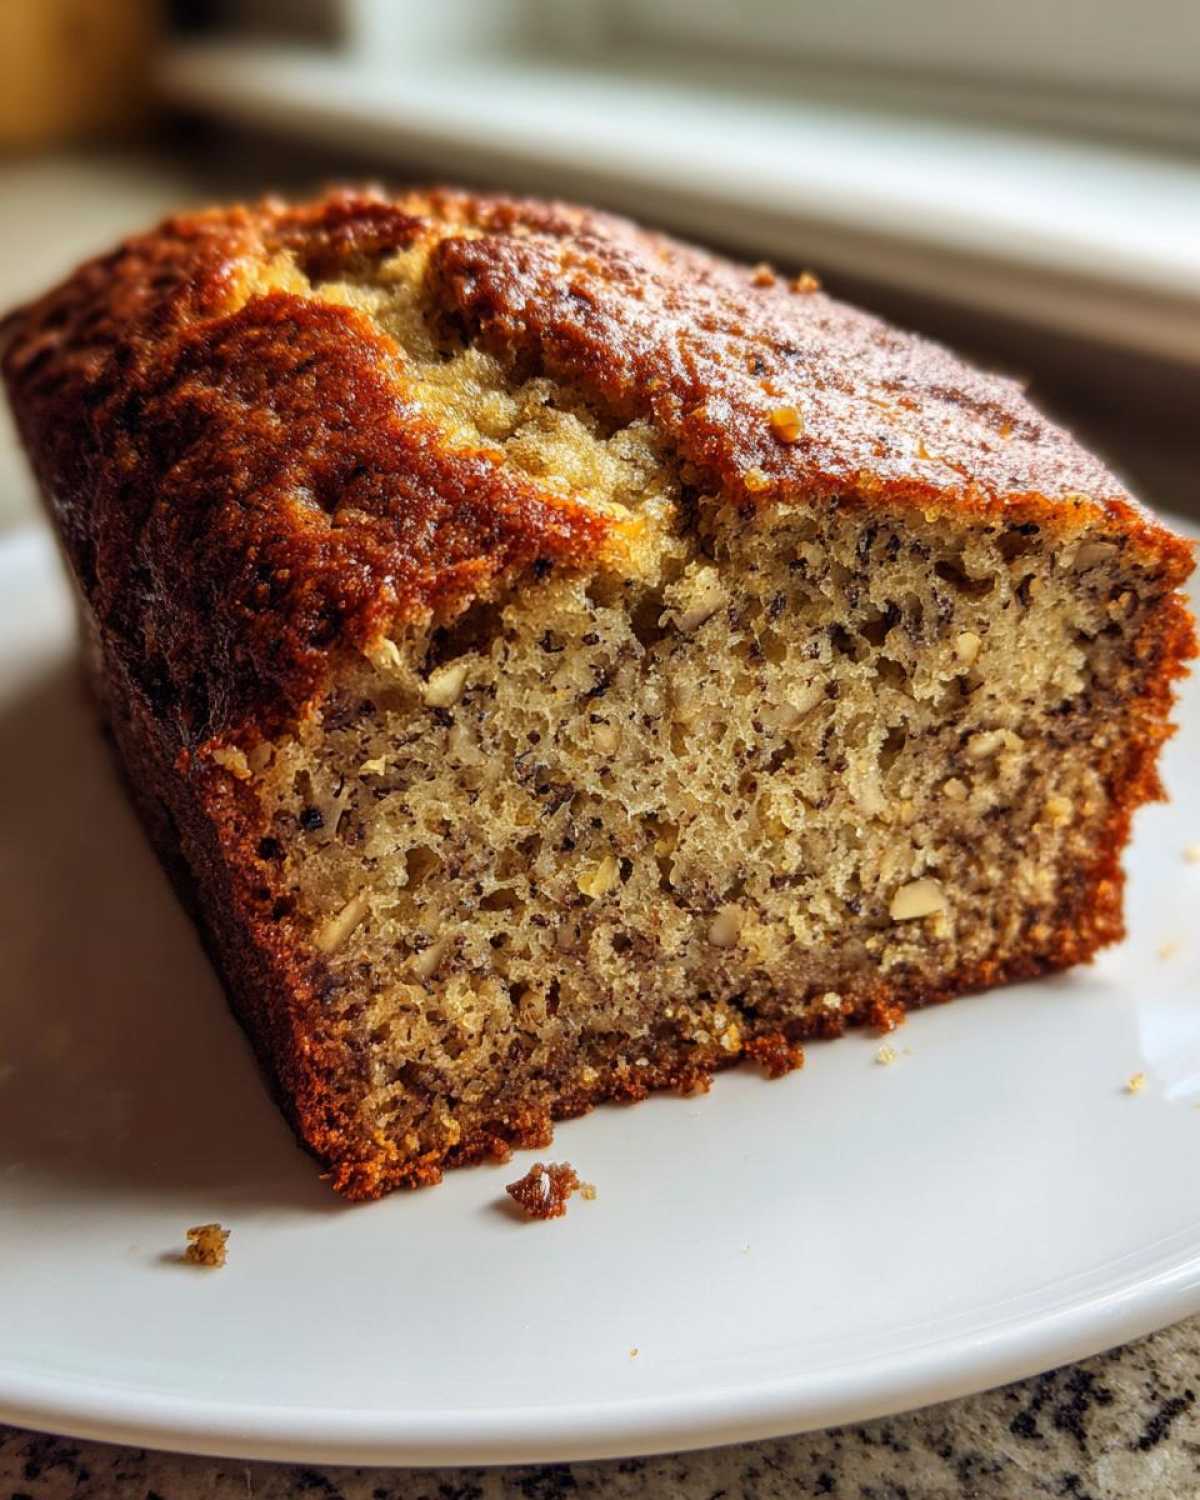
Now for the moment of truth! Setting the timer for a specific time is only the first part of knowing how long to bake banana bread. Because ovens vary wildly—mine runs hot, yours might run cool—you need to check for doneness around the 50-minute mark. The recipe says 50 to 65 minutes, so start checking early!
The classic test is the toothpick test: stick a wooden skewer or toothpick right into the thickest part of the loaf. If it comes out clean, you’re mostly done. However, because we prize moisture so highly, I look for just a couple of moist crumbs clinging to the stick—not wet batter, just crumbs! If you don’t have a toothpick handy, gently press the top of the loaf with your fingertip. If it springs right back at you, it’s ready to come out. This gentle bounce tells you the structure is set.
Once it passes the test, pull it out and let it rest in that hot pan for exactly 10 minutes. Don’t skip that initial cooling period; it helps the loaf firm up before you try to move it. For more baking confidence tips across different fruit breads, you can look at my moist pumpkin bread guide!
Tips for Success When You Bake Banana Bread
Okay, we’ve mixed it gently, and we think it’s baked through. But a little extra TLC when you bake banana bread means the difference between good and legendary. My number one pro tip, beyond the mixing, is about cooling down. Don’t rush taking it out of the pan!
That 10 minutes I mentioned earlier is non-negotiable. If you try to dump it out too soon, the structure is still too delicate, and you’ll end up with a sad, broken bottom crust. For the final cool, make sure you use a wire rack—air circulation is key to prevent condensation, which is the enemy of a perfectly dry top crust.
Also, think about your pan size. If you use a narrower, deeper loaf pan than the standard 9×5 inch I suggest, you absolutely need to reduce your temperature by 25 degrees and add 10 to 15 minutes to the bake time to avoid a burnt edge and a raw middle. For fantastic tips on managing moisture in other delicious quick breads, check out my thoughts on moist spice cake!
Best Mix Ins for Banana Bread and Flavor Variations
After you master the basic loaf, the fun really starts because this batter is just begging for mix-ins! I usually divide my batter in half when I make it—one batch plain and one batch loaded up. For chocolate lovers out there, you absolutely have to try tossing in about half a cup of semi-sweet chocolate chips. Don’t use the mini ones; they vanish! I have a whole deep dive on that chocolate chip banana bread if you want the full story.
Chopped toasted walnuts are the classic, of course. They add a wonderful crunch that contrasts nicely with the soft crumb. If you do use nuts, double-check if you need a nut free banana bread option for friends or family—if so, just skip them completely!
Want more spice? A teaspoon of cinnamon or even a dash of nutmeg blended into the dry ingredients before you add them makes the whole house smell incredible. You can totally simplify this recipe into muffins too, but always remember, muffins usually bake faster than a full loaf!
Storing and Reheating Your Classic Banana Bread Loaf
Nobody wants to see this beautiful loaf go bad! Thankfully, this moist banana bread keeps really well, which is what makes it such a great staple loaf. For the best flavor outcome, always store your cooled classic banana bread loaf tightly wrapped—I use plastic wrap followed by a layer of foil—at room temperature. It stays perfectly moist like this for three or four days.
If you made too much? You can totally freeze it! Wrap individual slices tightly in plastic wrap, then put them all together in a freezer bag. Need it warm right now? Pop a slice in the microwave for just 15 seconds, or wrap it in foil and warm it in a 300°F oven for about 10 minutes. If you’re curious about how other fruit breads like applesauce cake hold up, give my applesauce cake recipe a look!
Frequently Asked Questions About Banana Bread
I always get the same batch of questions when people first try this, so let’s just clear those up right now so you can jump right into baking! Armed with the right answers, you’ll find this recipe is incredibly reliable.
Here are a few things folks ask me all the time:
- Can I use yellow bananas instead of brown ones? You technically can, but wow, the flavor won’t be the same! Yellow bananas haven’t converted all their starch to sugar yet. If you use them, you’ll notice the bread isn’t as sweet or as moist.
- Why is my banana bread dense and gummy? Nine times out of ten, this is from overmixing the flour. Remember what I said? Stop stirring the second the dry ingredients disappear. That makes for a tough loaf!
- Can I freeze this banana bread loaf? Absolutely! Wrap individual slices tightly in plastic wrap, then put them all together in a freezer bag. It keeps beautifully for about three months. Thaw on the counter or briefly reheat.
What is the best way to ripen bananas quickly for baking?
Oops! You went to the store, saw bananas that were still yellow, and now you want to bake right now? I totally get that impatience! No worries, we can cheat the process. Just toss your unpeeled bananas onto a baking sheet. Throw them in a 300°F oven for about 15 minutes. The skins will turn completely black, and they’ll be perfectly soft and sweet inside for mashing. It works like a charm when you need that banana bread ASAP! If you want to see another delicious quick bread you can whip up using fruit, check out my date nut bread recipe next!
Estimated Nutritional Information
Now, I have to give you the official heads-up here. This is a classic, delicious, buttery loaf, so it’s definitely not health food—it’s a treat we bake with love! The estimates I have here are based on the recipe using all-purpose flour and a mix of walnuts. If you swap out ingredients, especially the sugar or the fat used, those numbers are going to change!
Here is a general snapshot:
- Serving Size: 1 slice
- Calories: Around 250
- Sugar: 18g
- Fat: 11g (with 6g saturated)
- Carbohydrates: 38g
- Protein: 4g
Just remember, this is what happens when you bake the best, most moist banana bread! It’s meant to be comforting and rich. For those days you are looking for something a little lighter, you might want to check out my recipe for almond flour pancakes instead. Enjoy every slice!
PrintClassic Moist Banana Bread
Follow these simple steps to bake a moist, flavorful loaf of banana bread using overripe bananas.
- Prep Time: 15 min
- Cook Time: 60 min
- Total Time: 75 min
- Yield: 1 loaf (about 10 slices)
- Category: Dessert
- Method: Baking
- Cuisine: American
- Diet: Vegetarian
Ingredients
- 3 large overripe bananas, mashed
- 1/3 cup melted unsalted butter
- 1 teaspoon baking soda
- Pinch of salt
- 3/4 cup granulated sugar
- 1 large egg, lightly beaten
- 1 teaspoon vanilla extract
- 1 1/2 cups all-purpose flour
- Optional: 1/2 cup chopped walnuts or chocolate chips
Instructions
- Preheat your oven to 350°F (175°C). Grease and flour a 9×5 inch loaf pan.
- In a large bowl, mash the bananas until mostly smooth.
- Stir the melted butter into the mashed bananas.
- Add the baking soda and salt to the banana mixture and mix well.
- Stir in the sugar, beaten egg, and vanilla extract until combined.
- Gradually add the flour to the wet ingredients, mixing only until just combined. Do not overmix.
- If using, fold in the nuts or chocolate chips now.
- Pour the batter into the prepared loaf pan.
- Bake for 50 to 65 minutes, or until a toothpick inserted into the center comes out clean.
- Let the bread cool in the pan for 10 minutes before turning it out onto a wire rack to cool completely.
Notes
- For a richer flavor, substitute half the granulated sugar with packed light brown sugar.
- If your bananas are not very ripe, you can bake them on a baking sheet at 300°F for 15 minutes to speed up the ripening process before mashing.
- To check for doneness without a toothpick, gently press the top of the loaf; if it springs back, it is likely done.
- Store cooled banana bread tightly wrapped at room temperature for up to 4 days.
Nutrition
- Serving Size: 1 slice
- Calories: 250
- Sugar: 18g
- Sodium: 150mg
- Fat: 11g
- Saturated Fat: 6g
- Unsaturated Fat: 5g
- Trans Fat: 0g
- Carbohydrates: 38g
- Fiber: 2g
- Protein: 4g
- Cholesterol: 35mg