

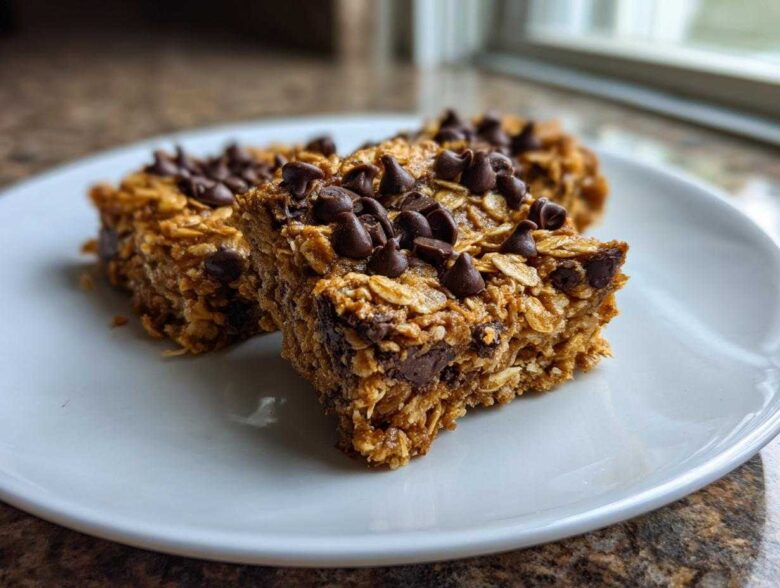
Listen, between school lunches, afternoon slumps, and needing something quick for breakfast that doesn’t feel like a dusty box of granola, I need snacks that bake themselves. And trust me, I have tried *every* variation of oatmeal bar out there. Seriously, I’ve been chasing the perfect texture for years! So when I tell you I perfected these Banana Oats Bars, I mean it. This specific recipe—the Chewy Baked Banana Oatmeal Bars with Dark Chocolate Chips—is my absolute gold standard. They are sturdy enough for a lunchbox but still melt-in-your-mouth soft, and that little hit of melted chocolate? Game changer. I’ve made this batch more times than I can count, tweaking the banana ratios until they were the chewiest, most satisfying snack bars possible.
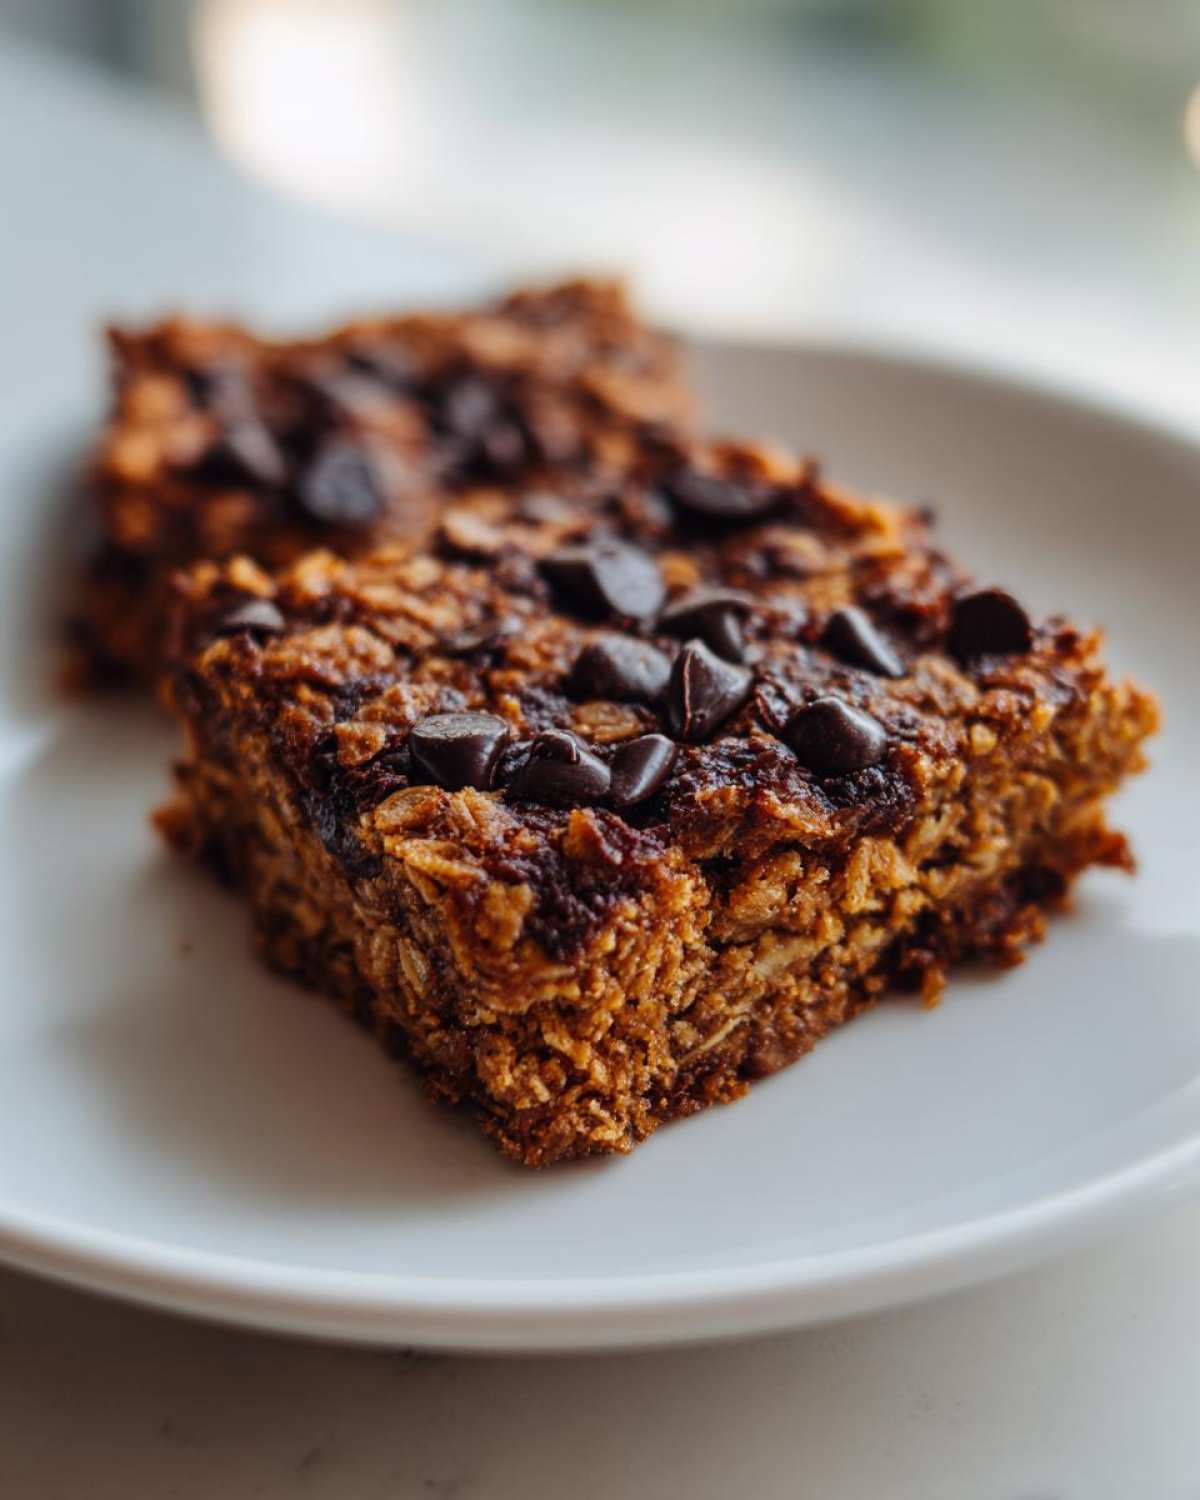
Why This is the Best Chewy Baked Banana Oats Bars Recipe
If you were hunting for the absolute easy banana oatmeal bars recipe, congratulations, you found it! These aren’t the dry, crumbly ones that shatter the second you try to move them. These are satisfying, hearty, and surprisingly healthy. They tick every box:
- They come together in seriously under 15 minutes of hands-on time.
- They bake up wonderfully golden, perfect for packing up to make ahead.
- They are naturally sweetened, relying mostly on the banana’s sweetness.
Perfect Texture: Achieving Chewy Banana Oats Bars
The secret to that amazing chewiness is all in the liquid ratio. We use just enough melted coconut oil and maple syrup to bind that mashed banana, but we make sure the oats are the main bulk. This keeps them dense and chewy, not fluffy like a cake!
See how easy that is? Now, let’s get those ingredients ready. If you love moist banana baked goods, you’re going to adore this foundation.
Gathering Ingredients for Your Banana Oats Bars
Okay, time to talk groceries! This recipe is fantastic because it uses stuff you probably already have lurking in the pantry. Seriously, no fancy almond flour or obscure seeds required here. We’re keeping things simple for these super satisfying Banana Oats Bars. Grab your list, and let’s check off what we need for the best chewy result.
You’ll need two really ripe bananas—I mean, brown spots everywhere, almost too soft to eat straight—about 1/2 cup of melted coconut oil, and just enough maple syrup to keep things sweet and chewy. We’re swapping out most of the sugar, which is why I love this one so much!
For the structure, we rely on 1 1/2 cups of good old rolled oats, along with about 1/2 cup of whole wheat flour for a little extra body. And don’t forget the mandatory addition: that 1/2 cup of dark chocolate chips! If you want to check out some other great oat recipes while you’re gathering everything, I’ve got my favorite fluffy pancake recipe here.
Ingredient Notes and Simple Substitutions for Banana Oats Bars
This is where we make it work for *your* kitchen! If you need gluten free banana oat bars, it’s the easiest swap ever: just make sure those rolled oats are certified gluten-free. Easy peasy. For those watching sugar, I mentioned it before, but you can definitely cut back to 3 tablespoons of maple syrup if you want something closer to low sugar banana oat bars—the banana still provides plenty of sweetness.
If you don’t have coconut oil, melted unsalted butter works in a pinch, though I find the coconut oil helps them firm up nicely when they cool down. Coconut oil is your friend for achieving that perfect texture!
Step-by-Step Instructions: Making Perfect Banana Oats Bars
I always tell people that the magic of these Banana Oats Bars isn’t in the ingredients, it’s in the process. It’s fast, sure, but if you rush the steps, your texture will suffer. We need that perfect balance—not too much liquid, not too much flour. If you follow these steps exactly, you’ll have the best chewy banana bars imaginable. Don’t stress about being an expert; just follow the flow!
Preparing the Pan and Oven for Baked Banana Oats Bars
First things first, get your oven warmed up. We need it cruising at 350°F (or 175°C) when the batter is ready. While it heats, grab that 8×8 inch baking pan. Now, this is a trick I learned the hard way when trying to get bars out of a pan cleanly: line it with parchment paper! Leave an overhang on two sides—just let the paper peek over the edges. This lets you lift the entire cooled block of bars out in one piece later, saving you a huge headache.
Mixing the Wet and Dry Components for Banana Oats Bars
Start with the wet stuff in your big bowl. Mash those ripe bananas until they’re practically soup, then whisk in your melted coconut oil, maple syrup, and vanilla. It should look gorgeously smooth and golden. In a separate bowl, you’re just going to gently whisk the dry stuff: oats, flour, baking powder, cinnamon, and salt. You just want those mixed well enough that the baking powder is evenly distributed.
Now, tip the dry mix into the wet bowl. Here’s my big tip, and listen closely: Mix only until you see no more streaks of dry flour. Stop! Seriously! If you mix too much, you develop the gluten in the flour and oats, and suddenly your bars turn hard and cakey instead of perfectly chewy. Do not overmix! Once those chips go in, give it one or two final gentle folds, and that batter is done. It will look thick, which is exactly what you want for those simple breakfast bars with oats.
If you want to see my absolute favorite way to make next-level oatmeal cookies (which share a lot of the same foundation as these bars), check out my guide on the best oatmeal cookie recipe for soft, chewy results!
Baking Time and Cooling for Ideal Banana Oats Bars
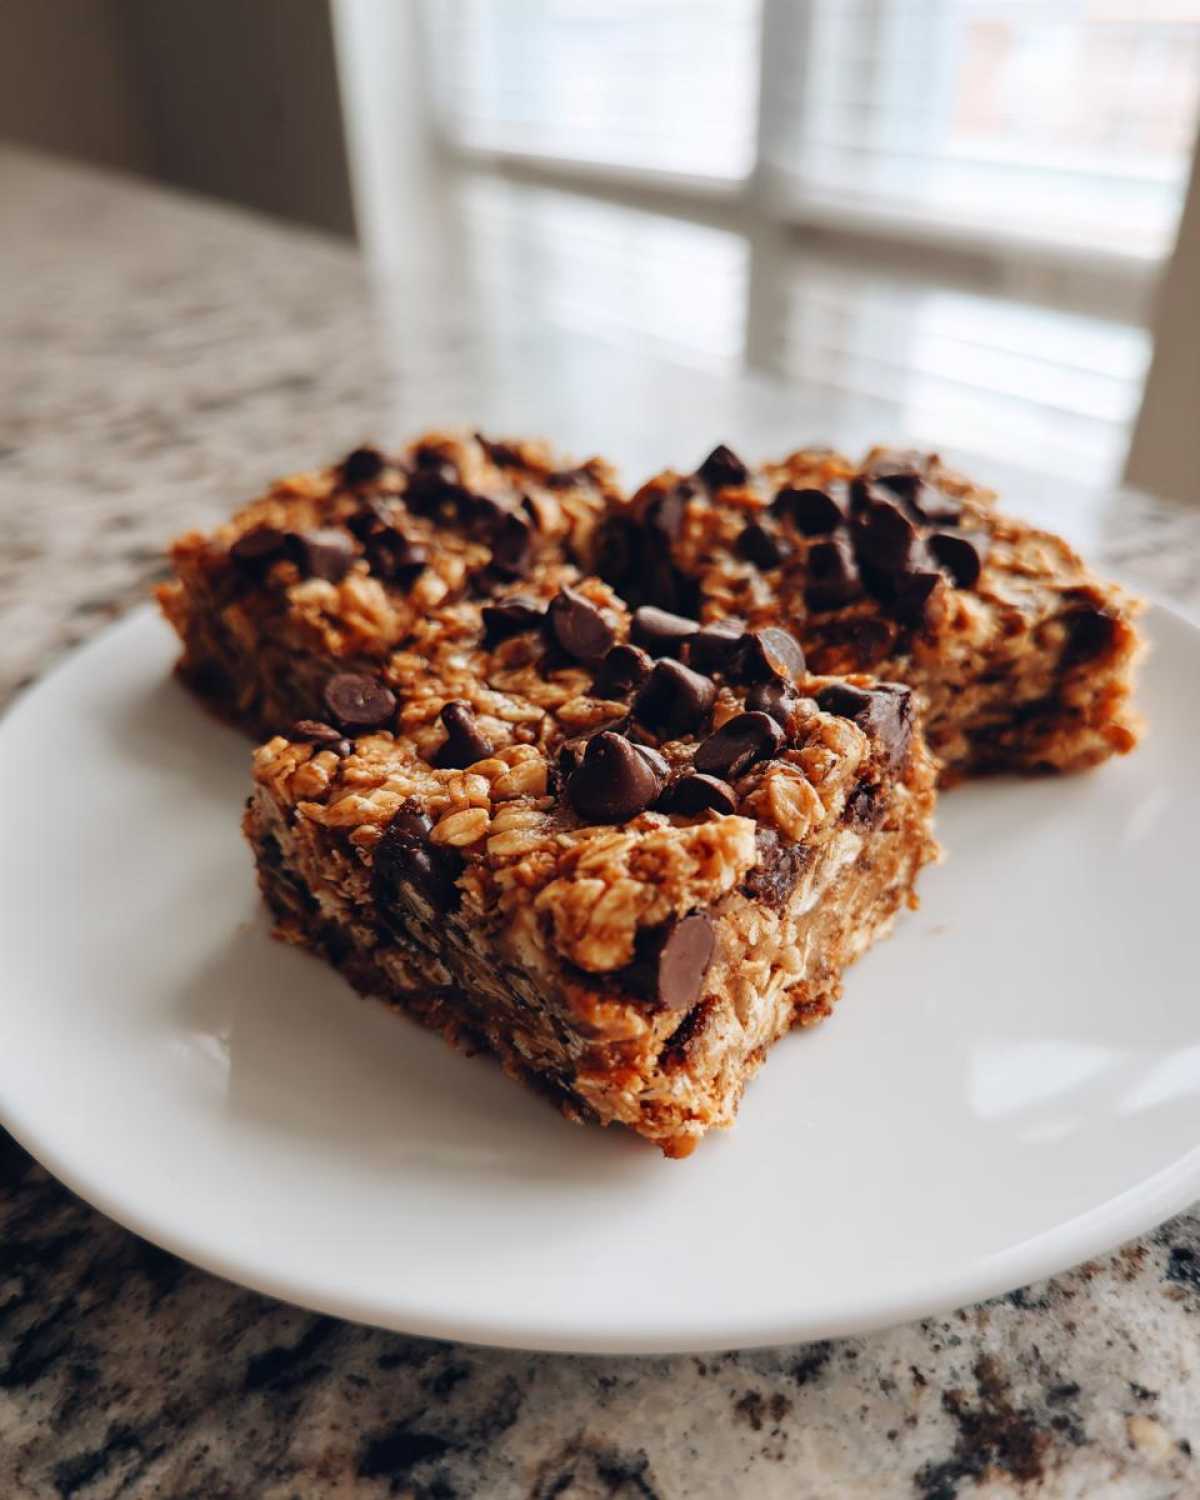
Alright, the batter is spread, it looks beautifully thick and chunky in the pan, and now we wait! These Banana Oats Bars need about 25 to 30 minutes in that 350°F oven. Keep an eye on them, because ovens vary like crazy, right? You’re looking for visual cues that scream “I’m done!” The edges should look nicely golden brown—not burnt, just well-baked and slightly pulling away from the parchment paper you set up.
When you test them, use a toothpick inserted right into the center. If it comes out with wet batter, give it 5 more minutes. If it comes out mostly clean, maybe with a few moist crumbs clinging to it, that’s your perfect signal. If it comes out bone dry, congratulations, you baked too long! But don’t panic if that happens; we can fix almost anything.
Now, here is the most important, most annoying rule for achieving maximum chewiness: You have to let them cool completely. I know, I know, the smell when they first come out is divine, and you want to dive right in. But if you try to cut into them warm, they will absolutely crumble and fall apart. They need that full cooling time—at least an hour on the counter—to let the coconut oil and the mashed banana truly set up and bond with those oats. That cooling period is what locks in the chew! Once they are set, you can grab that parchment sling and lift that whole beautiful slab out for perfect squares. If you like other bar recipes that rely on that cooling time, you should check out my cranberry crumble bars sometime!
Tips for Success with Your Banana Oats Bars
I’ve made these Banana Oats Bars so many times that I swear I can bake them mostly by smell now! But for you, starting out, there are just a couple of things that will guarantee you get that perfect, bakery-quality result versus one that’s just… okay. You want the *best*, right?
First, let’s talk about those bananas again. If you think your bananas are ripe enough, wait three more days. That deep, almost black exterior is where all the essential moisture and natural sweetness lives to make these bars soft. Underripe bananas mean you’ll have to add more maple syrup, and that totally defeats the purpose of a simple, wholesome snack!
Second, I cannot stress enough how much oven consistency matters. If your oven runs hot, those edges will burn before the middle sets. If you are having trouble with the center setting correctly, I really recommend investing in a cheap oven thermometer. Knowing your *actual* temperature versus what the dial says is a game-changer for all baking, especially for these healthy baked oatmeal bars.
Finally, don’t mess with the baking powder quantity. It looks like a small amount, but it’s the only real lift we have since we’re avoiding tons of fluff. Too much, and they get metallic; too little, and they get leaden. Trust the teaspoon measure!
If you’re looking for even more ways to make great snacks quickly, I have a super simple 5-ingredient protein bar recipe that uses almost zero dishes!
Storage and Make Ahead Options for Banana Oats Bars
One of the best—maybe *the* best—things about these Banana Oats Bars is that they are fantastic for making ahead! I often bake a full batch on Sunday night, and honestly, they make my grab-and-go breakfast situation for the whole week perfect. Since these are so dense and hearty, they hold up beautifully.
The main storage rule is keeping them airtight. Once they are completely cooled (remember that crucial cooling step?), cut them up into those 16 squares and store them in a container with a tight lid. I usually just keep mine right on the counter at room temperature. They stay wonderfully fresh and chewy for up to four days this way. They actually seem to get even a little chewier on day two, which I personally love!
If you make a huge batch and know you won’t eat them within four days, you can absolutely freeze them! Wrap individual bars tightly in plastic wrap, and then place the wrapped bars into a zip-top freezer bag. They last great in the freezer for about two months. When you want one, just pull it out the night before and let it thaw on the counter, or zap it for 15 seconds in the microwave if you’re desperate. This is why these are seriously the **make ahead snack bars** I rely on!
If you’re trying to meal prep for even bigger items, sometimes I rely on my freezer breakfast burrito recipe, but for quick, healthy weekday snacks, these bars are unbeatable.
Variations on Classic Banana Oats Bars
While this recipe for Banana Oats Bars—with the dark chocolate chips—is my favorite way to make them, I totally get that everyone’s pantry and dietary needs are different! It’s important that a good recipe can flex a little bit. We’re aiming for versatile, wholesome snacks here, so let’s talk about how you can tweak this base recipe to fit whatever you need.
If you’re swapping ingredients, just remember the golden rule: don’t change the ratio of wet to dry too much, or you lose that perfect chewy structure we worked so hard for! For instance, if you want to add nuts, that’s great! Just chop them coarsely and fold them in with the chocolate chips. Walnuts or pecans give these oatmeal snack bars for school a really satisfying crunch.
You can also play with spices! A tiny pinch of allspice or a bit of finely grated orange zest added to the dry ingredients pumps up the flavor profile instantly. It keeps them exciting even when you are making a big batch for meal prep. If you need other gluten-free inspiration, I love these gluten-free blueberry muffins, too!
Creating Vegan Banana Oat Bars Recipe
Making these vegan is almost as easy as the base recipe, which is wonderful! Since we aren’t using butter or eggs, most of the work is already done for you. The key is twofold: First, double-check your maple syrup—it’s almost always vegan, but it’s good practice to quickly confirm. Second, make sure those dark chocolate chips you fold in are dairy-free. Many high-quality dark chocolates are naturally vegan, but some have hidden milk fat, so just look for that label!
That’s it! No need to worry about flax eggs or tricky binders here. The mashed banana and coconut oil handle all the binding work you need when creating those wonderfully vegan banana oat bars recipe favorites.
Frequently Asked Questions About Banana Oats Bars
I totally get it—when you find a recipe you love, you instantly start wondering how to tweak it or troubleshoot issues. I’ve answered the top questions I always get about these Banana Oats Bars so you can bake with confidence!
Can I use quick oats instead of rolled oats?
This is a popular question, especially if you’re looking for something even faster! You absolutely can use quick oats, but be warned: they will absorb liquid faster and result in a softer, almost mushier texture. If you want that signature chew, stick to old-fashioned rolled oats. Quick oats are better for my overnight oats recipe, but for baked bars, stay rolled!
How do I make these bars firmer and less chewy?
If you’re looking for something that feels more like a shelf-stable granola bar or a firm square, you need to reduce the moisture slightly. You can increase the whole wheat flour from 1/2 cup to 3/4 cup, or alternatively, slightly reduce the amount of maple syrup by about a tablespoon. Less liquid equals a firmer final product—just be sure they bake until the toothpick comes out completely dry!
Can I make these flourless banana oat bars?
Yes! It’s super simple to make these completely flourless banana oat bars. Just skip the 1/2 cup of whole wheat flour entirely. Because you’ve removed one of the main binders, you might want to add an extra 1/4 cup of rolled oats to make sure the batter seems thick enough to spread. They will be a little more delicate when cutting, so letting them cool is even more crucial!
My banana oats bars are too sweet now, what do I do?
If you find your bars turned out sweeter than you intended (maybe your bananas were super sweet!), you have two options. You can either gently drizzle the top with a tiny bit of melted, unsweetened dark chocolate right before cooling, which balances the sweetness nicely. Or, next time, stick to the substitution note I mentioned earlier and reduce the maple syrup to 3 tablespoons; that usually gets us into the perfect zone for a low sugar banana oat bars style snack.
Nutritional Estimates for These Healthy Baked Oatmeal Bars
I know a lot of you grab these Banana Oats Bars because you want something satisfying that actually fits into your day-to-day healthy eating plan. While I’m not a nutritionist, I ran these through a calculator just to give you a ballpark idea of what you’re getting per square. Remember, this is based on using the full amount of maple syrup and standard dark chocolate chips, so your numbers might change if you use my low sugar banana oat bars modification!
Here’s the snapshot for one bar, yielding 16 servings:
- Calories: About 165
- Fat: 8g (with 5g saturated)
- Carbohydrates: 22g
- Protein: 3g
- Sugar: 8g (Remember, most of this comes from the natural banana and maple syrup!)
These really shine because they pack a good two grams of fiber from all those oats, making them great for keeping you full until lunch. If you’re curious about other options that use oats, you absolutely have to try my oatmeal chocolate chip breakfast cookies recipe—they’re another favorite snack bar base!
Just take these numbers as a general guide, okay? If you use olive oil instead of coconut, or if you use milk chocolate instead of dark, things shift! But for a homemade, preservative-free snack, I think these healthy baked oatmeal bars are a wonderful choice for the family.
PrintChewy Baked Banana Oatmeal Bars with Dark Chocolate Chips
Make simple, chewy banana oatmeal bars baked with dark chocolate chips. This recipe is easy to follow and results in a satisfying snack.
- Prep Time: 10 min
- Cook Time: 30 min
- Total Time: 40 min
- Yield: 16 bars
- Category: Snack
- Method: Baking
- Cuisine: American
- Diet: Vegetarian
Ingredients
- 2 ripe bananas, mashed
- 1/2 cup melted coconut oil
- 1/4 cup maple syrup
- 1 teaspoon vanilla extract
- 1 1/2 cups rolled oats
- 1/2 cup whole wheat flour
- 1 teaspoon baking powder
- 1/2 teaspoon ground cinnamon
- 1/4 teaspoon salt
- 1/2 cup dark chocolate chips
Instructions
- Preheat your oven to 350°F (175°C). Line an 8×8 inch baking pan with parchment paper.
- In a large bowl, mix the mashed bananas, melted coconut oil, maple syrup, and vanilla extract until combined.
- In a separate bowl, whisk together the rolled oats, flour, baking powder, cinnamon, and salt.
- Add the dry ingredients to the wet ingredients and mix until just combined. Do not overmix.
- Fold in the dark chocolate chips.
- Spread the batter evenly into the prepared baking pan.
- Bake for 25 to 30 minutes, or until the edges are golden brown and a toothpick inserted in the center comes out mostly clean.
- Let the bars cool completely in the pan before lifting them out and cutting them into squares.
Notes
- For gluten-free banana oat bars, use certified gluten-free rolled oats.
- If you prefer a less sweet bar, reduce the maple syrup to 3 tablespoons.
- Store leftovers in an airtight container at room temperature for up to 4 days.
Nutrition
- Serving Size: 1 bar
- Calories: 165
- Sugar: 8
- Sodium: 45
- Fat: 8
- Saturated Fat: 5
- Unsaturated Fat: 3
- Trans Fat: 0
- Carbohydrates: 22
- Fiber: 2
- Protein: 3
- Cholesterol: 0