

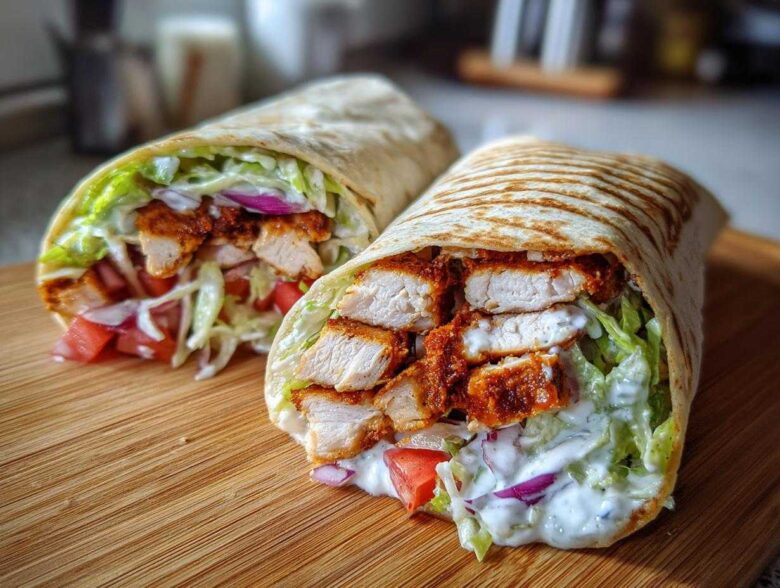
Oh my gosh, are you ever just *craving* that perfect crunch? You know the one—the kind that makes a tiny little shattering sound when you bite into it? I get it! That’s exactly why I spent nearly a whole month tweaking my triple-dip breading technique. Stop settling for soggy wraps, friends. Today, we are conquering the crave with the very best Crispy Chicken Wrap with Garlic Yogurt Sauce you’ve ever made. Seriously, this is my go-to for an easy weeknight chicken wrap dinner that feels totally gourmet.
The secret, and I mean the *real* secret, isn’t just the oil temperature—it’s how you treat that chicken before it even meets the heat. We want maximum texture here. Once you master this breading method, you won’t skip a single step, trust me. It results in shatteringly crisp chicken strips nestled inside a soft tortilla, cooled down by the brightest, zingiest sauce imaginable.
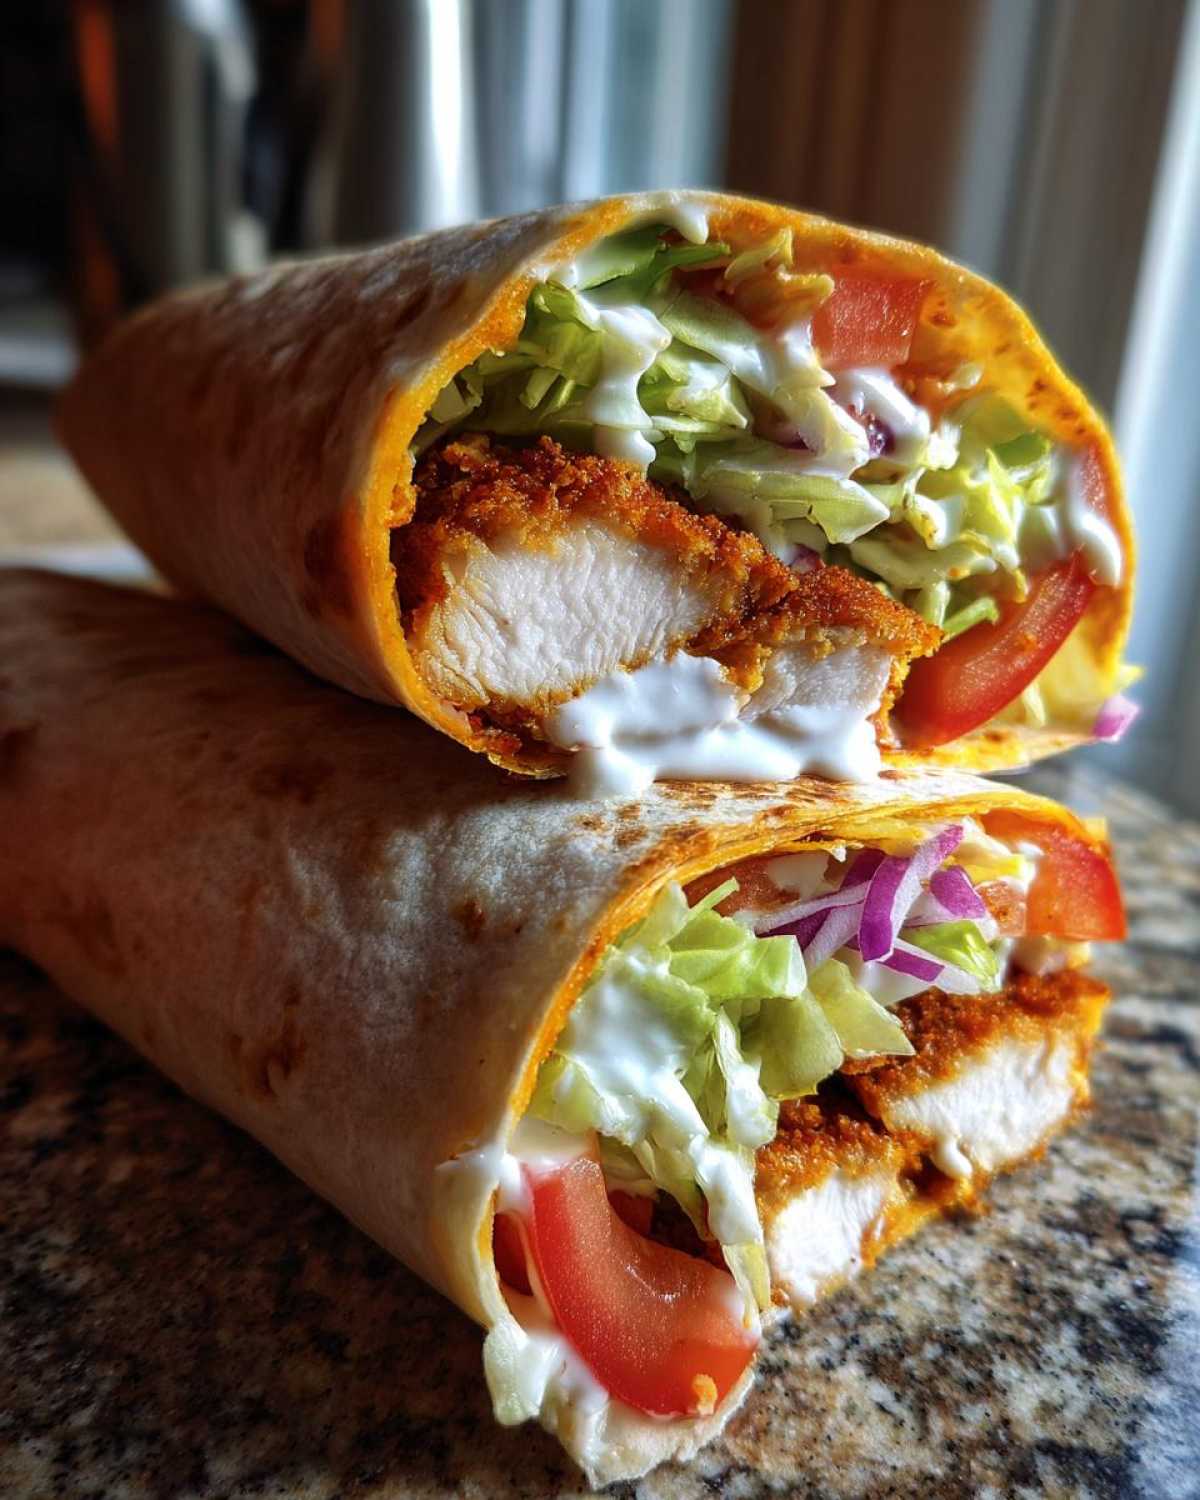
Why This Crispy Chicken Wrap with Garlic Yogurt Sauce Recipe Works
This isn’t just another recipe thrown together; this is all about texture and balance, which is why it guarantees success every time you’re looking for an Easy Chicken Wrap Dinner. You won’t find dry chicken or watery sauce here!
- Maximum Crisp: We use the Panko dream team here combined with a mandatory chill time. That crunch stays put, even after you roll it up.
- Bright, Zesty Sauce: Forget bland mayo! Our homemade garlic yogurt sauce cuts right through the richness of the fried chicken. It’s creamy but tangy, thanks to fresh lemon and dill.
- Quick Assembly: Since the chicken cooks up fast (especially in the air fryer!), you can have this spectacular wrap on the table in about 35 minutes flat. You really should check out my tips on getting juicy chicken while you’re setting up your dredging station!
Essential Ingredients for Your Crispy Chicken Wrap with Garlic Yogurt Sauce
When you’re aiming for the absolute best flavor and texture, I can’t stress this enough: the quality of your components matters! Don’t try to substitute the Panko for regular breadcrumbs—it just won’t give you that gorgeous, airy crunch we’re after. Gathering everything before you start prepping is key, especially since the chicken breading process moves quickly! If you’re interested in other quick meals, you can check out my old post on homemade cream of chicken soup recipes for inspiration!
For the Crunchy Panko Chicken
This is where the magic starts! You need three separate dishes set up for our dredging system.
- Chicken: You’ll need 2 large boneless, skinless chicken breasts, and I want you to slice those right into 1-inch strips, like fat little tenders.
- The Seasoned Flour: Mix 1 cup of all-purpose flour with 1 teaspoon of salt, 1 teaspoon of black pepper, 1 teaspoon of paprika, 1/2 teaspoon of garlic powder, and 1/2 teaspoon of onion powder.
- The Wet Binder: Just 2 large eggs, beaten nice and smooth.
- The Crunch Factor: 1 full cup of Panko breadcrumbs. This is non-negotiable for that light, crispy coating!
For the Homemade Garlic Yogurt Sauce
This sauce is bright, fresh, and takes about 60 seconds to whip up. It’s the perfect cool counterpoint to the hot, crunchy chicken.
- 1 cup plain Greek yogurt (I really prefer full fat here for that velvety texture, you can always thin it later if you need to!)
- 2 cloves garlic, minced so finely it practically disappears—or you might end up with a garlic chunk!
- 1 tablespoon fresh lemon juice. That fresh citrus zing is super important.
- 1 tablespoon fresh dill, chopped up. If you’re not a dill fan, parsley works too, but dill is my favorite secret weapon here.
- 1/4 teaspoon salt to make those flavors pop.
For Assembling the Best Chicken Wrap Ideas
We need sturdy vehicles for all this goodness, so choose your tortillas wisely! If they’re too flimsy, our beautiful crispy filling will just tear right through.
- 4 large flour tortillas—I mean the burrito-sized ones work best for rolling these babies up tight.
- 1/4 cup shredded lettuce. Feel free to use iceberg for extra snap!
- 1/2 cup sliced tomatoes.
- 1/4 cup thinly sliced red onion. That little bite of raw onion is fantastic!
How to Make Crispy Chicken for Wraps: The Breading Process
Okay, this is the part where we turn those plain chicken strips into the crunchy stars of our show! Don’t rush through our Homemade Chicken Breading Recipe; this three-step dance is what separates a mediocre wrap from something truly legendary. You’ve already got your seasoned flour, your eggs, and your Panko ready to go, right?
First, you take a chicken strip and give it a nice, thorough dust in the seasoned flour mixture. Make sure it’s coated on all sides, then shake off any huge excess clumps. You just want a thin layer of seasoned dust sticking to it. Think of this layer like the glue for everything else!
Next, dip that floured piece straight into the beaten eggs. Let any extra drip off for just a second. The egg is the binder that makes sure the crust stays put when it hits the hot oil. Don’t let it soak—a quick dip is all it needs.
Now for the big moment: the Panko! Drop the egg-coated chicken into your Panko breadcrumbs. This is crucial: you need to press the crumbs onto the chicken. Really press them in with your fingers gently. We’re not just tossing it; we’re adhering the breading so it can’t escape during frying. That firm pressure locks in the texture so you get that amazing shatter-crisp result!
Here’s a pro trip I learned the hard way: once all your chicken strips are breaded, don’t cook them immediately! Lay them out on a wire rack or a plate lined with parchment paper and pop them in the fridge for about 15 minutes. Seriously! This little chill time helps the breading firm up and stick even better. When they go into the hot oil or air fryer, that coating won’t surrender—you’ll see that beautiful crunch developing instantly. You can find some other great crunchy tips over at my guide for crispy air fryer chicken chimichangas, which uses a similar technique!
Cooking Methods for the Ultimate Crispy Chicken Wrap with Garlic Yogurt Sauce
Alright, the chicken is breaded and chilled—it’s ready for its transformation! We have two fantastic ways to cook this up. Whether you love the classic deep fry crunch or prefer skimming fat using the air fryer, both methods deliver that perfect texture needed for our Air Fryer Crispy Chicken Wrap dreams. Safety first, folks: chicken needs to hit 165°F internally before it’s ready to go into our wraps!
I’ve got instructions for both, so pick your battle!
Deep Frying for Maximum Crunch
If you have a thermometer, use it! It makes deep frying so much less scary. Let your vegetable oil heat up in a heavy skillet until it hits 350°F. If you don’t have a thermometer, drop a tiny sprinkle of flour in; if it sizzles aggressively right away, you’re close!
Work in batches—don’t crowd the pan, or the oil temperature will crash and you’ll end up with greasy chicken instead of crispy gold. Fry those beautiful strips for about 3 to 4 minutes on each side until they are deep golden brown. Pull them out and let them drain completely on a wire rack. Seriously, drain them well so the bottoms don’t steam!
The Air Fryer Crispy Chicken Wrap Method
This is my preferred method on a busy Tuesday night because the cleanup is minimal! Preheat your air fryer basket to 400°F. Make sure you gave your breaded strips a generous spritz of cooking spray or oil—that helps achieve that golden-fried look without the deep fryer. You don’t want dry, pale chicken!
Lay the chicken strips in a single layer in the basket. We’re looking at about 12 to 15 minutes total cooking time. You MUST flip them halfway through, maybe around the 7-minute mark. This ensures both sides get that beautiful even browning and crispness. Once they look perfectly golden, check that internal temperature just to be sure!
For more air frying secrets, especially when dealing with breaded items, take a peek at how I manage crispy air fryer chicken wings—the principles are exactly the same!
Preparing the Garlicky Creamy Wrap Sauce
While your chicken is either frying away or resting nicely, let’s tackle the sauce. Honestly, this Garlicky Creamy Wrap Sauce is so easy it feels like cheating, yet the flavor is totally restaurant-quality. We are aiming for bright, herbaceous, and just garlicky enough to wake everything up!
Grab a small bowl—no need to drag out the big mixer for this. We’re combining the full cup of plain Greek yogurt. Remember, I said full fat is best for creaminess, but if you only have 2% on hand, that works in a pinch too, just know it might feel slightly thinner.
Next up is the garlic. Two cloves, minced super fine. If you’re worried about raw garlic punching you in the face, try grating it on a microplane instead of mincing! It integrates much smoother into the yogurt base. I always throw in the juice of one fresh lemon and about a tablespoon of finely chopped fresh dill. That dill just screams fresh Mediterranean flavor!
Mix everything until it’s beautifully smooth and uniform. Give it a quick taste test right here. This is your chance to customize! If you’re a total garlic fiend, throw in a tiny clove more. If you want it tangier, splash in a few extra drops of lemon juice. I sometimes like to whisk in a tiny bit of water or milk if the sauce gets too thick after the flavors sit together for a minute.
Once it’s mixed, put a lid on it and stick it in the fridge while you finish the chicken. Letting the garlic sit in the yogurt for even 10 minutes allows the flavor to deepen and mellow out just slightly. It tastes even better if you make it a day ahead, so that’s a great option if you’re planning ahead! If you want to dive deeper into making creamy, bright sauces from scratch, you might enjoy my tutorial on easy homemade mayonnaise, which follows similar principles of emulsification!
Assembling Your Perfect Crispy Chicken Wrap with Garlic Yogurt Sauce
Okay, the chicken is crisp, the sauce is bright, and the veggies are chopped—it’s time for the grand finale: putting together your Crispy Chicken Wrap with Garlic Yogurt Sauce! If you mess up the assembly, all that beautiful crunch will turn into a slippery mess within three bites. We want structural integrity, people! We are going for a tight, neat package that doesn’t leak sauce everywhere.
Before anything else, you absolutely have to warm your tortillas. This step is crucial! Cold tortillas crack when you try to fold them around hot, crisp filling. I never use a microwave for this because they puff up unevenly. Instead, heat each large flour tortilla in a dry skillet over medium heat for about 20 seconds per side until it’s soft, pliable, and maybe shows a few tiny brown spots.
Now, lay that warm beauty flat. We stick to a very specific layering system to make sure the wrapper stays strong. First, drizzle a generous amount of that homemade garlic yogurt sauce right down the center third of the tortilla. Don’t drench it, but give it good coverage!
Next, lay down your shredded lettuce next to the sauce. This acts as a protective barrier between the moist sauce and the chicken. Then, scatter your tomatoes and those crunchy red onions over the top. Finally, pile your hot, crispy chicken strips right on top of all those cooler ingredients.
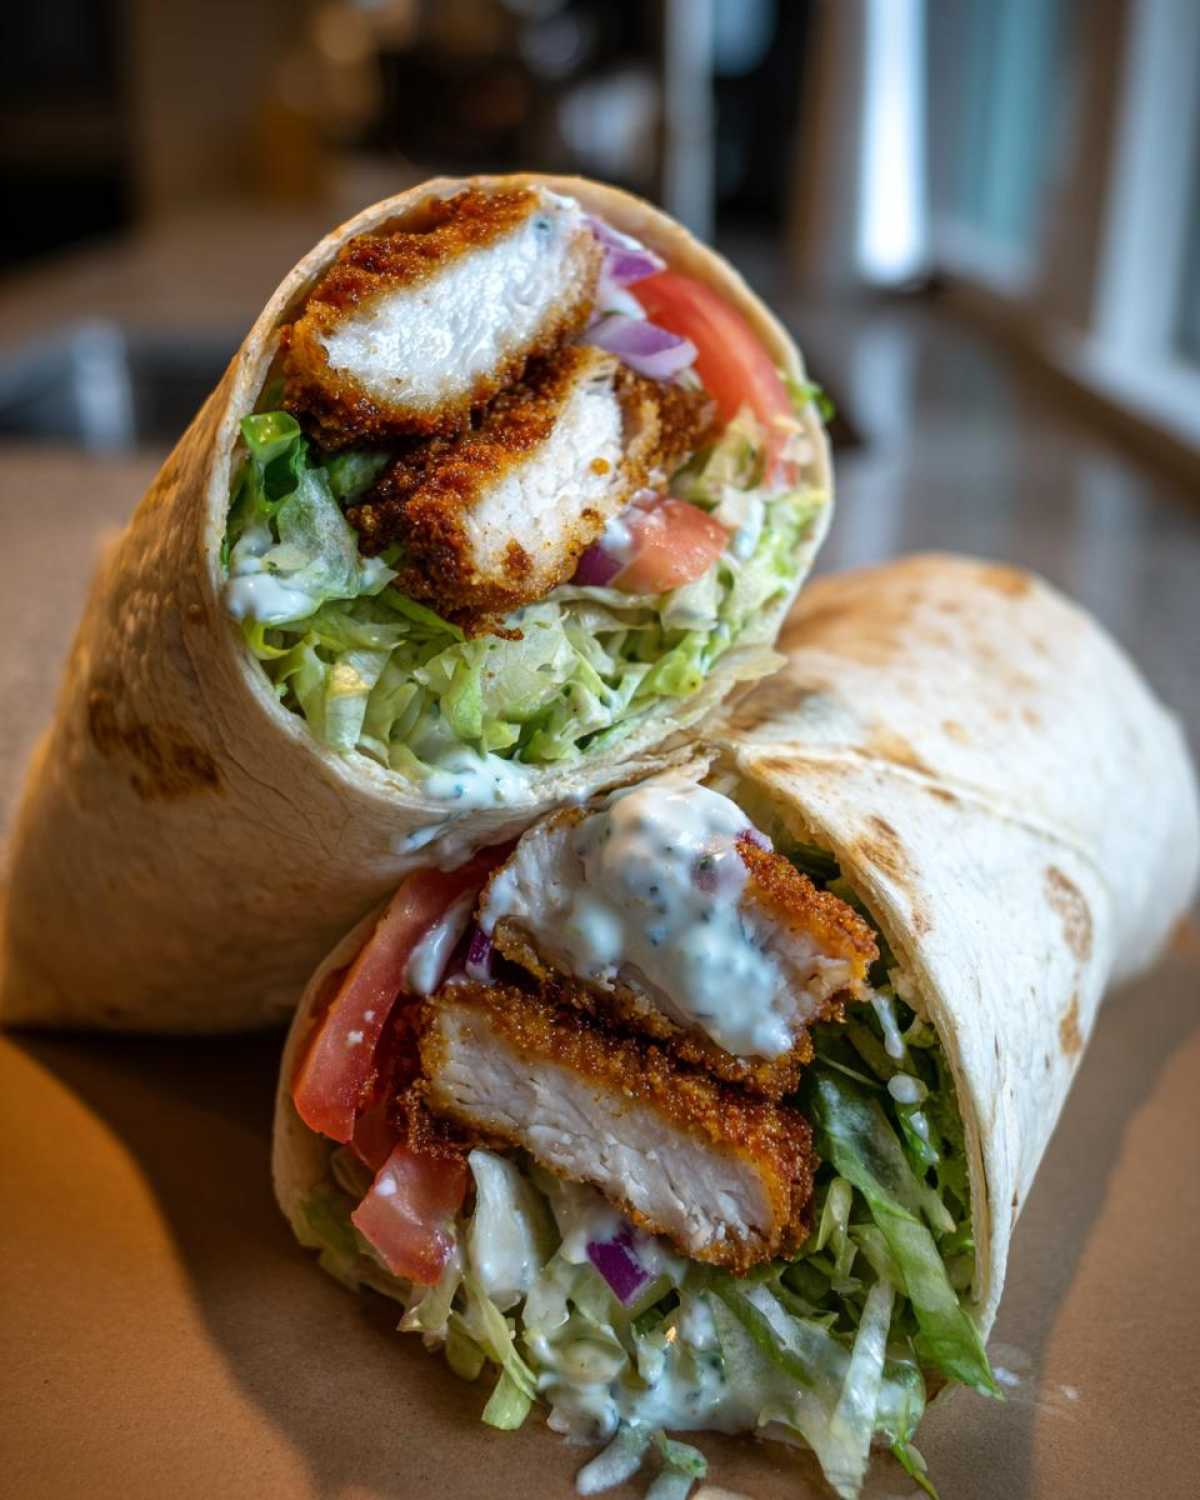
Tips for Warming Tortillas and Rolling
Remember that tip about warming the tortillas? That pliability is what saves you from tearing halfway through the fold. As for the actual rolling technique—this is the secret to getting that tight seal that keeps everything inside where it belongs. You want to fold the right and left edges inward first, aiming to cover about a third of the filling on each side. Bring those sides in snugly!
Once the sides are tucked in, move to the bottom edge closest to you. Pull that bottom flap up firmly over the filling, tucking it under the edges you just folded in. Now, keep that tension tight and roll the whole thing forward and up toward the top edge until you have a perfectly sealed package. If you want to see other tips on picking the best wrappers, check out my guide on choosing the best tortillas for rolling wraps!
Serve immediately while that chicken is still audibly crispy. You’re going to love biting into this perfectly balanced meal!
Tips for Success and Variations on the Crispy Chicken Wrap with Garlic Yogurt Sauce
Now that you’ve mastered the bake, the fry, and the assembly, let’s talk about making this recipe work perfectly for your life. Meal prep is my game, and I love having components ready to go. For your Simple Chicken Wrap Filling to come together fast later in the week, you have to do a little pre-work!
The absolute number one make-ahead star here is the sauce. My best tip is to mix up that Homemade Garlic Yogurt Sauce completely, as detailed above, and keep it stored tightly covered in the fridge. It tastes even better the next day—seriously! It’ll be thicker when cold, but just give it a quick stir before you use it. If it’s too thick, thin it with maybe half a teaspoon of cold water or a tiny splash of extra lemon juice.
For the chicken, I highly recommend cooking it fresh right before wrapping, as that’s the only way to guarantee that audible crunch. However, if you *must* cook it ahead, here’s what I do: Cook it fully, let it cool completely, and store it in an airtight container in the fridge. When you go to assemble your wrap, reheat those strips briefly in a 350°F oven or in the air fryer for about 4 minutes. This step sucks a little moisture back in just enough so they don’t taste cold, and it crisps up that crust again!
When it comes to variations, this framework is so flexible! If you’re trying to keep it lighter or are vegetarian one night, you can totally swap out the chicken. I often make a vegetarian version where I use chickpeas that I lightly mash and toss with the same flour coating. You still get a great textural element! You can check out how I prep chickpeas for flavor in my Mediterranean chickpea salad—the seasoning logic is similar.
Don’t stop at the basic veggies either! If you’re feeling like mixing things up, try adding some thinly sliced avocado right over the sauce layer—hello, healthy fat! Or, for a bit of extra crunch without frying, shred some crisp Napa cabbage and mix that in with the lettuce. If you want to see how I adapt fillings for other lunchtime favorites, take a look at this turkey cranberry wrap recipe to see how presentation can change everything!
Storing Leftovers of Your Crispy Chicken Wrap with Garlic Yogurt Sauce
Oh, leftovers! Who doesn’t love having a pre-prepped lunch waiting for them? But let me tell you right now: assembling the whole Crispy Chicken Wrap with Garlic Yogurt Sauce and then sticking the whole thing in the fridge is a recipe for sadness. Why? Because that glorious Panko crust we worked so hard on turns instantly soggy when it sits next to the wet veggies and that creamy sauce. We can’t have that!
If you have extras after dinner, you absolutely must deconstruct the wrap before storing anything for later. Think of it like putting ingredients back in their individual containers. The goal is keeping the components separate so they maintain their integrity.
The chicken is the most delicate feature here. Store the leftover crispy strips in a non-airtight container, or even just loosely covered on a plate in the fridge. Too tight a seal will trap steam, and steam is the enemy of crispiness! It should be fine this way for about 2 to 3 days, though honestly, it’s best eaten within 24 hours.
The garlic yogurt sauce is a breeze! Since it’s yogurt-based and has lemon juice, it keeps beautifully in an airtight jar in the fridge for up to five days. It handles being made ahead of time perfectly. The only thing you assemble fresh is the vegetables, but keep the onions, lettuce, and tomatoes separate, too!
When you are ready to enjoy your leftover creation—maybe for a quick lunch as detailed in my guide on freezer breakfast burritos (similar storage logic applies!)—you need to revive that chicken. Do not, I repeat, DO NOT put the strips in the microwave. The microwave instantly steams the breading. Instead, reheat the chicken strips ONLY in a hot oven (around 375°F) or pop them back into the air fryer for 4 minutes until they are piping hot and the crunch has returned. Then, assemble your wrap fresh with a new tortilla and enjoy that blast of crispiness all over again!
Frequently Asked Questions About This Recipe
I know you must have a few lingering questions now that you’ve seen how easy it is to whip up this amazing dinner! Anytime I adapt a favorite recipe, my head fills with “what ifs.” Don’t worry, I’ve gathered the most common questions I get about making Crispy Chicken Wraps Recipe so you can bake, fry, or prep with total confidence!
Can I make the chicken ahead of time for my Crispy Chicken Wraps Recipe?
You absolutely can, but you have to manage your expectations about the final texture. Remember, the entire goal here is that shatteringly crisp coating! If you bread and cook the chicken completely ahead of time—say, the morning before—it’s going to lose a significant amount of its crunch once it’s refrigerated, even in a sealed container. It’s always, always best to cook the chicken strips right before you assemble the wrap.
If you are making these for a party and need speed, you can lay the *breaded but uncooked* chicken strips on a tray and keep them chilled for up to 4 hours. Then, fry or air fry them right before serving. That prep step helps them stick, and cooking them fresh guarantees the best results for those Crunchy Chicken Tortilla Wraps!
What is the best way to reheat the cooked chicken strips?
If you have leftovers of the cooked chicken (which you might after making a batch for an Easy Chicken Wrap Dinner!), please, please listen to me on this one: avoid the microwave! Microwaving heats the water molecules inside the breading, steaming it soft, and that defeats the whole purpose of making them crispy in the first place.
For the best chance of bringing back that crunch, you need dry heat. Pop the cold strips in the oven preheated to about 375°F for about 5 to 8 minutes. If you have an air fryer, that’s even faster and better! Try 3 minutes at 380°F, just checking frequently. They should heat up quickly and the outside crust will firm right back up. It won’t be exactly like fresh-fried perfectly, but it’s miles better than a soggy microwave mess!
Can I use chicken thighs instead of breasts?
Yes, you totally can! Chicken thighs are actually more forgiving than breasts because they have higher fat content, meaning they are much harder to dry out—which is great news for anyone worried about overcooking. If you use thighs, make sure to trim off any excessive fat patches first. You might need to cut them into slightly smaller pieces than the 1-inch strips we use for the breast, or add an extra minute or two to your cooking time depending on the thickness. Thigh meat has a richer flavor, and it pairs wonderfully with our Yogurt Sauce for Chicken!
How long does the Homemade Garlic Yogurt Sauce really last in the fridge?
Because this sauce is made with Greek yogurt and has the preservative magic of fresh lemon juice mixed right in, it holds up really well! As long as you keep it covered tightly, ideally in a jar, you can safely use it for about 5 days. I’ve tried pushing it to a week, but that fresh dill starts to lose its bright spark after day 5. If you have questions about other kitchen storage, feel free to reach out through my contact page!
Recipe Metrics and Serving Information
Alright, here is the straightforward data breakdown for our Crispy Chicken Wraps Recipe. I’ve done my best to calculate the nutritional estimates based on the ingredients listed, but remember, if you use extra sauce or a different tortilla, those numbers will shift a little! This chart is meant to give you a good ballpark idea of what you’re getting when you sit down for this delicious lunch.
I always look at the protein count first—40 grams! That’s what makes this such a satisfying meal that actually keeps you full until dinner. And while this is fried, if you air-fry it, you’ll be saving a decent amount of fat compared to traditional frying. Check out the details below, and if you ever have questions about recipe disclosures, you can always read my full disclaimer here.
Prep, Cook, and Yield
- Prep Time: 20 minutes (This assumes your chicken is already cut!)
- Cook Time: 15 minutes (Whether you air fry or pan-fry)
- Total Time: A speedy 35 minutes! This is a fantastic Quick Weeknight Chicken Wrap solution.
- Yield Servings: 4 large, satisfying wraps.
Estimated Nutritional Information (Per 1 Wrap)
This data is based on the ingredients listed in the recipe above. Please note these are always estimates!
- Calories: 550
- Protein: 40g
- Fat: 25g
- Saturated Fat: 6g
- Carbohydrates: 45g
- Sugar: 7g (Mostly natural sugars from the tortilla and onions!)
- Fiber: 3g
- Sodium: 650mg
It’s a hearty meal, but it checks all the boxes: protein, crunch, freshness, and that killer sauce. Enjoy knowing exactly what’s fueling you up!
Share Your Ultimate Crispy Chicken Wrap with Garlic Yogurt Sauce
Well, that’s it! You now have every single trick, tip, and technique I use to make the most unbelievably crunchy and flavorful Crispy Chicken Wrap with Garlic Yogurt Sauce. I’m already jealous of the lunch you’re going to have tomorrow!
But guess what? Cooking is always better when you share the results. I absolutely live for hearing how my tried-and-true recipes turn out in your fabulous kitchens. Did you manage to get that Panko to stick perfectly? Did you sneak in extra garlic in the sauce?
Here’s what I need you to do next: Please, please, please leave a rating! If this recipe earned its spot in your rotation, give it 5 stars right below this section. And then, drop me a comment! I want to hear all about your wrapping adventures. Tell me what vegetables you chose, if you stuck strictly to the frying method, or if you threw in any wild substitutions that actually worked like a charm. Your feedback helps build this community and inspires me to keep tweaking and sharing more of my family’s favorite quick meals. You can learn a bit more about me and the mission of this site over on the About Us page!
Happy wrapping, and I can’t wait to read your results!
PrintUltimate Crispy Chicken Wraps with Creamy Homemade Garlic Yogurt Sauce
Follow this recipe to make wraps filled with crunchy, seasoned chicken and a bright, homemade garlic yogurt sauce. This recipe focuses on achieving maximum chicken crispiness.
- Prep Time: 20 min
- Cook Time: 15 min
- Total Time: 35 min
- Yield: 4 servings
- Category: Lunch
- Method: Frying or Air Frying
- Cuisine: American
- Diet: Vegetarian
Ingredients
- 2 large boneless, skinless chicken breasts, cut into 1-inch strips
- 1 cup all-purpose flour
- 1 teaspoon salt
- 1 teaspoon black pepper
- 1 teaspoon paprika
- 1/2 teaspoon garlic powder
- 1/2 teaspoon onion powder
- 2 large eggs, beaten
- 1 cup panko breadcrumbs
- Vegetable oil, for frying (or cooking spray for air frying)
- 4 large flour tortillas (burrito size)
- 1 cup plain Greek yogurt (full fat recommended)
- 2 cloves garlic, minced finely
- 1 tablespoon fresh lemon juice
- 1 tablespoon fresh dill, chopped
- 1/4 teaspoon salt
- 1/4 cup shredded lettuce
- 1/2 cup sliced tomatoes
- 1/4 cup thinly sliced red onion
Instructions
- Prepare the chicken breading: In one shallow dish, mix the flour, 1 teaspoon salt, 1 teaspoon pepper, paprika, garlic powder, and onion powder. In a second dish, place the beaten eggs. In a third dish, place the panko breadcrumbs.
- Dredge each chicken strip first in the seasoned flour, shaking off excess. Dip completely in the egg mixture. Finally, press firmly into the panko breadcrumbs to coat thoroughly.
- Cook the chicken: For frying, heat 1 inch of oil in a skillet to 350°F (175°C). Fry chicken in batches for 3-4 minutes per side until golden brown and cooked through (internal temperature 165°F). Drain on a wire rack. For air frying, spray coated chicken with oil and cook at 400°F (200°C) for 12-15 minutes, flipping halfway.
- Make the garlic yogurt sauce: In a small bowl, combine the Greek yogurt, minced garlic, lemon juice, chopped dill, and 1/4 teaspoon salt. Mix well.
- Warm the tortillas: Heat the flour tortillas briefly in a dry skillet or microwave until soft and pliable.
- Assemble the wraps: Lay a warm tortilla flat. Spread a generous amount of garlic yogurt sauce down the center. Layer with shredded lettuce, tomato slices, red onion, and top with the crispy chicken strips.
- Fold the wrap tightly by folding in the sides first, then rolling from the bottom up. Serve immediately.
Notes
- For extra crispiness, chill the breaded chicken strips for 15 minutes before cooking.
- Use a high-quality, thick flour tortilla to prevent tearing when rolling.
- You can substitute dill with fresh parsley or mint in the sauce.
- Make the yogurt sauce up to one day ahead and store it covered in the refrigerator.
Nutrition
- Serving Size: 1 wrap
- Calories: 550
- Sugar: 7
- Sodium: 650
- Fat: 25
- Saturated Fat: 6
- Unsaturated Fat: 19
- Trans Fat: 0
- Carbohydrates: 45
- Fiber: 3
- Protein: 40
- Cholesterol: 110