

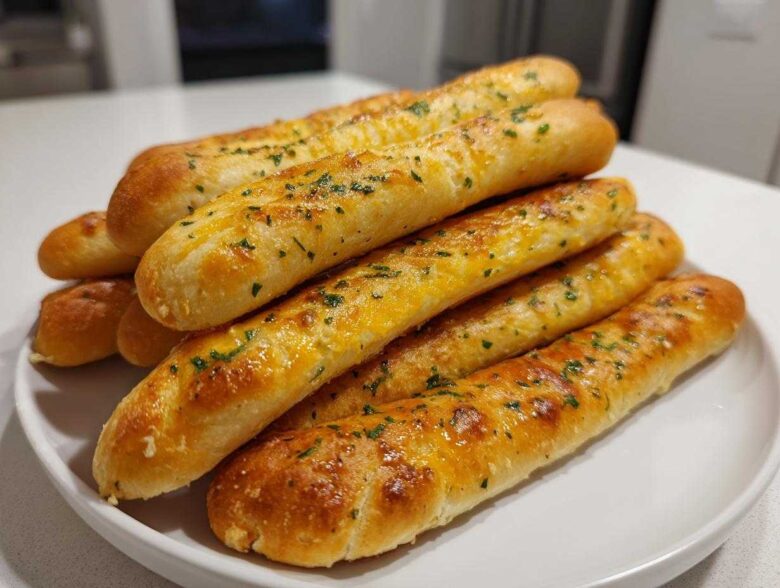
Listen, I know that feeling. You’re sitting there waiting for your Italian dinner, but the meal just isn’t complete without that basket of impossibly soft, buttery sticks covered in garlic. For years, I tried every recipe out there to replicate that specific restaurant magic, and let me tell you, I finally cracked the code! Forget those dense, dry attempts you might have made before. I’m sharing my absolute favorite, go-to recipe for **Easy Homemade Copycat Garlic Breadsticks**. Seriously, this dough is so simple, and the secret lies almost entirely in that glorious garlic butter topping we brush on right as they come out of the oven. If you want the softest, fluffiest **breadsticks** you’ve ever made at home—trust me on this one—you have to try my method.
Why You Will Make These Copycat Restaurant Breadsticks Again and Again
I’m not kidding, once you try these, you’ll swear off the take-out version forever. Why? Because they are exactly what you want in a perfect baked treat: pillowy soft, drenched in flavor, and surprisingly fast for a yeasted dough. You don’t need to be a professional baker to nail this either!
- They are unbelievably soft! We’re talking melt-in-your-mouth, not chewy or tough.
- The garlic butter topping is potent and fresh—what makes these truly shine.
- The dough rises quickly, so you get fantastic results in under an hour and a half total. These are perfect for a last-minute side dish!
- They freeze beautifully, so you can always have **Buttery Breadsticks** ready for dinner.
Achieving Fluffy Breadsticks Texture
The key to that amazing fluffiness isn’t just the yeast; it’s how we treat the dough. We knead it long enough—about seven full minutes—to develop the gluten structure. This structure traps all those wonderful yeast gasses, making the finished sticks light, airy, and slightly stretchy, which is the hall-mark of great **Soft Garlic Breadsticks Recipe**.
Essential Ingredients for Soft Garlic Breadsticks Recipe
When you’re making something this simple, the quality of your ingredients really shows through. You only need a few pantry staples, but paying attention to the temperature and type matters a ton for these delicious **breadsticks**. This list is short and sweet, but feel free to check out my main blog for general baking tips over at my baking resource page!
- For the Dough: You absolutely need 1 cup of warm water—I mean, seriously warm—aim for between 105-115°F. If it’s too cold, the yeast won’t wake up; too hot and you’ll kill it!
- Yeast: We use 2 1/4 teaspoons of active dry yeast, plus one teaspoon of sugar to feed it. That little bit of sugar is crucial for a good rise.
- Flour and Salt: 2 3/4 cups of all-purpose flour works perfectly, balanced out with 1 teaspoon of salt.
- Oil: 2 tablespoons of plain vegetable oil helps keep the dough supple during kneading.
- The Topping: You can’t skip the 1/4 cup of melted unsalted butter. And yes, you need real garlic—2 cloves, minced—and 1 teaspoon of dried parsley for that classic look!
Ingredient Notes and Substitutions for Your Breadsticks
Now, here’s where you can cheat a little without ruining the magic. If you only have instant yeast, don’t worry! You can skip the whole resting/foaming step; just skip Step 1 and mix the instant yeast right in with your flour and salt. That makes this an even more **Quick Breadstick Recipe**! Also, if you don’t have vegetable oil, melted butter works in the dough too, but stick to neutral oil if you want that truly classic soft texture we’re aiming for in these **Homemade Italian Breadsticks**.
Step-by-Step Instructions for Easy Homemade Breadsticks
If you’re looking for a truly **Fast Bread Baking** project that pays off big time, this is it! Follow these steps exactly, and you’ll have the most incredible **breadsticks** ready faster than you think. Remember, this recipe is totally vegetarian and makes a fantastic **Dinner Side Dish Bread**.
- First things first, wake up that yeast! In a big bowl, mix your warm water (must be that 105-115°F range!), the yeast, and the sugar. Just let it chill for about five minutes until it looks foamy and happy.
- Next, stir in your flour and salt right into that bubbly yeast mix until it gets sort of shaggy—don’t overthink it yet.
- Drizzle in that vegetable oil, and now it’s time to work! Turn the dough out onto a floured surface and knead it hard for a solid 5 to 7 minutes until it feels smooth and elastic. This is where the texture magic happens!
- Pop the dough into a lightly oiled bowl, cover it up, and stick it somewhere warm. You need to let it rise for a full hour until it’s doubled. Don’t rush this rise time; this is key for light **Fluffy Breadsticks**!
- Get your oven blazing hot at 400°F (200°C) and get a baking sheet ready by lining it with parchment paper.
- Punch that dough down gently. Divide it into 12 equal parts. Roll each little hunk into a long, 10-inch rope—like you’re making a skinny snake! Place them neatly on your prepared sheet.
- Bake these beauties for about 10 to 12 minutes. You want them just lightly golden, not dark brown.
- Here’s the kicker: As soon as they come out of the oven, you need to brush them immediately! That heat is what makes the topping soak deep into the dough.
Preparing the Signature Garlic Butter Topping Recipe
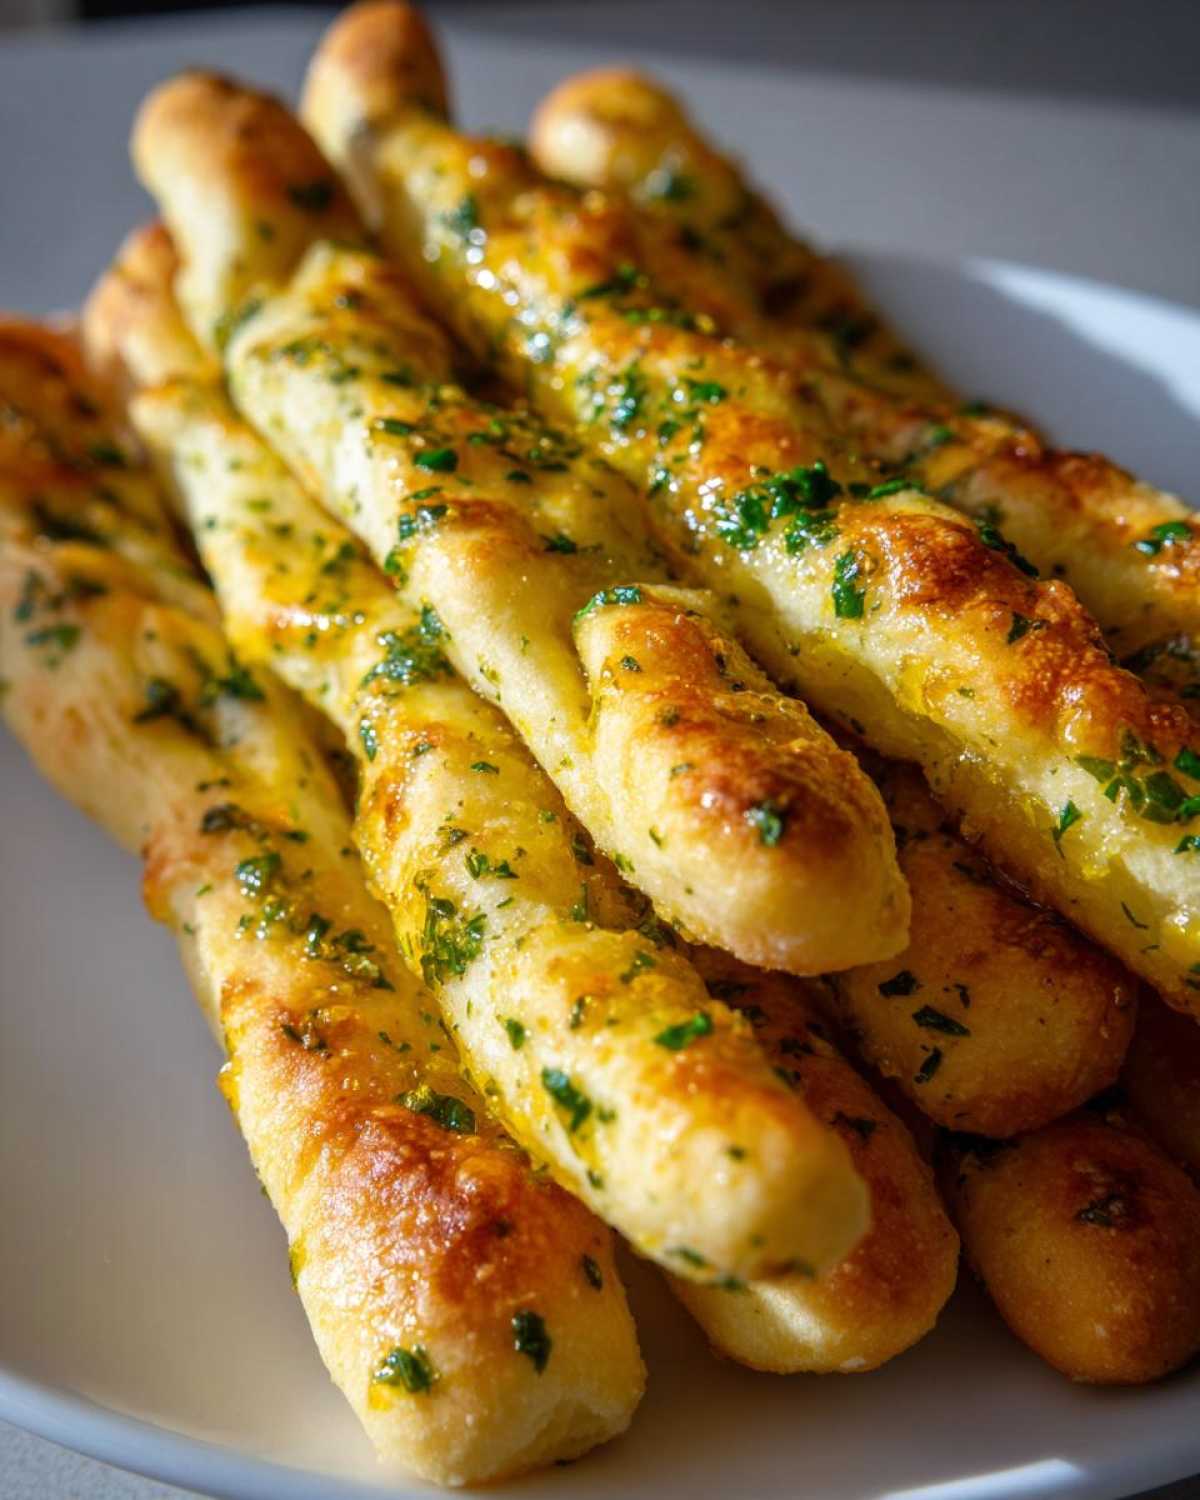
You should be multitasking here! Get this ready while your **breadsticks** are in their final minutes of baking. In a small bowl, just mix together the 1/4 cup of melted butter—it needs to be fully liquid—with your 2 cloves of minced fresh garlic and that teaspoon of parsley. That punch of fresh garlic is what makes them taste so much better than store-bought! Brush this mixture lavishly all over the hot breadsticks the second they hit the counter. Seriously, don’t wait, or the flavor won’t sink in properly. You can check out my guide on fast bread baking techniques if you want even more speed-up tips!
Tips for Success When Making Buttery Breadsticks
Okay, you’ve pulled those golden beauties out, and they smell incredible! But just because the recipe technically works doesn’t mean we can’t make them absolutely legendary. I’ve learned a few tricks over my many, many batches—because I make these almost every Friday night!
First off, temperature control is everything when you’re dealing with yeast. Make sure your oven is holding that 400°F steady. Putting the dough in a cold oven is the fastest way to get dense, sad **breadsticks**! If your oven runs cool, maybe give it five extra minutes on ‘Preheat Complete’ before sliding those trays in.
Another thing: when you transfer the ropes to the baking sheet, try not to stretch them too aggressively, or you’ll tease all the air out right before baking. Just gently roll them out to that 10-inch length, like you’re comforting them more than forcing them.
How to Make Cheesy Breadsticks Recipe Variations
Now, sometimes plain garlic isn’t enough, right? Sometimes you need that salty, savory kick that only Parmesan can provide! This is so easy to add to make them just absolutely irresistible. While the **Buttery Breadsticks** are still piping hot—and I mean *seconds* out of the oven—take about a half cup of freshly grated Parmesan cheese. Sprinkle it right over that wet garlic butter!
Because the topping is still hot and wet from the butter, the Parmesan melts just enough to adhere beautifully without burning immediately. Trust me, turning these into **Cheesy Breadsticks Recipe** status takes thirty extra seconds and elevates them into the ultimate **Breadsticks Appetizer**. Do this, and I promise you won’t regret having any leftovers!
Serving Suggestions for Your Homemade Breadsticks Appetizer
Honestly, these **breadsticks** are so good, I’ve eaten them straight out of the pan like a snack! But they really shine when paired with something you want to smother in garlic goodness. Obviously, they are the **Best Breadsticks for Dinner** next to any big bowl of spaghetti or lasagna. Don’t stop there, though!
They are totally perfect for dunking. If you have any soup left over, you absolutely have to serve these alongside it. People go wild when I bring these out with my broccoli cheddar soup—it’s the ultimate comfort combination. Seriously, grab a bowl of chili or even a hearty stew, and watch how fast these **Homemade Italian Breadsticks** disappear!
Storage and Reheating Instructions for Leftover Breadsticks
Now, if you somehow manage to have any of these glorious **breadsticks** leftover—which, surprise, rarely happens at my house—you need to store them correctly so they don’t turn into little stale rocks overnight! The biggest piece of advice I can give you? Avoid the refrigerator if you can, especially if you want to keep them soft.
The fridge just zaps the life right out of bread dough, making it taste stale almost instantly. If you are keeping them for just a day, just place them in a large Ziploc bag or an airtight container at room temperature. Make sure you push all the air out of the bag before sealing it up tight! They might lose a *tiny* bit of that wonderful garlic punch, but they should stay reasonably soft.
If you have more than you can eat in 24 hours, the freezer is your friend! Let them cool completely first, then wrap them tightly in plastic wrap, followed by a layer of aluminum foil. You can freeze these **Buttery Breadsticks** for up to three months. You’re essentially freezing them in their own little time capsule!
Reheating is the secret handshake here. Forget the microwave; it makes bread rubbery, which is the opposite of what we want for these fluffy treats. The absolute best way to revive them is back in the oven. Lay the breadsticks directly on a baking sheet and warm them at about 350°F (175°C) for about 5 to 7 minutes. They heat evenly, the outside crisps up just slightly, and the inside blooms right back to fluffy perfection, feeling almost freshly baked!
Frequently Asked Questions About These Breadsticks
I get so many questions about these recipes because everyone wants that perfect result! I’ve gathered up the most common ones below, but if you have other thoughts, feel free to check out more about my baking philosophy over at my About Me page!
Can I make these breadsticks ahead of time?
Yes, you absolutely can prepare the dough ahead of time, which is fantastic for getting a head start on your **Easy Homemade Breadsticks**! You can let the dough rise in the fridge overnight, but make sure you let it warm up on the counter for about 30 minutes before you go to shape it. Don’t shape them and bake them much later than that, though; they are best fresh from the oven!
Are these Better Than Olive Garden Breadsticks?
That’s the big question, isn’t it? I genuinely believe so, and here’s why: the topping! When you make these **Copycat Restaurant Breadsticks** yourself, you’re brushing them with fresh, vibrant garlic butter right off the stove. That makes a huge difference compared to letting them sit under heat lamps! Our **Soft Garlic Breadsticks Recipe** focuses on that immediate burst of fresh flavor.
Can I use instant yeast for this Quick Breadstick Recipe?
You sure can! As I mentioned above, if you have instant yeast, you just skip the whole Step 1 where you proof it in water. Just mix the instant yeast directly with your flour, salt, and oil, and let the dough hang out for its hour rise. It seriously speeds up your prep time!
What makes these the Best Breadsticks for Dinner?
It’s the simplicity and the flavor profile. They are savory enough to complement heavy pasta dishes or soups, but they aren’t so overwhelming that they compete with the main course. Plus, since they are quick to bake, you can throw them in the oven as soon as you sit down to eat!
Estimated Nutritional Data for Homemade Breadsticks
Okay, I have to give you a quick heads-up before you dive into an entire basket of my amazing **breadsticks**! Since these are made completely from scratch, the exact numbers can wiggle a bit depending on the brand of oil or flour you use. I’ve calculated these estimates for one breadstick based on the recipe provided, but remember, this is just a guideline. These **Dinner Side Dish Bread** treats are definitely worth the indulgence!
- Serving Size: 1 breadstick
- Calories: About 180 (Wow, that’s sneaky for how much butter is involved!)
- Fat: Around 7 grams
- Carbohydrates: Approximately 26 grams
- Protein: About 4 grams
If you’re making the **Cheesy Breadsticks Recipe** variation I mentioned earlier, you’ll want to add an extra 20 to 30 calories per stick because of that lovely Parmesan cheese. But honestly, I never count calories when garlic butter is involved. Just enjoy them while they are hot!
Share Your Experience with These Easy Homemade Breadsticks
Now that you have the keys to making the absolute best, softest **breadsticks** known to mankind, I really want to hear about it! Baking is a shared joy, right? So please, don’t just leave here silently!
Did you try the cheesy variation? Did your kids demolish the whole batch before dinner was even ready? Tell me everything! I think feedback is honestly the best way we all learn together in the kitchen. It helps me keep my recipes sharp and relevant for everyone.
If you took a picture proving you made these incredible **Copycat Restaurant Breadsticks**, I would absolutely love it even more if you could share it with me on social media—tag me! And if you have a moment, please shoot over to the recipe card above and give it a little star rating. Even a quick five-star rating tells me this recipe is still doing its job providing fluffy, amazing **Homemade Breadsticks**!
If you have any lingering questions about the dough, the topping mixture, or if you just want to share how much better these are than anything you order out, please drop a comment in the box below. You can also reach out to me directly through my contact page if you have a specific dilemma. Happy baking, and enjoy every single delicious, buttery bite!
PrintEasy Homemade Copycat Garlic Breadsticks

Make soft, fluffy breadsticks at home that taste like your favorite restaurant version, topped with a rich garlic butter sauce.
- Prep Time: 15 min
- Cook Time: 12 min
- Total Time: 87 min
- Yield: 12 breadsticks
- Category: Appetizer
- Method: Baking
- Cuisine: American
- Diet: Vegetarian
Ingredients
- 1 cup warm water (105-115°F)
- 2 1/4 teaspoons active dry yeast
- 1 teaspoon sugar
- 2 3/4 cups all-purpose flour, plus more for dusting
- 1 teaspoon salt
- 2 tablespoons vegetable oil
- 1/4 cup unsalted butter, melted (for topping)
- 2 cloves garlic, minced (for topping)
- 1 teaspoon dried parsley (for topping)
Instructions
- Combine the warm water, yeast, and sugar in a large bowl. Let stand for 5 minutes until foamy.
- Stir in the flour and salt into the yeast mixture. Mix until a shaggy dough forms.
- Add the vegetable oil. Knead the dough on a lightly floured surface for 5 to 7 minutes until smooth and elastic.
- Place the dough in a lightly oiled bowl, turning once to coat. Cover and let rise in a warm place for 1 hour, or until doubled in size.
- Preheat your oven to 400°F (200°C). Line a baking sheet with parchment paper.
- Punch down the dough. Divide it into 12 equal pieces. Roll each piece into a 10-inch rope shape. Place the ropes on the prepared baking sheet.
- Bake for 10 to 12 minutes, or until lightly golden brown.
- While the breadsticks bake, prepare the topping: Mix the melted butter, minced garlic, and parsley in a small bowl.
- Remove the breadsticks from the oven. Brush the garlic butter mixture generously over the hot breadsticks immediately.
- Serve warm.
Notes
- For cheesy breadsticks, sprinkle 1/2 cup of grated Parmesan cheese over the butter topping right after they come out of the oven.
- If your kitchen is cold, place the covered dough bowl inside a turned-off oven with the light on to help it rise faster.
- You can use instant yeast; mix it directly with the flour instead of proofing it first.
Nutrition
- Serving Size: 1 breadstick
- Calories: 180
- Sugar: 1
- Sodium: 250
- Fat: 7
- Saturated Fat: 4
- Unsaturated Fat: 3
- Trans Fat: 0
- Carbohydrates: 26
- Fiber: 1
- Protein: 4
- Cholesterol: 15