


Oh my gosh, if you need a dessert that screams decadence but whispers “I spent zero time on this,” you’ve found your absolute winner. Forget complicated baking projects; we are getting straight to the good stuff with the easiest, no-bake recipe for perfect oreo balls you will ever try! I made these for the first time during a frantic single-day Christmas cookie marathon years ago, and honestly, they saved my sanity—and everyone loved them more than the actual layered cookies! I always remind folks to check out all my quick ideas over on the main blog page when they’re looking for inspiration.
Seriously, these creamy, fudgy little chocolate truffles are pure magic. They require almost nothing, and you can whip up a huge batch in about 25 minutes of active work. Trust me, they disappear instantly at any gathering. If you’ve been looking for that ultimate, low-effort, high-reward treat, look no further than these essential oreo balls.
Why You Need This Easy No-Bake Oreo Balls Recipe
Honestly, I keep this recipe in my back pocket for absolute emergencies because it’s just that foolproof. You should make these today because:
- They are genuine 3 Ingredient Oreo Balls if you skip the optional shortening! So simple.
- They are the ultimate Quick Oreo Bites—no oven required, so the kitchen stays cool.
- They are always the star of any table, making them fantastic Party Dessert Ideas.
- I know you’ll love the smooth, creamy texture of these Easy Oreo Truffles.
If you enjoy fuss-free desserts like this, you have to check out my recipe for No Bake Peanut Butter Pie next!
Gathering Ingredients for Perfect Oreo Balls
Okay, gathering supplies for these oreo balls is so easy, it almost feels like cheating. You only need four things, really, plus maybe that secret weapon shortening I mention later! I always lay my ingredients out first, which helps keep things tidy when you’re mixing crumbs.
Here is exactly what you need for about 30 incredible, creamy treats:
- One standard package (the 14.3 oz size) of Oreo cookies—and yes, don’t pick out the cream filling! That stuff is necessary.
- Eight ounces of cream cheese. A big tip from me: always splurge on the full-fat block cream cheese. The low-fat versions don’t bind nearly as well and can make your dough crumbly later!
- Sixteen ounces of melting chocolate or chocolate almond bark for the coating.
- One tablespoon of shortening—this is totally optional, but I swear by it to keep the chocolate nice and fluid for dipping.
When you’re ready to add more simple treats to your rotation, you absolutely have to try my 3 Ingredient Nutella Brownies!
Step-by-Step Instructions for Creamy Oreo Balls
Alright, buckle up, because this is where the magic—and the easy cleanup—happens! We are going to break this down into two simple parts: making the fudgy cookie base, and then giving those beauties the shiny chocolate shell they deserve.
Making the Oreo Cookie Ball Base
First things first, you need crumbs. If you have a food processor, just toss in the entire package of cookies and pulse, pulse, pulse! You want them totally fine, like beach sand. If you don’t have a machine, don’t panic! Throw the cookies into a heavy-duty Ziploc bag, seal it tight, and take out your frustration on them with a rolling pin until they’re finely crushed. I’ve done it both ways, and the food processor is faster, but the rolling pin method makes for a great stress reliever, if you ask me!
Dump those crumbs into a bowl and add that softened cream cheese. Now, mix it up good. I usually use my hand mixer on low speed, but you can totally use your hands if you don’t mind the mess; just make sure that cream cheese is fully incorporated. You want a stiff, uniform dough that holds together.
Chilling and Coating Your Oreo Balls
Once you have your dough, start rolling! Scoop out little bits and roll them between your palms into uniform balls, about one inch around. This is the best place to make sure you get the perfect size for your oreo balls. Pop these onto a baking sheet lined with parchment paper—parchment is your best friend here! Now, stick that sheet in the fridge for at least 30 minutes. Don’t skip this chilling time! If they are warm, they melt right into the chocolate later.
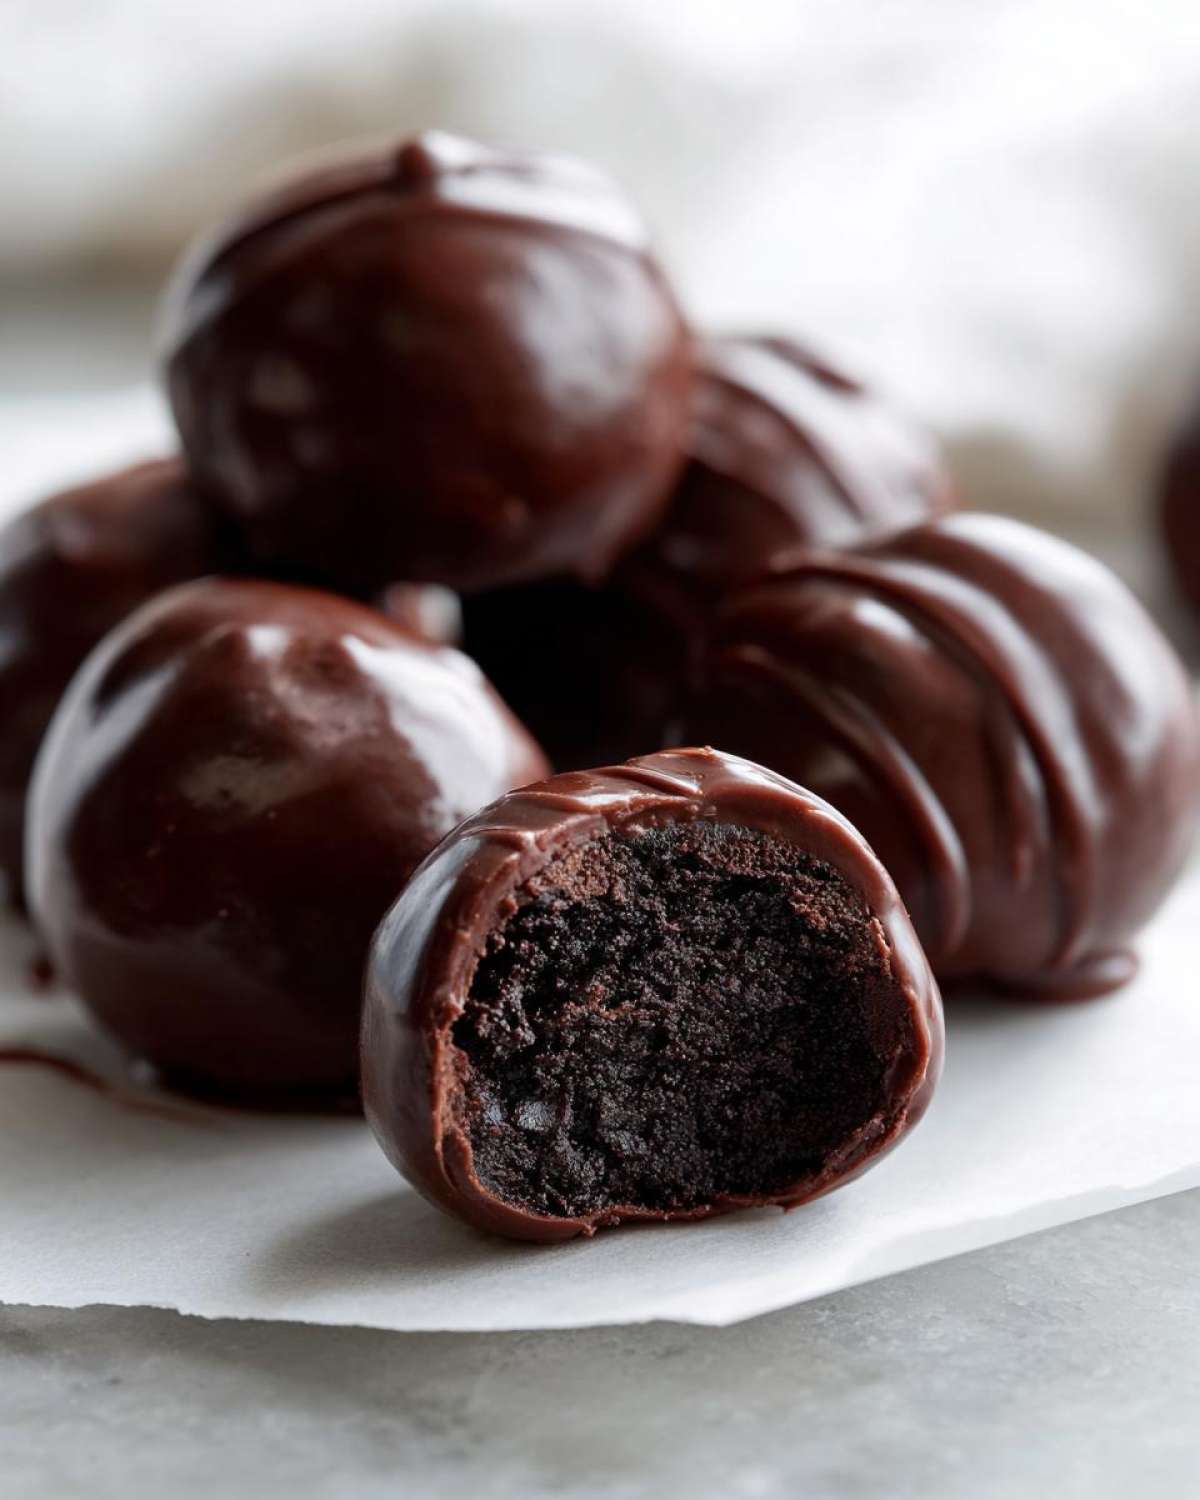
While chilling, melt your chocolate. If you’re using it, stir in that tiny bit of shortening; it makes the chocolate incredibly smooth for dipping. Once chilled, take them out one by one, poke them with a fork, dip them fully into the chocolate, and lightly tap the fork on the side of the bowl to let the extra drip off.
Pop those finished treats back onto the parchment paper. They firm up fast, usually in 15 to 20 minutes back in the fridge, and then they are ready to devour!
If you love these no-bake chocolate coatings, you should take a peek at my recipe for Cookies and Cream Puppy Chow while you’re here!
Tips for Making the Best No Bake Oreo Balls
Even though this recipe is super straightforward, I’ve gathered a few little tricks over the years to make sure every batch of your Fudgy Oreo Bites turns out absolutely perfect. It’s all about managing consistency!
First, let’s talk texture. If your dough feels too soft to roll, it probably means your cream cheese wasn’t cold enough when you started, or maybe you didn’t chill the finished balls long enough before dipping. Pop the whole tray back in the freezer for 15 minutes if you’re struggling to get them rolled tightly.
As for the chocolate coating, a sad, thick coating is the worst, right? That’s why I always add that optional teaspoon of shortening or maybe even a tiny splash of coconut oil if I’m using standard melting wafers. It thins the chocolate just enough so you get a perfect, thin shell instead of one that weighs down your whole treat. Speaking of flavor, don’t forget you can always add a little espresso powder to the crumbs for a deeper chocolate punch!
If you’re looking for another great make-ahead dessert that sets up beautifully in the fridge, check out my recipe for Brownie Bottom Cheesecake!
Creative Variations for Your Oreo Balls
You know I love sticking to tradition, but these oreo balls are just begging for you to personalize them! Once you master that basic, fudgy center, the sky’s the limit on decoration. Don’t feel like you have to stick to plain milk chocolate dipping every time!
My favorite switch-up, especially when the weather gets cold, is swapping out the milk chocolate for white chocolate chips. Melt the white chocolate and then drizzle a thin layer of dark chocolate on top once the white has set—it looks so professional!
For the holidays, try mixing a tiny bit of peppermint extract right into the cream cheese mixture before you roll them. Then, dip them in white chocolate and crush up some candy canes for a festive topping. Wow! If you aren’t into mint, peanut butter chips make an amazing coating too, especially if you drizzle them with dark chocolate for that classic peanut butter cup look.
If you’re feeling bold and adventurous with your chocolate game, you’ve got to check out how I use chocolate in my Ghost Pepper Chocolate Truffles—though maybe skip the heat in this recipe unless you’re making them for someone brave!
Storage and Make Ahead Tips for Oreo Treats
One reason I love these oreo balls so much is that they are absolutely fantastic for making ahead of time, which is a lifesaver when you’re hosting a party!
You can absolutely store finished, chocolate-coated treats in an airtight container in the refrigerator for up to two full weeks. They stay wonderfully creamy! If you need them to last even longer, the freezer is your friend. Pop your finished batches onto a tray and freeze them uncovered until solid, then transfer them to a freezer-safe bag or container.
They last for about two months in the deep freeze. The great thing is thawing is simple: just move them to the fridge an hour before you plan to serve them. My secret for keeping them fresh longer is to put a small square of parchment between the layers in the container, just so the chocolate shells don’t stick together.
Need more freezer-friendly ideas? You should definitely check out my awesome recipe for Freezer Breakfast Burritos for effortless mornings!
Frequently Asked Questions About Oreo Balls
I always get so many questions when folks first try making these chocolatey wonders! It’s natural when you’re relying on something super simple, like these amazing Easy Oreo Truffles; you want to make sure you nail the texture.
Can I use a cookie other than Oreos?
That’s a common question if someone is out of Oreos or wants to mix things up! You absolutely can use other sandwich cookies, but be aware that the texture will change a little. Vanilla wafers or chocolate chip sandwich cookies work fine, but you might need slightly less or more cream cheese because different cookie recipes have different levels of dry filling versus cookie wafer. For the classic, fudgiest results, though, stick to the original Oreos—they are the gold standard for Minimal Ingredient Desserts like this!
Why are my Oreo balls crumbling when I try to roll them?
Ah, the dreaded crumble! This almost always comes down to the cream cheese temperature. If your cream cheese is straight from the fridge, it won’t mix evenly into the crumbs, leaving dry pockets that fall apart when you try to form a ball. Make absolutely sure your cream cheese is soft—sit it on the counter for at least an hour before you start. If you forgot, you can microwave it for about 10 seconds, checking frequently so it doesn’t melt!
How do I get that perfectly smooth chocolate candy coating?
Getting that seamless shell is all about consistency, just like I mentioned when talking about the coating earlier. If your dipped balls look bumpy or the chocolate hardens too fast and streaks, you need to thin it out a touch. Adding that optional teaspoon of shortening or even a half-teaspoon of vegetable oil to your melting chocolate does wonders. It loosens up the temper of the chocolate just enough so it flows beautifully over the chilled, firm cookie ball, giving you a gorgeous, crisp shell.
If any other questions pop up while you’re whipping these up, feel free to reach out to me over on the contact page!
Nutritional Estimates for These Simple Oreo Dessert Bites
Now, I always tell people that when you’re making something this good, you aren’t exactly eating clean, but still, it’s good to have a general idea of what you’re indulging in! Remember, because these are coated in chocolate, these numbers are just estimates based on standard, full-fat ingredients.
Here’s a quick snapshot per single, delicious bite:
- Serving Size: 1 ball
- Calories: 150
- Sugar: 15g
- Sodium: 75mg
- Fat: 10g
- Saturated Fat: 6g
- Carbohydrates: 15g
- Protein: 2g
For full transparency about how I use recipes on my site and what these kinds of figures really mean, please take a moment to read my full disclaimer page. Enjoy responsibly!
Share Your Favorite Oreo Balls Creations
That’s it! You’ve got the easiest, creamiest, no-bake oreo balls recipe right here, and I truly hope you love them as much as my family does.
Once you’ve let them set up and you’ve had your first glorious bite, please come back and tell me what you thought! Drop a star rating below so other folks know just how fantastic these are, and don’t be shy about leaving a comment detailing any variations you tried.
If you snap a picture of your finished treats—maybe you added sprinkles or used white chocolate—please tag me on social media! I absolutely adore seeing your creations come to life in your kitchens. It keeps me inspired to share more unbelievably simple recipes!
And hey, if you want to know a little more about the person sharing all these kitchen secrets, check out my About Us page!
PrintEasy No-Bake Oreo Balls

Make simple, creamy Oreo balls using just a few ingredients. This no-bake recipe is perfect for quick desserts or holiday parties.
- Prep Time: 20 min
- Cook Time: 5 min
- Total Time: 25 min
- Yield: About 30 balls
- Category: Dessert
- Method: No Bake
- Cuisine: American
- Diet: Vegetarian
Ingredients
- 1 package (14.3 oz) Oreo cookies
- 8 oz cream cheese, softened
- 16 oz melting chocolate or chocolate almond bark
- 1 tablespoon shortening (optional, for smoother melting)
Instructions
- Place all Oreo cookies, including the cream filling, into a food processor. Pulse until you have fine crumbs.
- Transfer the crumbs to a medium bowl. Add the softened cream cheese.
- Mix the crumbs and cream cheese together using a hand mixer or clean hands until fully combined and a dough forms.
- Roll the mixture into small balls, about 1 inch in diameter. Place them on a baking sheet lined with parchment paper.
- Chill the balls in the refrigerator for at least 30 minutes to firm up.
- Melt the chocolate according to package directions. If using, stir in the shortening for a thinner consistency.
- Dip each chilled Oreo ball into the melted chocolate, ensuring it is fully coated. Tap off any excess chocolate.
- Return the coated balls to the parchment-lined sheet.
- Refrigerate the finished Oreo balls until the chocolate shell is set, about 15 to 20 minutes.
Notes
- For a different look, you can roll the balls in sprinkles or crushed nuts after dipping them in chocolate.
- If you do not have a food processor, crush the cookies in a sealed plastic bag using a rolling pin.
- Make sure your cream cheese is fully softened to avoid lumps in the mixture.
Nutrition
- Serving Size: 1 ball
- Calories: 150
- Sugar: 15
- Sodium: 75
- Fat: 10
- Saturated Fat: 6
- Unsaturated Fat: 4
- Trans Fat: 0
- Carbohydrates: 15
- Fiber: 0
- Protein: 2
- Cholesterol: 15