

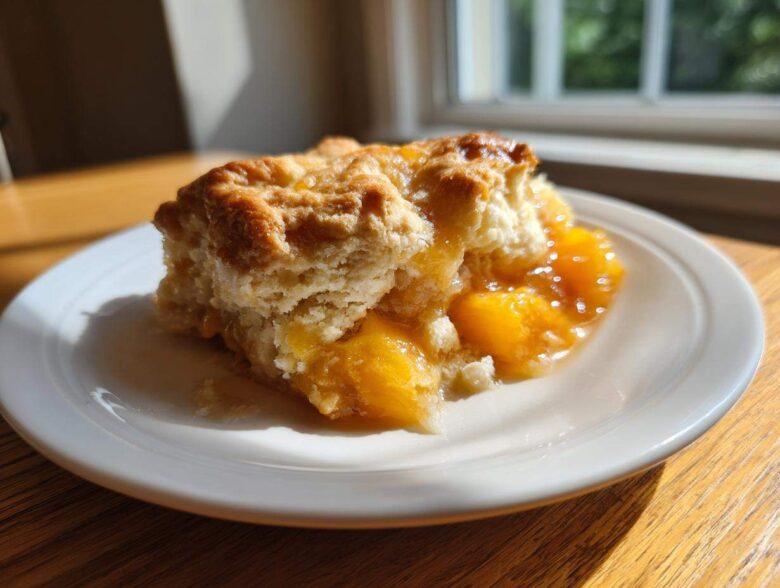
When the weather gets sticky, or honestly, any time I need a hug in a bowl, there’s only one thing that fixes it: a deep, bubbling, homemade dessert. Forget fancy layered cakes for a minute. I’m talking about the ultimate comfort food baking experience—a proper Southern Peach Cobbler. Trust me when I say, this particular recipe changed my life when I first tried to pull it off.
I remember wanting to bake something impressive for the first summer cookout after college, and I was so intimidated by the idea of a true Southern cobbler. I thought it had to take all day! But this version? It cracked the code. It delivers that rich, spiced peach filling and that slightly rustic, biscuit-style topping you dream about, all without needing to be a baking genius. It is, without a doubt, the easiest and most authentic peach cobbler you’ll ever whip up.
Why This Easy Fruit Cobbler Recipe is a Weeknight Dessert Idea Favorite
When you need that rustic, warm fruit bake flavor tonight, this is your go-to. We’re talking about a seriously simple berry cobbler that doesn’t require hours of waiting. It hits all that Southern comfort food baking nostalgia without any fuss.
- It’s lightning fast—prep is genuinely under 15 minutes!
- The topping is dropped on rather than meticulously rolled out.
- It tastes exactly like Grandma made it, even though it’s a super quick summer dessert.
- Less cleanup means more time enjoying that perfect dessert with ice cream topping.
Ingredients for the Ultimate Cobbler Recipe
You don’t need a pantry stocked like a professional bakery for this gorgeous dessert. Seriously, most of this stuff you probably have hanging out right now. The filling is bright and spicy, and the topping is that perfect, slightly sweet biscuit texture that just melts into the hot fruit underneath. That’s the secret to any good cobbler, right?
Here is what you need pulled out and ready to go. I like to measure everything into little bowls—it keeps me organized and makes the whole process feel even faster, which is key for a quick summer dessert:
- The Peaches: 4 cups of peach slices. Fresh is my absolute favorite—that texture is unmatched—but don’t you dare skip this if you only have frozen peaches on hand! Frozen work brilliantly, especially if you don’t thaw them first.
- Sweeteners and Spice: 1 cup granulated sugar for the fruit, plus another 1/2 cup for the topping. And you absolutely need that warm touch of 1 teaspoon ground cinnamon and 1/4 teaspoon ground nutmeg.
- For the Filling Base: Just 1 tablespoon of bright lemon juice to balance the sweetness, and 1/2 cup of all-purpose flour to thicken up those glorious juices.
- The Cold Butter Matters: 1/2 cup of cold, unsalted butter, cut into little pieces. Make sure it’s cold! This is non-negotiable for that flaky topping texture.
- The Topping Dough: 1 cup all-purpose flour, 1 teaspoon baking powder, and 1/2 teaspoon salt.
- The Liquid: 1/2 cup milk—and here’s a tip: if you have buttermilk, use it instead! It makes the biscuit topping even richer.
- The Glaze: 1 large egg, lightly beaten, just for brushing the top and making it golden brown.
See? Simple. You’re already halfway to the best homemade dessert experience ever.
Step-by-Step Southern Cobbler Baking Instructions
Okay, now for the fun part! Once you have your ingredients lined up, putting this amazing cobbler together is ridiculously fast. Remember, we’re aiming for that perfectly rustic look where the fruit bubbles up gorgeously around mounds of golden biscuit topping. Don’t stress if it doesn’t look picture-perfect when it goes in the oven—that’s part of its charm!
Make sure you preheat your oven to 375°F (190°C) right now so it’s hot when your cobbler is ready to bake. Also, get that 8×8 inch dish greased up lightly so nothing sticks!
Preparing the Fruit Filling for Your Cobbler
First, we handle the peaches. Grab your large bowl and toss those 4 cups of fruit with the 1 cup of sugar, the lemon juice to keep things bright, the cinnamon, and the nutmeg. Gently massage those spices around so every piece gets coated. Then, add that 1/2 cup of flour in, stirring just until the peaches look nicely dusted. Pour that sweet, spiced mix right into your prepared dish. That’s your base!
Making the Simple Cobbler Topping Secrets
This is where a lot of people get nervous, but don’t be! In a separate bowl, whisk the topping dry ingredients: 1 cup flour, 1/2 cup sugar, baking powder, and salt. Now, grab that cold butter—I mean cold—and use your fingertips or a pastry blender to cut it in. You’re looking for something that resembles coarse crumbs or some flakes. Stop right there before it turns into a sandy mess! Add the milk and stir just until a soft dough barely comes together. If you overwork this, you lose the biscuit tenderness, so stop mixing the minute you can still see flour streaks.
Assembling and Baking the Warm Fruit Bake Cobbler
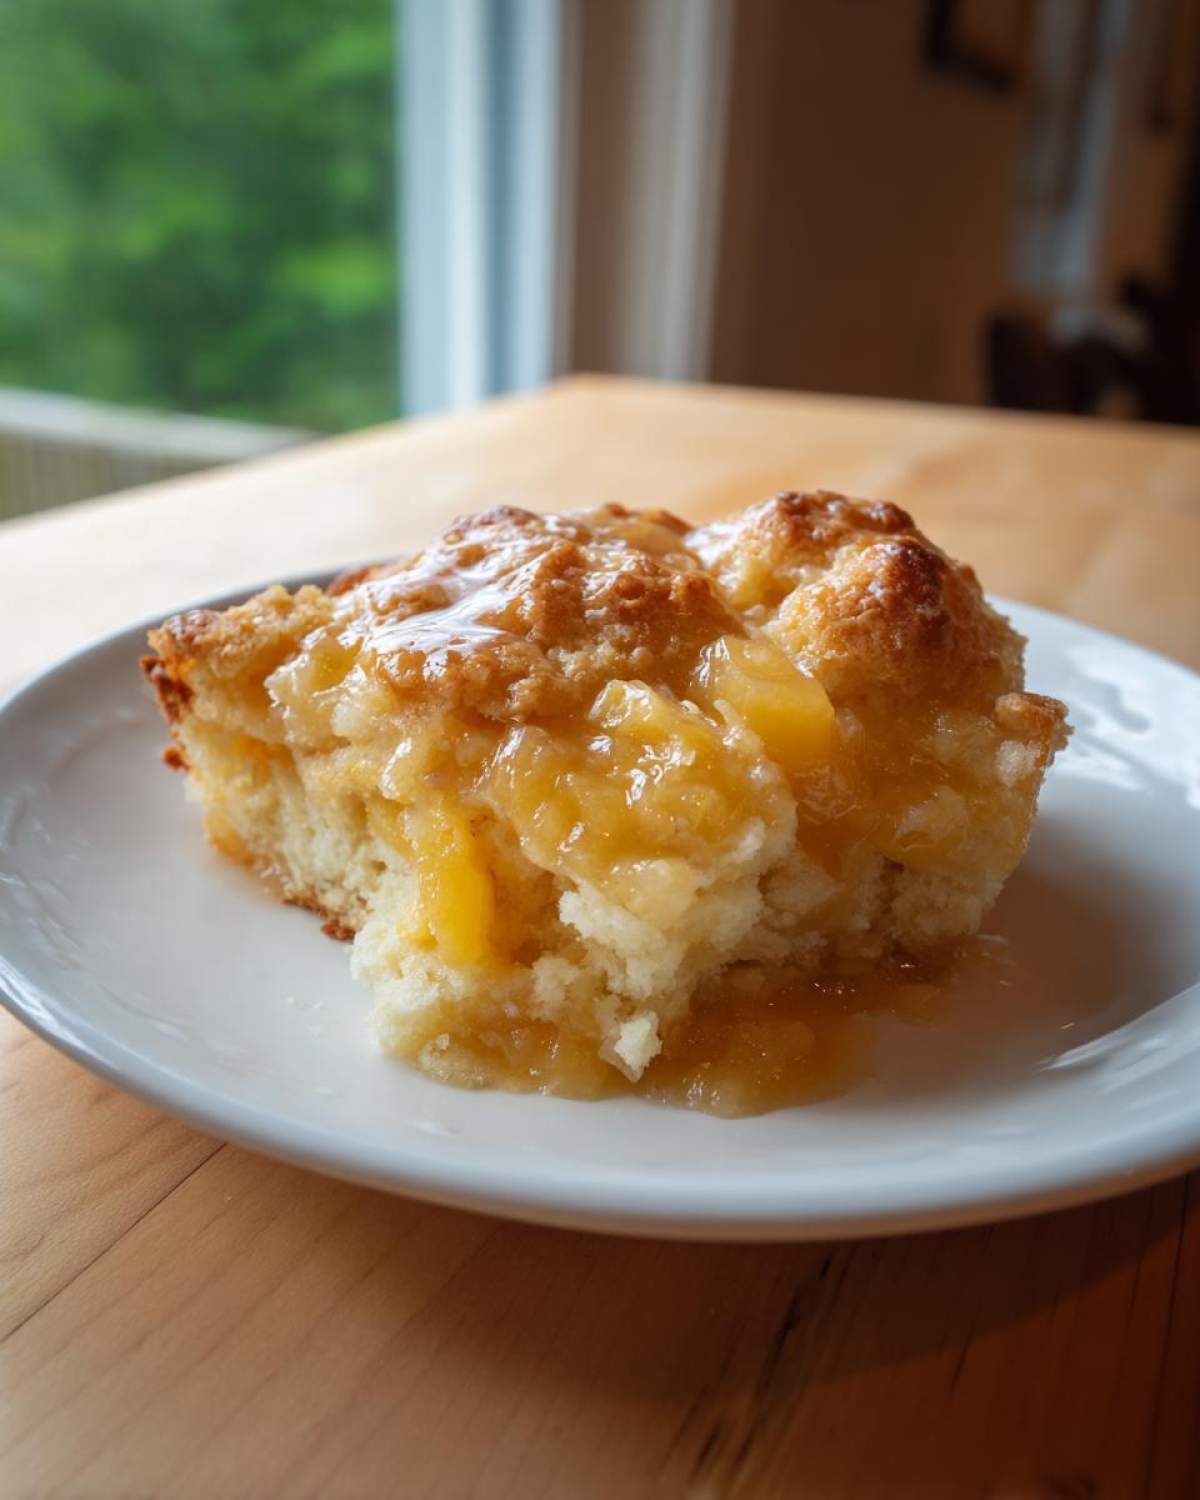
Take spoonfuls of that soft dough and drop them right over the peaches—they don’t need to touch or cover every inch of the fruit. Remember, we want rivers of bubbling peach filling running between those drops! Brush the tops of the dough mounds lightly with that beaten egg we set aside. Pop it into the preheated oven for about 35 to 45 minutes. You’ll know your cobbler is done when that topping is beautifully golden brown and you see the filling bubbling up thick around the edges. Let it rest for 15 minutes before diving in!
Tips for Success with This Classic Dessert Guide Cobbler
Even though this is an easy fruit cobbler recipe, a few little tricks will take it from good to legendary. My grandmother always said that the difference between a tasty dessert and a spectacular one lies in those small pre-bake steps!
First, let’s talk about that soggy bottom issue that plagues so many baked fruit desserts. If you are using a lot of very juicy fruit—especially if you chose frozen peaches or fresh berries—you might want to give the fruit base a quick 10-minute head start in the oven before adding the topping. This lets some of the excess moisture steam off.
My favorite technique for ensuring a great topping texture, whether I’m making peach or an apple topping dessert style, is chilling the dough. After you mix up that topping dough (the one that looks like coarse crumbs), stick it in the fridge for about 10 minutes while your oven finishes heating up. Cold butter means steam during baking, and steam means those lovely flaky layers in your biscuit top. It prevents it from flattening out on the peaches.
Also, don’t be afraid of a heavy dusting of sugar on top of the dough mounds, right before that egg wash. That extra sugar dissolves a little during baking and creates a thin, shiny, almost crackly shell over your biscuits. It’s a little visual cue that you’ve made something truly special, even if it only took you 15 minutes of prep time!
Finally, for real authenticity, use whatever fruit is peaking! If you switch to, say, blueberries, you might need to reduce the initial sugar slightly, as berries can be sharper than peaches. But the technique for this classic cobbler stays exactly the same.
Variations: Making a Simple Berry Cobbler or Apple Cobbler
I absolutely love that the foundation of this recipe is so sturdy. It’s not just a peach cobbler! Once you master this biscuit topping, you can pivot to almost any seasonal fruit you have on hand. That’s the beauty of a true old-fashioned fruit dessert—it’s adaptable!
Switching to Apple Topping Dessert Style
If you’re going for apples—which is a fantastic choice for a weekend baking project—you need to treat those apples a little differently. Apples are much firmer than peaches, so they need a head start cooking down. I usually slice them thin, toss them with the sugar, spices, and lemon juice, and then microwave them for about 3 minutes, or sauté them gently on the stove until they just start to soften up. This ensures they are tender when the topping is perfectly done.
The fruit flour amount usually stays the same, but sometimes if the apples are very crisp, I’ll add just one more teaspoon of flour to the filling to make sure we get that super thick, saucy base we want for a great cobbler.
How to Make a Simple Berry Cobbler
Berries—oh, berries! Blackberries, raspberries, mixed berries—they are amazing. The wonderful thing about berries is they don’t usually need extra cooking time like apples do. They release tons of liquid fast. Because of this, you should bump up that flour in the filling just a touch. I increase the 1/2 cup of flour in the filling to about 3/4 cup if I’m using a full 4 cups of soft berries.
Another tiny point for berries: they are naturally tarter than peaches. You might want to add an extra tablespoon of sugar to that fruit mix to keep that comforting dessert flavor humming. That gorgeous, bubbly, purple-edged cobbler is worth the tiny adjustment!
Honestly, once you have the butter cut into the flour just right for that topping, you can use this same technique for almost any sweet baked fruit. It’s your new secret weapon for easy weeknight desserts!
Serving Suggestions: Dessert with Ice Cream Topping
You’ve done the hard work—you baked the most glorious, bubbling Southern Peach Cobbler! You absolutely must not let that beautiful, warm fruit bake sit around naked. That is simply a crime against comfort food, in my book! The absolute best way to enjoy this dessert is warm—not piping hot straight from the oven hot, but definitely warm enough to melt whatever you put on top.
The pairing that never fails is a big, generous scoop of good quality vanilla ice cream. That contrast between the hot, spiced peaches and the cold, creamy vanilla swirl is pure magic. Trust me, let that ice cream start melting down the side of the fruit so it gets into all the nooks and crannies of that biscuit topping. It creates its own little sauce!
If ice cream isn’t your thing, or maybe you’re serving it for brunch the next day (don’t judge, it happens!), a dollop of freshly whipped cream is fantastic. Take your heavy cream and beat it with just a splash of vanilla extract and maybe a tiny sprinkle of powdered sugar until you get soft, pillowy peaks. That lightness cuts through the richness of the cobbler topping perfectly.
When I need to make this feel extra fancy for company, I sometimes grate a little fresh dark chocolate over the top of the ice cream as it sits on the warm cobbler. It melts instantly and adds a lovely dark note to the sweet fruit. Whatever you choose for your dessert with ice cream topping, just make sure you serve it right away!
Storage and Reheating Instructions for Leftover Cobbler
If somehow you managed to have any of this amazing dessert left—show off! You should store covered leftovers airtight. If you plan to eat it within a day, leaving it on the counter is usually fine, but the fridge is safer for longer storage. Forget the microwave if you want that topping crisp! The best way to revive it is to reheat individual slices in a toaster oven or regular oven at about 325°F for 10 minutes. That gentle heat dries out the topping just enough so it snaps again.
Frequently Asked Questions About Making a Homemade Dessert Cobbler
I get so many messages asking minor little tweaks about this recipe, so I figured I’d just put the answers right here! These little questions are usually what separates a good cobbler from the best one you’ve ever had. Don’t worry if you have your own questions—that’s what the comments section is for!
Can I use canned peaches instead of fresh or frozen?
Yes, you absolutely can use canned peaches if you need a truly amazing weeknight dessert idea! Just be thoughtful about it. If you use canned peaches, you need to drain them very, very well, or you risk ending up with a soupy mess at the bottom of your dish. I’d recommend draining off at least half of the syrup. Because canned peaches are already super sweet, you might want to cut the granulated sugar in the filling down to 3/4 cup instead of the full cup. It still turns out great for a quick comfort food baking session!
What is the difference between a cobbler and a crisp?
This is a classic query! The main difference for any good cobbler is the topping. Our recipe gives you that lovely, rustic, biscuit-style dollop top—it bakes up soft and cakey with a bit of crispness on the edges. A crisp or a crumble, on the other hand, has a topping made primarily of flour, sugar, butter, and usually oats, which bakes up crunchy and completely covers the fruit. If you want that crunchy texture, look up my apple crisp recipe, but if you want that true Southern feel, stick to this biscuit cobbler!
Can I experiment with using my smoker for this dessert?
Oh, now we’re talking about some advanced territory for smoked dessert ideas! Yes, you can absolutely try smoking a cobbler, but you can’t bake it the whole way there. Smoke the fruit filling gently over low heat (around 225°F) for about 45 minutes until it’s soft and full of smoke flavor. Then, transfer that smoked fruit to your baking dish, add the biscuit topping, and bake it in a regular oven (or on indirect heat on the grill) at 375°F until the topping is golden. It adds such a unique layer to that warm fruit bake!
Do I really have to use cold butter for the topping?
Yes, yes, and a thousand times yes! This is my single most important rule for any topping, whether it’s for an easy fruit cobbler or a pie. Cold cubes of butter create steam pockets when they hit the hot oven. Those steam pockets push the dough up, giving you that wonderful, layered, biscuit texture. If you use soft, room-temperature butter, you get a greasy, flat, dense topping, and nobody wants that sad result.
Can I make this ahead of time?
For a great homemade dessert recipe, you can prep ahead, yes! You can make the fruit filling mixture (peaches, sugar, spices, flour) and keep it covered in the fridge for up to 24 hours. You can even prepare the topping dough and keep it chilled. But here’s the thing: never assemble them until you are ready to bake! The topping needs the cold butter to work its magic, and assembling too early lets the moisture from the fruit soak into the biscuit dough, making it gummy instead of crisp.
Nutritional Estimates for This Comfort Food Baking Recipe
I always feel a little guilty typing this part out because when you’re eating homemade dessert, you’re really not thinking about the numbers, are you? You’re thinking about how perfect it is with that cold scoop of vanilla ice cream on top! But for those of you keeping track, here are the rough estimates I came up with for one generous serving of this classic Southern Peach cobbler.
Remember, this is based on using the ingredients as listed and dividing it into 6 servings. If you use buttermilk or add extra sugar to your topping, those numbers will shift, so see these as a helpful guide rather than gospel truth for your perfect cobbler.
- Serving Size: 1 serving
- Calories: 380
- Sugar: 45g (Mostly from the peaches and topping sugar, naturally!)
- Sodium: 210mg
- Fat: 16g
- Saturated Fat: 10g
- Unsaturated Fat: 6g
- Trans Fat: 0.5g
- Carbohydrates: 58g
- Fiber: 3g
- Protein: 4g
- Cholesterol: 45mg
I want to be super clear: these are just estimates derived from the recipe components. The actual values can change based on the brand of butter you use, how much sugar you sneak in when nobody’s looking, or if you decide to make a *huge* serving (which I totally support). For the absolute most accurate numbers on any recipe, you should always cross-reference the exact items you purchase. But for now, just know that this comfort food baking is worth every single number!
PrintEasy Southern Peach Cobbler

A simple recipe for a classic, comforting Southern peach cobbler with a biscuit-style topping.
- Prep Time: 15 min
- Cook Time: 40 min
- Total Time: 55 min
- Yield: 6 servings
- Category: Dessert
- Method: Baking
- Cuisine: American
- Diet: Vegetarian
Ingredients
- 4 cups fresh or frozen peach slices
- 1 cup granulated sugar
- 1 tablespoon lemon juice
- 1 teaspoon ground cinnamon
- 1/4 teaspoon ground nutmeg
- 1/2 cup all-purpose flour (for filling)
- 1/2 cup cold unsalted butter, cut into pieces
- 1 cup all-purpose flour (for topping)
- 1/2 cup granulated sugar (for topping)
- 1 teaspoon baking powder
- 1/2 teaspoon salt
- 1/2 cup milk
- 1 large egg, lightly beaten (for brushing top)
Instructions
- Preheat your oven to 375°F (190°C). Lightly grease an 8×8 inch baking dish.
- In a large bowl, combine the peach slices, 1 cup sugar, lemon juice, cinnamon, and nutmeg. Toss gently.
- Stir in the 1/2 cup flour until the peaches are lightly coated. Pour the peach mixture into the prepared baking dish.
- Prepare the topping: In a separate medium bowl, whisk together the 1 cup flour, 1/2 cup sugar, baking powder, and salt.
- Cut in the cold butter using a pastry blender or your fingers until the mixture resembles coarse crumbs.
- Pour in the milk and stir just until a soft dough forms. Do not overmix.
- Drop spoonfuls of the dough evenly over the top of the peach filling. It does not need to cover the entire surface.
- Brush the tops of the dough mounds lightly with the beaten egg.
- Bake for 35 to 45 minutes, or until the topping is golden brown and the peach filling is bubbly.
- Let the cobbler cool for at least 15 minutes before serving.
Notes
- Serve warm with vanilla ice cream or whipped cream.
- If using frozen peaches, do not thaw them before mixing them into the filling.
- For a richer topping flavor, substitute buttermilk for regular milk.
Nutrition
- Serving Size: 1 serving
- Calories: 380
- Sugar: 45g
- Sodium: 210mg
- Fat: 16g
- Saturated Fat: 10g
- Unsaturated Fat: 6g
- Trans Fat: 0.5g
- Carbohydrates: 58g
- Fiber: 3g
- Protein: 4g
- Cholesterol: 45mg