

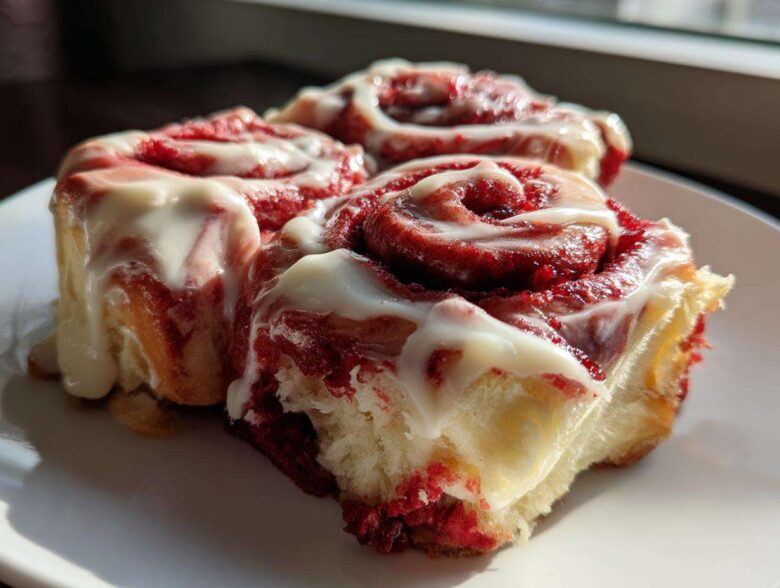
If you’re like me, sometimes a regular Saturday morning just demands something extra decadent, right? Forget those mediocre pastries; we’re diving headfirst into something truly spectacular today. I’ve finally cracked the code on the bakery-style fluffy red velvet cinnamon rolls that look like real showstoppers but actually come together without too many tears. Seriously, the secret to getting that incredible, soft dough texture that makes them melt in your mouth took me four tries, but trust me, we nailed it. These red velvet cinnamon rolls recipe combines that lush cocoa flavor with a swirl of cinnamon, all drowning in that tangy, thick cream cheese icing. Get ready for the absolute best sweet breakfast you’ve made all year!
Why You Will Love These Red Velvet Cinnamon Rolls
I know, I know, everyone promises the ‘best’ roll, but honestly, these red velvet cinnamon rolls are different. They are unbelievably soft—I mean, pillow-soft! When you pull them apart, you’ll see exactly why I spent forever perfecting the dough. Here’s what makes them worth every single minute in the kitchen:
- True Bakery-Style Fluffiness: We aren’t messing around with dense bread here! The technique I use guarantees those light, airy layers that you usually only find at a specialty bakery.
- Perfect Balance of Flavor: They have that classic, mild cocoa note that makes red velvet special, but it doesn’t overpower the fragrant cinnamon swirl we pack inside.
- They Are Actual Showstoppers: Imagine serving these for brunch—vibrant, gorgeous red swirls peeking out from under a blanket of thick icing. They are guaranteed to impress at any holiday table or special brunch.
- The Ultimate Homemade Cream Cheese Icing: Forget watery glaze! This icing is thick, tangy, and pools everywhere it should, soaking right into the warm rolls.
- Decadent Sweet Rolls without Being Too Heavy: Because the dough stays so light, you still feel satisfied, not weighted down, after eating one (or two!).
- Fantastic for Making Ahead: If you’re busy, you can easily mix the dough the night before to pop in the oven fresh the next morning.
Essential Ingredients for Soft Red Velvet Cinnamon Rolls
Picking the right ingredients here is crucial—it’s the difference between a chewy, sad roll and one of those amazing giant skillet cinnamon rolls you see online! Since we are making these from scratch cinnamon rolls, precision in measuring, especially the flour, and the coloring, makes all the difference in getting that pillowy soft dough.
For the Fluffy Red Velvet Dough
For the dough, temperature is everything. You want those eggs and that buttermilk sitting out for an hour before mixing! It really helps the yeast breathe and creates a better structure for these soft dough baking treats.
- 1 cup whole milk, warmed (It should feel like warm bath water, not hot!)
- 2 1/4 teaspoons active dry yeast
- 1/2 cup granulated sugar, plus 1 teaspoon specifically for waking up the yeast
- 1/2 cup unsalted butter, softened (Take this out early!)
- 2 large eggs, room temperature—this helps them blend seamlessly
- 1 teaspoon vanilla extract
- 1 teaspoon white vinegar (This really helps emphasize that classic red velvet tang!)
- 2 tablespoons red food coloring (I strongly recommend the gel version for the best, most vibrant red baked treats, not the watery kind.)
- 1/2 cup buttermilk for that signature slight sourness
- 4 1/2 cups all-purpose flour, plus whatever extra you need for dusting the counter
- 1 teaspoon salt
For the Cinnamon Swirl Filling
This filling needs to be easily spreadable like paste, not crumbly, otherwise, you struggle when rolling the log, and then you lose those gorgeous marbled cinnamon rolls! Mix this up while the dough is doing its first rise.
- 1/2 cup unsalted butter, softened (Again, nice and soft!)
- 1 cup packed light brown sugar (Make sure you pack it into the cup tight!)
- 2 tablespoons ground cinnamon
- 1/4 cup all-purpose flour (This flour is key to keeping the filling from running out during baking)
For the Homemade Cream Cheese Icing
This is the crowning glory! You MUST use room temperature cream cheese and butter for your homemade cream cheese icing. If they are cold, you get little lumps, and no one wants a bumpy frosting moment on their stunning rolls.
- 8 ounces cream cheese, softened
- 1/2 cup unsalted butter, softened
- 3 cups powdered sugar, sifted (Sifting gets rid of any lumps before they even start!)
- 1 teaspoon vanilla extract
- 1 tablespoon milk or heavy cream (Just use this only if you need to thin it out slightly)
Step-by-Step Guide to Making Bakery Style Red Velvet Cinnamon Rolls
Okay, deep breath! This is where we actually build those gorgeous red velvet cinnamon rolls. Don’t let the steps scare you; it flows really nicely. We start with the yeast, build a beautiful, vibrant dough, and then we tuck all that cinnamon goodness inside. Follow me closely, and these will come out just like the ones at the best local bakeries.
Activating Yeast and Mixing the Red Velvet Dough
First things first, we wake up the yeast. Measure out your warm milk—if it’s too hot, it kills the yeast, so aim for that perfect, cozy warmth. Mix the yeast with a tiny pinch of sugar and the rest of that warm milk. Let it sit until it gets foamy—that’s your cue that the yeast is happy and ready to work its magic!
Next, grab your big mixing bowl. Cream together the softened butter and the main portion of sugar until it looks light and airy, like pale whipped cream. Then beat in the room temperature eggs one by one. Now for the colors! Add your vanilla, vinegar, buttermilk, and the two tablespoons of red food coloring. Mix that until it’s richly colored. Pour in that foamy yeast mixture and slowly, I mean slowly, start adding the flour and salt until it just comes together into a shaggy dough. Don’t go crazy mixing yet!
Kneading and the First Rise for Fluffy Cinnamon Rolls
Time to get your hands dirty! Turn that shaggy dough out onto a lightly floured surface. You need to knead this for about five to seven minutes. This is where you build the strength for those soft dough baking results. You’ll know it’s ready when it feels smooth, elastic, and snaps back slightly when you poke it gently. Resist the huge temptation to add tons of extra flour—we want this dough soft, not tough!
Tuck the dough into a greased bowl, cover it up tight, and set it somewhere warm. Let it hang out for an hour to an hour and a half. You are waiting for it to double completely in size. Patience is key here; the long, slow rise makes these rolls so incredibly fluffy.
Assembling and Cutting Your Red Velvet Cinnamon Rolls
While the dough is rising, quickly whip up that filling paste we talked about—soft butter mixed with the packed brown sugar, cinnamon, and the last bit of flour. Doesn’t that smell amazing?
Once the dough has doubled, gently punch the air out. Roll it out on your counter into a big rectangle, about 12 by 18 inches. Now, spread that filling evenly edge-to-edge, leaving maybe a half-inch border clean on just one of the long sides. This clean edge will help seal the log later. Okay, deep breath: starting on the side opposite the clean edge, roll that dough up as tightly as you can! Really press it into a nice, firm log. Pinch that seam closed really well so it doesn’t pop open when it bakes. Then, taking a sharp, unflavored dental floss or thin knife, slice that log into 12 equal pieces for your cinnamon swirl dessert.
Arrange your beautiful cuts into a greased 9×13 pan. They will be snug, but that’s good! Cover them again and let them have a second nap—about 30 to 45 minutes—until they look puffy again.
Baking and Applying the Cream Cheese Frosting
Get your oven hotter now! Preheat it to 375 degrees Fahrenheit. These aren’t a slow bake; they bake up fast. Pop them in for about 20 to 25 minutes. You’re looking for the centers to be set, and the edges should look just barely kissed by golden brown—remember, we want soft and vibrant, not dry!
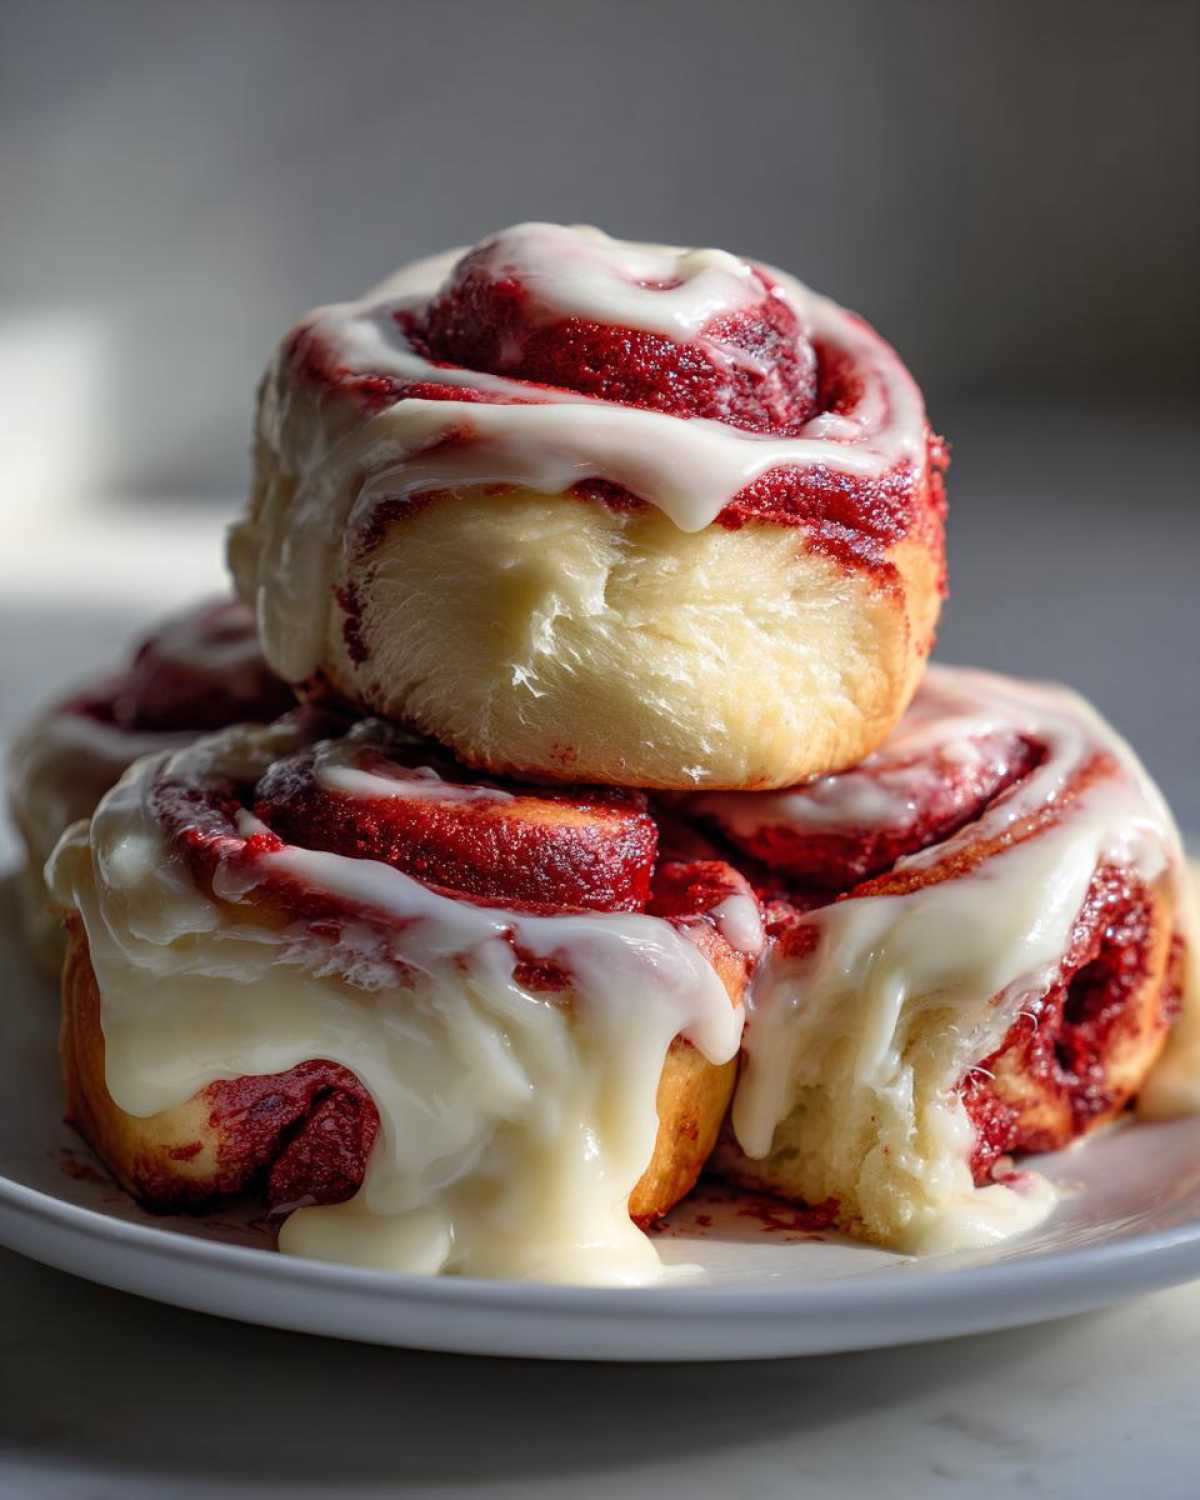
This part is non-negotiable for the best result: as soon as those red velvet cinnamon rolls come out of the oven, you must immediately slather that thick, ready-made cream cheese icing all over them. Spreading it while they are still hot makes the icing melt just enough to seep into every single crack and crevice. That thick blanket of frosting is what officially makes them the best comfort food!
Tips for Achieving Perfect Red Velvet Cinnamon Rolls Every Time
You’ve done the hard work! Now let’s talk about those little tweaks that separate a good batch of red velvet cinnamon rolls from the absolute showstoppers. Based on my endless testing, there are three main areas to focus on: color, softness, and timing. If you get these small things right, you’ll have guaranteed success every single time you bake these.
Ingredient Secrets for Vibrant Red Baked Treats
That beautiful, striking color is what screams “red velvet,” so we need to make sure we get it right! I learned the hard way that not all food coloring is created equal. Liquid coloring has too much water content, which can thin out our precious dough, and honestly, you end up needing a gallon of the stuff just to get a pale pink.
Seriously, if you want those vibrant red baked treats that truly pop, spend the extra dollar on gel food coloring. You use way less, and the pigment is deeply concentrated. A couple of drops, maybe a teaspoon for an extra intense hue, and you are set. Also, don’t skip the vinegar! It really helps enhance that subtle, slightly acidic layer of flavor that balances all the sweetness from the sugar and the filling.
Make-Ahead and Storage for Decadent Sweet Rolls
Life gets busy, and sometimes you need to bake the day before serving, especially when tackling something like these cinnamon roll pancakes’ fancier cousin. Good news: this dough is a fantastic candidate for overnight chilling!
To prep ahead, follow all the steps right up until you slice the rolls and place them in your baking pan. Cover that pan snugly with plastic wrap—I double wrap it just to be safe—and pop it right into the refrigerator. It can chill overnight, sometimes even up to 12 hours. When you wake up, let them sit on the counter for about an hour while the oven preheats. The second rise will take a little longer, but they’ll still be gorgeous.
Now, for leftovers (if you even have any of these decadent sweet rolls left!). Store uneaten frosted rolls airtight at room temperature for one day, then the fridge for up to three days. To reheat, I just microwave one roll with a tiny splash of milk for about 20 seconds. It brings back that incredible fresh-out-of-the-oven softness!
Serving Suggestions for Your Showstopper Desserts
Once these gorgeous red velvet cinnamon rolls are smothered in that glorious cream cheese frosting, they really become the star of the show! They are just so rich and decadent that they don’t need much company, but I always like to set up a little spread for brunches or holiday mornings. It elevates the whole experience, you know?
For a holiday morning like Christmas or Easter, where you want to look like you worked for days but actually you just mixed up this recipe, these rolls pair perfectly with something lighter and maybe something coffee-based. Think about serving them alongside something that isn’t quite as heavy—maybe my pumpkin spice pancakes recipe if it’s fall, or even just some fresh fruit salad to cut through the richness.
If you’re serving these as a dessert after dinner, which, yes, you absolutely should, they are amazing warmed up just slightly. I love serving mine with a tiny dollop of extra whipped cream on the side (if you think the frosting isn’t enough!) and maybe a strong cup of black coffee. These are one of those ultimate comfort food baking items that just scream, “Relax, you deserve this!” Check out my main roundup of brunch recipes for holidays for more ways to fill out your big morning spread!
Frequently Asked Questions About Red Velvet Cinnamon Rolls Recipe
Even the best rolls sometimes bring up questions, especially when you’re trying to get that perfect texture for these red velvet cinnamon rolls recipe. I’ve gathered up the ones I hear most often while people are baking. No matter if you’re an experienced baker or trying these from scratch cinnamon rolls for the first time, I’ve got the answers to keep things smooth!
Can I substitute buttermilk in this red velvet cinnamon rolls recipe?
That’s a great question! Buttermilk is awesome because the tiny bit of acid tenderizes the gluten just a bit, which helps with that soft dough magic. If you don’t have any on hand, it’s totally fixable! You can make a quick substitute at home. Just take one half-cup of regular milk—any kind works—and stir in one teaspoon of white vinegar or lemon juice. Let that sit on the counter for about five minutes until it curdles slightly. That acidic milk works almost exactly the same way in the dough!
How do I store leftover cinnamon rolls with frosting?
Since these cinnamon rolls with frosting are loaded with that rich homemade cream cheese icing, I recommend storing any leftovers in an airtight container in the refrigerator. They generally stay good for three to four days this way. Don’t worry! They might firm up a bit, but we can fix that.
To bring back that fresh-baked melt-in-your-mouth quality, cover a single roll with a paper towel and microwave it for about 15 to 20 seconds. It warms everything up perfectly, getting that icing gooey again without drying out the actual roll. It’s like getting a second day success!
If you have leftovers from a big batch, like after making those apple cinnamon pull apart bread style recipes, you can freeze them unfrosted for up to a month. Just make sure they are wrapped tightly in plastic wrap and then foil. Thaw them overnight in the fridge before warming.
Also, if you want to avoid the mess of storing them already frosted, you can store the rolls naked (unfrosted) at room temperature for two days. Then, just whip up a fresh batch of the homemade cream cheese icing when you’re ready to eat them!
Recipe Details and Timing for Easy Weekend Baking Projects
I always think it’s super helpful to see the whole picture laid out before you even decide to whip out the stand mixer. Knowing the timeline helps me slot my baking into my weekend schedule, especially when I’m trying to fit it around soccer practice or chores! These easy weekend baking projects are totally worth the time commitment, but it’s good to know exactly what you’re signing up for.
Here is the rundown on how long these gorgeous rolls take and what they yield. It might look like a long total time, but remember most of that is just passive rising time—you’re barely lifting a finger!
- Prep Time: 45 minutes (This is active work time, rolling and mixing!)
- Cook Time: 25 minutes (A quick blast in that hot oven.)
- Total Time: 175 minutes (A little over two and a half hours, mostly hands-off!)
- Yield: 12 servings (You get 12 generously sized, decadent rolls!)
- Category: Breakfast (Though honestly, they work any time of day.)
- Method: Baking
- Cuisine: American
- Diet: Vegetarian
See? It’s not bad at all for what you get. It’s the perfect baking adventure for a slightly slower Saturday morning when you want a truly special treat ready for brunch!
Nutritional Estimates for Your Decadent Sweet Rolls
Now look, I’m not going to pretend these glorious, fluffy, cream-cheese-laden red velvet cinnamon rolls are a health food! They are pure joy and comfort, meant for special mornings or end-of-the-week celebrations. But I know some of you are curious about what you’re digging into when you reach for one of these beauties. So, based on my recipe breakdown, here are the ballpark numbers per roll.
Remember, these are just estimates, okay? If you use regular milk instead of buttermilk, or maybe sneak a little less sugar into your homemade cream cheese icing, the numbers will change slightly. Always take these as a guide, not as gospel!
- Serving Size: 1 roll
- Calories: 550 (Worth every single one!)
- Sugar: 65g (Yep, we like it sweet!)
- Sodium: 350mg
- Fat: 30g
- Saturated Fat: 18g (That’s where the butter and cream cheese come in!)
- Unsaturated Fat: 10g
- Trans Fat: 0.5g
- Carbohydrates: 68g
- Fiber: 2g
- Protein: 8g
- Cholesterol: 95mg
If you are eyeing these for a holiday brunch, especially if you are serving them alongside other sweet breakfast ideas, just know that these rolls pack a punch! They are definitely meant to be the main event. Enjoy them guilt-free—we earned these treats with all that kneading we did!
Share Your Ultimate Comfort Food Baking Experience
Whew! We made it! Making a batch of these gorgeous red velvet cinnamon rolls really is one of my favorite things to see come together in the kitchen. Now that you’ve gone through all that kneading and rising, I absolutely want to hear how they turned out for you!
Did you manage to get that fantastic pillowy soft dough consistency? Was the color just shocking and vibrant like you hoped? Please drop a rating below—I love seeing how many stars you give these ultimate comfort food baking projects! Your feedback helps me know exactly what tips and tricks are working best for everyone.
And listen, if you did take a picture of those stunning, gooey, cream cheese-covered treats before everyone dove in, you absolutely have to share it on social media! Tag me so I can see your beautiful creations. There is nothing better than seeing my readers enjoy these incredible, homemade showstopper desserts. Happy baking, friends, and I can’t wait to read your comments!
PrintBakery-Style Fluffy Red Velvet Cinnamon Rolls with Classic Cream Cheese Glaze

Make soft, vibrant red velvet cinnamon rolls from scratch. These rolls feature a rich cocoa flavor in a fluffy dough, swirled with cinnamon filling, and topped with a thick cream cheese glaze.
- Prep Time: 45 min
- Cook Time: 25 min
- Total Time: 175 min
- Yield: 12 servings
- Category: Breakfast
- Method: Baking
- Cuisine: American
- Diet: Vegetarian
Ingredients
- 1 cup whole milk, warmed
- 2 1/4 teaspoons active dry yeast
- 1/2 cup granulated sugar, plus 1 teaspoon for yeast
- 1/2 cup unsalted butter, softened
- 2 large eggs, room temperature
- 1 teaspoon vanilla extract
- 1 teaspoon white vinegar
- 2 tablespoons red food coloring (gel preferred)
- 1/2 cup buttermilk
- 4 1/2 cups all-purpose flour, plus more for dusting
- 1 teaspoon salt
- 1/2 cup unsalted butter, softened (for filling)
- 1 cup packed light brown sugar (for filling)
- 2 tablespoons ground cinnamon (for filling)
- 1/4 cup all-purpose flour (for filling)
- 8 ounces cream cheese, softened (for glaze)
- 1/2 cup unsalted butter, softened (for glaze)
- 3 cups powdered sugar, sifted (for glaze)
- 1 teaspoon vanilla extract (for glaze)
- 1 tablespoon milk or heavy cream (for glaze, optional)
Instructions
- Activate the yeast: Combine warm milk, 1 teaspoon sugar, and yeast in a bowl. Let stand 5 to 10 minutes until foamy.
- In a large bowl, cream together 1/2 cup sugar and 1/2 cup softened butter until light and fluffy. Beat in eggs one at a time. Add vanilla, vinegar, red food coloring, and buttermilk. Mix well.
- Add the yeast mixture to the wet ingredients. Gradually mix in the flour and salt until a soft dough forms. Knead on a lightly floured surface for 5 to 7 minutes until smooth and elastic.
- Place dough in a greased bowl, cover, and let rise in a warm place for 1 to 1.5 hours, or until doubled in size.
- Prepare the filling: In a small bowl, mix the 1/2 cup softened butter, brown sugar, cinnamon, and 1/4 cup flour until combined into a paste.
- Punch down the risen dough. Roll it out on a lightly floured surface into a large rectangle, about 12×18 inches.
- Spread the cinnamon filling evenly over the dough surface, leaving a small border on one long edge.
- Starting from the long edge opposite the border, tightly roll the dough into a log. Pinch the seam closed.
- Slice the log into 12 equal rolls. Place rolls in a greased 9×13 inch baking pan. Cover and let rise for a second time for 30 to 45 minutes.
- Preheat your oven to 375 degrees Fahrenheit. Bake for 20 to 25 minutes, or until the centers are set and the edges are lightly golden.
- Prepare the glaze: Beat the softened cream cheese and 1/2 cup softened butter until smooth. Gradually add the powdered sugar and vanilla. Add milk if the glaze is too thick.
- Remove rolls from the oven and immediately spread the cream cheese glaze generously over the warm rolls. Serve warm.
Notes
- For the most vibrant color, use a high-quality gel food coloring instead of liquid coloring.
- If you prefer a less intense red, reduce the food coloring amount slightly.
- For extra soft rolls, ensure your milk is warm but not hot when activating the yeast.
- You can prepare the dough the night before, let it rise once, punch it down, wrap it tightly, and refrigerate. Roll and bake the next morning.
Nutrition
- Serving Size: 1 roll
- Calories: 550
- Sugar: 65
- Sodium: 350
- Fat: 30
- Saturated Fat: 18
- Unsaturated Fat: 10
- Trans Fat: 0.5
- Carbohydrates: 68
- Fiber: 2
- Protein: 8
- Cholesterol: 95