

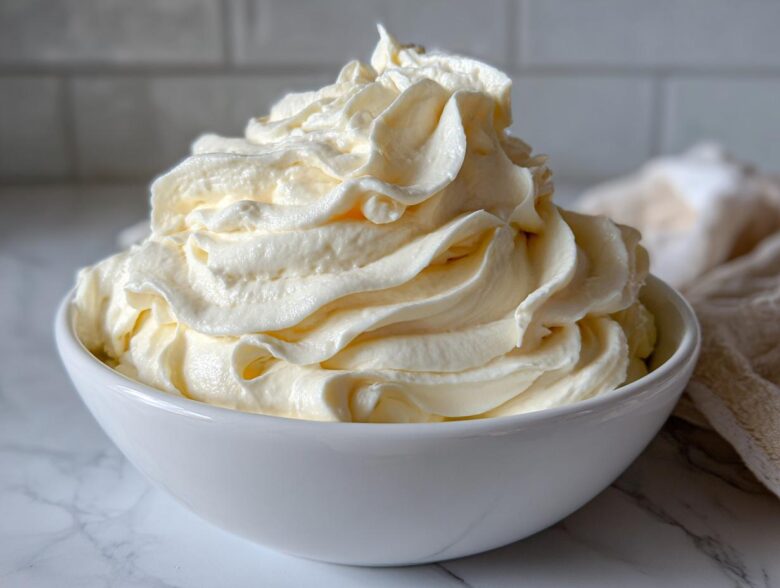
You know, there’s nothing sadder than finding the perfect cake or cupcake, only to be let down by lackluster, greasy frosting. It’s the crown jewel! For years, I struggled. My buttercream was either grainy or it slid right off the cake like a melted tire. Ugh! But I cracked the code. After way too many mixer bowls full of experimentation, I finally landed on what I now call the Best Ever Fluffy vanilla buttercream frosting. This isn’t some complicated Swiss meringue nonsense; this is the easy, deeply satisfying American buttercream everyone needs in their life. Trust me, once you master this simple icing—getting it perfectly smooth and tall enough for a serious swirl—you’ll never go back to that store-bought tub ever again. It’s truly essential baking magic!
Why This is the Best Vanilla Buttercream Frosting Recipe
If you’ve been searching for that elusive perfect topping, this is it. I promise you this is the last recipe you’ll ever save. It checks every single box you didn’t even know you had!
- It whips up incredibly fast—seriously, you’ll be decorating in under 15 minutes!
- The texture is pure cloud stuff—super light, airy, and wonderfully Fluffy Cake Icing.
- It’s sturdy enough to handle any star tip you throw at it; this is premier Creamy Cupcake Topping.
- It tastes purely of vanilla and butter, exactly how a classic Classic Homemade Buttercream should taste.
Ingredients for Perfect Vanilla Buttercream Frosting
Okay, stop what you’re doing and look at your ingredients. This recipe is simple, but only if quality matters! The butter has to be perfect—softened to room temperature, not melted, got it? That’s the secret to avoiding that greasy finish when making your Smooth Vanilla Icing.
- 1 cup unsalted butter, softened just right to room temperature
- 4 cups powdered sugar, sifted—don’t skip the sifting!
- 1 teaspoon pure vanilla extract (use the good stuff here!)
- 2 to 4 tablespoons heavy cream or whole milk
- A tiny pinch of salt to balance all that sweetness
Step-by-Step Guide to Making Vanilla Buttercream Frosting
Don’t let the mixer intimidate you! This is where the magic happens, and honestly, it’s faster than brewing a pot of coffee. We aren’t just mixing ingredients here; we are building structure and incorporating air, which is why that final fluffy texture happens. Follow these steps exactly, and you won’t ever have to worry about a flat topping again.
Creaming the Butter for Your Vanilla Buttercream Frosting
First things first: get that softened butter into your bowl. You want it soft enough that your finger leaves an indent, but definitely not oily! Turn your mixer onto medium speed—don’t go too fast or you’ll wear yourself out scraping the walls. Beat that butter alone for a solid three minutes. We are looking for it to change color slightly and get genuinely light and fluffy. This sets up the entire body of our Buttercream for Cakes.
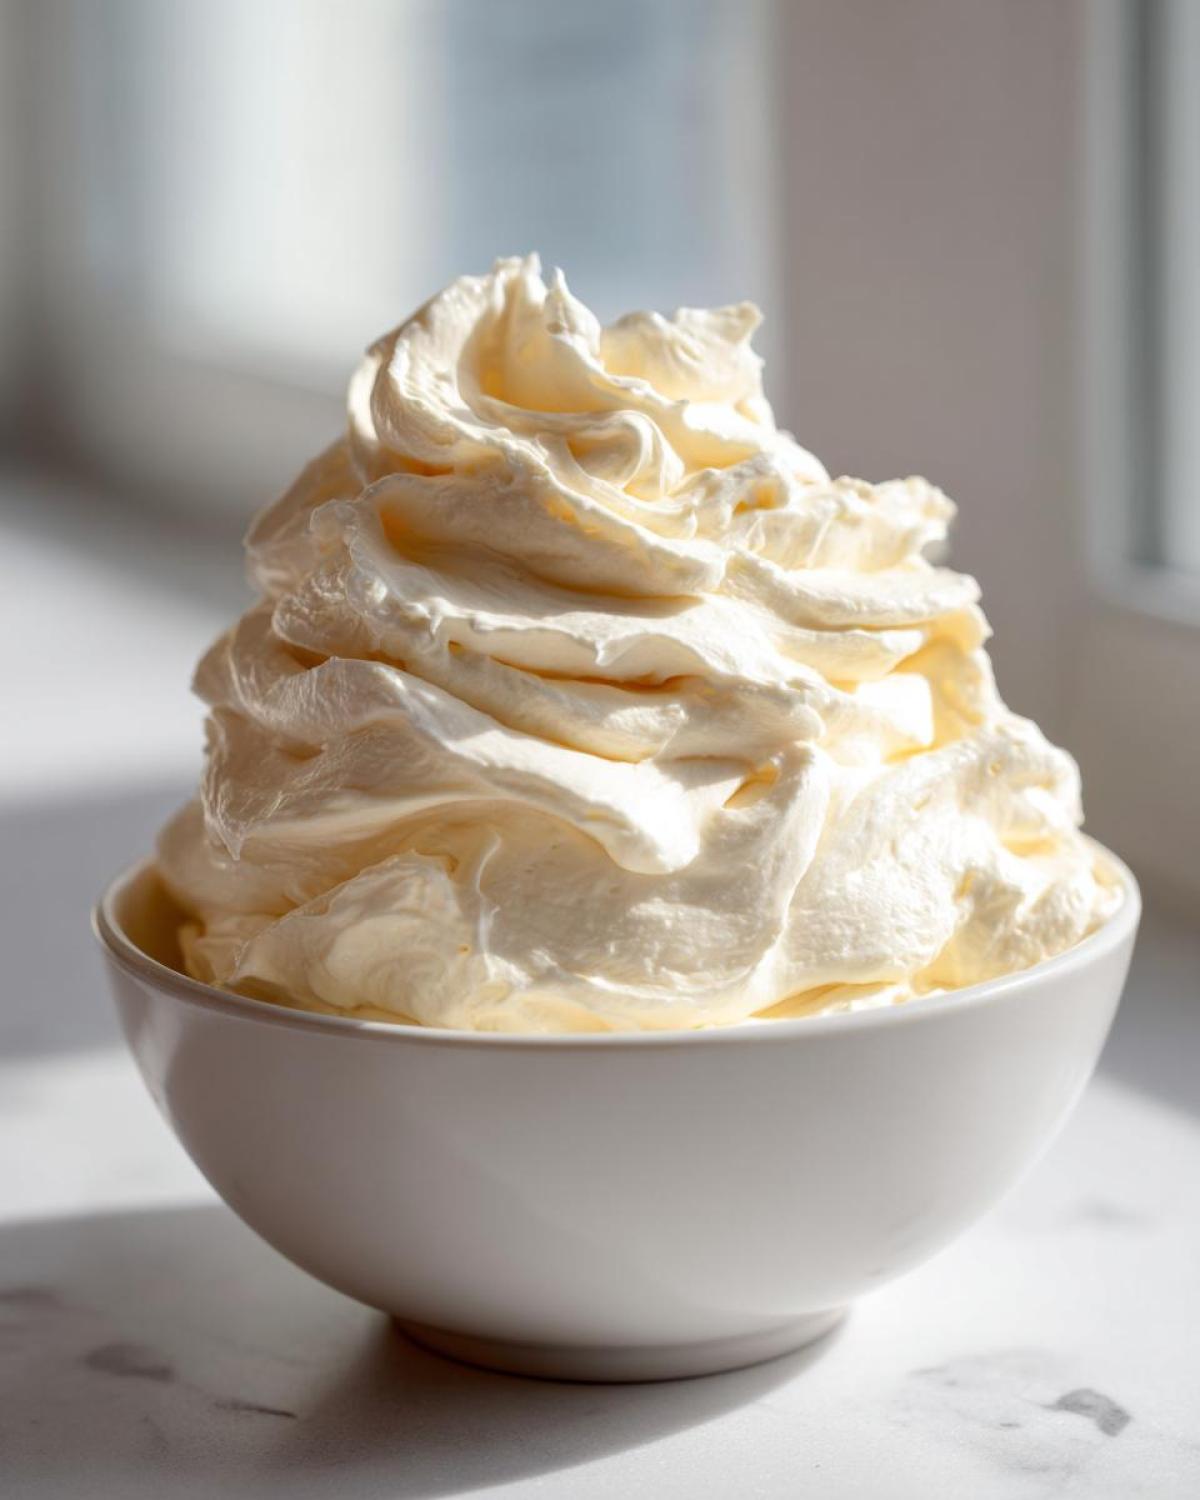
Incorporating Sugar and Flavoring into the Easy Frosting Recipe
Now, grab that sifted powdered sugar. We add it slowly, one full cup at a time, keeping your mixer speed on low. This stops a sugar cloud explosion in your kitchen, trust me! Once the sugar is mostly mixed in, stop and scrape down those sides really well. Then, toss in your vanilla and that little pinch of salt before cranking the speed up just a bit.
Whipping for a Truly Fluffy Creamy Cupcake Topping
This part is non-negotiable if you want that beautiful height for piping! After the initial incorporation, add just 2 tablespoons of your heavy cream or milk. Now, beat it on medium-high speed for at least 3 to 5 minutes. That extra beating time forces air into the fat molecules, creating that stunningly light texture. This aeration is what separates good frosting from legendary frosting!
Tips for Achieving Perfect Piping Frosting Recipe Consistency
This is the moment of truth! You’ve whipped all that air in, and now you need your beautiful Vanilla Buttercream Frosting to hold its exact shape when you put it on a cake or piping bag. For real decorating success with any star tip, you want a stiff but smooth consistency. Think about stiff peaks, but creamy ones!
If you find your batch is looking a little too relaxed—maybe it’s slouching over the back of a spoon—don’t panic! That means you need more structure. Just beat in another tablespoon or two of sifted powdered sugar while the mixer runs on low, then whip it up again. That sugar is your backbone for amazing Buttercream for Cakes designs.
Now, sometimes, despite our best efforts, it ends up too firm, especially if your kitchen is chilly. If it feels like you need a jackhammer to get it out of the bowl, carefully add your liquid—that heavy cream or milk—just a teaspoon at a time. Mix it in gently until it feels spreadable but still holds that perfect, defined edge. Remember, the best looking decorations come from a frosting that has just the right amount of stiffness. Check out my guide on frosting techniques for more decoration inspiration!
Ingredient Notes and Substitutions for Smooth Vanilla Icing
So you’ve seen the ingredient list, but let’s talk about *how* you treat those ingredients because this is where home cooks separate themselves from the pros! The absolute most important thing you have to get right for a creamy, lump-free Smooth Vanilla Icing is the temperature of your butter. Seriously, this decides everything.
If your butter is too warm—even slightly melty or greasy feeling—when you start whipping, your frosting ends up looking oily, separated, and sad. It just won’t hold air because the fat structure is damaged. On the flip side, if the butter is too cold right out of the fridge, your mixer will just drag lumps of cold butter through the sugar, and you’ll end up with that frustrating grainy texture, no matter how long you beat it.
Next up: powdered sugar. I know it’s tempting to skip sifting because you’re in a hurry. Don’t do it! Those tiny hard clumps of compressed sugar will absolutely guarantee you end up fighting lumps in your final beautiful batch of Classic Homemade Buttercream. Just run it through a fine sieve while you’re in the kitchen. As far as liquid goes, I prefer heavy cream because it adds richness that milk just can’t match, but whole milk works perfectly fine too. Just remember to start with less and add more slowly until you find that perfect spreadable sweet spot.
Storage and Reheating Instructions for Classic Homemade Buttercream
One of the joys of this recipe is that you can make a double batch and save half for later! Since this is a **no cook frosting**, it keeps really well, provided you treat it right. If you think you’ll use the leftovers within a day or two, leaving it sealed tightly on the counter is perfect. Just make sure it’s in an airtight container so it doesn’t dry out or absorb any weird fridge smells.
If you need it to last longer, the refrigerator is your friend. Pop that sealed container in the fridge for up to two weeks. Now, here’s the important part: don’t try to use it straight from the cold! Cold butter is rock hard, and trying to frost a cake with it results in chunks. Let your refrigerated Classic Homemade Buttercream sit on the counter for at least an hour, maybe two if your kitchen is cold, until it’s completely soft again. Then, pop it back in the mixer for 30 seconds on low just to bring the air back in. It will be perfectly smooth again, ready for decorating your next batch of treats, maybe even for this no-bake pie!
Troubleshooting Common Vanilla Buttercream Frosting Issues
Even with the best intentions, sometimes the mixer acts funny, or maybe I got distracted while softening the butter. It happens to everyone! The good news is that fixing almost any issue with this Easy Frosting Recipe is super simple if you know what the texture is trying to tell you. Don’t throw that bowl out!
If your Vanilla Buttercream Frosting looks glossy, separated, or just generally oily—like a little pool of butter is forming around the edges of the bowl—that means your butter got too warm. That greasy texture is your biggest enemy. The fix is surprisingly easy: just add about a half cup of sifted powdered sugar and beat it aggressively on medium speed. That sugar soaks up the extra fat and brings the whole mixture back together into a lovely, smooth consistency.
Now, if you’re struggling with lumps, it’s almost always temperature or preparation. Are you seeing little hard bits of cold butter clinging to the sides? That means your butter wasn’t soft enough when you started. Same fix as above on speed: start adding more sifted powdered sugar slowly. The extra sugar helps embrace those stubborn cold butter bits and smooths them out as you mix.
Sometimes, after all that whipping for maximum fluff, or maybe you got a little over-enthusiastic with the cream, things get too thin. If the frosting is running down the side of your bowl, it’s too runny to pipe a decent swirl. This is the simplest fix: just slowly add more sifted powdered sugar, a quarter cup at a time, mixing just until it comes together. You’ll rebuild that necessary structure in no time at all!
Frequently Asked Questions About This American Buttercream Guide
I get so many questions about this recipe in my DMs, which just shows how many people are searching for that perfect, reliable Easy Frosting Recipe! Here are the few things I hear most often about making this fluffy topping. Feel free to drop me a line if the answer to your specific quandary isn’t here!
Can I color this Vanilla Buttercream Frosting?
Oh yes, absolutely! This is the beauty of the American Buttercream base—it’s a blank canvas. Just make sure you are using gel food coloring, not the liquid drops you find in little bottles. Liquid coloring adds unnecessary moisture, which can thin out your gorgeous, stabilized frosting. A tiny toothpick dip of gel color is all you need to get super vibrant shades for all your cake decoration ideas!
How fast can I actually make this Quick Dessert Topping?
If you have an electric mixer and your butter is already ready, this is a seriously Quick Dessert Topping. From starting the butter beating to having fully whipped, pipe-ready frosting, we are looking at about 10 to 12 minutes total. That’s why I love it for last-minute cupcake toppings!
Do I have to use milk or cream? Can I make this dairy-free?
The liquid is essential to get that final fluffy texture we worked so hard to achieve in the whipping stage. You can swap the heavy cream or milk for unsweetened almond milk or oat milk very easily. Just add it slowly, as non-dairy milks can sometimes be thinner than traditional cream. If you need a completely dairy-free batch, make sure you use a high-quality, solid stick of plant-based butter alternative!
Will this hold up if I chill the frosted cookies or cake?
Because this is a high-butter, high-sugar ratio, it’s pretty stable. If you need to chill a cake with this Homemade Sweet Frosting, go for it! Just be sure to bring the whole thing back to room temperature for about an hour before serving. The texture will soften right back up to that perfect, creamy consistency. Don’t microwave it; just let it warm up slowly on the counter!
Estimated Nutritional Data for Your Homemade Sweet Frosting
Let’s talk quickly about the numbers, though honestly, when something tastes this good, who’s really counting calories? Just kidding, I know you are! Since we are dealing with pure butter and sugar here, this is definitely a treat. Keep in mind that this data is an estimate based on the standard amounts I use, so if you swap out a brand of butter or use whole milk instead of heavy cream, things might shift slightly.
This estimation is based on a serving size of about 1/4 cup of the final product, which realistically covers a generous mound of Creamy Cupcake Topping or a sizable slice of cake. I always advise using this as a general guideline for your incredible Homemade Sweet Frosting!
- Serving Size: 1/4 cup
- Calories: Around 320 (Yes, it’s rich!)
- Sugar: Approximately 45 grams
- Fat: About 16 grams
- Saturated Fat: Close to 10 grams
- Sodium: Only about 35 mg
Because we use pure ingredients and skip all the weird stabilizers found in canned icing, the breakdown is pretty straightforward. It’s mostly energy from the fat and the sugar, as there’s essentially no protein or fiber in this delicious topping. Enjoy it responsibly—or don’t, because it’s worth every single bite!
PrintFluffy Vanilla Buttercream Frosting
This recipe provides instructions for a classic, smooth, and creamy American buttercream frosting perfect for topping cakes and piping decorations.
- Prep Time: 10 min
- Cook Time: 0 min
- Total Time: 10 min
- Yield: About 3 cups
- Category: Dessert Topping
- Method: Mixing
- Cuisine: American
- Diet: Vegetarian
Ingredients
- 1 cup unsalted butter, softened to room temperature
- 4 cups powdered sugar, sifted
- 1 teaspoon pure vanilla extract
- 2 to 4 tablespoons heavy cream or milk
- Pinch of salt
Instructions
- Place the softened butter in a large bowl. Beat the butter with an electric mixer on medium speed until it is light and fluffy, about 3 minutes.
- Gradually add the sifted powdered sugar, one cup at a time, mixing on low speed until incorporated. Scrape down the sides of the bowl as needed.
- Add the vanilla extract and the pinch of salt. Increase the mixer speed to medium-high and beat for 2 minutes.
- Add 2 tablespoons of heavy cream or milk. Beat on medium-high speed for another 3 to 5 minutes until the frosting is very light and fluffy. This whipping time incorporates air for the best texture.
- If the frosting seems too stiff, add the remaining cream or milk, one teaspoon at a time, until you reach your desired spreading consistency. If it is too soft, add a few more tablespoons of sifted powdered sugar.
- Use immediately for frosting cakes or piping decorations.
Notes
- For best results when piping, use a stiff consistency achieved with less liquid. This frosting holds its shape well with star tips.
- If your butter is too warm, the frosting will be greasy. If the butter is too cold, the frosting will be lumpy. Room temperature is key.
- Sifting the powdered sugar prevents lumps in your final smooth icing.
Nutrition
- Serving Size: 1/4 cup
- Calories: 320
- Sugar: 45
- Sodium: 35
- Fat: 16
- Saturated Fat: 10
- Unsaturated Fat: 6
- Trans Fat: 0
- Carbohydrates: 45
- Fiber: 0
- Protein: 0
- Cholesterol: 60