

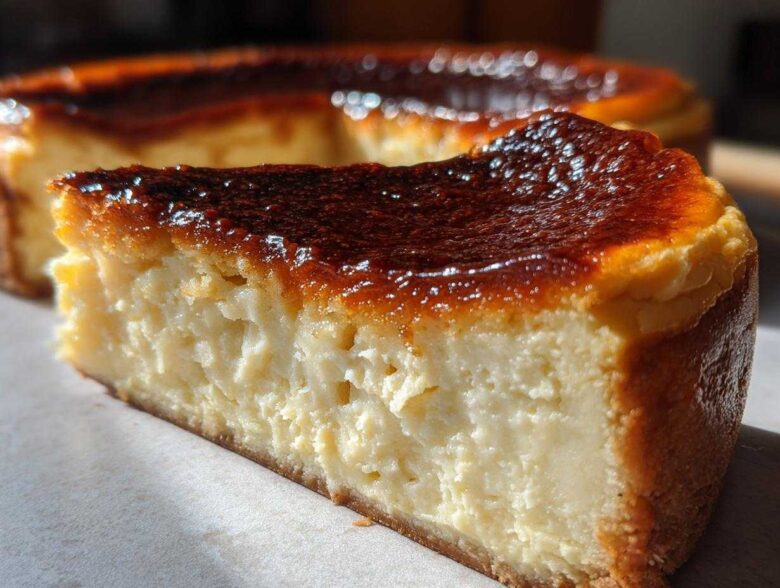
Oh, honey, if you’ve ever stared at two incredible desserts and wished you could just shove them together in a delicious, high-stakes marriage, you are talking my language! I live for those decadent dessert mashups, and nothing—absolutely nothing—beats the drama and flavor explosion of a creme brulee cheesecake. Seriously, it’s rich, it’s tangy, and then you get that stunning shatter of pure caramelized magic on top? It’s pure showstopping bliss.
For years, I messed this up. My first attempts were either too soupy or the sugar topping tasted burnt. It took me, I’m not kidding, about five tries to nail that perfect, impossibly creamy center without any cracks, right before conquering the torch part. Trust me when I say I’ve figured out all the pitfalls so you don’t have to. This guide? It’s the real deal—the ultimate secret to achieving that perfect, elegant baked dessert every single time.
Why This Creme Brulee Cheesecake Recipe Works
So, why should you trust my method for this incredible creme brulee cheesecake? Because we aren’t cutting any corners here! This isn’t some sad half-baked experiment; this is where two legends meet and become something even better.
- You get the deep, luxurious flavor of a rich vanilla bean cheesecake filling.
- The crust is perfectly sturdy—no soggy bottoms allowed!
- And, of course, that gorgeous, glassy, crackly sugar topping that makes everyone gasp when you bring it out.
This combination is what takes it from a simple dessert to a true showpiece.
Essential Ingredients for Your Creme Brulee Cheesecake
Okay, the success of this creme brulee cheesecake hinges entirely on the quality of what goes into it. Don’t skimp here! Since this is so rich, every single flavor note needs to shine through, especially that gorgeous vanilla bean note.
Here’s what you need to gather for your decadent layers:
- For the Crust: 1 1/2 cups graham cracker crumbs, 1/4 cup granulated sugar, and 6 tablespoons unsalted butter, melted.
- For the Filling: 3 (8 ounce) packages cream cheese, softened—this is important! Then you need 1 1/2 cups granulated sugar, 1 teaspoon vanilla extract (use the good stuff!), 1/2 teaspoon almond extract (don’t skip this, it’s subtle magic), 4 large eggs, and 1/2 cup sour cream.
- For the Top: Just 1/4 cup granulated sugar for that final, satisfying crackle.
Ingredient Notes and Substitutions for the Creme Brulee Cheesecake Filling
The absolute most important thing you have to do is make sure that cream cheese is truly at room temperature. If it’s cold, you’re guaranteed a lumpy, sad filling—we are going for pure silk here! Beat it until it’s fluffy before you ever think about adding sugar.
Also, that splash of sour cream? It’s not just filler! It adds a lovely, necessary tang that cuts through the richness of the cheese and eggs. It keeps this cheesecake with crunchy topping from tasting too heavy. If you’re out, plain Greek yogurt works in a pinch, but sour cream is definitely the champ for that creamy texture.
Preparing the Crust for the Creme Brulee Cheesecake
Alright, let’s deal with the foundation before we build this creamy tower! A great creme brulee cheesecake needs a crust that can hold up to all that luxurious filling and the eventual torching, which is why we give it a little head start in the oven.
First, wrap that 9-inch springform pan tight—and I mean TIGHT—with heavy-duty foil. You don’t want even a single drop of water leaking in during the water bath later. Trust me, waterlogged crusts are a tragedy!
Mix those graham cracker crumbs, that quarter cup of sugar, and the melted butter until it looks like wet sand. Then, press it down firmly across the bottom of your prepared pan. I mean really pack it in there, using the bottom of a measuring cup can help you get it nice and uniform. Pop that into a 325°F oven for just 10 minutes. This pre-bake sets the crust beautifully. Once it comes out, just let it cool down completely before moving on to the batter. If you need inspiration for cookie bases, check out some of my other cheesecake crust ideas!
Mixing the Creamy Dessert Mashup Filling
Now for the main event! This step is where we create that utterly smooth, melt-in-your-mouth texture that defines this creme brulee cheesecake. Remember, we are aiming for an opulent, creamy dessert mashup, not rubber cement, so put your mixer on its lowest respectable speed!
First, take your softened cream cheese—and I mean soft, like room temperature butter—and beat it all by itself until it is completely homogenous and smooth. No lumps allowed! Then, slowly incorporate that cup-and-a-half of sugar, followed by your flavor boosters, the vanilla and almond extract. Mix until just combined.
Here’s the part where you need patience: eggs go in one by one. You only mix until the yolk disappears after each addition. Overmixing after the eggs are in introduces too much air, which means cracks when it cools. Nobody wants a cracked top on the masterpiece destined for the torch! Finally, gently fold in the sour cream. If you want to see how this technique works beautifully for smaller versions, take a peek at my mini cheesecake technique guide!
Baking Your Decadent Baked Cheesecake Using a Water Bath
This next step is non-negotiable if you want that picture-perfect, crack-free surface on your decadent baked cheesecake. We are talking about the water bath, or the bain-marie, and I promise it’s worth the small extra effort. Since the filling is so soft and rich, baking it directly subjects it to dry oven heat, which causes it to dry out and crack around the edges.
The water bath surrounds the springform pan with cozy, moist heat, guaranteeing that the cheesecake bakes evenly from the outside in. So, after you pour your beautiful batter over that crust, set the foil-wrapped pan inside a larger roasting pan. Carefully pour very hot water into the roasting pan until it comes about halfway up the sides of your cheesecake pan.
Get it into that 325°F oven and let it bake for about 60 to 75 minutes. You’ll know it’s done when the edges look set, but the very center still has a slight wiggle, like soft gelatin. Don’t peep too much! The secret weapon against cracking comes *after* the timer goes off. Turn the oven completely off, crack the door open an inch or two, and just let your masterpiece cool down inside the oven for a full hour. This slow temperature drop prevents shock, which is the #1 cause of surface cracks! For more tips on getting this right, check out my general guide on best cheesecake recipes.
Mastering the Caramelized Sugar Top Tutorial for Your Creme Brulee Cheesecake
Okay, we’ve reached the moment that separates the good cheesecakes from the legendary ones: the crunchy top! This is what defines our creme brulee cheesecake, and honestly, it’s the part I look forward to the most. Before you even think about sprinkling sugar on this beauty, you have to let it chill. I mean, *chill*. It needs at least six hours in the fridge, but overnight is genuinely better. This ensures the filling is rock solid, which protects it from the heat we’re about to blast it with! For a deeper dive into the topping specifics, check out my full creme brulee topping tutorial.
When you’re ready for the show—and trust me, it is a show—take the cheesecake out. Sprinkle that last 1/4 cup of sugar evenly across the top. I like to gently tilt the pan to make sure every corner is thinly and uniformly coated. Now, bring out the big guns: your kitchen torch! This is the heart of the creme brulee topping tutorial.
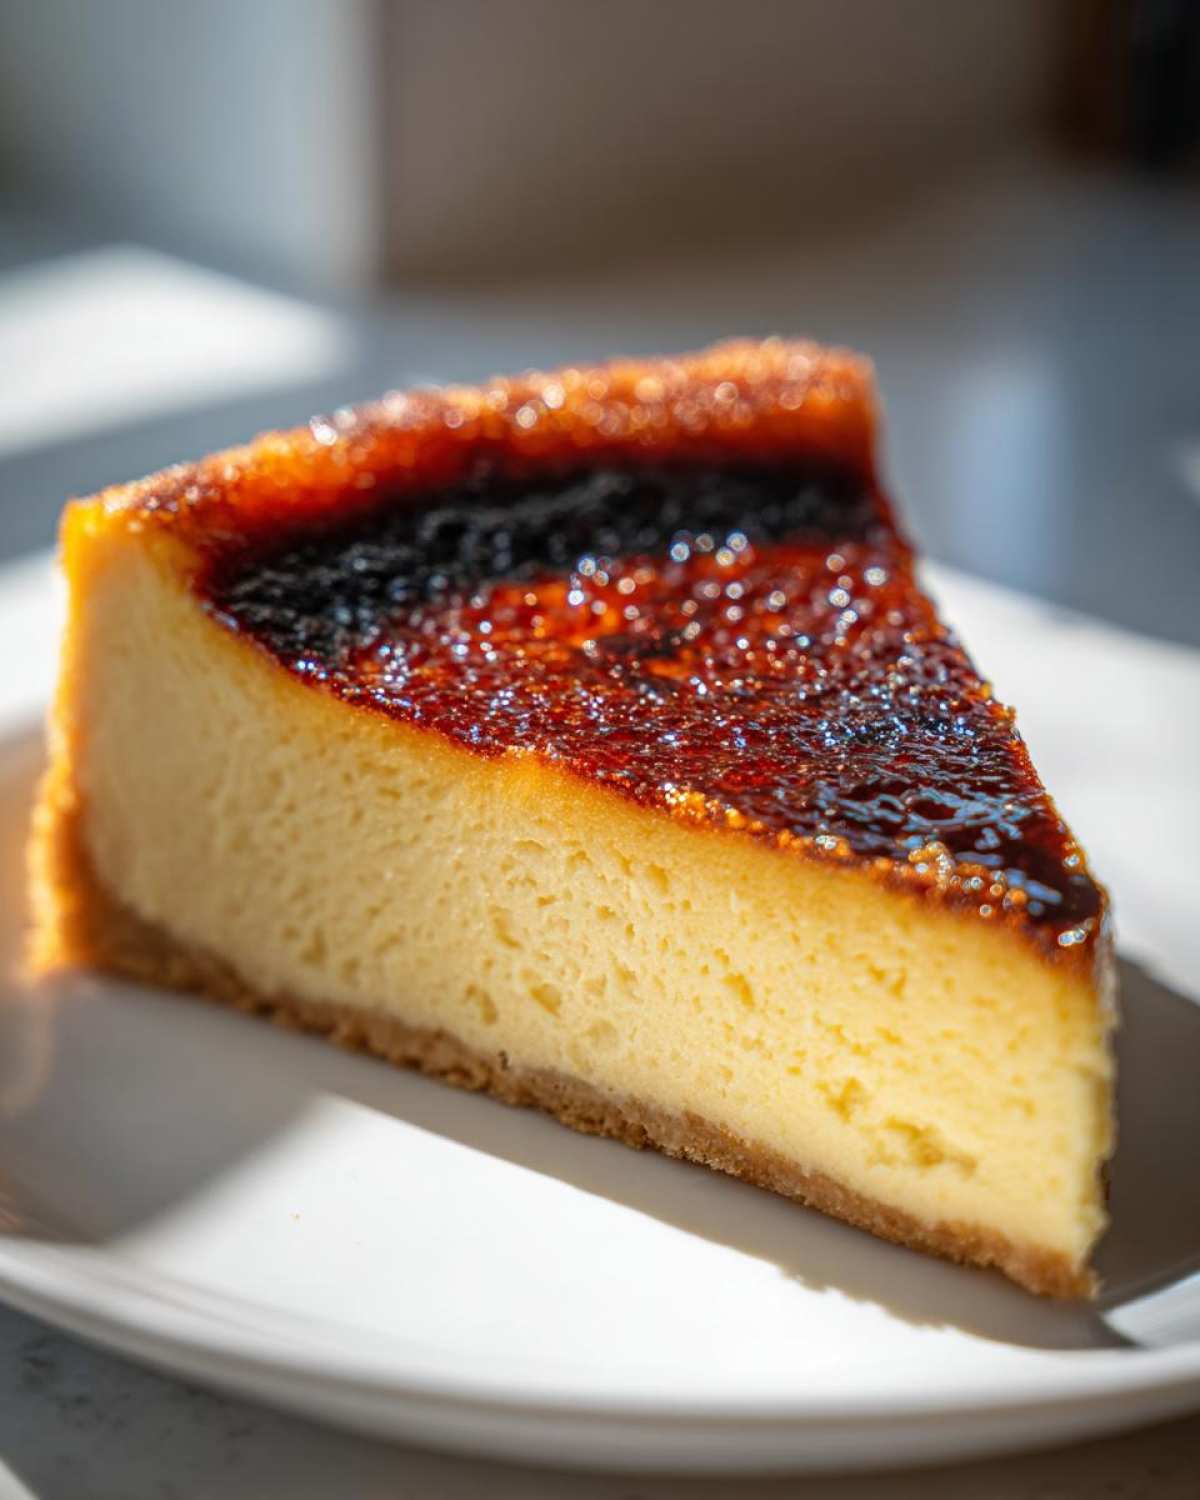
Hold the torch a few inches away and move that flame constantly over the sugar. Don’t ever stop moving it, or you’ll get a burnt spot! You’ll watch it go from white granules to melting pools, and finally, that gorgeous amber color forms. If you don’t have a torch for your cheesecake with crunchy topping, you can carefully place it under a very hot broiler, but you have to stand there and watch it like a hawk for 60 seconds—it burns fast! We want that signature snap on this elegant baked dessert.
Once that beautiful, glassy layer forms, you need to let it sit for about five minutes until it hardens. That’s the perfect moment to slice into your ultimate indulgent dessert for parties! Remember, that beautiful shatter on this creme brulee cheesecake comes right after the sugar cools just enough.
Tips for Success with Your Creme Brulee Cheesecake
Even with the perfect recipe, a few little tricks can take this creme brulee cheesecake from fantastic to legendary. These are my final notes to make sure you nail that texture and presentation every time you try this treat.
My biggest tip for slicing? Don’t rush it right after torching! Let that gorgeous caramelized sugar cool and fully set for about five minutes. If you try to cut it immediately, the hot topping will crack messily and melt into the filling. Allow it those few minutes, and you’ll get those perfect, clean wedges, just like in the professional pictures!
Also, remember while mixing: gentleness is authority here. If you aggressively beat the filling, you’ll whip in air bubbles that turn into ugly craters when baked. Always use low speed for the cream cheese and eggs to maintain that dense, decadent mouthfeel we are aiming for.
Finally, if you are making these ahead of time, only torch the tops right before serving. If you torch them a day early, the ambient moisture in the fridge will inevitably soften that incredible crunch we worked so hard to build!
Storage and Reheating Instructions for This Elegant Baked Dessert
Because this creme brulee cheesecake is such an indulgent dessert, we definitely need to talk about keeping leftovers—though I rarely have any!
You must keep the cheesecake tightly covered in the refrigerator. The fat content helps it stay fresh, but that beautiful, crisp sugar top is sensitive. If you’re planning on enjoying this elegant baked dessert over several days, only torch the top layer right before you plan to serve it.
If you torch the whole thing the day before, that beautiful, hard caramel layer will absorb moisture from the fridge and get sticky and soft. That’s a crime! So, bake, chill overnight, and only torch what you plan to eat that day. Seriously, you don’t want to reheat a whole cheesecake anyway; it messes up that perfect, creamy texture we worked so hard for!
Frequently Asked Questions About Creme Brulee Cheesecake
I know you might have questions when combining two such beautiful desserts into one creme brulee cheesecake! It feels fancy, but I promise we can troubleshoot anything. Here are the things folks ask me most often when they’re planning on making this dessert.
Can I skip the water bath for this baked cheesecake?
Oh, I really, really advise against skipping the water bath! That gentle, moist heat is the secret weapon for any truly best cheesecake recipe. Without it, the edges cook way faster than the middle, and you end up with a dry ring around a sunken middle. It’s the key to that smooth, creamy texture!
What if I haven’t got a kitchen torch for the topping?
Don’t worry if you can’t get your hands on a specific torch for the creme brulee topping tutorial! As I mentioned, the broiler is your backup plan—but treat it like high drama in the kitchen. Preheat your broiler until it’s sizzling hot, put the sugared cheesecake on the highest rack safely possible, and then stand right there. It will only take 60 to 120 seconds to get that beautiful caramelized sugar top. If you look away for even a second, you’ll have a charcoal top instead of that perfect amber glaze!
Can I turn this into mini creme brulee cheesecakes?
Absolutely! I love making mini creme brulee cheesecakes, especially when I’m hosting a big group. You’ll still want to use the water bath, but you reduce the baking time significantly—probably down to about 20 to 25 minutes depending on where you place them. Just watch them until the edges set. They are delightful little single-serving wonders!
How long ahead of time can I bake the cheesecake itself?
This is a fantastic make-ahead option! You can bake the entire cheesecake, chill it completely (for at least 6 hours or overnight), and keep it wrapped in the fridge. Keep it plain, though! Only sprinkle on the sugar and torch it right before you serve it. You can find my general tips on storing these elegant baked desserts in my notes.
PrintCrème Brûlée Cheesecake
A rich, creamy baked cheesecake topped with a crisp, caramelized sugar crust, combining two classic desserts.
- Prep Time: 25 min
- Cook Time: 75 min
- Total Time: 8 hours 40 min
- Yield: 12 servings
- Category: Dessert
- Method: Baking
- Cuisine: American
- Diet: Vegetarian
Ingredients
- 1 1/2 cups graham cracker crumbs
- 1/4 cup granulated sugar (for crust)
- 6 tablespoons unsalted butter, melted
- 3 (8 ounce) packages cream cheese, softened
- 1 1/2 cups granulated sugar (for filling)
- 1 teaspoon vanilla extract
- 1/2 teaspoon almond extract
- 4 large eggs
- 1/2 cup sour cream
- 1/4 cup granulated sugar (for topping)
Instructions
- Preheat your oven to 325°F (160°C). Wrap the outside of a 9-inch springform pan tightly with heavy-duty aluminum foil.
- Combine graham cracker crumbs, 1/4 cup sugar, and melted butter. Press the mixture firmly into the bottom of the prepared springform pan. Bake the crust for 10 minutes. Let it cool.
- In a large bowl, beat the softened cream cheese until smooth. Gradually add 1 1/2 cups sugar, vanilla extract, and almond extract. Mix until just combined.
- Beat in the eggs one at a time, mixing on low speed after each addition. Stir in the sour cream until the batter is smooth. Do not overmix.
- Pour the filling over the cooled crust. Place the springform pan into a larger roasting pan. Carefully pour hot water into the roasting pan until it reaches halfway up the sides of the springform pan (water bath).
- Bake for 60 to 75 minutes, or until the edges are set but the center still jiggles slightly.
- Turn off the oven, crack the door open, and let the cheesecake cool inside the oven for 1 hour. Remove from the water bath and cool completely on a wire rack.
- Chill the cheesecake in the refrigerator for at least 6 hours, or preferably overnight.
- Before serving, sprinkle the top evenly with the remaining 1/4 cup of sugar. Use a kitchen torch to melt and caramelize the sugar until it forms a hard, amber crust. Serve immediately after torching.
Notes
- For the water bath, use very hot water to help maintain a consistent baking temperature.
- If you do not have a kitchen torch, you can place the sugared cheesecake under a preheated broiler for 1-2 minutes, watching constantly to prevent burning.
- Allow the caramelized sugar topping to cool and harden for about 5 minutes before slicing.
Nutrition
- Serving Size: 1 slice
- Calories: 450
- Sugar: 35g
- Sodium: 250mg
- Fat: 30g
- Saturated Fat: 18g
- Unsaturated Fat: 12g
- Trans Fat: 0.5g
- Carbohydrates: 40g
- Fiber: 1g
- Protein: 8g
- Cholesterol: 120mg