

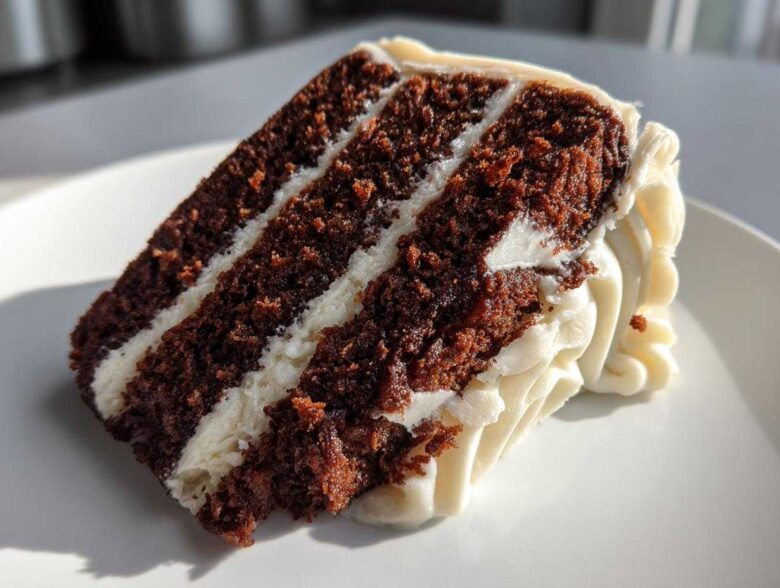
Oh my goodness, when that first chill hits the air and the scent of woodsmoke is everywhere, what is the first thing you crave? For me, it’s warmth in cake form! Forget dry, crumbly messes; my entire baking mission this time of year is delivering pure, unadulterated comfort. That’s why I’m sharing my absolute must-make recipe: the Super Moist Spice Cake with Classic Cream Cheese Frosting.
I spent years trying to develop a spice cake that actually *tastes* like autumn without needing a mountain of applesauce or carrots to keep it from drying out. This recipe, I promise you, is it. It’s packed with those classic spices—think cinnamon, ginger, and cloves—and I’ve absolutely nailed the moisture level. You’re going to see just how easy it is to bake the absolute best homemade spice cake from scratch!
Why This Moist Spice Cake Recipe is Your New Favorite Autumn Dessert Recipes
If you’re anything like me, the minute the leaves start turning (or honestly, maybe even late August), you want baking projects that smell incredible and keep well for a few days. This recipe for a moist spice cake checks every single box for a perfect Fall Spice Cake experience. We’re talking about a tender crumb that just melts in your mouth, not that dry stuff that needs a whole glass of milk just to get down!
I remember one year I tried adapting my favorite zucchini bread recipe, and it just fell flat for a proper layered cake. It lacked that deep, comforting warmth. This specific combination of warm spices gives you everything you want in an Autumn Dessert Recipe without needing heavy fruit purees to carry the moisture. Trust me, this is the best Moist Spice Cake Recipe you’ll ever need!
The Perfect Spice Blend: Cinnamon Ginger Nutmeg Cake
The secret sauce is absolutely in the blend here. We use two teaspoons of cinnamon because, let’s be real, cinnamon is the foundation! Then we bring in a teaspoon of ginger—that’s what gives it that tiny little kick. Finished off with just a half teaspoon each of cloves and nutmeg, you get this beautifully balanced, Warm Spiced Cake flavor. It smells like holiday magic is happening in your oven, I swear!
Achieving the Tender Spiced Crumb Texture
For that truly tender Spiced Crumb texture, we skip the butter almost entirely and rely on oil. I know, I know, butter is king, but for this specific spice profile, oil delivers superior, all-around moisture that stays put. Coupled with the buttermilk—which tenderizes the flour—this cake stays soft and fluffy for days. It’s an Old Fashioned Spice Cake technique, updated to guarantee supreme moistness every single time you bake it.
Ingredients for the Super Moist Spice Cake
Okay, gather everything up! A truly great spice cake depends on having all your components ready before you even turn on the oven. Since we aren’t relying on heavy additions like carrots or pineapple, the quality and precision of these standard pantry items really shine through. You can find the full list, but here are the essentials we’re working with for both the cake and that gorgeous frosting you’re already dreaming about!
This is where we ensure we have that perfect Buttermilk Spice Cake base:
- 2 cups all-purpose flour
- 2 teaspoons baking soda
- 1 teaspoon baking powder
- 1 teaspoon salt
- 2 teaspoons ground cinnamon
- 1 teaspoon ground ginger
- 1/2 teaspoon ground cloves
- 1/2 teaspoon ground nutmeg
- 1 cup granulated sugar
- 1 cup packed brown sugar (make sure it’s tightly packed!)
- 1 cup vegetable oil (this is key for moisture!)
- 4 large eggs
- 1 cup buttermilk
- 1 teaspoon vanilla extract
And for the star of the show—the frosting—we need:
- 8 ounces cream cheese, softened just right
- 1/2 cup unsalted butter, also softened
- 4 cups powdered sugar, sifted (don’t skip the sifting!)
- 1 teaspoon vanilla extract
- 1/4 teaspoon salt
Having everything measured out before you start mixing really keeps you calm and prevents those frantic moments where you realize you missed the baking soda. Accuracy builds trust in any recipe, especially when you’re aiming for the best flavor possible!
Crafting the Classic Spice Cake with Cream Cheese Frosting
Alright, now we get to the fun part—making the actual cake batter! Remember how I mentioned this is the secret to a truly soft crumb? It’s all about careful integration. We are aiming for a stunning layered cake here, so treating our ingredients gently is step number one. If you pull your buttermilk out of the fridge about 15 minutes before starting, it’ll mix in much more smoothly with the oil and eggs.
When it comes to mixing, I’m a firm believer in the low-and-slow approach for this recipe. You want everything cheerful and combined, but the second you add the flour, you have to stop yourself from going too fast. Overmixing develops gluten, and gluten means tough cake—and nobody wants a tough winter spice cake, right? Keep that hand mixer on low speed once the dry stuff goes in!
Mixing Dry and Wet Components of the Spice Cake
First things first: whisk all those glorious dry ingredients together until they look uniform. That’s your flour, baking soda, baking powder, salt, and all those wonderful ground spices. I always give this dry mix an extra minute just to make sure the cloves are evenly distributed. Set that bowl aside.
Now, back to the wet stuff in the big bowl. Whisk your sugars and oil until they look happy, and then tackle the eggs. The trick here is adding them one at a time. Beat in that first egg until it completely disappears into the mix before daring to add the next one. It creates tiny, strong structures in the batter. Then, gently stir in your room-temperature buttermilk and vanilla.
Finally, we marry the two worlds: gradually add your dry mixture to the wet mixture, mixing only on the lowest speed until you see *just* the last streaks of flour disappear. You can use your bowl scraper to finish those last few folds by hand. Any temptation to whip it up fast must be resisted! Check out this chai spice snickerdoodles recipe—they know the importance of gentle mixing too!
Baking and Cooling the Perfect Spice Cake Layers
This is where patience pays off, honestly. We’ve mixed this beautiful batter, and now we need to treat it right so we get those beautiful, flat layers perfect for stacking. Remember, we preheated the oven to 350 degrees F (175 degrees C) earlier, right? If you got sidetracked whispering sweet nothings to your spices, go preheat it now! Cold ovens equal sad, flat cakes.
Make sure those two 9-inch pans you greased and floured earlier are ready to go. Divide that batter evenly between them—I like to use a kitchen scale for this step if I’m being fussy, but eyeballing it works too, just try to keep them close!
Slide them gently into the hot oven. Set your timer for 30 minutes, but don’t walk away just yet. Because this is a lovely, moist cake, it can sometimes set up quickly on the edges while the center is still soft. Check them right around the 30-minute mark. If a wooden pick or toothpick you’ve hidden away comes out clean, you’re golden!
Now for the cooling process—this part is non-negotiable if you want happy, unbroken layers. Let them sit right there in those pans on a wire rack for a full 10 minutes. Seriously, don’t touch them! Those 10 minutes let the structure firm up just enough so they don’t fall apart when you flip them. After that 10 minutes, carefully invert the cakes onto the wire rack to cool completely. If you try to frost them even slightly warm, that gorgeous cream cheese frosting will just melt into a sugary puddle. Patience, darling!
Making the Rich Cream Cheese Frosting for Your Spice Cake
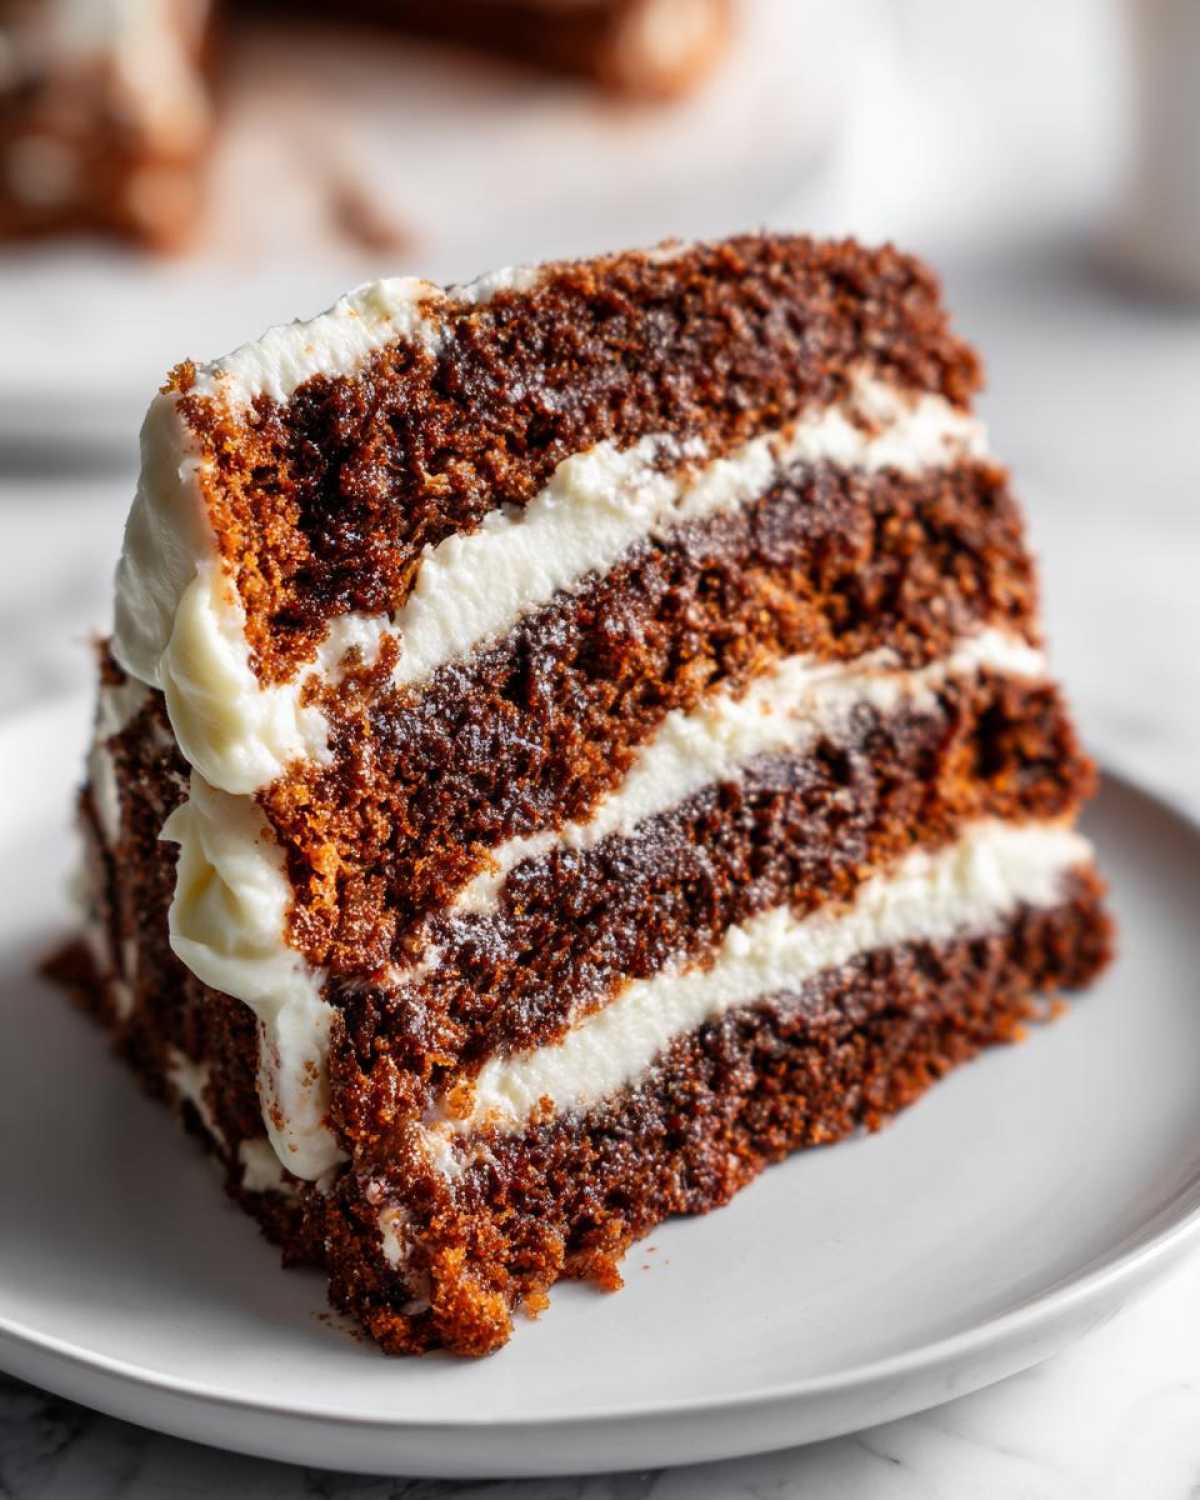
While the cake layers are cooling down (which they absolutely must do!), we get to create the crowning glory: the cream cheese frosting. This is what takes a great Warm Spiced Cake and turns it into something truly unforgettable, especially when you’re baking for the holidays. Honestly, nothing else works as perfectly with the deep spice notes as tangy cream cheese frosting does. It’s the classic pairing for a reason!
The absolute number one rule for this frosting is twofold: your cream cheese and your butter must be genuinely soft. I mean ‘you can poke it easily’ soft, but definitely not melty or greasy. If they are too cold, you end up beating your mixer into submission trying to get rid of lumps! I always pull mine out an hour before I plan to start frosting.
When you start mixing, treat those two fats gently until they are completely smooth. Then comes the powdered sugar. Now, if you skip sifting that powdered sugar, I can almost guarantee you’ll end up with little white knobs in your beautifully smooth frosting. Don’t let that happen! Sifting it in slowly—a cup at a time—gives you a consistently silky texture. It’s an extra tiny step that signals expertise, and it makes all the difference in the final look of your brown butter pumpkin cookies, or in this case, your perfect spice cake!
Tips for Smooth Frosting Application
Listen, this is crucial advice for anyone assembling a layer cake: Wait until the layers are stone cold. If they are even slightly warm, the butter and cream cheese in the frosting will start to liquefy the second they touch the surface. It’s a heartbreaking mess that turns your beautiful layers into a slouchy, sliding disaster!
Once your cake is totally cool, you can apply this frosting liberally. If you are making this for a big event and feeling extra fancy, this rich cream cheese frosting pairs wonderfully with any Holiday Spice Cake you happen to be making. It’s sweet, it’s tangy, and it beautifully cuts through the warmth of the cinnamon and cloves. You’re going to want to sneak a few spoonfuls straight from the bowl!
Assembling Your Homemade Spice Cake
This is the moment we’ve been waiting for! You have your perfectly cooled layers, you have your silky smooth cream cheese frosting—now we build this beautiful structure. This part is super straightforward, but it does require a steady hand after all that patient baking.
First, grab that first cake layer that’s going on the bottom. Put a good, generous dollop of frosting right in the center of your cake plate or whatever you plan to serve it on. This acts like glue! Press that bottom layer firmly onto the plate. That little smear of frosting keeps your entire creation exactly where you want it, which is handy since this is such a perfect Fall Spice Cake.
Now, take about a third of your remaining frosting and spread it evenly over the first layer. Don’t be shy, but make sure you leave a small border near the edge unfrosted. Why? Because when you place the second layer on top, the frosting will squish out a little bit—it’s inevitable! You want that slight squeeze-out, but if you frost too close to the edge, you end up losing half your filling to the counter.
Gently place the second layer right on top. Line it up as best you can; try not to wiggle it around too much once it’s touching the bottom layer! Now you can cover the top and sides with the rest of that dreamy frosting. If you are making this as a layer cake, make sure you smooth out the sides. I like to use a long offset spatula for the sharpest edges, but honestly, if you’re going for that cozy, rustic look—the kind that makes people feel instantly at home—a little swirl or texture on the side is just lovely. Pop over and check out my Cinnamon Roll Pancakes for inspiration on how to make something rustic look intentional and gorgeous!
If you decided to bake this as a layer cake, make sure you smooth out the sides. I like to use a long offset spatula for the sharpest edges, but honestly, if you’re going for that cozy, rustic look—the kind that makes people feel instantly at home—a little swirl or texture on the side is just lovely. Pop over and check out my Cinnamon Roll Pancakes for inspiration on how to make something rustic look intentional and gorgeous!
Ingredient Notes & Substitutions for Your Spice Cake
Baking from scratch is the best, but sometimes we don’t have every single ingredient sitting ready in the pantry! That’s okay! I’ve been down that road many times, and I’ve figured out the best ways to tweak this gorgeous, moist spice cake recipe without losing that signature cozy flavor. These little substitutions are straight from my trial-and-error notebook, saving you stress when you’re ready to bake but missing one item.
Remember, we are aiming for supreme moisture here, so when we substitute, we have to keep moisture in mind first. Don’t worry about finding that exact item; that’s the beauty of home baking! We’re building on that Old Fashioned Spice Cake base, but making it work for today’s kitchen.
Substituting Oil for Applesauce
If you look at the ingredient list, you see we rely on vegetable oil for that incredible tenderness and moisture retention. However, if you’re looking to shave off a little bit of fat or just want to lighten the texture slightly—maybe you’re planning on slicing this thinly for a tea party—you can substitute half of the oil with unsweetened applesauce. It’s not a full one-to-one swap if you use all applesauce, because it tends to make things a bit spongier than I like for a spiced layer cake.
Use half a cup of applesauce for half a cup of oil. You might notice the crumb is a tiny bit less rich, but you gain a nice, subtle fruitiness that works beautifully with the spices. Just remember, this might bake *slightly* faster, so keep an eye on those clean toothpicks!
My Go-To Trick for DIY Buttermilk
Buttermilk honestly works magic in baking because its acidity reacts with the baking soda, giving you a higher, fluffier rise while tenderizing everything. But what if you’re out? Don’t run to the store! I use this trick constantly for everything from pancakes to my maple apple cider fizz!
It’s so simple: take your standard cup of regular milk—whole, 2%, whatever you have—and stir in one lonely tablespoon of white vinegar or fresh lemon juice. You just let that sit on the counter for about five minutes while you finish measuring your flour. When you look back, you’ll see it has curdled just slightly, looking thick and tangy. That’s homemade buttermilk, and it works perfectly in this recipe. It’s exactly what you need to keep your spice cake tender.
Adjusting for Different Pan Sizes
Most people use two 9-inch rounds, but if you’re catering a huge crowd or just want a denser, quicker bake, you might use a 9×13 inch pan. If you do, just pour all that gorgeous batter right into the greased pan. Since the depth changes, the time changes too—plan on about 35 to 40 minutes instead of the 30–35 minutes for the layers. You’ll still check for that clean toothpick, of course!
If you’re making cupcakes, you’ll get a massive batch—easily two dozen! Bake them slightly less, usually around 18 to 22 minutes. No matter the pan size, the spice blend and wonderful moisture level of this spice cake stay consistent!
Frequently Asked Questions About This Spice Cake Recipe
I totally get it; when you find a winner like this super moist spice cake, you want to know all the little details before you commit to baking! People always have questions about making adjustments or ensuring they get that perfect texture, especially with rich, spiced recipes. Shoot, I did too when I was perfecting this! Here are some of the most common things folks ask me about this recipe. I hope this helps you feel totally confident before you even preheat the oven!
Can I make this an Easy Spice Cake using a mixer?
Oh yes, you certainly can! You can absolutely use your stand mixer or hand mixer for beating the wet ingredients, eggs, and incorporating the sugars! That’s actually much easier than beating everything by hand, like my grandmother used to do. However, here is my huge warning flag for any Easy Spice Cake recipe like this: once you start adding the dry flour mixture, slow that mixer down to the absolute lowest setting—I mean snail speed! A quick whip will make this Homemade Spice Cake tough instead of tender. I usually mix just until the flour streaks disappear on low, and then I finish off the last few stirs by hand with a spatula. That way, you get the speed, but you keep the fluffiness we worked so hard for!
How long does this Homemade Spice Cake stay fresh?
Because this is such a wonderfully moist spice cake recipe—thanks to that oil and buttermilk—it honestly stays incredibly fresh longer than a standard butter cake. If you keep it tightly covered at room temperature, away from sunlight, it should hang out beautifully for about three days. If you’ve added the cream cheese frosting, though, you *must* keep it refrigerated because of the dairy. To serve a refrigerated slice, just pull it out about 30 minutes beforehand. That slight rest time lets the frosting soften up and brings back that amazing, fresh-from-the-oven softness to the crumb of your Spice Cake with Cream Cheese Frosting.
What other frostings work well on a Spice Cake?
While I am fully devoted to the tangy richness of classic cream cheese frosting, I know some people prefer something a little different, especially if they’re serving this as a Winter Spice Cake for a big holiday meal! If you want to elevate it a bit, you absolutely should try my Brown Butter Cream Cheese Frosting; browning the butter adds such a deep, nutty layer that complements the spices perfectly. If you want something totally different, a smooth Maple Icing is fantastic—it’s just powdered sugar, maple syrup, and maybe a splash of milk. It gives it a distinct comforting flavor and is a little less heavy than a full buttercream. You’ve got options, but none of them are wrong!
Storage and Reheating Instructions for Leftover Spice Cake
I truly hope you have leftovers, because this Spice Cake tastes even better the next day—it gives all those warm spices time to really deepen into one another! But because we went to the trouble of making that rich, tangy cream cheese frosting, storage is super important. We don’t want to lose that beautiful moist texture we worked so hard to achieve.
If you’ve frosted your layers or if you just topped it with a generous amount, this cake needs to live in the refrigerator. Keep it in an airtight container, or if the slices are already cut, cover the cut sides tightly with plastic wrap before placing them in a container. The fridge is essential to keep that dairy-based frosting safe and firm. Don’t worry; this cake is sturdy enough to handle the cold without turning into cardboard!
Now, here’s the crucial part that separates good leftovers from great leftovers: **You must let it warm up!** Never serve this cake straight out of the fridge. When it’s cold, the butter and cream cheese in the frosting solidify too much, and the cake’s crumb tightens up just a little bit.
For the absolute best experience, slice off what you want to eat and let it sit on your plate on the counter for about 30 to 45 minutes before serving. This allows the frosting to soften to that perfect, smearable consistency and brings the cake back to its ideal, tender temperature. It’s like a little act of kitchen faith, but trust me, that little rest period makes all the difference. If you’re ever curious about how we handle food safety around here, you can check out our cookie policy for general guidelines, though this cake is generally fine for several days!
If you need it slightly warmer in a hurry—maybe it’s a chilly evening and you want an extra cozy feeling—you can microwave a slice on a plate for about 10 seconds. Just a quick little burst! That thaws the frosting just enough without cooking the cake again. Enjoy those precious leftovers!
PrintSuper Moist Spice Cake with Classic Cream Cheese Frosting
A tender and moist spice cake featuring classic fall spices, topped with a rich cream cheese frosting.
- Prep Time: 20 min
- Cook Time: 35 min
- Total Time: 55 min
- Yield: 12 servings
- Category: Dessert
- Method: Baking
- Cuisine: American
- Diet: Vegetarian
Ingredients
- 2 cups all-purpose flour
- 2 teaspoons baking soda
- 1 teaspoon baking powder
- 1 teaspoon salt
- 2 teaspoons ground cinnamon
- 1 teaspoon ground ginger
- 1/2 teaspoon ground cloves
- 1/2 teaspoon ground nutmeg
- 1 cup granulated sugar
- 1 cup packed brown sugar
- 1 cup vegetable oil
- 4 large eggs
- 1 cup buttermilk
- 1 teaspoon vanilla extract
- For Frosting: 8 ounces cream cheese, softened
- For Frosting: 1/2 cup unsalted butter, softened
- For Frosting: 4 cups powdered sugar, sifted
- For Frosting: 1 teaspoon vanilla extract
- For Frosting: 1/4 teaspoon salt
Instructions
- Preheat your oven to 350 degrees F (175 degrees C). Grease and flour two 9-inch round cake pans.
- In a medium bowl, whisk together the flour, baking soda, baking powder, salt, cinnamon, ginger, cloves, and nutmeg. Set aside.
- In a large bowl, whisk together the granulated sugar, brown sugar, and vegetable oil until combined.
- Beat in the eggs one at a time, mixing well after each addition.
- Stir in the buttermilk and vanilla extract.
- Gradually add the dry ingredients to the wet ingredients, mixing on low speed until just combined. Do not overmix.
- Divide the batter evenly between the prepared cake pans.
- Bake for 30 to 35 minutes, or until a wooden pick inserted into the center comes out clean.
- Let the cakes cool in the pans for 10 minutes before inverting them onto a wire rack to cool completely.
- To make the frosting, beat the softened cream cheese and butter together until smooth.
- Gradually add the powdered sugar, mixing until smooth.
- Beat in the vanilla extract and salt.
- Once the cakes are completely cool, frost and stack them.
Notes
- For an extra moist cake, you can substitute 1/2 cup of the oil with 1/2 cup of unsweetened applesauce.
- If you do not have buttermilk, mix 1 cup of regular milk with 1 tablespoon of white vinegar or lemon juice and let it sit for 5 minutes before using.
- You can use a 9×13 inch pan; bake for 35 to 40 minutes.
Nutrition
- Serving Size: 1 slice
- Calories: 450
- Sugar: 55g
- Sodium: 320mg
- Fat: 23g
- Saturated Fat: 9g
- Unsaturated Fat: 14g
- Trans Fat: 0g
- Carbohydrates: 60g
- Fiber: 1g
- Protein: 4g
- Cholesterol: 75mg