

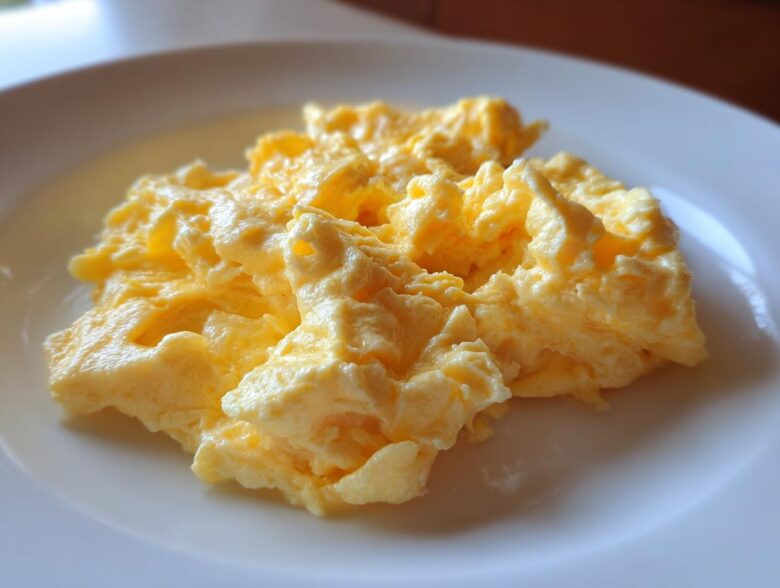
Oh my gosh, I used once to think making incredible scrambled eggs meant waiting for some fancy brunch spot to do it for you. Seriously, my home attempts always turned out sad—either rubbery little discs or just watery messes. I was ready to give up! But then I realized the secret to truly perfect scrambled eggs isn’t some fancy gadget; it’s all about the heat and the patience. I’m going to show you the simple, game-changing technique that guarantees they come out both unbelievably creamy *and* perfectly fluffy every single time. Get ready for your new favorite breakfast!
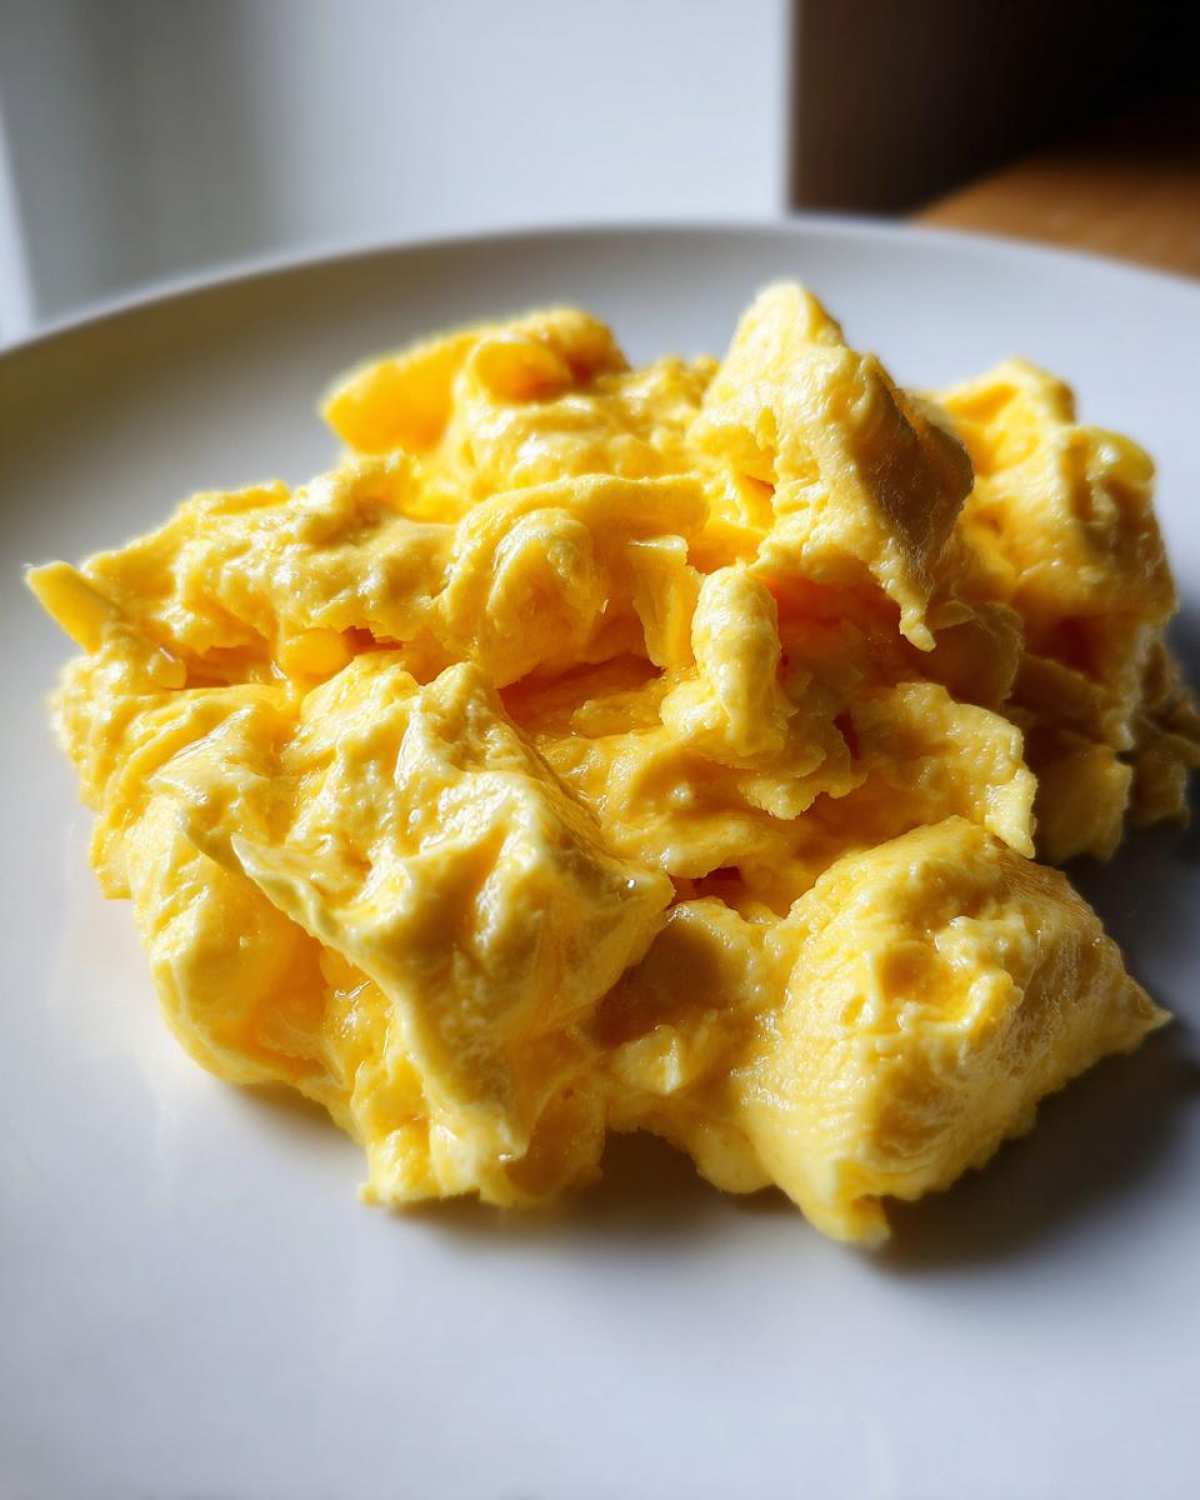
Why This Method Guarantees Perfect Scrambled Eggs
It seems like there are a million ways to cook an egg, but this specific technique is pretty much foolproof egg cooking. If you want to understand exactly how to get those amazing, restaurant-style scrambled eggs at home, you need to know a little bit about what’s happening in the pan. If the heat is too high, the egg proteins snap together way too fast, squeezing out all the moisture, and that’s how you get those tough, yellow rubber balls. Understanding the science behind why this works changes everything!
My method focuses on respecting the heat. We want those proteins to link up slowly and gently, allowing the fat to coat them for that incredible texture. This balance ensures we get speed without sacrificing that unbelievable creaminess for your next batch of scrambled eggs.
Achieving Velvety Soft Eggs Texture
The key to velvety soft eggs texture is keeping your pan cool enough that the eggs never actually brown. Browning means you’ve gone too hot, and that changes the flavor completely, pushing it away from creamy and toward eggy and dry. We are stirring slowly, almost coaxing the mixture into soft, custard-like curds instead of forcing them into hard, fast-forming chunks. It’s all about gentle agitation!
The Fluffy Egg Technique Explained
This recipe is designed to hit that sweet spot between the custardy style and the genuinely fluffy one. For real fluffiness, you need a little bit of steam to incorporate. Even though we are using cream for richness, the initial vigorous whisking incorporates just enough air to create those light, pillowy curds when they meet the gentle heat. Trust me, the first time you see them puff up just a little bit, you’ll be hooked on this fluffy egg technique.
Essential Ingredients for Creamy Scrambled Eggs
You only need a few things for the absolute best scrambled eggs, but quality really matters here! We are using four large eggs, of course, and then choosing between whole milk or heavy cream for that incredible richness—that’s where a lot of the magic for those creamy egg tutorials comes from. We also definitely need unsalted butter for the pan; skip the oil for this technique! Sprinkle in your salt and pepper right at the beginning. I know some people save the salt until the end, but mixing it in now helps keep those proteins relaxed.
Ingredient Notes and Substitutions for Scrambled Eggs
If you want silky smooth eggs, try to let your eggs sit on the counter for about 15 minutes before you crack them. Room temperature eggs cook more evenly, which is a huge time-saver in the morning! If you’re dead set on ultimate fluffiness instead of maximum creaminess, swap out the milk or cream entirely and use just one tablespoon of water instead—the steam helps them puff up wonderfully. Just remember, heavy cream gives you the mouthfeel of restaurant-style scrambled eggs, while a little bit of milk keeps them tender but lighter.
Step-by-Step Instructions for Perfect Stovetop Eggs
This is where all that careful prep pays off! Getting your setting right is key to achieving those perfect stovetop eggs we dream about. Don’t rush this part; if you preheat your pan wrong, the results will show it immediately. We are going for gentle heat, not a scorching surface!
Preparing the Egg Mixture and Pan
First things first, take that egg mixture you whisked until it was slightly frothy—remember, we want those yolks and whites totally married! Get a good non-stick skillet on the stove and set it to medium-low heat. You want the little pat of butter to melt until it’s foamy but not browned at all. Pop the egg mixture in and just let it chill out for about 30 seconds untouched. This gives the edges a tiny head start to set, which is important for texture later.
The Gentle Folding Technique for Creamy Scrambled Eggs
Now, the technique! This is the most crucial part for making creamy scrambled eggs. Take your heat-resistant spatula and gently push the cooked egg from the edge toward the center. As you push, tilt the pan so that beautiful, raw egg flows underneath the cooked part, filling the gap you just made. Keep doing this slow pushing and folding motion. I listen for a quiet, slow sizzle—if it’s hissing loudly, pull it off the heat for a second! I keep folding gently until the eggs look mostly done but still really glossy. That sheen tells you they are ready to come off the heat because those scrambled eggs will finish cooking themselves outside the pan.
Making Scrambled Eggs for a Crowd
Scaling up eggs seems intimidating, doesn’t it? Suddenly you feel like you need a commercial kitchen just to feed the family on Sunday morning! If you’re looking into how to make eggs for a crowd, the biggest change isn’t the ingredients—it’s how you handle the heat and the pan.
You absolutely cannot use the same technique for six servings that you use for one. When you dump a huge batch of eggs into a standard skillet, the middle starts cooking way faster than the edges because there’s so much mass! The key here is to ditch the speed and go low and slow. You’ll want to multiply your ingredients—say, 12 eggs instead of 4—but use a really big, heavy-bottomed pan. Cast iron is actually fantastic here because it holds that low, even temperature so well.
Instead of the slow folding we do for single servings, when you are cooking for a group, you need to stir almost constantly, like you’re making risotto. This ensures every bit cooks evenly and prevents those giant, hard curds from forming. Keep the heat low, maybe even medium-low, and just keep stirring gently until they reach that glossy, slightly wet stage. It takes longer, maybe 10 or 12 minutes, but the result is still that beautiful, velvety texture. If you do this right, you’ll have enough soft, delicious scrambled eggs for everyone without anyone complaining about dry edges!
Variations: Scrambled Eggs with Mix-ins
Okay, once you master the perfect base—that creamy, velvety canvas we just created—you get to start having fun with mix-ins! My fridge always seems to have leftover bacon bits or chives that need using up, and adding things to your scrambled eggs is such an easy way to create entirely new weekend breakfast ideas. The biggest thing I learned early on is this: don’t overload the pan!
If you toss in frozen veggies or a huge handful of cold cheese chunks right at the start, you instantly drop the temperature of your eggs, and you’ll end up back in the land of rubbery messes. That’s why timing everything perfectly is key to keeping your scrambled eggs soft. Herbs like fresh parsley or chives are wonderful stirred in right at the very end, just off the heat, so they wilt slightly and release their fresh flavor without cooking down into nothingness.
When to Add Cheese to Your Scrambled Eggs
If you ask me, nothing beats cheesy egg scrambles, but you have to be strategic with the cheese. If you add it too early, the fat separates out and you end up with a greasy mess instead of that satisfying, gooey melt. For the best result, seriously wait until the eggs are virtually done—I mean, they should look glossy, slightly wet, and you should already have removed the pan from the burner.
Toss in about a quarter cup of finely shredded sharp cheddar or maybe some crumbled feta if you’re feeling fancy. Use your residual heat to gently fold it in. Stir constantly for maybe 10 to 15 seconds until the cheese has just softened and melted beautifully into those soft curds. That simple timing makes all the difference between perfect cheesy scrambled eggs and a disappointing scramble!
Storage and Reheating Silky Smooth Eggs
I’ll be honest with you: perfection is fleeting when it comes to scrambled eggs. That incredible velvety texture we worked so hard for? It really only lasts about five minutes from the time they hit the plate. But hey, sometimes you make too many, or maybe I have a craving leftovers for lunch, so we need a plan! Storing them correctly is crucial if you want to salvage that silky smooth eggs texture.
The absolute best way to store leftovers is in an airtight container. Try not to leave them sitting out too long, obviously, but once they cool down, get them tucked away in the fridge. They will firm up significantly once cold, and yes, reheated eggs rarely ever match that initial fresh-off-the-pan magic. It’s just a fact of life with eggs!
When you’re ready to reheat, forget the microwave if you want to maintain any shred of creaminess. If you absolutely must use the microwave (because hey, sometimes we need those quick morning meals!), use short 10-second bursts and stir vigorously between each burst. It’s risky, but sometimes it works in a pinch.
My preferred way to reheat is back on the stovetop. You need very low heat—lower than you think! Take whatever portion of scrambled eggs you want and put them in a small non-stick pan. Here’s the secret weapon: add just a tiny splash of milk or heavy cream for every half cup of eggs you reheat. This helps reintroduce some moisture that evaporated during the initial cooking. Stir gently and constantly until they are just warm through. They won’t get as pillowy as the first time, but they will certainly be much softer than microwaved ones, getting you close to that original quality.
If you’re planning ahead, you might want to look into how to freeze eggs for later, like those great freezer breakfast burritos I make sometimes. That takes a lot more planning, but for standard leftovers, low and slow with a splash of dairy is the way to go!
Troubleshooting Common Scrambled Eggs Issues
Even with the best intentions and the perfect recipe, sometimes our pans decide they have a mind of their own, right? Don’t panic if your first batch of scrambled eggs turns out a bit… challenging. Every cook—and I mean *every* cook—has had moments where the eggs were too dry or stuck right to the bottom of the pan. The good news is that once you understand where the mistake happened, it’s super easy to fix next time. It almost always comes down to timing or heat management, the two things we talked about a lot!
Dealing with stuck eggs usually means the pan got too hot, too fast, or you were cooking a huge batch and stirring wasn’t keeping up. If you used enough butter like I said, sticking shouldn’t be a major problem in a good non-stick pan, but if it happens, it’s a clear sign the pan surface dried out before the eggs were ready. Just clean up, let the pan cool down completely, and start again, remembering to use a bit more butter next time!
Fixing Browned or Overcooked Scrambled Eggs
This is the most common heartbreak when making the best scrambled eggs. If you look down and see any hint of actual brown color on those delightful curds, it means you cooked them too long or the heat was cranked too high. That brown speck means the sugars in the egg have caramelized, which tastes slightly burnt, and trust me, it means the surrounding texture is definitely rubbery. The only real fix here is immediate action and better heat control next time.
To save them, immediately pull the pan completely off the burner. If you can’t remove the pan, throw in a small splash of cold milk or even a cube of ice (yes, ice! It cools the pan down *fast*). That immediate temperature drop stops the cooking process instantly. But honestly, the real fix is this: take the eggs off the heat a full minute earlier than you think you should. They should look slightly wet, glossy, and underdone when you pull them off. That residual heat will finish them perfectly on the plate without ever risking a single brown spot on your beautiful, creamy scrambled eggs!
Estimated Nutritional Data for Scrambled Eggs
I always feel a tiny bit guilty looking at the nutrition panel for breakfast, but you deserve to know exactly what you’re putting into your body! Since this recipe leans on butter and cream for that fantastic texture, it’s a bit richer than if you just cooked plain eggs, but look at that protein count! That’s serious staying power to keep you full until lunch.
Based on the core ingredients for one serving—the four large eggs, butter, and heavy cream as suggested for the creamiest outcome—the estimated values are looking pretty good. These numbers hover around 220 calories for the base recipe. You’re looking at about 16 grams of fat, which is mostly due to that delicious butter we used, and a solid 18 grams of high-quality protein to get your day going.
The carbohydrates are super low, only about 2 grams, making this a wonderful, quick morning meal for pretty much any dietary goal. Remember, though, these figures are our best guess! If you use milk instead of heavy cream, your fat and calorie count will dip down a little bit. And if you toss in bacon, sautéed potatoes, or go wild with cheddar cheese for those cheesy egg scrambles, you’ll definitely need to add those totals to your count. But as a base for perfect scrambled eggs, it’s a fantastic foundation!
Your Next Easy Breakfast Recipes
Whew! I hope you’re not too full from all those fantastic, creamy scrambled eggs we just made. Seriously, if you try this method and love it—and I know you will—please pop down into the comments below and let me know! Did you add chives? Did you choose cream or milk? I love hearing how you customize breakfast comfort food in your own kitchen!
Now that you’ve mastered the secret to perfect stovetop eggs, you’re probably looking for more ways to make your mornings easier without sacrificing flavor. We all need some quick morning meals in our back pocket for those chaotic weekdays, right?
Since you nailed the technique for silky smooth eggs today, you might want to check out my guide on quick morning meals that come together in under ten minutes. They are fantastic for busy workdays when you still need a real meal, not just toast!
And if you’re planning a weekend brunch or just want to impress someone, you absolutely cannot skip taking a look at my recommendations for the best brunch foods that feel fancy but are surprisingly simple to pull off. You’re already halfway there since you know how to make incredible eggs now!
Keep practicing this foundational recipe. Once you master these basic, foolproof egg cooking skills, every single one of these easy breakfast recipes just gets simpler from here on out. Happy cooking, friends!
PrintThe Best Creamy and Fluffy Stovetop Scrambled Eggs

Learn the simple technique for making velvety, custardy, and fluffy scrambled eggs quickly on the stovetop.
- Prep Time: 2 min
- Cook Time: 5 min
- Total Time: 7 min
- Yield: 1 serving
- Category: Breakfast
- Method: Stovetop
- Cuisine: American
- Diet: Vegetarian
Ingredients
- 4 large eggs
- 2 tablespoons whole milk or heavy cream
- 1 teaspoon unsalted butter
- Pinch of salt
- Pinch of black pepper
Instructions
- Crack the eggs into a medium bowl. Add the milk or cream, salt, and pepper. Whisk vigorously until the yolks and whites are fully combined and slightly frothy.
- Place a non-stick skillet over medium-low heat. Add the butter and let it melt until it foams slightly.
- Pour the egg mixture into the warm skillet. Let the eggs sit undisturbed for about 30 seconds until the edges just begin to set.
- Using a heat-resistant spatula, gently push the cooked egg from the edge toward the center, tilting the pan so the uncooked egg flows underneath.
- Continue this gentle pushing and folding motion slowly. Keep the heat low to prevent browning and promote creaminess.
- When the eggs are mostly set but still look slightly wet and glossy (this is key for creaminess), remove the pan from the heat immediately. The residual heat will finish cooking them.
- Serve right away for the softest texture.
Notes
- For fluffier eggs, whisk in 1 tablespoon of water instead of milk and cook over medium heat, stirring constantly until large, soft curds form.
- To make eggs for a crowd, multiply the ingredients and use a larger, heavy-bottomed pan over low heat, stirring more frequently.
- If adding cheese, stir it in during the last 30 seconds of cooking.
Nutrition
- Serving Size: 1 serving
- Calories: 220
- Sugar: 1
- Sodium: 150
- Fat: 16
- Saturated Fat: 8
- Unsaturated Fat: 8
- Trans Fat: 0
- Carbohydrates: 2
- Fiber: 0
- Protein: 18
- Cholesterol: 450