

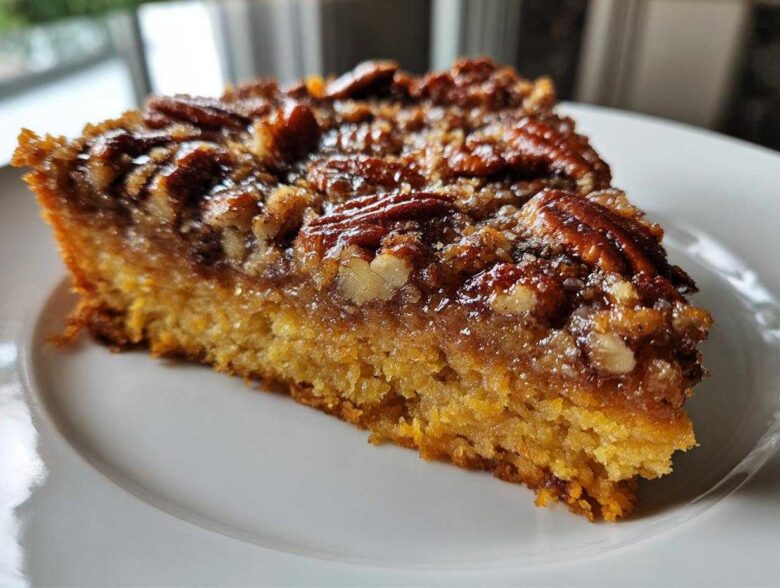
Oh my gosh, pull up a chair because I have finally perfected the dessert that makes everyone stop talking at Thanksgiving: the truly legendary **pumpkin crunch cake**! I swear, I’ve spent years tweaking this recipe because the magic is all in that textural difference—you gotta have that unbelievably moist, warmly spiced pumpkin layer hugging the bottom, instantly contrasted by a sweet, buttery, crunchy pecan topping. It’s unbelievably easy, darling, thanks to a little cheating with yellow cake mix, but trust me, nobody ever guesses! If you need one foolproof, show-stopping Fall bake that disappears first off the dessert table, this is it. I’ve tested every single variation so you don’t have to.
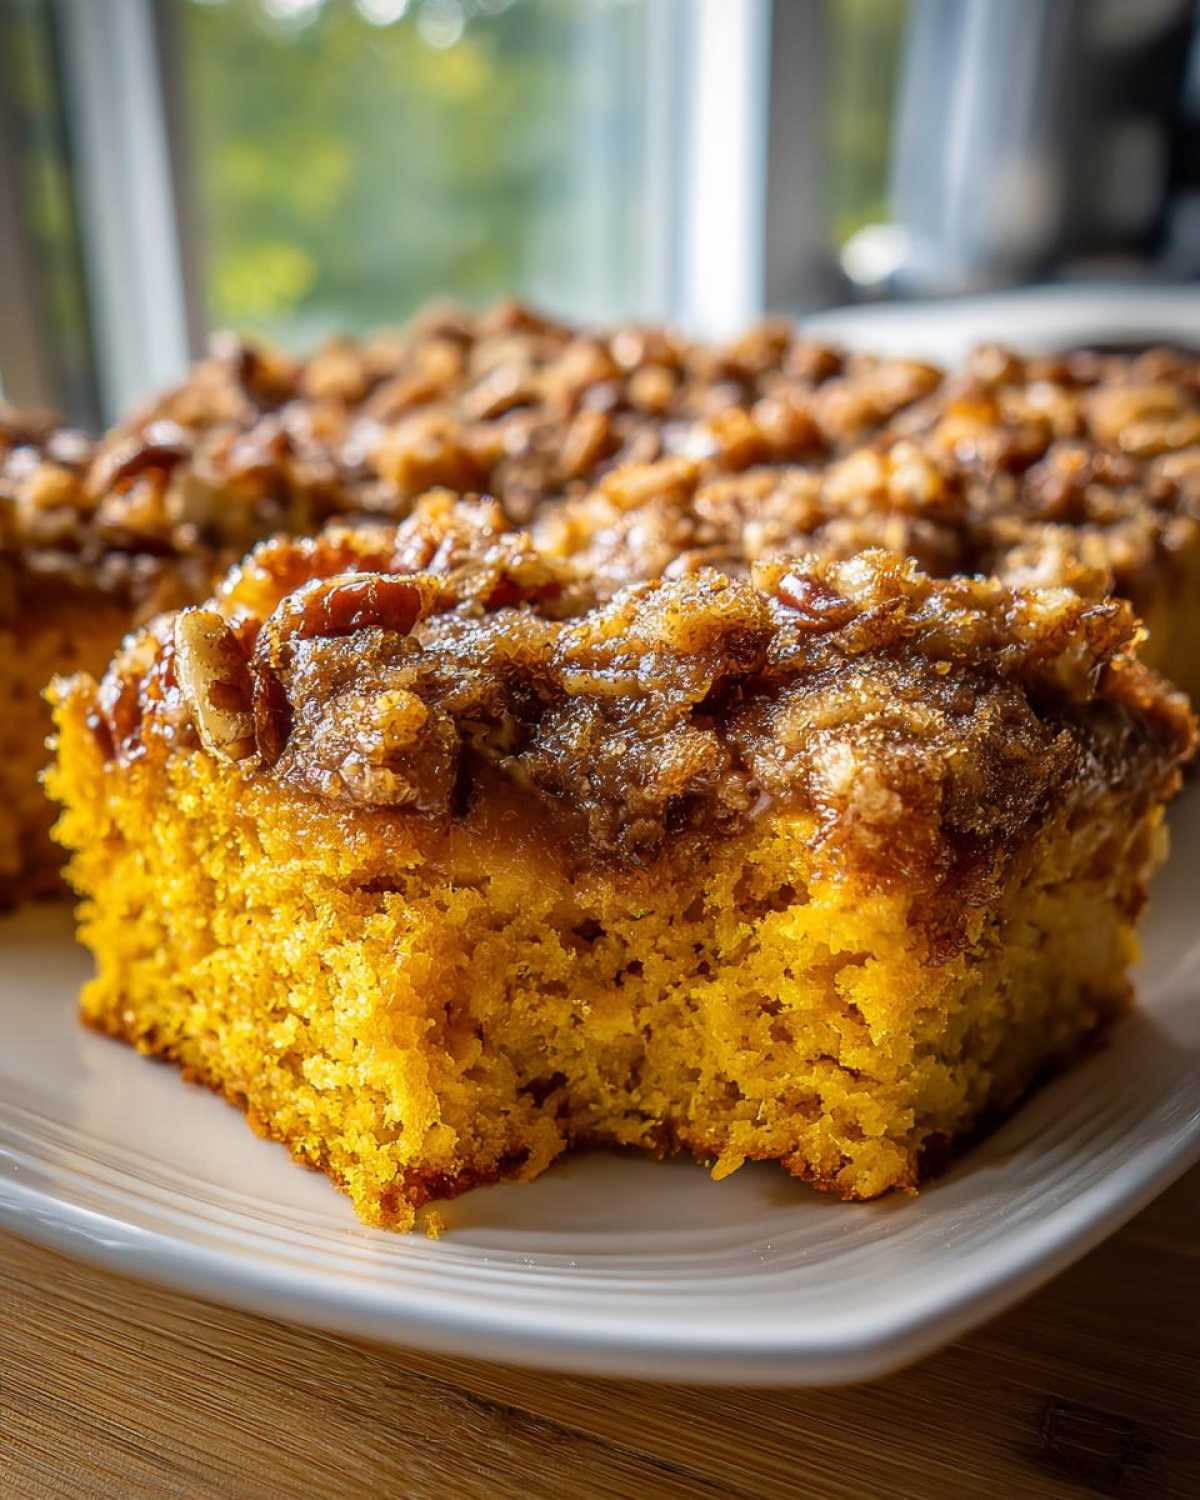
If you want to learn more about what goes into baking with heart, you can always check out my philosophy over at our little corner of the internet, but right now, let’s just focus on getting that crunch right!
Why This Easy Pumpkin Crunch Cake Recipe is a Fall Favorite
This isn’t just another pumpkin dessert; it’s the one everyone asks for, year after year. Why? Because it delivers massive flavor without demanding hours in the kitchen. See? It just works perfectly every time!
- The texture contrast is heavenly: moist cake meets intensely crunchy topping.
- It uses a yellow cake mix shortcut, so it’s virtually foolproof.
- It always disappears first at potlucks and family gatherings.
Quick Prep Time for Your Simple Layered Pumpkin Dessert
Seriously, you only spend about fifteen active minutes getting this ready for the oven. That’s less time than it takes to clean up dinner sometimes! Because it’s such a **Simple Layered Pumpkin Dessert**, you have time to actually enjoy the fall air instead of being glued to the counter.
Gathering Ingredients for the Perfect Pumpkin Crunch Cake
Okay, so this is where the magic starts, but don’t panic! Because we’re using a little shortcut, gathering supplies for this **pumpkin crunch cake** is super quick. The biggest thing you need to look for is 100% pure pumpkin puree—not the pumpkin pie filling, mind you! That pure stuff gives us the authentic, deep color and all that essential moisture we need for the base to stand up to that crunchy topping later on.
Ingredient Checklist: Yellow Cake Mix Pumpkin Cake Components
Here is everything you’ll need laid out. I put the word ‘divided’ next to the eggs because we use them at two different stages, so pay attention there! Remember, we are aiming for the very **best Pumpkin Crunch Cake** experience, and that starts with quality basics.
- 1 box (15.25 oz) yellow cake mix
- 1 can (15 oz) pure pumpkin puree
- 4 large eggs, divided
- 1 cup vegetable oil
- 1/2 cup water
- 2 teaspoons pumpkin pie spice
- 1 cup chopped pecans
- 1 cup granulated sugar
- 1/2 cup (1 stick) unsalted butter, melted
- 1 can (14 oz) sweetened condensed milk
Step-by-Step Instructions for Your Crowd-Pleasing Fall Bake
Okay, let’s get this amazing **pumpkin crunch cake** in the oven! First thing’s first: set your oven to 350°F (175°C) and make sure you grease and flour that standard 9×13 inch baking pan really well. I always forget this part unless I do it first!
This recipe is designed to go fast, so you’ll be mixing the pumpkin base while the oven heats up. Get ready!
Mixing the Moist Pumpkin Cake Base
Grab a big bowl. We’re throwing in the yellow cake mix, the pure pumpkin puree, half of your eggs—that’s 3 eggs right here—the vegetable oil, the water, and the pumpkin pie spice. Mix it up, but listen closely: mix it *only* until everything is wet and combined. Don’t get aggressive! Overmixing this base is the fastest way to lose that nice, moist texture we are aiming for. Spread that batter right into your prepared pan so it’s nice and even.
Creating and Applying the Crunchy Topping Pumpkin Dessert Layer
Now for the crunch! In a separate, smaller bowl, whisk up that remaining 1 egg, the granulated sugar, and all your chopped pecans. Sprinkle this gorgeous pecan mixture evenly right over the wet pumpkin batter. Pop it into the oven and let it bake for about 40 to 45 minutes until a toothpick inserted in the middle comes out clean. This is where you can check out my very latest thoughts on baking over at my blog archives if you need a distraction!
But don’t walk away! Once that initial bake is done, gently pour the melted butter all over the hot cake, and then drizzle that beautiful sweetened condensed milk right over the top. Pop the whole thing back in for just another 10 to 15 minutes until that pecan layer turns golden brown and bubbly. That double-baking process locks in the moisture while crisping the top—absolutely crucial for that signature **pumpkin crunch cake** feeling!
Expert Tips for the Best Pumpkin Crunch Cake Texture
You know, following the steps is great, but I’ve learned a few little secrets over the years that push this from a good dessert to the absolute **Best Pumpkin Crunch Cake** you’ll ever have. These tips are all about managing that delightful contrast between soft and crunchy.
First, about the crunch: make sure your final bake time is spot on. If you pull it out too soon after the condensed milk goes on, that topping stays a little sticky. We want it caramelized and crisp, so watch for that bubbly, golden brown color right before you pull it out the second time. Also, don’t skip chilling! Letting this cake cool completely, and even chilling it in the fridge for a few hours, helps the layers set up perfectly. It makes slicing so much cleaner, and honestly, the flavors taste richer when cold.
Another thing I learned: if your pecans seem too big, give them a rough chop before sprinkling them on. You want little islands of crunch, not giant clumps! If you want to experiment with fresh pumpkin, I’ve done that too, but you might need an extra tablespoon of oil since fresh puree can sometimes be drier. If you want more recipe inspiration, I shared my favorite fall pancake recipe last week, in case you need a breakfast idea!
Ingredient Notes and Substitutions for Your Pumpkin Crunch Cake
Let’s talk ingredients, because while this recipe is already super simple, knowing *why* we pick certain things really helps build your confidence. Remember, this is all about keeping that incredible texture in your final **pumpkin crunch cake**!
The main thing you might wonder about is the oil in the pumpkin base. We use vegetable oil instead of butter in the cake batter itself because oil stays liquid at cooler temperatures. That’s the secret weapon to guaranteeing that base layer stays impossibly moist and tender, even when chilled. Butter sets up firm when cold, making the base taste stiff, and we absolutely do not want a stiff base!
For that fantastic crunch layer, pecans are my absolute go-to. I love how they taste after they’ve soaked up some of that butter and condensed milk sweetness. But hey, if you’re out of pecans or just prefer something else, walnuts are a completely wonderful substitute. Just chop them up roughly; we want texture variation, not perfectly uniform pieces.
What if you’re staring at your spice rack and realize you’re out of pre-mixed pumpkin pie spice? Don’t sweat it! You can easily whip up a replacement blend yourself. A good ratio to aim for is 1 teaspoon cinnamon, 1/4 teaspoon ginger, and a tiny pinch of ground cloves and nutmeg if you have them. Just make sure you total about 2 teaspoons worth of spice blend to get that warm fall flavor profile that makes this **pumpkin crunch cake** sing!
Serving Suggestions for This Thanksgiving Pumpkin Cake
Part of the joy of making this **Thanksgiving Pumpkin Cake** is figuring out the perfect way to serve it! Because the base is so rich and the topping is so crunchy, you can actually go in a few different directions depending on what mood you’re in.
The recipe notes mention serving it chilled with whipped cream or vanilla ice cream, and honestly, that’s probably my favorite way to eat it straight from the fridge. The cold temperature really firms up that moist pumpkin layer, making the crunch stand out even more!
If you’re serving it warm, though—maybe shortly after you let it cool enough to cut—a simple dollop of freshly whipped cream is divine. You can even spice up your whipped cream with a tiny dash of extra cinnamon or nutmeg if you’re feeling fancy!
For a real holiday showstopper, especially if you’re having a big dinner, I love pairing a slice of this with a mug of something warm and cozy. It goes absolutely perfectly with my copycat recipe for Pumpkin Cream Cold Brew, if you want a refreshing, non-coffee option, or even just a hot mug of spiced apple cider. The way those seasonal spices blend together is just heaven. Seriously, this cake elevates any holiday table!
Storage & Make Ahead Pumpkin Crunch Instructions
The absolute best part about this **pumpkin crunch cake** is that it’s an amazing **Make Ahead Pumpkin Crunch** treat! You really don’t need to stress about making it right before guests arrive, which is a lifesaver during the holidays.
According to my notes, this cake keeps beautifully in the refrigerator for up to four days, which is fantastic. Because of that moist base, chilling actually makes it even better!
Here’s my biggest tip for storing it: make sure you keep it covered tightly with plastic wrap or put it in an airtight container once it’s completely cooled. If you leave it uncovered, especially that yummy pecan layer, it might start to absorb fridge smells or soften too much. I always look forward to eating the leftovers the next day! For more make-ahead magic, you can check out my recipe for Pumpkin French Toast Bake, too!
Frequently Asked Questions About Pumpkin Crunch Cake
I always get so many questions after people try this recipe, mostly about customizations! That’s the best part about baking—making it your own. Here are the top things I hear about trying to get the very best **pumpkin crunch cake**.
Can I make this Hawaiian Pumpkin Crunch Cake style?
That’s a fun question! The Hawaiian style usually involves adding crushed pineapple directly into the cake batter itself, which pumps up the moisture even more. If you want to try it, you can definitely add one 8 oz can of crushed pineapple (drained very well!) right into the pumpkin wet ingredients when you’re mixing the base layer. Just remember that because you are adding more moisture, the primary cake layer might bake up a little slower, so keep an eye on that toothpick test!
How do I prevent a soggy bottom on my pumpkin crunch cake?
This is the eternal struggle with layered pumpkin desserts! The secret to keeping the bottom layer from getting soggy is twofold: first, make sure you grease and flour that 9×13 pan religiously. Second, and this is key, don’t skip cooling the cake completely before you slice it. When you chill it, that moisture redistributes evenly. Also, never let the cake sit uncovered in the fridge! If you want another great layered fall recipe, you have to check out my Pumpkin Spice Latte Bars!
Is this recipe hard to freeze?
It actually freezes surprisingly well, especially since this is such a fantastic **No-Fuss Pumpkin Dessert**! I recommend wrapping the entire cooled cake tightly in plastic wrap, then wrapping it again in aluminum foil to keep any freezer burn out. It keeps well for up to three months in the freezer. When you’re ready to eat it, just thaw it overnight in the fridge! The crunch might soften just a tiny bit, but it still tastes amazing.
Estimated Nutrition for This No-Fuss Pumpkin Dessert
Listen, I’m not a nutritionist, and I definitely don’t measure exact calories when I’m baking up something this good, especially family favorites like this **No-Fuss Pumpkin Dessert**. I tracked this batch using the guidelines provided in the recipe details, but honestly, you should treat these numbers as a general estimate rather than gospel!
When I tallied everything up based on 12 generous servings, here’s what we’re looking at for one piece. Remember, this is definitely a delicious treat, so the numbers reflect all that buttery, sugary goodness that makes this **pumpkin crunch cake** so addictive!
- Calories: Around 410
- Fat: Roughly 22 grams (A good chunk of that is the butter and oil, which helps keep the cake moist!)
- Carbohydrates: About 52 grams
- Protein: Around 5 grams
- Sugar: Be warned, it’s around 45 grams—that super sweet condensed milk layer adds up, but it’s worth every single one!
Take these figures with a grain of salt—or maybe a grain of sugar! The true measure of this dessert is in the smiles it brings to the table. We bake these cakes out of love, not math, right?
Share Your Perfect Pumpkin Crunch Cake Experience
Now that you have the secrets to what I think is the most divine **pumpkin crunch cake** recipe ever devised, I really, really want to hear about it! Seriously, I live for your feedback—it keeps me motivated in the kitchen!
Did you make it for a family gathering? Did you get compliments on that amazing crunchy topping? Or maybe you tried swapping out those pecans for walnuts, or perhaps you ventured into adding that crushed pineapple like we discussed? Tell me everything when you leave a comment below.
When you inevitably take that first incredible bite of the moist bottom layer touching that crisp top layer, please rate the recipe right there on the page! Five stars is the goal, but any feedback helps me make sure this recipe stays perfect for everyone.
If you snap a picture while you’re enjoying this beautiful **Thanksgiving Pumpkin Cake**, why don’t you tag me on social media? It always makes my day to see my recipes out in the world making people happy. And if you need to send over any specific questions that I didn’t cover in the FAQs, feel free to reach out through my contact page. Happy baking, everyone!
PrintEasy Pumpkin Crunch Cake
A simple, layered pumpkin cake featuring a moist pumpkin base and a sweet, crunchy pecan topping, often made using yellow cake mix.
- Prep Time: 15 min
- Cook Time: 60 min
- Total Time: 75 min
- Yield: 12 servings
- Category: Dessert
- Method: Baking
- Cuisine: American
- Diet: Vegetarian
Ingredients
- 1 box (15.25 oz) yellow cake mix
- 1 can (15 oz) pure pumpkin puree
- 4 large eggs, divided
- 1 cup vegetable oil
- 1/2 cup water
- 2 teaspoons pumpkin pie spice
- 1 cup chopped pecans
- 1 cup granulated sugar
- 1/2 cup (1 stick) unsalted butter, melted
- 1 can (14 oz) sweetened condensed milk
Instructions
- Preheat your oven to 350°F (175°C). Grease and flour a 9×13 inch baking pan.
- In a large bowl, combine the yellow cake mix, pumpkin puree, 3 eggs, vegetable oil, water, and pumpkin pie spice. Mix until just combined; do not overmix.
- Spread the batter evenly into the prepared baking pan.
- In a separate small bowl, whisk together the remaining 1 egg, granulated sugar, and chopped pecans.
- Sprinkle the pecan mixture evenly over the pumpkin batter.
- Bake for 40 to 45 minutes, or until a toothpick inserted into the center comes out clean.
- Remove the cake from the oven. Immediately pour the melted butter evenly over the hot cake.
- Slowly drizzle the sweetened condensed milk over the entire surface of the cake.
- Return the cake to the oven and bake for an additional 10 to 15 minutes, until the topping is golden brown and bubbly.
- Let the cake cool completely before slicing and serving.
Notes
- Serve chilled or at room temperature with a dollop of whipped cream or vanilla ice cream.
- You can substitute walnuts for pecans in the topping if you prefer.
- This cake keeps well covered in the refrigerator for up to four days.
Nutrition
- Serving Size: 1 slice
- Calories: 410
- Sugar: 45
- Sodium: 300
- Fat: 22
- Saturated Fat: 7
- Unsaturated Fat: 15
- Trans Fat: 0
- Carbohydrates: 52
- Fiber: 2
- Protein: 5
- Cholesterol: 65