

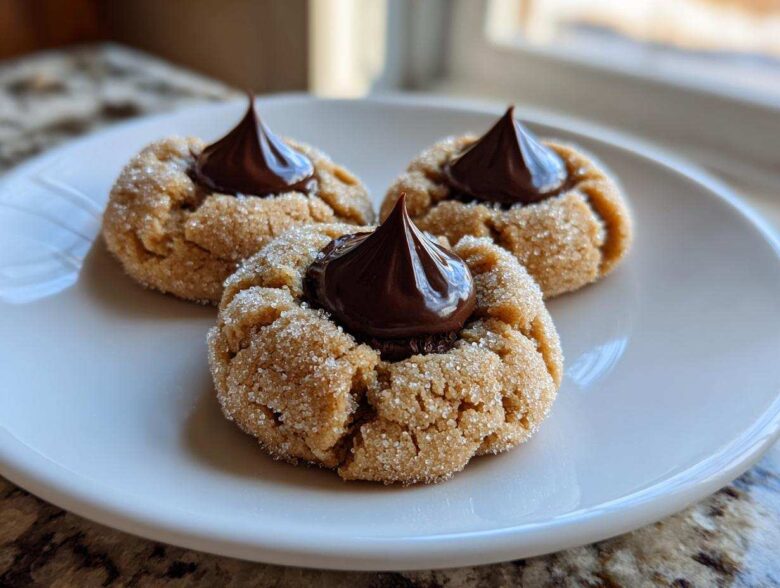
Oh, the nostalgia! If you’ve spent any Christmas season near a cookie platter, you know exactly what I’m talking about. That perfect, salty-sweet peanut butter base with that little hat of perfectly melted chocolate right on top? Iconic. I swear, I’ve been making these Peanut Butter Blossom cookies since I was tall enough to reach the countertop, and I’ve finally nailed down the secret to keeping them perfectly soft and chewy—no dry, crumbly edges allowed! Forget those sad, cracked shells you sometimes see; my recipe guarantees you the “Best Peanut Butter Blossom Recipe” that stays melt-in-your-mouth tender for days. If you love Traditional Holiday Desserts, you need this foolproof guide. We’re skipping the chill time, too, because who has time for that when baking season is upon us? I learned so much about the foundation of good baking over the years, which you can read more about on our About Us page. Trust me, this version, based on years of testing, is the one you’ll be clipping onto your fridge.
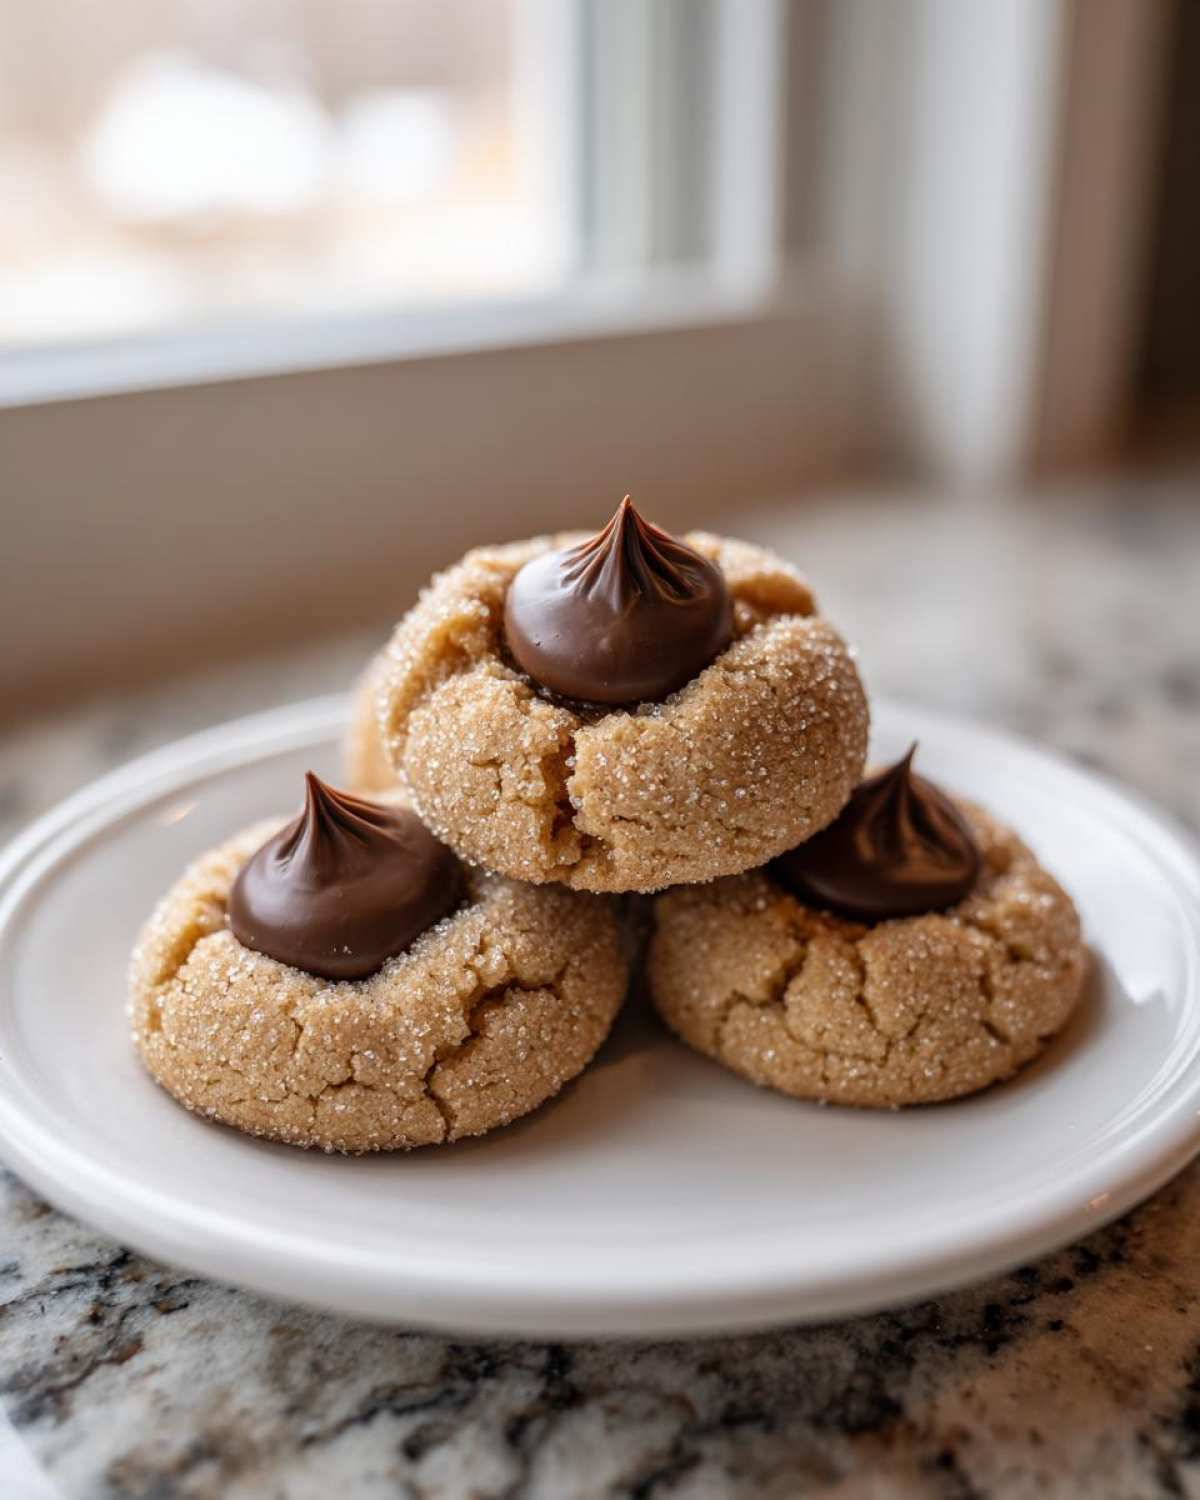
Why This Is The Best Peanut Butter Blossom Recipe
I’m telling you, friends, this isn’t just another cookie recipe jammed onto the internet. This is the Best Peanut Butter Blossom Recipe because it solves all the annoying problems that usually come with Soft Peanut Butter Cookies. We all want that classic look, but we really crave that amazing texture, right? I worked hard to make sure these stay wonderfully soft and chewy long after they leave the cooling rack.
- Zero chill time needed—mix them and bake them right away!
- They stay incredibly soft thanks to the perfect creamed base.
- The chocolate kisses sink in just right without cracking the cookie half off.
- Honestly, they’re the easiest traditional holiday cookie you’ll make all year.
Achieving Soft and Chewy Peanut Butter Blossoms Every Time
The secret to keeping these delightful, Chewy Chocolate Kiss Cookies soft always comes down to the sugar. See that brown sugar we use? Wow. Molasses, the delicious stuff inside brown sugar, acts like a little moisture magnet. It keeps the Peanut Butter Blossom from drying out in the oven. That extra moisture retention is why my cookies feel so delightfully tender and aren’t stiff by morning. Don’t swap it out for white sugar, or you’ll miss out on that perfect pillowy texture we’re aiming for!
Essential Ingredients for Perfect Peanut Butter Blossom Cookies
Okay, let’s talk supplies, because you can’t make the Best Ever Peanut Butter Blossoms using just anything! When you’re aiming for that classic look and that specific, wonderful texture, the ingredients really matter. I’m sticking precisely to what works best for these iconic Homemade Chocolate Kiss Cookies, focusing on making sure everything is ready to go when you start mixing. This clarity builds trust, and when you see how simple this list is, you’ll feel much better about your Easy Christmas Baking ahead!
- 1 cup unsalted butter, softened (needs to be totally soft!)
- 1 cup creamy peanut butter (yes, creamy is the secret weapon here)
- ¾ cup granulated sugar
- ¾ cup packed brown sugar (don’t scoop it loosely!)
- 2 large eggs
- 1 teaspoon vanilla extract
- 2 ¼ cups all-purpose flour
- 1 teaspoon baking soda
- ½ teaspoon baking powder
- ½ teaspoon salt
- About 1 bag (12 ounces) Hershey’s Kisses, unwrapped (Keep these handy by the oven!)
Ingredient Notes and Substitutions for Your Peanut Butter Blossom
When talking about the foundation of your Peanut Butter Blossom, creamy peanut butter is my non-negotiable. Crunchy bits interrupt the smooth texture we want for a Melt in Your Mouth Cookie. And listen closely: use the actual Hershey’s Kisses! Store-brand chocolate drops sometimes don’t melt or set right for that perfect little divot. Also, notice we have both baking soda AND baking powder? That’s intentional! The soda helps with browning and spreading, while the powder gives just enough lift so your cookies aren’t totally flat discs. It’s how we manage to get those Perfectly Cracked Peanut Butter Cookies without them being stiff.
Step-by-Step Instructions for Classic Peanut Butter Blossom
Getting these iconic Peanut Butter Blossom cookies right is easier than you think, especially since we aren’t waiting around for dough to chill! We move fast, but we move smart. This whole process moves quickly once you get going, so try to have your kisses unwrapped and ready to go beside the oven. We want that beautiful contrast—a warm, set cookie base meeting a slightly softened chocolate top. For more quick baking tips and tricks, check out our latest baking articles! Remember, achieving that perfect texture for these Simple Drop Cookies relies heavily on what you do in the initial mixing stage.
Mixing the Dough for Soft Peanut Butter Cookies
We start by getting our fats and sugars singing! In a big bowl, you need to beat the softened butter, creamy peanut butter, both sugars (white and brown!), eggs, and vanilla until it’s just beautifully light and creamy. This creaming step is crucial for your final Soft Peanut Butter Cookies—it whips in the air needed for that tender crumb. Now, for the dry stuff. Whisk your flour, soda, powder, and salt separately. When you add this dry mix to the wet base? Stop mixing the second it comes together. Seriously! Overmixing flour is the fastest way to switch your gorgeous dough from “soft cookie” to “biscuit texture,” and we definitely don’t want that here.
Baking and Adding the Chocolate Kiss to Your Peanut Butter Blossom
After you roll those dough balls and give them a quick roll in extra sugar, they go into a 375-degree oven. They only need 8 to 10 minutes, tops. Don’t wait for them to look completely done! That’s the trick for Chewy Chocolate Kiss Cookies. When you pull them out, the edges should look set, but the very center should still look a little soft, maybe even a tiny bit glossy. This is the moment of truth for every Peanut Butter Blossom! Immediately, press one unwrapped chocolate kiss right into the middle of that warm surface. The residual heat softens the chocolate perfectly, giving you that signature crater without melting the whole thing. Let them sit on the hot pan for five minutes before carefully moving them; this lets the cookie structure firm up around the base of the Kiss.
Tips for Perfect Peanut Butter Blossom Success
Even though this is my foolproof method for Peanut Butter Blossom cookies, sometimes the oven gods just throw us a curveball, right? Don’t panic if a few cookies decide to get sassy and crack a little too much! Remember what I said way back when? If you pull a sheet out and notice your Chewy Chocolate Kiss Cookies are splitting like crazy (which usually means your dough was too cold or dry), go ahead and pop the dough bowl into the fridge for just 30 minutes next time. That small break helps stabilize everything.
On the flip side, if you pull them out and the chocolate kiss melts straight down into a greasy puddle, you baked them too long! For that perfect, slightly soft center that ensures chewiness later, slightly underbake them. They should still look a little soft in the middle when you press the Kiss in. Trust your eyes over the timer for those last two minutes!
Making Peanut Butter Blossom Cookies for Holiday Cookie Platters
These Peanut Butter Blossom cookies are absolute superstars when it comes to assembling a stunning Holiday Cookie Platter. Seriously, they add that perfect familiar touch among all the fancy shortbreads! Since this recipe yields about three dozen cookies, you get plenty to share—or hide away for yourself, I won’t tell! The golden brown base paired with that dark chocolate hat makes them instantly recognizable as Classic Holiday Cookies.
When you’re planning your platter, I like mixing textures, and these are wonderfully soft and slightly crumbly on the edges. They look fantastic next to something crisp, like a sugar cookie cut-out. If you’re looking for other crowd-pleasing holiday bakes that fill up a platter beautifully, you have to check out my recipe for Apple Cider Donut Muffins—they smell like autumn heaven!
Storage and Reheating Instructions for Your Peanut Butter Blossom
Okay, keeping these gorgeous Peanut Butter Blossom cookies soft past day one is easy, but you have to be disciplined! The air is the enemy of a chewy cookie. You must store them in a truly airtight container. Don’t use loose foil or plastic bags; they need a proper seal. I find that if I layer them with wax paper between layers, it keeps the chocolate kiss from sticking to the cookie above it. These Simple Drop Cookies freeze like a dream, too! Just pop the cooled, un-Kissed cookies into an airtight container and freeze for up to three months. Add the chocolate kiss after thawing and warming them up slightly.
Variations on the Classic Peanut Butter Blossom
While this recipe for Peanut Butter Blossom cookies is truly perfect as is—it’s a classic for a reason!—sometimes I just get the itch to tweak things up a bit for fun. A fabulous way to add a little *pop* to these Homemade Chocolate Kiss Cookies is to sprinkle a tiny pinch of flaky sea salt right on top of the dough ball, just before it goes into the sugar coating. That salt cuts beautifully against the sweet peanut butter cookie base!
Now, if you’re dealing with allergies or trying something new, you might wonder about other options. If you have friends who need a gluten-free option, the great news is that this base *is* very adaptable! You can swap out the all-purpose flour for a quality 1-to-1 gluten-free blend, though sometimes the texture is slightly different. You can read more about my approach to making adjustments like that in my Gluten-Free Blueberry Muffins guide! Just remember, if you change the flour, the dough might feel a little wetter, so you might need that 30-minute chill I mentioned earlier.
And hey, don’t feel trapped by the milk chocolate Kiss, either! If you try a peanut butter cup mini, or even a dark chocolate Kiss, you totally change the flavor profile without changing the basic dough mechanics. So many ways to enjoy this simple treat!
Frequently Asked Questions About Peanut Butter Kiss Cookies
It’s natural to have questions about the logistics of making perfect Homemade Chocolate Kiss Cookies! Even though this Peanut Butter Blossom recipe is super easy, details matter when you’re putting together your Traditional Holiday Desserts. I compiled a few of the things I always wondered about when I was first learning to bake these beauties. Ask away, bakers!
Why do my peanut butter blossom cookies crack so much?
Oh, the dreaded cracking! This usually happens because the fat—the butter and peanut butter—gets too warm and starts to break down right before the structure sets in the oven. If you notice your dough balls are cracking before they even hit the oven, don’t worry! Just pop the whole bowl of dough into the fridge for about 30 minutes. Chilling it slightly firms everything back up so that when you roll them and press them, they hold their shape better. Remember, a *little* crack is normal and shows you’re on your way to a great cookie, but excessive splitting means the dough needs a minute to rest!
Can I make these peanut butter blossom cookies ahead of time?
Absolutely, you can prep these ahead! If you prefer to bake them fresh on Christmas Eve, you can totally mix the dough, roll them into balls, toss them in sugar, and place them snugly onto a parchment-lined baking sheet. Cover that pan tightly with plastic wrap and keep them in the fridge for up to two days. When you are ready to bake, just add about 2 minutes extra to the baking time since the dough is cold. I wouldn’t recommend pressing the chocolate Kiss in until they are actually baked and cooling, though!
What is the best way to wrap these cookies for gifting?
When you’re packaging up your beautiful Peanut Butter Blossom cookies for friends and family, presentation and protection are key! You need to make sure that beautiful chocolate top doesn’t get smushed. I always let them cool completely first—don’t try wrapping them warm! Then, I arrange them in sturdy tin containers, using cupcake liners or small squares of parchment paper between the layers. This keeps them from sliding around and keeps that signature Kiss sitting pretty. If you ever need to reach out with a special request or just want to chat about baking, feel free to use the contact form on the site!
Nutritional Estimates for This Peanut Butter Blossom Recipe
I wanted to include some general nutritional info just so you have an idea of what you’re grabbing when you reach for one of these gorgeous Peanut Butter Blossom cookies. Now, these numbers are just estimates, right? They are based on using the standard ingredients listed here, like the creamy peanut butter and regular granulated sugar. If you start swapping things out or making a gluten-free option, those numbers will shift around.
This is based on a yield of about 3 dozen cookies, so keep that in mind when you look at the numbers—one cookie is one serving! It’s fun to see how these Simple Drop Cookies stack up, especially compared to something store-bought. Honestly, making them from scratch means you know exactly what’s in them, which is worth more than any calorie count in my book when it comes to Family Favorite Cookies!
- Serving Size: 1 cookie
- Calories: 150
- Protein: 3g
- Fat: 8g (with 3g listed as Saturated Fat)
- Carbohydrates: 18g
- Sugar: 13g
- Sodium: 75mg
The Ultimate Soft & Chewy Peanut Butter Blossoms: Classic Recipe That Never Crumbles
Make classic Peanut Butter Blossoms that stay soft and chewy. This recipe uses simple steps to create the iconic peanut butter cookie base topped with a chocolate kiss.
- Prep Time: 15 min
- Cook Time: 10 min
- Total Time: 25 min
- Yield: About 3 dozen cookies
- Category: Dessert
- Method: Baking
- Cuisine: American
- Diet: Vegetarian
Ingredients
- 1 cup unsalted butter, softened
- 1 cup creamy peanut butter
- ¾ cup granulated sugar
- ¾ cup packed brown sugar
- 2 large eggs
- 1 teaspoon vanilla extract
- 2 ¼ cups all-purpose flour
- 1 teaspoon baking soda
- ½ teaspoon baking powder
- ½ teaspoon salt
- About 1 bag (12 ounces) Hershey’s Kisses, unwrapped
Instructions
- Preheat your oven to 375 degrees F. Line baking sheets with parchment paper.
- In a large bowl, beat the softened butter, peanut butter, granulated sugar, and brown sugar until creamy.
- Beat in the eggs one at a time, then stir in the vanilla extract.
- In a separate bowl, whisk together the flour, baking soda, baking powder, and salt.
- Gradually add the dry ingredients to the wet ingredients, mixing until just combined. Do not overmix.
- Roll the dough into 1-inch balls. Roll each ball in granulated sugar to coat lightly.
- Place the sugared balls about 2 inches apart on the prepared baking sheets.
- Bake for 8 to 10 minutes. The edges should look set but the centers should still look slightly soft.
- Immediately upon removing the cookies from the oven, press one unwrapped chocolate kiss gently into the center of each warm cookie. The residual heat will soften the chocolate slightly.
- Let the cookies cool on the baking sheet for 5 minutes before transferring them to a wire rack to cool completely.
Notes
- For extra soft cookies, slightly underbake them; they firm up as they cool.
- If your cookies crack too much during baking, try chilling the dough for 30 minutes before rolling and baking.
- Use creamy peanut butter for the best texture in the cookie base.
Nutrition
- Serving Size: 1 cookie
- Calories: 150
- Sugar: 13
- Sodium: 75
- Fat: 8
- Saturated Fat: 3
- Unsaturated Fat: 5
- Trans Fat: 0
- Carbohydrates: 18
- Fiber: 1
- Protein: 3
- Cholesterol: 20