

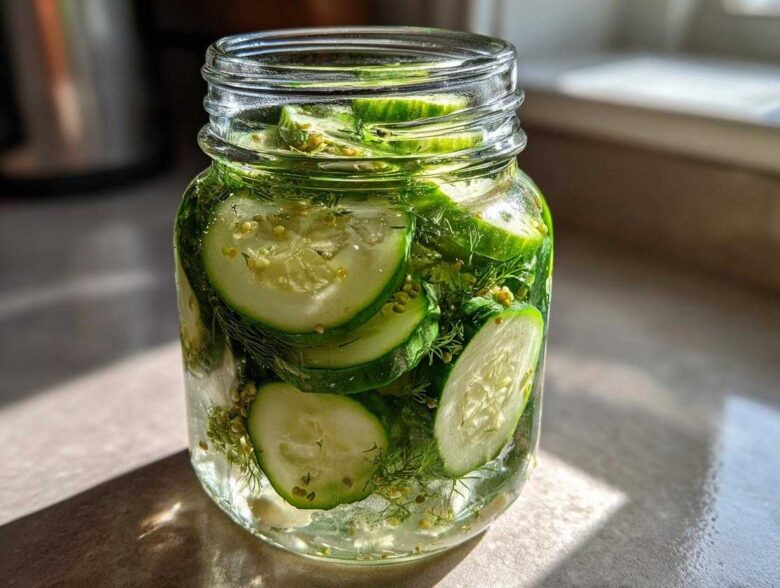
Oh my gosh, if you are anything like me, you know the absolute tragedy of a soggy, floppy pickle. I spent years trying to figure out how to get that perfect snap without messing around with hot water baths and serious canning equipment. Trust me, the texture was always the dealbreaker!
Well, that struggle is over because I finally perfected these unbelievably crisp garlic dill refrigerator pickles. The best part? We skip the whole canning thing entirely! We’re talking about fresh, tangy, crunchy cukes ready in just 24 hours. These are honestly the easiest homemade pickles you’ll ever attempt, perfect for beginners who just want that satisfying crunch.
Why These Are the Best Refrigerator Pickles (No Canning Required)
Look, I love my grandmother, but sometimes you just don’t have all day to babysit a canner! These are my go-to because they skip all that fuss but deliver way better results than those store-bought jars. It’s just pure, simple flavor waiting for you.
Here’s why you’re going to love this approach:
- They are genuinely the absolute easiest homemade pickles out there—I mean, anyone can do this!
- You get that unbeatable, fresh-from-the-garden snap that canning seems to destroy.
- Zero sterilizing jars or worrying about seals. You just mix, pour, and wait.
Achieving Maximum Crunch in Your Refrigerator Pickles
The secret to getting those fantastic Crispy Refrigerator Dill Pickles without the canning mess is managing the temperature. We use a warm brine, not a blistering boiling one when we cover the cukes. This wakes up the flavors fast but doesn’t cook the cucumbers, keeping that essential structural integrity intact.
Quick Refrigerator Pickles Ready in 24 Hours
If you need something fast, this is your winner. We call this my 24 Hour Pickles Recipe because you seriously can’t wait that long before digging in! Traditional methods mean weeks of waiting, but these deliver that tangy bite the very next day. Perfect for last-minute burger toppings, honestly!
Ingredients for Crispy Garlic Dill Refrigerator Pickles
Okay, gathering your supplies is the fun part! This recipe makes about one pint, which is the perfect Small Batch Pickling size for trying things out or just keeping a little jar around for yourself. Don’t try to substitute the salt here, either—you absolutely need that pickling salt for the brine to work right.
- 2 cups water
- 1 cup white vinegar
- 1 tablespoon pickling salt (Please, use pickling salt, not iodized table salt—the additives mess up the texture!)
- 1 tablespoon granulated sugar
- 2 cloves garlic, smashed (give those cloves a good whack with the side of your knife first!)
- 1 teaspoon whole black peppercorns
- 1 teaspoon dried dill seed
- 2 medium pickling cucumbers, thinly sliced (Kirby or Persian are my favorites for staying firm)
See? That’s it! Super simple components for the Best Refrigerator Pickles that are ready before the weekend is over.
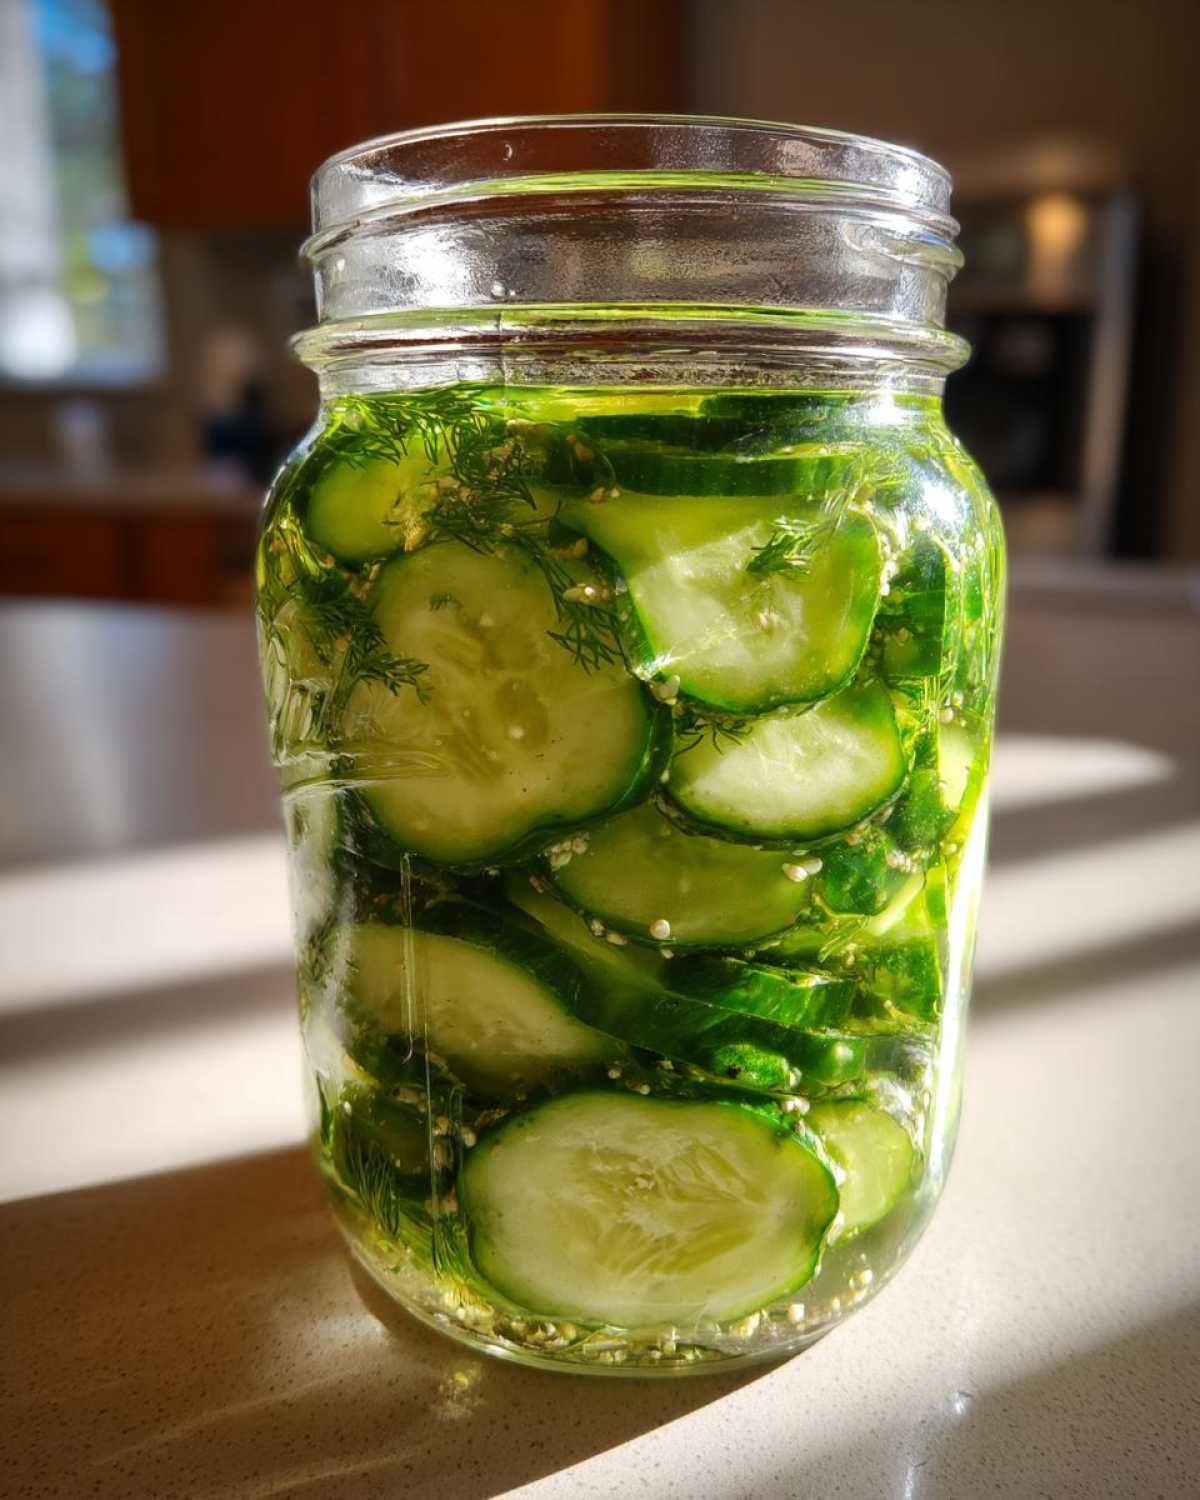
Ingredient Notes and Substitutions for Your Refrigerator Pickles
Trust me when I say that the quality of your starting ingredients really shines through in these Easy Homemade Pickles. Since we aren’t cooking these at high heat like traditional canning, the cucumber matters most!
You absolutely need firm cukes. I always grab Kirby cucumbers if I can find them, or even the smaller Persian variety works great because they stay crunchy longer. Skip those big watery ones from the garden center, they’ll turn to mush way too fast.
Speaking of staying crisp, use pickling salt—this is non-negotiable for me. Regular table salt has anti-caking agents that can make your Fresh Pickled Cucumbers cloudy. If you’re out of dill seed, don’t panic! Just take a few sprigs of fresh dill and chop them up instead. The fresh version gives a brighter, cleaner flavor, which is lovely!
Step-by-Step Instructions for Easy Homemade Pickles
Now we get to the fun part! This is truly a Simple Pickle Recipe for Beginners because there’s virtually no way to mess it up. But listen closely to the brine part—that’s where the magic (and the crunch) lives. If you remember nothing else, remember this: we are warming the brine, we are NOT boiling the cucumbers!
You’ll need a small saucepan for the brine, a clean pint jar, and maybe a cup of coffee because this goes fast. If you want to check out my recipe for Air Fryer Zucchini Fries for a side dish later, feel free, but right now, focus on those crisp cukes!
Preparing the Flavorful Brine for Refrigerator Pickles
First thing’s first, we build the flavor vehicle. In your little saucepan, combine the water, vinegar, pickling salt, and sugar. Put that on medium heat and just stir, stir, stir until everything dissolves. It doesn’t need to roll—I mean it! Do not boil it hard, just heat it enough to dissolve the salt and sugar, maybe five minutes max. Once it’s clear, take it off the heat and let it sit while you prep the jar. That slight cooling before it hits the cucumbers is key for keeping them crisp!
Packing and Chilling Your Refrigerator Cucumber Pickles
While the brine cools a bit, smash up your garlic cloves and toss them in the empty pint jar along with the peppercorns and dill seed. Now, pack those sliced pickles in super tight! Seriously, fill that jar up. Then, carefully pour that warm brine over the top, making sure every slice is totally covered—if they aren’t submerged, they won’t pickle right!
Seal that lid on really tight, let it sit on the counter for about an hour until it cools down completely, and then—the hardest part—put it in the fridge. You have to hold out until those Tangy Quick Pickles chill for a full 24 hours before you can taste them. I know, it’s brutal, but it’s worth the wait!
Tips for Success Making Perfect Refrigerator Pickles
You’ve got the brine ready and the cucumbers sliced—awesome! But I want to make sure you get that loud, satisfying crunch every single time, so here are a few insider tips I learned over trial and error. Honestly, these little extras are what turn a good pickle into the best one.
First up, if you are serious about that snap, consider adding a tiny bit of pickling lime to the brine when you dissolve your salt and sugar. It’s old school, but wow, does it work! If you use lime, just remember that you need to give your cucumbers a really good rinse before you pack them into the jar so you don’t end up with funky tasting Quick Refrigerator Pickles.
Also, don’t be shy with the dill! If you’re using fresh dill sprigs instead of the seed, make sure you tuck a couple of pieces right down along the sides of the jar. You want that essence to totally permeate the brine.
Finally, remember that tight seal we talked about? Check that lid after the jar has cooled on the counter. If you’re ever unsure about a jar, just shoot me a message—you can find me easily—because we certainly don’t want any weak seals.
Serving Suggestions for Homemade Garlic Dill Pickles
So, you waited the agonizing 24 hours and now you have the most perfectly crisp, garlicky spears (or slices!) in your fridge. What now? Well, these aren’t just for show, trust me. My favorite way to use these Homemade Sandwich Topper Pickles is straight up with a giant ham and Swiss sandwich—that tang cuts right through the richness!
But go beyond sandwiches! They are phenomenal chopped up small and thrown into creamy potato salad when you need a little zest. Or just stick a fork in the jar and eat them standing over the sink, which I absolutely do not recommend doing in front of company. Seriously though, they are the star of any snack platter. Check out more of my favorite snack ideas right here!
Refrigerator Pickle Variations
While I adore this classic garlic dill version, the beauty of refrigerator pickles is how easily you can get creative! Since we aren’t trying to preserve these for years—we’re just enjoying them fresh—you can switch things up week to week. It keeps things exciting!
Want to kick the heat up? Just toss a pinch of red pepper flakes right into the jar along with your garlic before you pour in the brine. That gives you a great little spicy surprise in every few bites.
Or, try subtly changing the vinegar. Swapping out half the white vinegar for apple cider vinegar gives you a slightly fruitier, softer tang that’s really nice. You can also grab a few thin slices of onion—red or white—and pack those right in with the cucumbers when you make your Quick Vinegar Pickles. They pickle right up and add a mellow sweetness!
Storage and Shelf Life of Your Refrigerator Pickles
This is super important since these aren’t canned! Because we skipped that high-heat sealing process, these refrigerator pickles need to stay chilling the whole time. Think of them like fresh produce that just happens to be pickled—they won’t last forever on the counter, that’s for sure.
The great news is you get about three wonderful weeks of snacking! Keep the jar sealed tight in the coldest part of your fridge. If you ever notice the brine getting cloudy or smelling funky, toss it, but honestly, they usually disappear long before that happens!
If you want to review our safety policies about recipe storage, you can look over the full privacy policy here. Happy crunching!
Frequently Asked Questions About Refrigerator Pickles
I always get so many questions when people first try making my Easy Homemade Pickles! It’s understandable; it feels a little different from what we grew up seeing on the shelves. Here are the things I hear most often that might help you out!
Can I leave the cucumbers out on the counter while they cool?
Yes, you absolutely can, and I actually recommend it! After you pour that slightly warm vinegar brine over your cucumbers, you should let the jar sit on the counter for about an hour until it cools toward room temperature before it goes into the fridge. That initial warm temperature helps the flavors get into the cucumber faster, but you must move them to the refrigerator immediately afterward. They aren’t shelf-stable, so they need that cold environment right away!
What is the difference between these and canned pickles?
This is the biggest difference, and it’s why you get that amazing crunch! Canned pickles go through a high-heat water bath process that *seals* the jar, which is great for long-term storage on a shelf. But that heat cooks the cucumber a little bit, softening it up. Since these are refrigerator pickles, we skip that intense heat, which keeps the cucumbers fresher, crisper, and closer to their original texture—they are basically fresh pickled cucumbers that have been nicely flavored!
Do I need to peel the cucumbers for these refrigerator pickles?
Nope, don’t waste your time peeling! I never peel mine. Keeping the skin on is actually a huge help in keeping the pickle structure strong and firm during that 24-hour wait time. Plus, it gives them that lovely bit of color, too. Just give them a really good scrub before slicing them up!
If you ever want to know even more about my cooking philosophy, you can always check out the About Us page!
PrintPerfectly Crisp Garlic Dill Refrigerator Pickles Ready in 24 Hours (No Canning Required)
Make crisp, flavorful garlic dill refrigerator pickles quickly without any canning process. These fresh pickled cucumbers are ready to eat in just 24 hours and are great for beginners.
- Prep Time: 15 min
- Cook Time: 5 min
- Total Time: 20 min
- Yield: 1 pint
- Category: Side Dish
- Method: Quick Pickling
- Cuisine: American
- Diet: Vegetarian
Ingredients
- 2 cups water
- 1 cup white vinegar
- 1 tablespoon pickling salt
- 1 tablespoon granulated sugar
- 2 cloves garlic, smashed
- 1 teaspoon whole black peppercorns
- 1 teaspoon dried dill seed
- 2 medium pickling cucumbers, thinly sliced
Instructions
- In a small saucepan, combine the water, vinegar, salt, and sugar. Heat over medium heat, stirring until the salt and sugar dissolve completely. Do not boil. Remove from heat.
- While the brine cools slightly, place the smashed garlic, peppercorns, and dill seed into a clean pint-sized jar.
- Pack the sliced cucumbers tightly into the jar.
- Pour the warm brine over the cucumbers, ensuring they are fully submerged. Leave about half an inch of headspace at the top.
- Seal the jar with a tight-fitting lid. Let the jar cool to room temperature on the counter for about one hour.
- Transfer the jar to the refrigerator. Allow the pickles to chill for at least 24 hours before serving for best flavor and crispness.
Notes
- For extra crispness, you can add one teaspoon of pickling lime to the brine, but rinse the cucumbers thoroughly before brining if you use lime.
- If you prefer a stronger dill flavor, substitute dill seed with 1 teaspoon of fresh dill sprigs.
- These pickles store well in the refrigerator for up to three weeks.
Nutrition
- Serving Size: 1/4 cup
- Calories: 15
- Sugar: 2
- Sodium: 350
- Fat: 0
- Saturated Fat: 0
- Unsaturated Fat: 0
- Trans Fat: 0
- Carbohydrates: 3
- Fiber: 0
- Protein: 0
- Cholesterol: 0